Authors
Will Russell
Will Russell
Kestra is an event driven data orchestration platform that’s highly flexible and easy to use. This guide is going to go through the basics and get you started building your own pipeline!
Originating as a platform for data orchestration, Kestra finds itself well-equipped to manage all types of pipelines with its highly flexible interface and a huge range of plugins. Through this blog post, I’m going to show you how to get set up with Kestra and set up a simple workflow to run a Python script every hour and send the result as a Discord notification.
Kestra is open source meaning anyone can run it on their machine for free. To get it set up, you’ll need to make sure you have Docker installed on your machine and run the following command to start up your instance!
docker run --pull=always --rm -it -p 8080:8080 --user=root \ --name kestra \ -v kestra_data:/app/storage \ -v kestra_db:/app/data \ -v /var/run/docker.sock:/var/run/docker.sock \ -v /tmp:/tmp \ kestra/kestra:latest server localOnce you’ve run this command, head over to your browser and open https://localhost
to launch the interface so we can start building workflows!Before we start making our workflows, it’s worth learning a few fundamental properties that we’ll use to build everything!
Workflows are referenced as Flows and they’re declared using YAML making it very readable as well as works with any language! Within each flow, there are 3 required properties you’ll need:
id which is the name of your flow. This can’t be changed once you’ve executed your flow for the first time.namespace which allows you to specify the environments you want your flow to execute in, e.g. production vs developmenttasks which is a list of the tasks that will execute when the flow is executed, in the order they’re defined in. Tasks contain an id as well as a type with each different type having their own additional properties.To help visualise it, here’s an example:
id: getting_startednamespace: company.teamtasks: - id: hello_world type: io.kestra.plugin.core.log.Log message: Hello World!Everything builds off of these 3 properties but there’s a few more optional properties that you’ll want to use to give you full flexibility.
{{ inputs.webhook_url }} ."{{ outputs.script.vars.variable_name }}"The last thing to mention is Plugins. To help you build powerful flows, you can utilise Plugins for tools and platforms you already use to help speed things up. Every plugin is different but we’ll cover a few examples later in the blog.
While that might be a lot of properties to get your head around, the Kestra platforms interactive topology will help us configure these correctly!
For our first flow, we’re going to set up a simple automation that runs a Python script once every hour and sends its output to Discord as a notification. Let’s start with the Python part. Firstly, we need a Python file for Kestra to execute! We’ll use something really simple that generates an output from an API request.
import requests
r = requests.get('https://api.github.com/repos/kestra-io/kestra')gh_stars = r.json()['stargazers_count']print(gh_stars)
The code above makes a GET request to the GitHub API asking for information on the Kestra repository. It then prints out the number of stars the repository currently has. If you haven’t already, you should give us a star! Now we have some code, next step is to start building the flow to automate this script.
The first time you launch Kestra in your browser, it will ask you if you want to make your first flow. When we press that, we’ll see a basic example containing the 3 fundamental properties we discussed earlier:
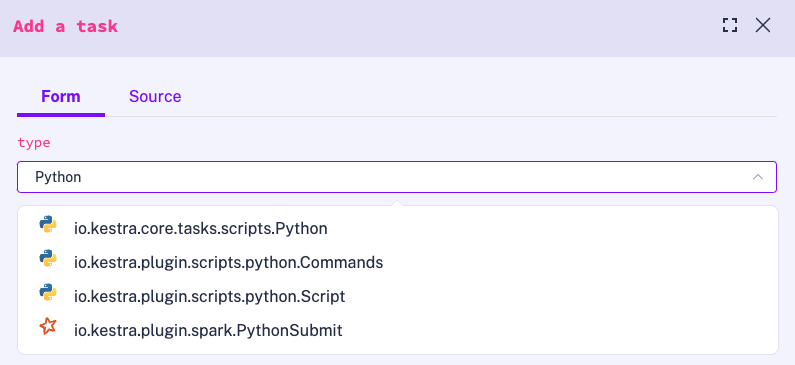
id: getting_startednamespace: company.teamtasks: - id: hello_world type: io.kestra.plugin.core.log.Log message: Hello World!We can use this as a starting point, replacing the Log task type with a Python one. For Python, you can either use a Commands or Script plugin. Commands is best for executing a separate .py file whereas Script is useful if you want to write your Python directly within the task. As we’ve written a .py file, we’ll use the Commands plugin. We can use the topology editor to add this and searching for Python. This will help us as it will give us the other fields to fill out, giving us some structure to work with!
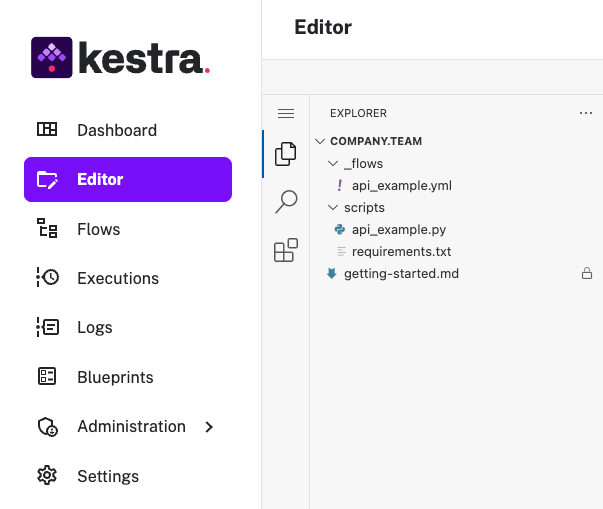
Now you’re probably wondering, how do I get my Python file into Kestra? We can use the Editor in the left side menu to create this file on the platform and save it in a new folder called scripts as api_example.py. On top of this, we can add the property namespacesFiles in our flow and set that as enabled to allow our flow to see other files.
Once we’ve done that, we just need to make sure we install any dependencies before the script runs by using the beforeCommands property to create and activate a virtual environment and install the dependencies into it. One last thing: we’ll need to also make a requirements.txt with the requests library inside it so this runs without any issues!
Now let’s test this by saving our flow and executing it! Our flow should look like the following below:
id: api_examplenamespace: company.teamtasks: - id: python_script type: io.kestra.plugin.scripts.python.Commands namespaceFiles: enabled: true runner: PROCESS beforeCommands: - python3 -m venv .venv - . .venv/bin/activate - pip install -r scripts/requirements.txt commands: - python scripts/api_example.pyOn the Logs page, we can see the output from the Python execution, including with the desired output at the end. It set ups the virtual environment, installs the dependencies inside of requirements.txt and then executes the Python script.
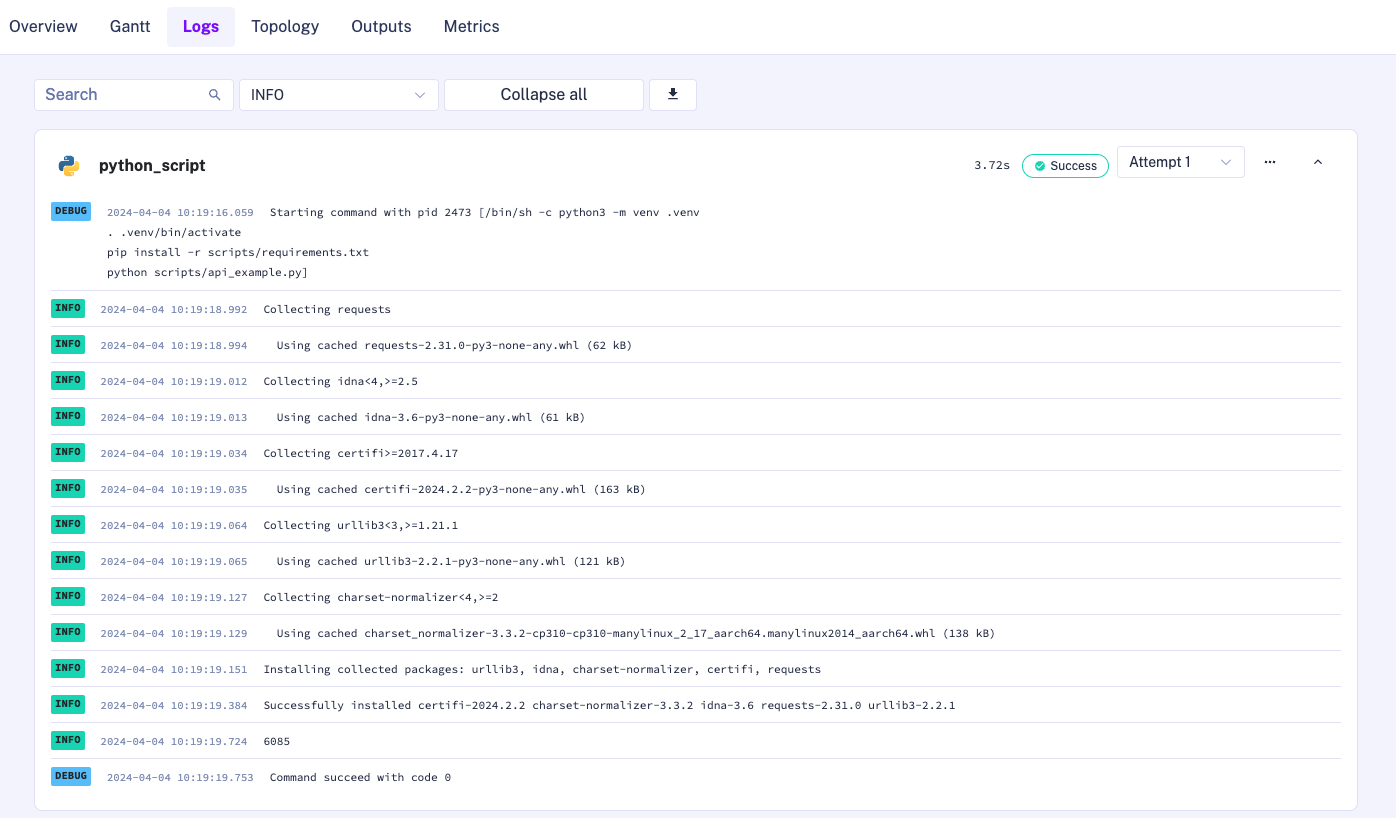
Great, we can see that our Python script is correctly fetching the number of stars on the GitHub repository and outputting them to the console without having to make any additional changes to work with Kestra. However, we want to send the gh_stars variable back to our Kestra Flow so we can send a notification with this variable. We can adjust our Python task to generate an output which we can pass downstream to the next task.
To do this, we’ll need to tweak our Python script to use the Kestra library to send the gh_stars variable to our Flow. Firstly, we need to add kestra to the requirements.txt so we can install the library when our flow executes. Now we can import it at the top using from kestra import Kestra . All that’s left is to use the class instead of the print statement to assign the gh_stars variable to an gh_stars key in a dictionary which we’ll be able to access inside of Kestra.
import requestsfrom kestra import Kestra
r = requests.get('https://api.github.com/repos/kestra-io/kestra')gh_stars = r.json()['stargazers_count']Kestra.outputs({'gh_stars': gh_stars})
With this change made, we can add an additional task that uses this variable to print it to the logs rather than mixed in with the full Python output. We can use the Log type and use the following syntax to get our output: {{ outputs.task_id.vars.output_name }}. As our Python task was called python_script, we can easily get our Python variable using {{ outputs.python_script.vars.gh_stars }} to retrieve it. If you’re familiar with Python f-strings or Liquid markup, then this will feel very familiar.
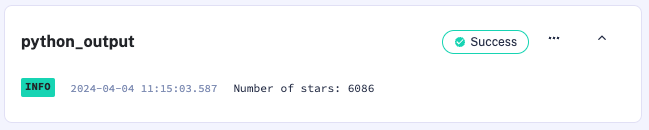
- id: python_output type: io.kestra.plugin.core.log.Log message: "Number of stars: {{ outputs.python_script.vars.gh_stars }}"Your new task should look like the following which will get out new output and print it out to the logs clearly for us to see. When we execute it, we should see it separated from all the Python logs for easier reading!
Now we can take this one step further and send this output to a messaging app to notify us more easily on the number of stars, rather than digging through logs to find out the final value. For this example, we’ll use Discord but this will work with any of the Plugins in the Notifications group.
For this example, we can use the UI to build it rather than YAML as they’ll be a lot more customisable fields. When we edit our flow, we can open a view that shows YAML on one side, and the topology view on the other giving you the best of both worlds. Underneath the python_output task, we can press the ➕ to add a new task and search for Discord.
We’re going to use the DiscordExecution task as this lets us push a message to a webhook which will send a message to a channel. The other is useful if you want your flow to trigger based on an action inside of Discord. Now we’ve opened the DiscordExecution page, we’re presented with a long list of properties which can be overwhelming but we can focus on the required ones for now.
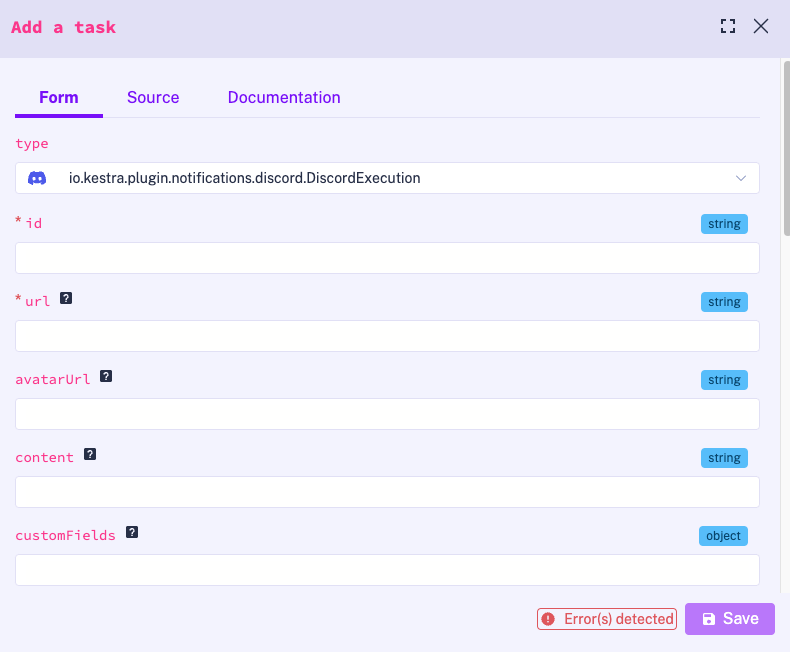
For our Discord message, we’ll need to give this task an id , as well as a Webhook URL which we can get from Discord. While nothing else is required, there’s plenty of customisation to make the message feel more polished and clearer such as adding a title and avatar. For this example, we’ll call the task send_notification and change the username to be Kestra. We can also add an Avatar by using the URL of the GitHub Organisation profile picture.
Instead of hard coding this straight into the avatarUrl box, we can create an input to allow us to reuse this later on in case we send notifications to multiple platforms for example. Our input should look like the example below which we can put above the tasks in our flow, similar to what you would do with constants in Python.
inputs: - id: kestra_logo type: STRING defaults: https://avatars.githubusercontent.com/u/59033362?v=4While we’re creating inputs, we can also make our Webhook URL an input in case we want to reuse it too. Discord has a great guide on how to generate the Webhook URL for a specific channel so all the messages are sent there.
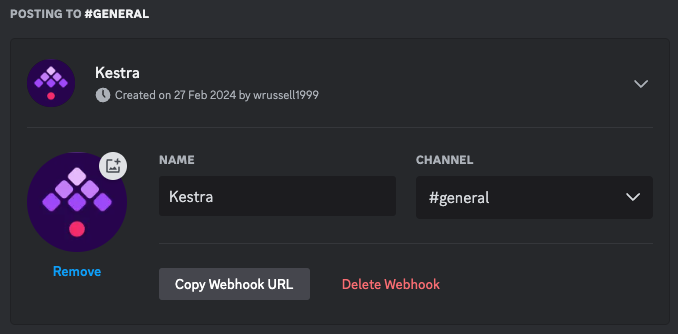
All we need to do is Edit a channel, head to Integrations and we’ll see an option for creating a Webhook. The details of the Webhook aren’t important as our flow will set these instead but we can simply call it Kestra to remind us what it’s used for and press save. Once we’ve done that, we can copy the Webhook URL ready to paste into Kestra.
Now we can easily make another input underneath the kestra_logo input using the same format:
inputs:  - id: kestra_logo    type: STRING    defaults: https://avatars.githubusercontent.com/u/59033362?v=4
  - id: discord_webhook_url    type: STRING    defaults: https://discordapp.com/api/webhooks/1234/abcd1234
All we need to do now is reference these inputs inside of our tasks and we should be ready to run our flow! Similar to the Outputs, we can use the format {{ inputs.input_id }} where input_id is the id of our input set above.
- id: send_notification type: io.kestra.plugin.discord.DiscordExecution url: "{{ inputs.discord_webhook_url }}" avatarUrl: "{{ inputs.kestra_logo }}" username: Kestra content: "Total of GitHub Stars: {{ outputs.python_script.vars.gh_stars }}"Before we execute our flow, let’s recap and check out the full flow together. We should have 2 inputs and 3 tasks defined in the order set below.
id: api_examplenamespace: company.team
inputs:  - id: kestra_logo    type: STRING    defaults: https://avatars.githubusercontent.com/u/59033362?v=4
  - id: discord_webhook_url    type: STRING    defaults: https://discordapp.com/api/webhooks/1234/abcd1234
tasks:  - id: python_script    type: io.kestra.plugin.scripts.python.Commands    namespaceFiles:      enabled: true    runner: PROCESS    beforeCommands:      - python3 -m venv .venv      - . .venv/bin/activate      - pip install -r scripts/requirements.txt    commands:      - python scripts/api_example.py
  - id: python_output    type: io.kestra.plugin.core.log.Log    message: "Number of stars: {{ outputs.python_script.vars.gh_stars }}"
- id: send_notification type: io.kestra.plugin.discord.DiscordExecution url: "{{ inputs.discord_webhook_url }}" avatarUrl: "{{ inputs.kestra_logo }}" username: Kestra content: "Total of GitHub Stars: {{ outputs.python_script.vars.gh_stars }}"Let’s execute this and see the outcome!
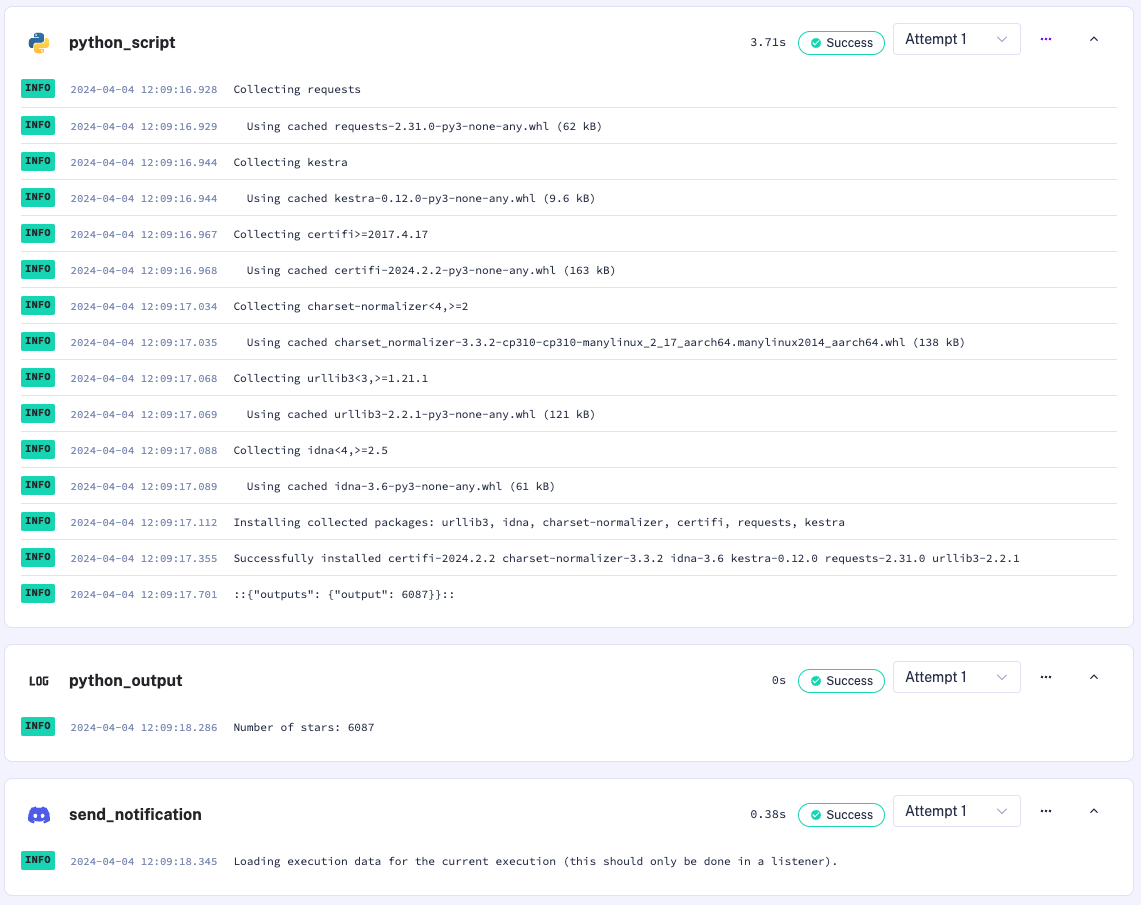
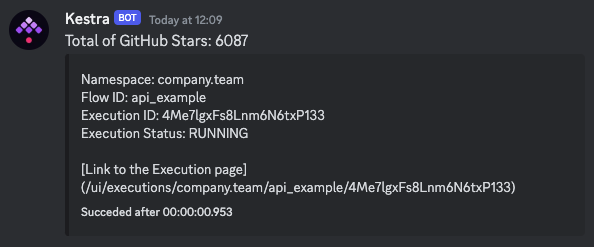
Our Python script is executed once the virtual environment is created and the dependencies are installed. The output of this is passed back to Kestra so it can be handed down to our next two tasks. The log outputs our variable correctly and we also see the variable in our Discord channel too with the correct title as well avatar image we defined as an input!
Now that we have everything running, there’s one last step we need to complete this workflow: set up a trigger to execute our flow automatically! As mentioned earlier, you can set flows to execute based on an event, such as a schedule or webhook. For our example, we’re going to use a schedule to run it once every hour.
To start with, we can use the triggers keyword underneath our tasks to specify our schedule. Similar to tasks, each trigger has an id and a type. With this in mind, we can call our trigger hour_trigger and we will want the Schedule type. For the Schedule type, we will also need to fill in a cron property so it knows what schedule to use.
We can use crontab.guru to help us figure out what the correct cron schedule expression would be to run once every hour. This tool is super helpful in visualising what the different expressions mean, as well as with a handy glossary to understand the syntax!
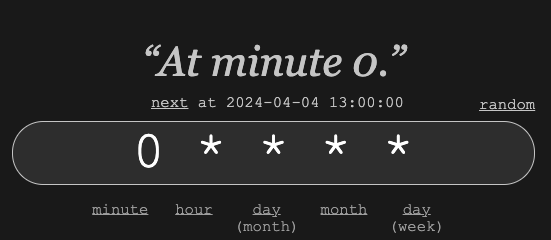
This cron schedule expression will execute it at minute 0 of every hour so we can now put that into our cron property in our trigger.
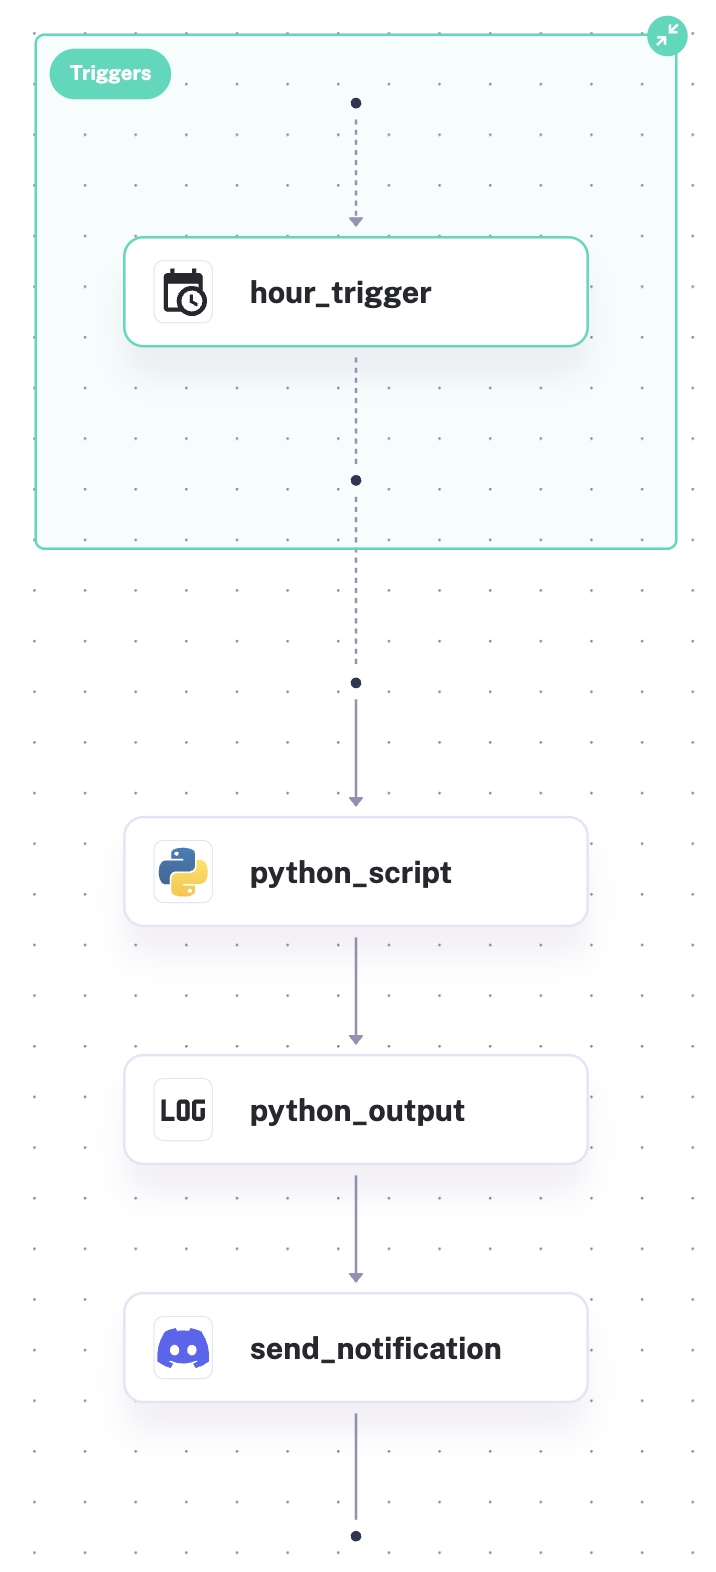
triggers: - id: hour_trigger type: io.kestra.plugin.core.trigger.Schedule cron: 0 * * * *When we look at our topology view, we can now see our trigger has been correctly recognised. There’s no further actions needed to set up the trigger, it will work as soon as you’ve saved your flow! But it is worth noting that if you want to disable it, you can add a disabled property set to true so you don’t have to delete it. Helpfully, you can find all these extra properties through the topology edit view.
With that configured, we now have our fully functioning flow that can make an API request to GitHub through our Python script, output a value from that request to the Kestra logs as well as send it as a Discord notification. And on top of that, it will automatically execute once every hour! To recap, our flow should look like this:
id: api_examplenamespace: company.team
inputs:  - id: kestra_logo    type: STRING    defaults: https://avatars.githubusercontent.com/u/59033362?v=4
  - id: discord_webhook_url    type: STRING    defaults: https://discordapp.com/api/webhooks/1234/abcd1234
tasks:  - id: python_script    type: io.kestra.plugin.scripts.python.Commands    namespaceFiles:      enabled: true    runner: PROCESS    beforeCommands:      - python3 -m venv .venv      - . .venv/bin/activate      - pip install -r scripts/requirements.txt    commands:      - python scripts/api_example.py
  - id: python_output    type: io.kestra.plugin.core.log.Log    message: "Number of stars: {{ outputs.python_script.vars.gh_stars }}"
  - id: send_notification    type: io.kestra.plugin.discord.DiscordExecution    url: "{{ inputs.discord_webhook_url }}"    avatarUrl: "{{ inputs.kestra_logo }}"    username: Kestra    content: "Total of GitHub Stars: {{ outputs.python_script.vars.gh_stars }}"
triggers: - id: hour_trigger type: io.kestra.plugin.core.trigger.Schedule cron: 0 * * * *Did you find this useful for getting started with Kestra? Let us know via Slack!
If you want to learn more about Kestra, check out our documentation or request a demo, and if you like the project, become our next star on GitHub.

Stay up to date with the latest features and changes to Kestra