Authors
Quentin Sinig
Quentin Sinig
This guide was written by a non-technical user for non-technical users. Being familiar with a terminal is a plus and not mandatory.
After completing this tutorial, you’ll be able to:
All in full autonomy! Sounds exciting, isn’t it?
Here is a list of tools that you need to install to follow up with this tutorial.
If you’re new to this, there is nothing to be afraid of! You’re just a few installations click away from getting started with Kestra. Just like you would download Spotify for Desktop. Simply follow the links above and once you’re ready, you can continue this tutorial.
As a person without an engineering background, manipulating the Command Line Interface (CLI) was a source of stress for a while! I’ve been there, and I got your back. Here are two tips to follow for a Full Click Installation.
After installing Visual Studio Code, download Docker Extension for VSC and directly click right on the docker-compose.yaml file to access the Compose Up command. If any dependency is missing on your local machine, leveraging this plugin will overcome the issue.

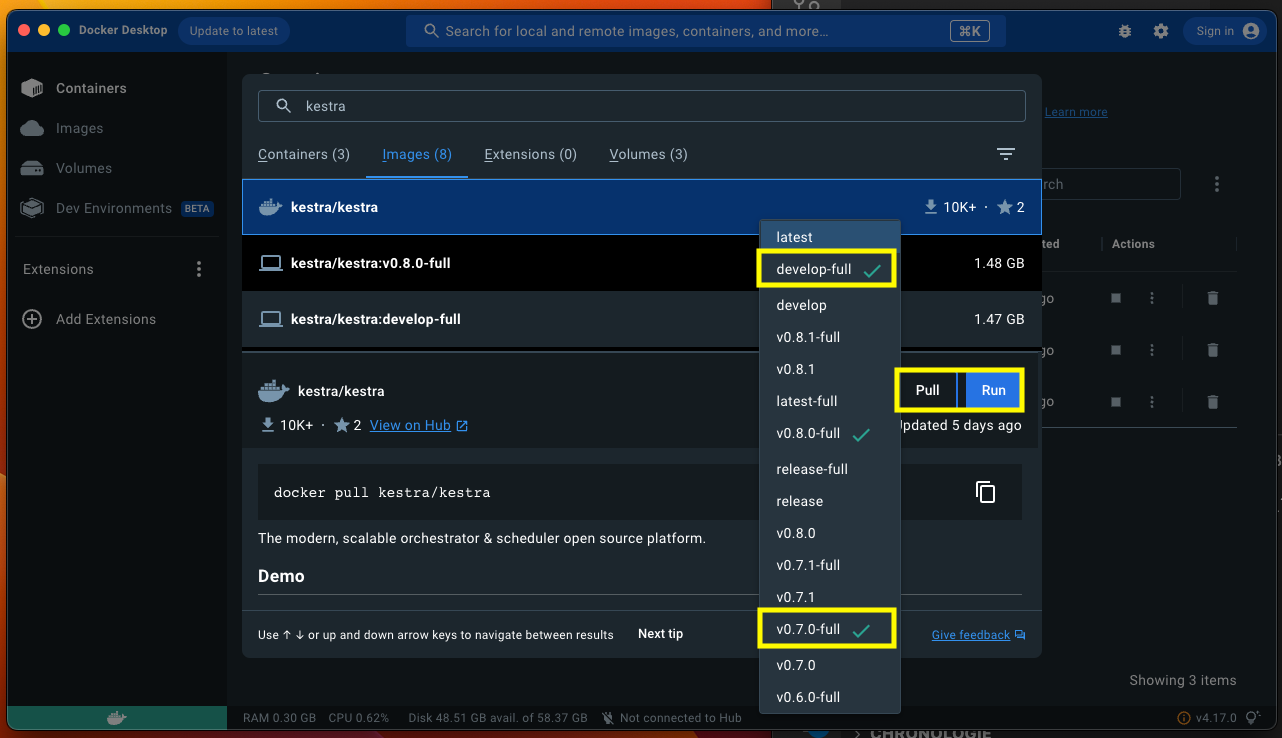
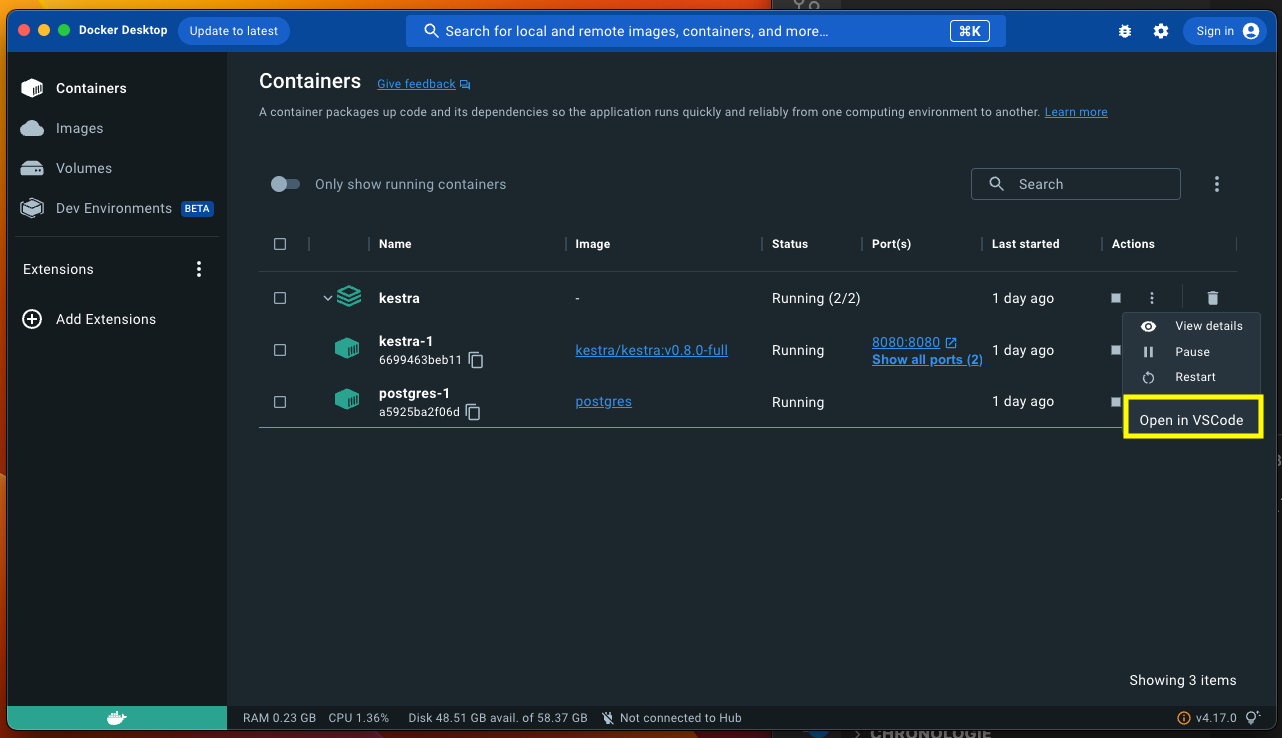
Thanks to the UI, you can directly search the Kestra installer (a.k.a the Docker image) via the Search Bar. You can also decide which version you want to pick up. Once it’s done, you can keep using it to stop/start your server and directly open Kestra in Visual Studio Code.
You can also download Docker Extension for VSC and directly click right on the docker-compose.yaml file to access the Compose Up command.
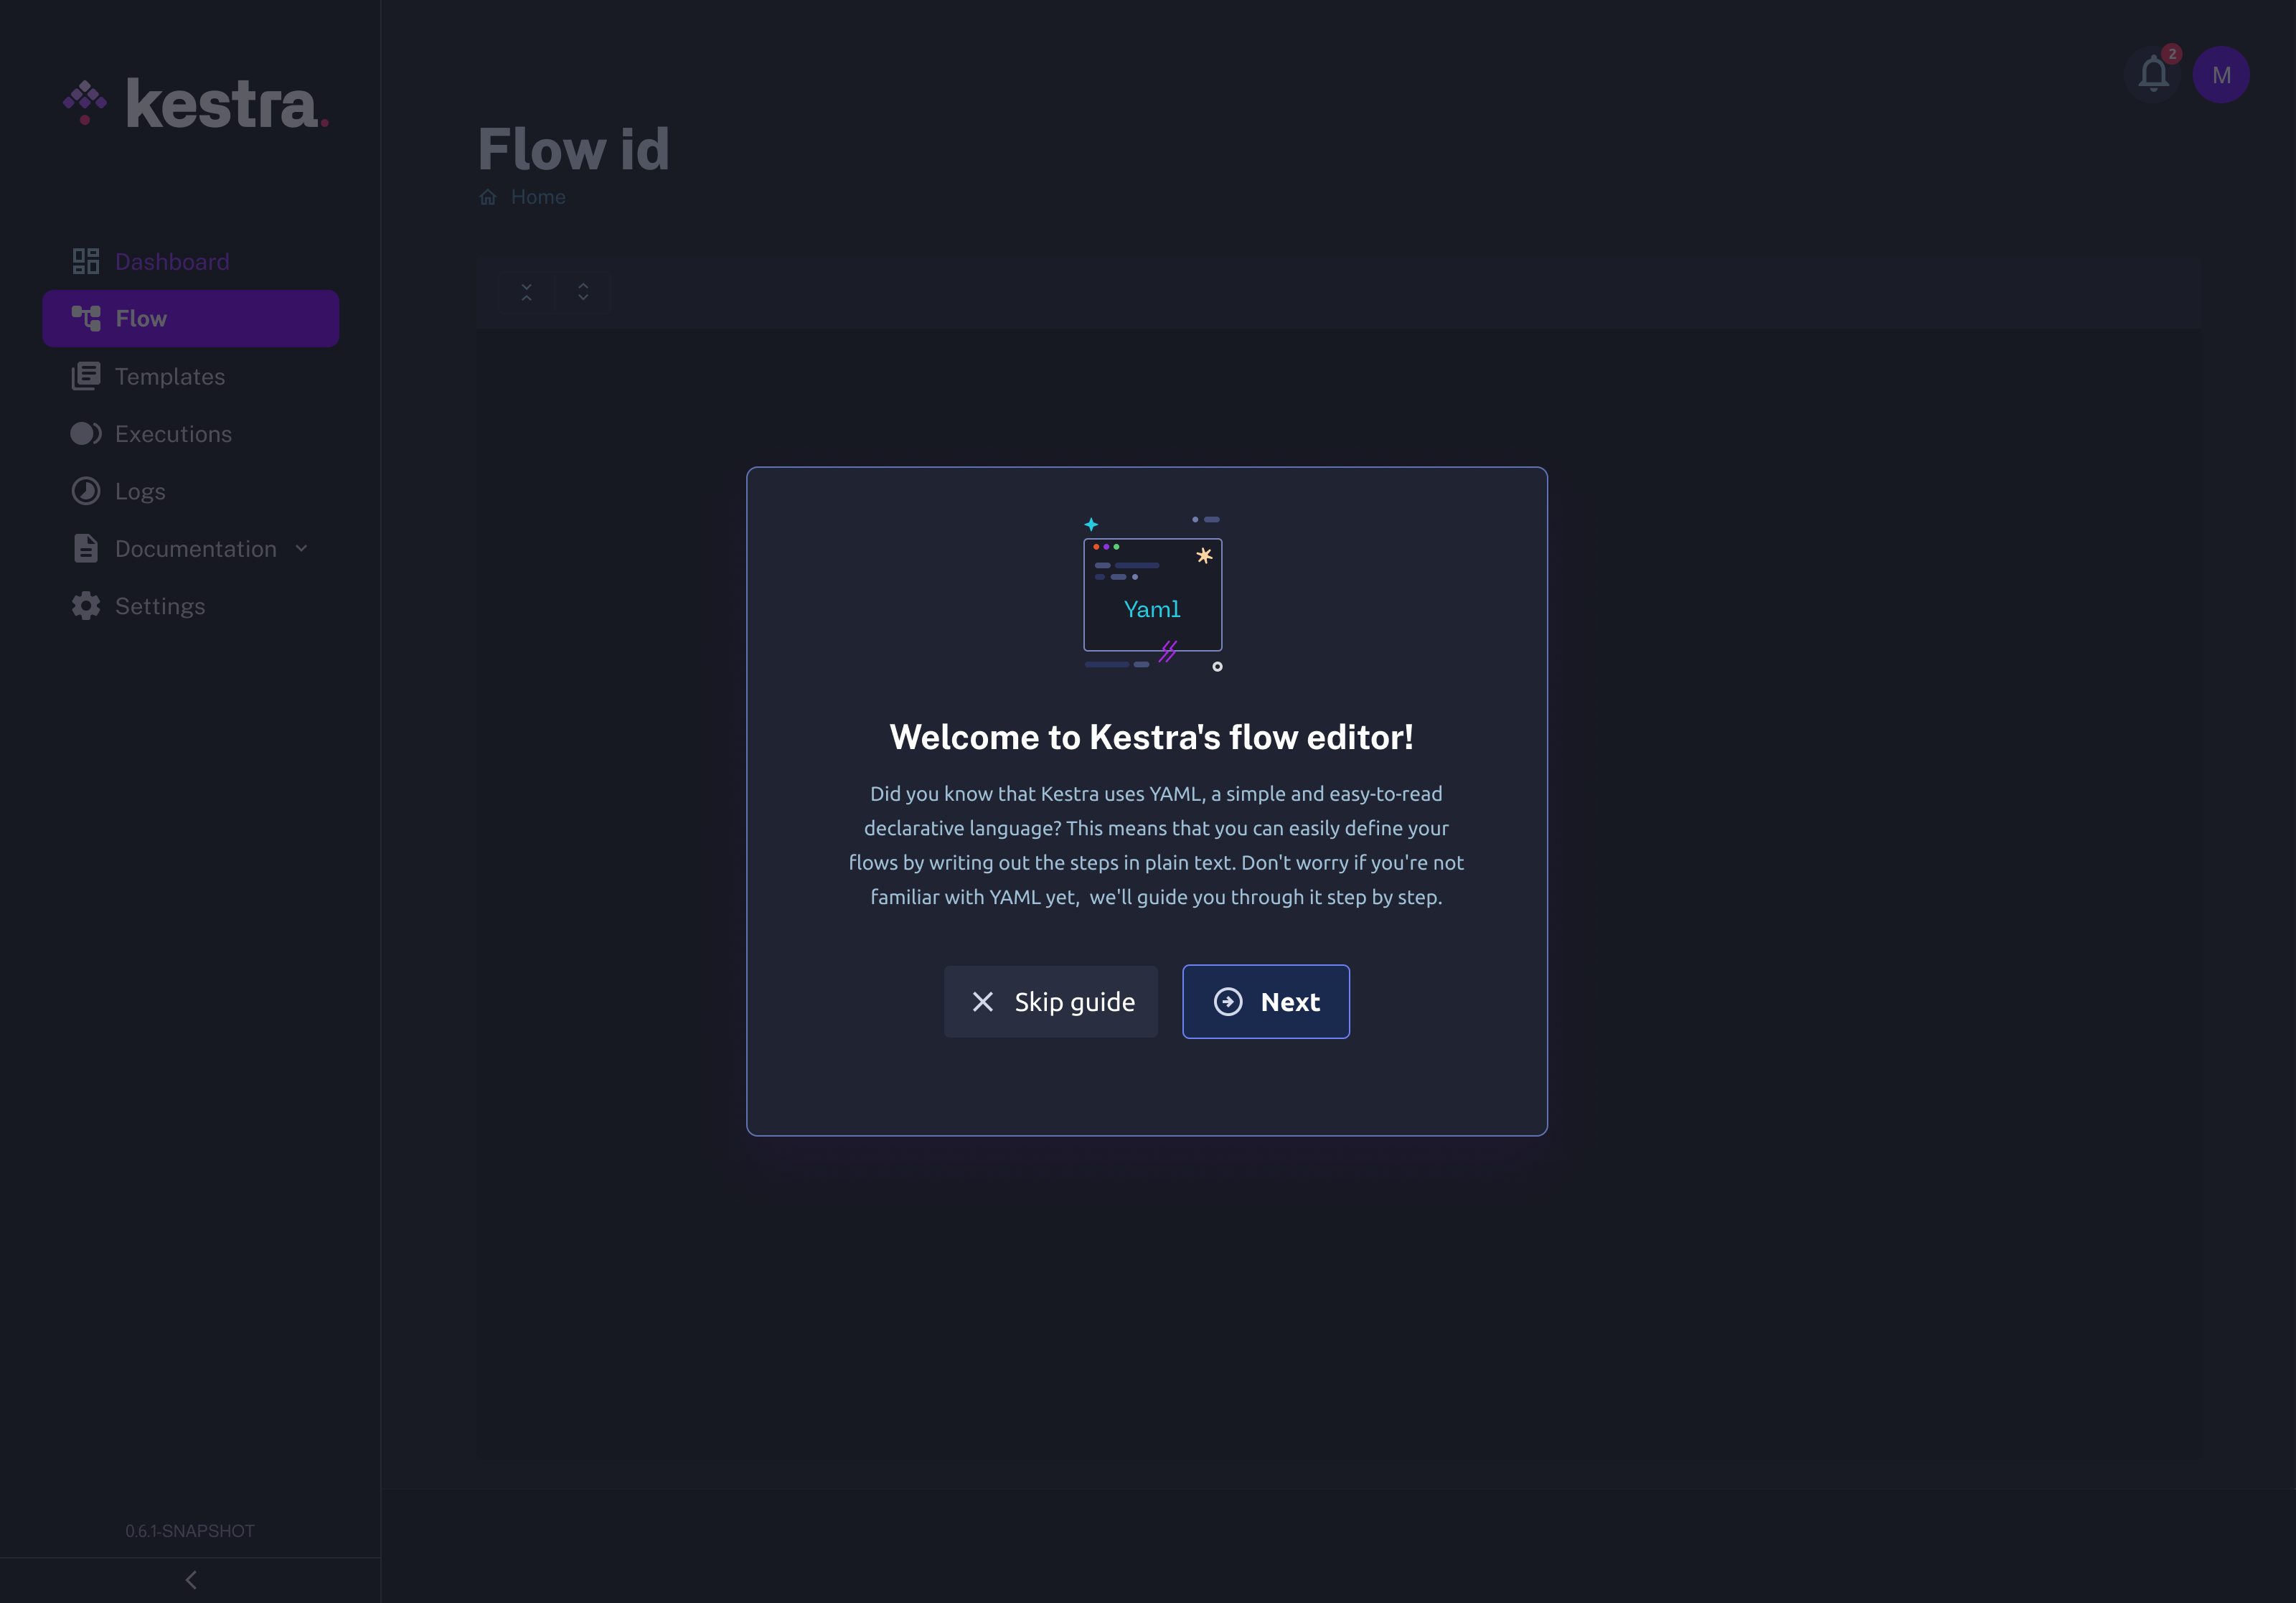
Once you’re in, the easiest thing to do is the follow the Guided Tour automatically suggested by Kestra. Step by step, several code snippets will appear in a dialog box. The good news is: they’re written in YAML, a human-readable file format.
Personally, I like to pause between each step. Indeed, to understand, I need to:
If you’re in the same position, continuing the reading should ease the process
Now you discovered what a flow is in a guided manner, let’s build one together and review step-by-step each part of a flow creation.
First thing first, your flow needs to “exist”. Your flow needs to have an identity, a place to live, and attributes. Just like your files in your Google Drive.
As you can see, once you scale, the idea is to group them and build a comprehensive set. Not feeling inspired? Try something like com.COMPANYNAME.project or just use the snippet below.
id: kestra_download_csvnamespace: company.teamdescription: My first flow is a CSV Download and transform the results into JSONThe second step introduces the concept of flows.
A flow is a sum of tasks. At the moment of writing this guide, Kestra has hundreds of tasks, which can be challenging to remember. That’s why we provide an auto-completion feature to help you find the task you need. Use the shortcut CTRL or ⌘ + SPACE to activate it.
With a few “parameters”. Also named Inputs. You can see them as a way to add context during the execution of your tasks or to pass data from task to task.
inputs: - id: csvUrl type: STRING defaults: https://www.data.gouv.fr/fr/datasets/r/6637991e-c4d8-4cd6-854e-ce33c5ab49d5The last step is the creation of a task.
A task is a step in your flow that will execute a specific action.
For example, a Python task requires an inputFiles while a Log task requires a format attribute.
tasks: - id: downloadCsv type: io.kestra.plugin.core.http.Download uri: "{{inputs.csvUrl}}"Now, add more tasks below to build an end-to-end pipeline.
This task will download the CSV, it will be sent to Kestra’s internal storage and available from the task output.C
This task will take results in CSV and turn it into a JSON file
id: kestra_download_csvnamespace: company.teamdescription: My first flow is a CSV Download and transform the results into JSON
inputs:  - id: csvUrl    type: STRING    defaults: https://www.data.gouv.fr/fr/datasets/r/6637991e-c4d8-4cd6-854e-ce33c5ab49d5
tasks:  - id: downloadCsv    type: io.kestra.plugin.core.http.Download    uri: "{{inputs.csvUrl}}"
  - id: CsvToJson    type: io.kestra.plugin.serdes.json.IonToJson    from: "{{ outputs.downloadCsv.uri }}"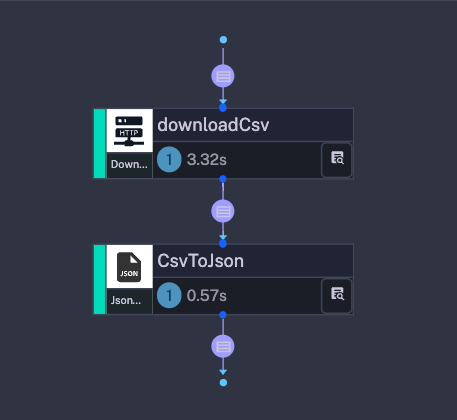
Yaiiii! Congrats! You just wrote your first flow to download a CSV and transform it into a JSON file!
What will your next move be? To play a few SQL Queries and export the results in Google Sheets to manually analyze the results. While we agree that it’s not state-of-the-art data engineering, I believe today’s world still counts many people in the same situation.
And that’s what I personally love about Kestra: it empowers thousands of people to manipulate data regardless of their technical background!
Join the Slack community if you have any questions or need assistance. Follow us on Twitter for the latest news. Check the code in our GitHub repository and give us a star if you like the project.

Stay up to date with the latest features and changes to Kestra