Authors
Dario Radecic

Dario Radecic
If you’re entering the world of data engineering and data orchestration in 2023, boy do you have options. So many actually that it’s overwhelming at times, especially when looking for a database vendor.
Do you go with a traditional relational approach? How about storing documents? Graphs would be nice too. Can you have all of that and more with a single database? Well, according to SurrealDB, you absolutely can.
Because of these reasons (any many more), we’ve developed a Kestra SurrealDB plugin that allows you to interact with the database in easy and convenient format.
Today’s article will give you a primer in SurrealDB - an innovative NewSQL multi-model cloud database suitable for just anything you can imagine, but also show you how to work with it in Kestra. Let’s dig in!
This portion of the article goes over the basics of SurrealDB - from installation to fundamental queries. Feel free to skip it if you’re familiar with the topic.
Think of SurrealDB as an innovative NewSQL database solution that’s suitable for serverless apps, jamstack apps, single-page apps, and can be deployed on cloud, on-premise, embedded, and edge-computing devices. The database packs a wide array of disruptive features, such as an SQL-style query language, real-time queries with efficient related data retrieval, advanced security permissions for multi-tenant access, and superb support for performant analytical workloads.
Some find it to be the next generation of a serverless database.
Further, SurrealDB is a multi-model database, which means you can store your data in tables, documents, and graphs. You don’t have to choose the method in advance. It allows you to add inter-document record links which results in completely avoiding traditional SQL JOINs.
This database also has machine learning and real-time functionalities built in, but that’s out of the scope of today’s article.
You can find out more on the official page.
If we’re talking about a local installation of SurrealDB, you’ll be pleased to know that Windows, Linux, and macOS are all supported. You can also run it with Docker.
We’ll show you how to install it on Mac. Feel free to consult the official installation guide for other operating systems.
Open up a new Terminal window and run the following command:
curl --proto '=https' --tlsv1.2 -sSf https://install.surrealdb.com | shYup, that’s all you need to do - SurrealDB is now installed:
It’s a good idea to add it to PATH while you’re here - the output shown in the previous image lists the command you have to run. Here’s the one generated for me - but remember that yours will be different:
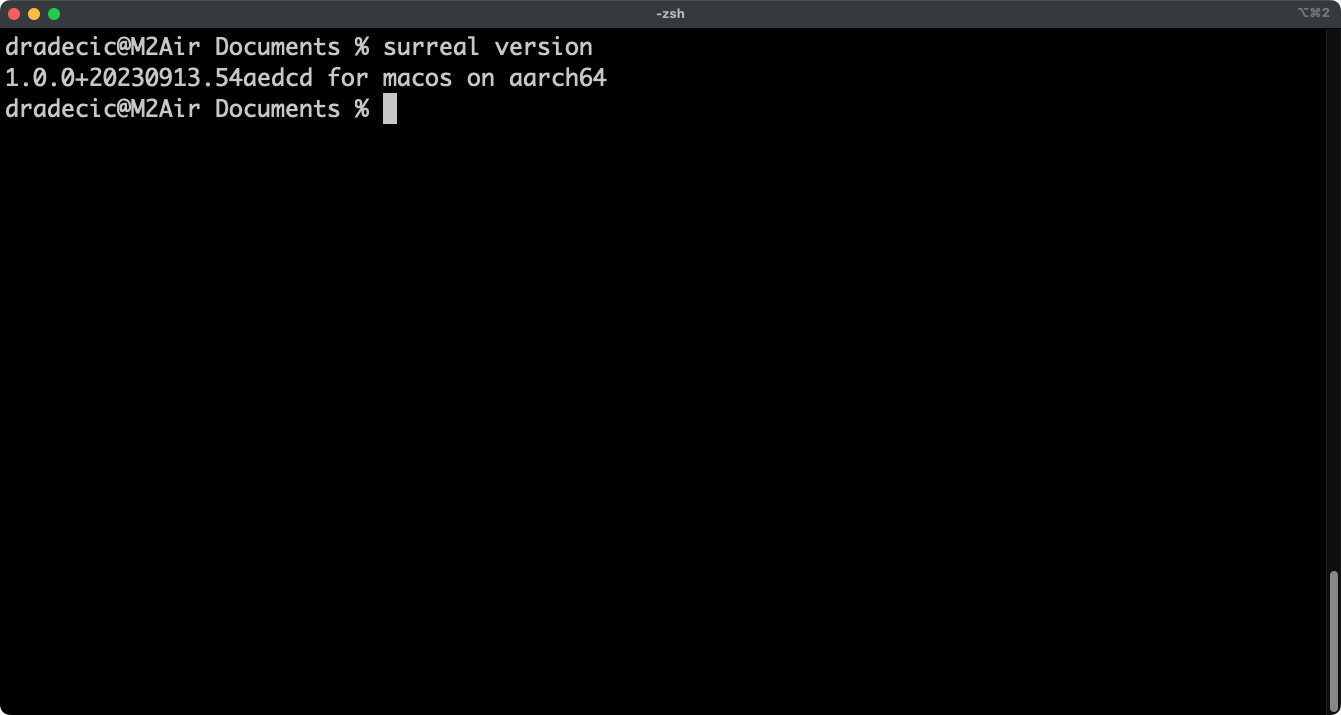
PATH=/Users/dradecic/.surrealdb:$PATHYou’ll probably how to open a new Terminal session to continue. Run the following command to check the database version you have installed:
surreal versionProvided you don’t get an error (surreal not found), you’re good to go:
The database is now installed, but isn’t running yet.
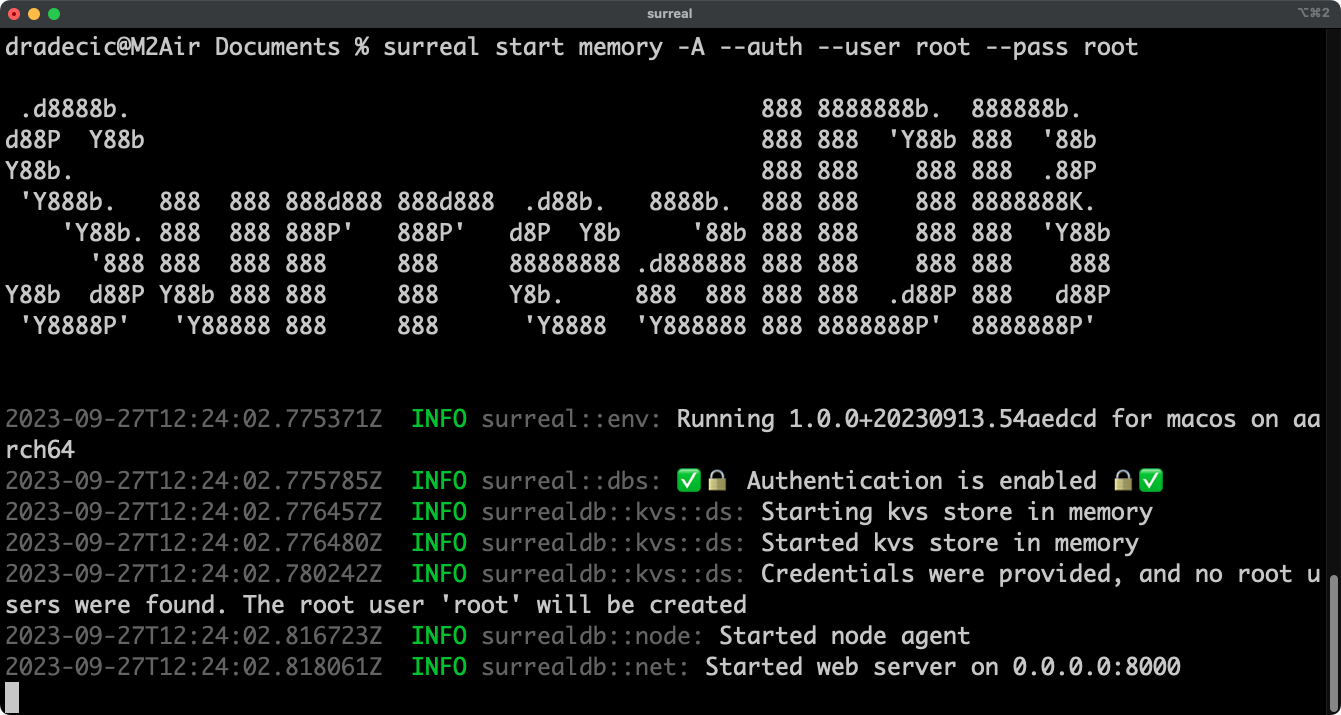
To start SurrealDB locally, you can use the surreal start memory command, followed by the authentication credentials for your user. We’ll keep things simple and set both to root:
surreal start memory -A --auth --user root --pass rootYou’ll see the following output in the Terminal:
SurrealDB is now running locally, which means we should be able to connect to it.
A recommended GUI for SurrealDB is Surrealist.app. It’s a web application you can use for free, but we couldn’t establish a database connection through it.
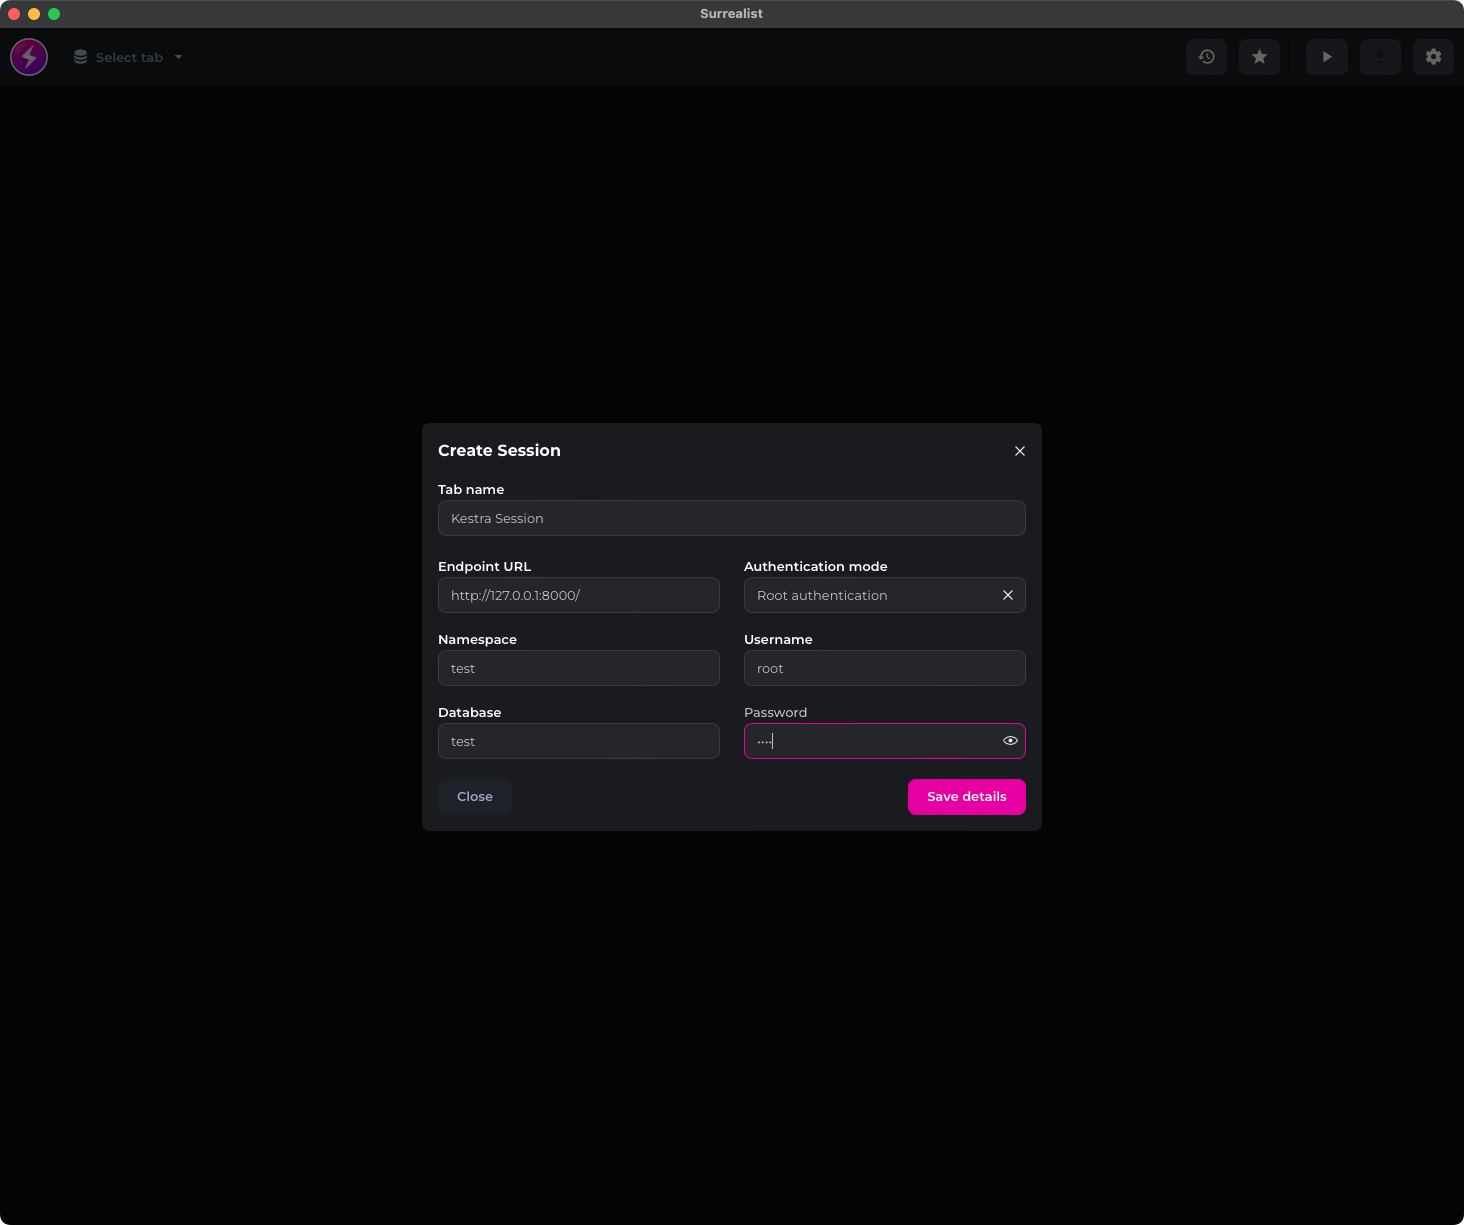
A dedicated desktop application solved the connection issue. Install it, open it, and create a new session with the following details:
Here’s what you should see on the screen:
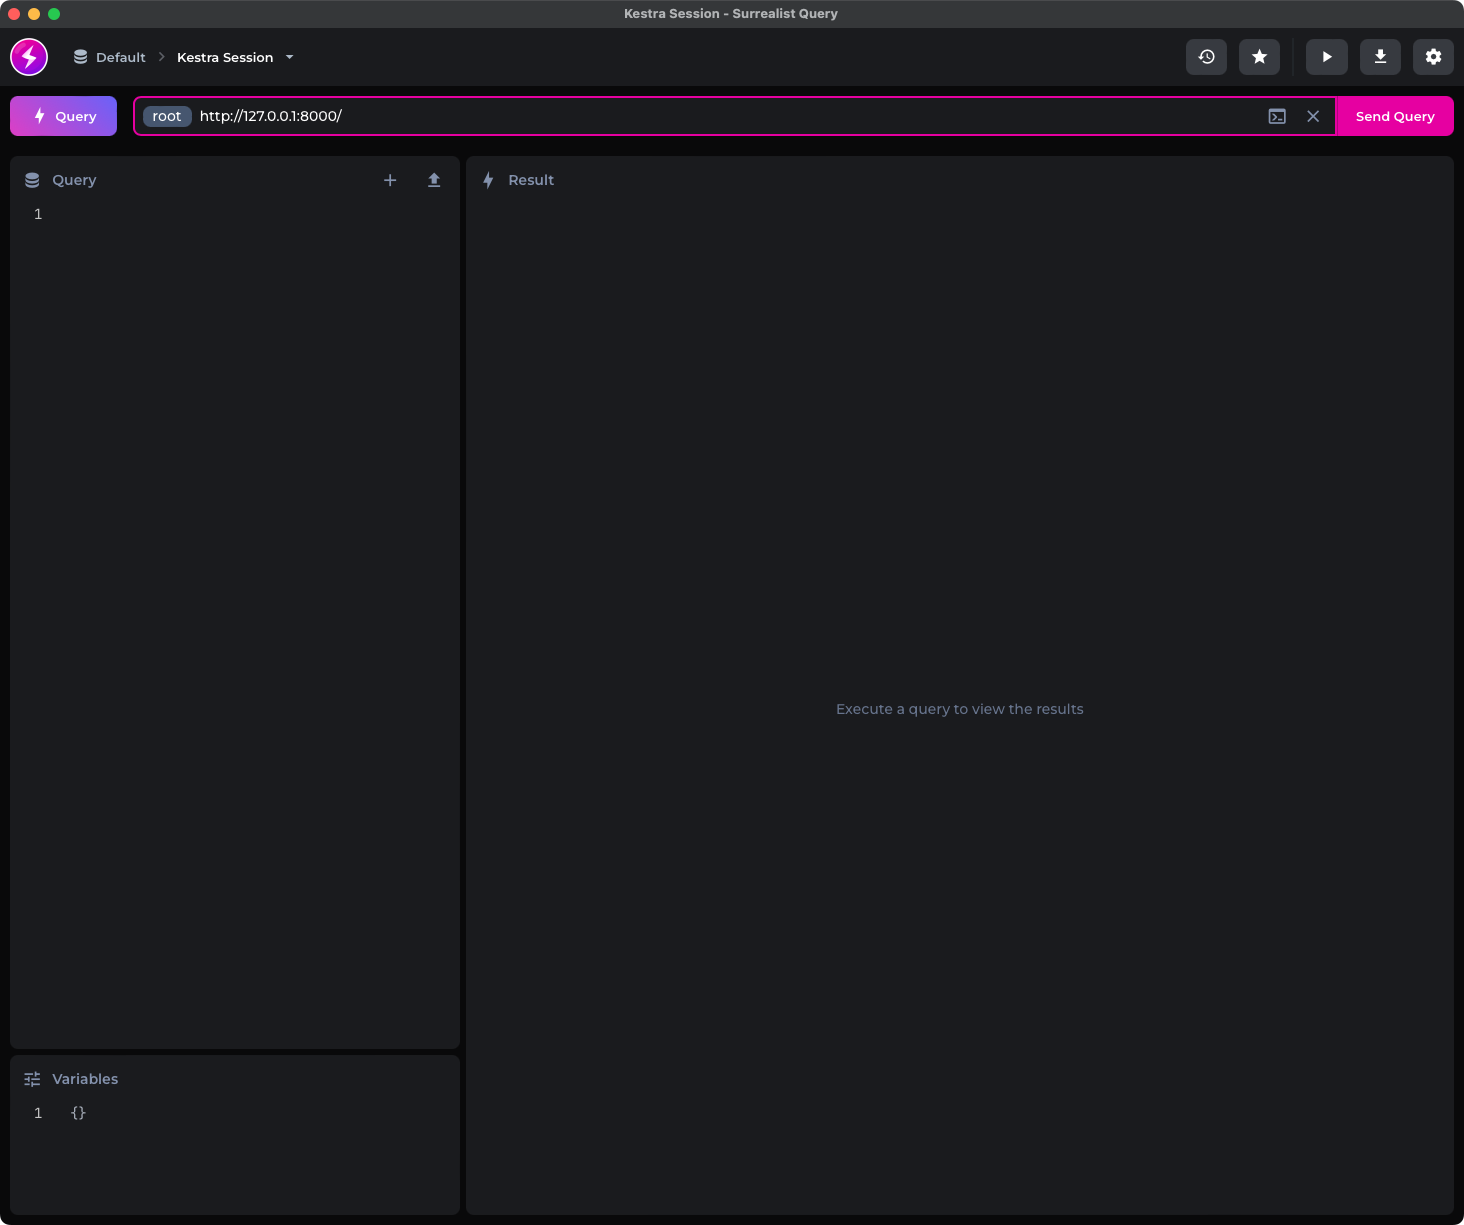
Once you enter the connection parameters, hit the “Save details” button. You’ll be redirected to the following screen:
As soon as you see the pink “Send query” button, and not the gray “Connect” button, it means the database connection was established, and you’re ready to proceed to the following section.
If you’re already familiar with SurrealDB, feel free to skip this section - it will only cover the basics.
SurrealDB uses SurrealQL - a powerful query language similar to traditional SQL, but with some differences and improvements. We’ll keep things light today, which means you don’t have to go and watch a SurrealQL crash course to follow. If you understand basic SQL, you’re good to continue.
Let’s start by adding a couple of records to our database. You don’t have to create a table schema beforehand. You are able to add records to the database directly.
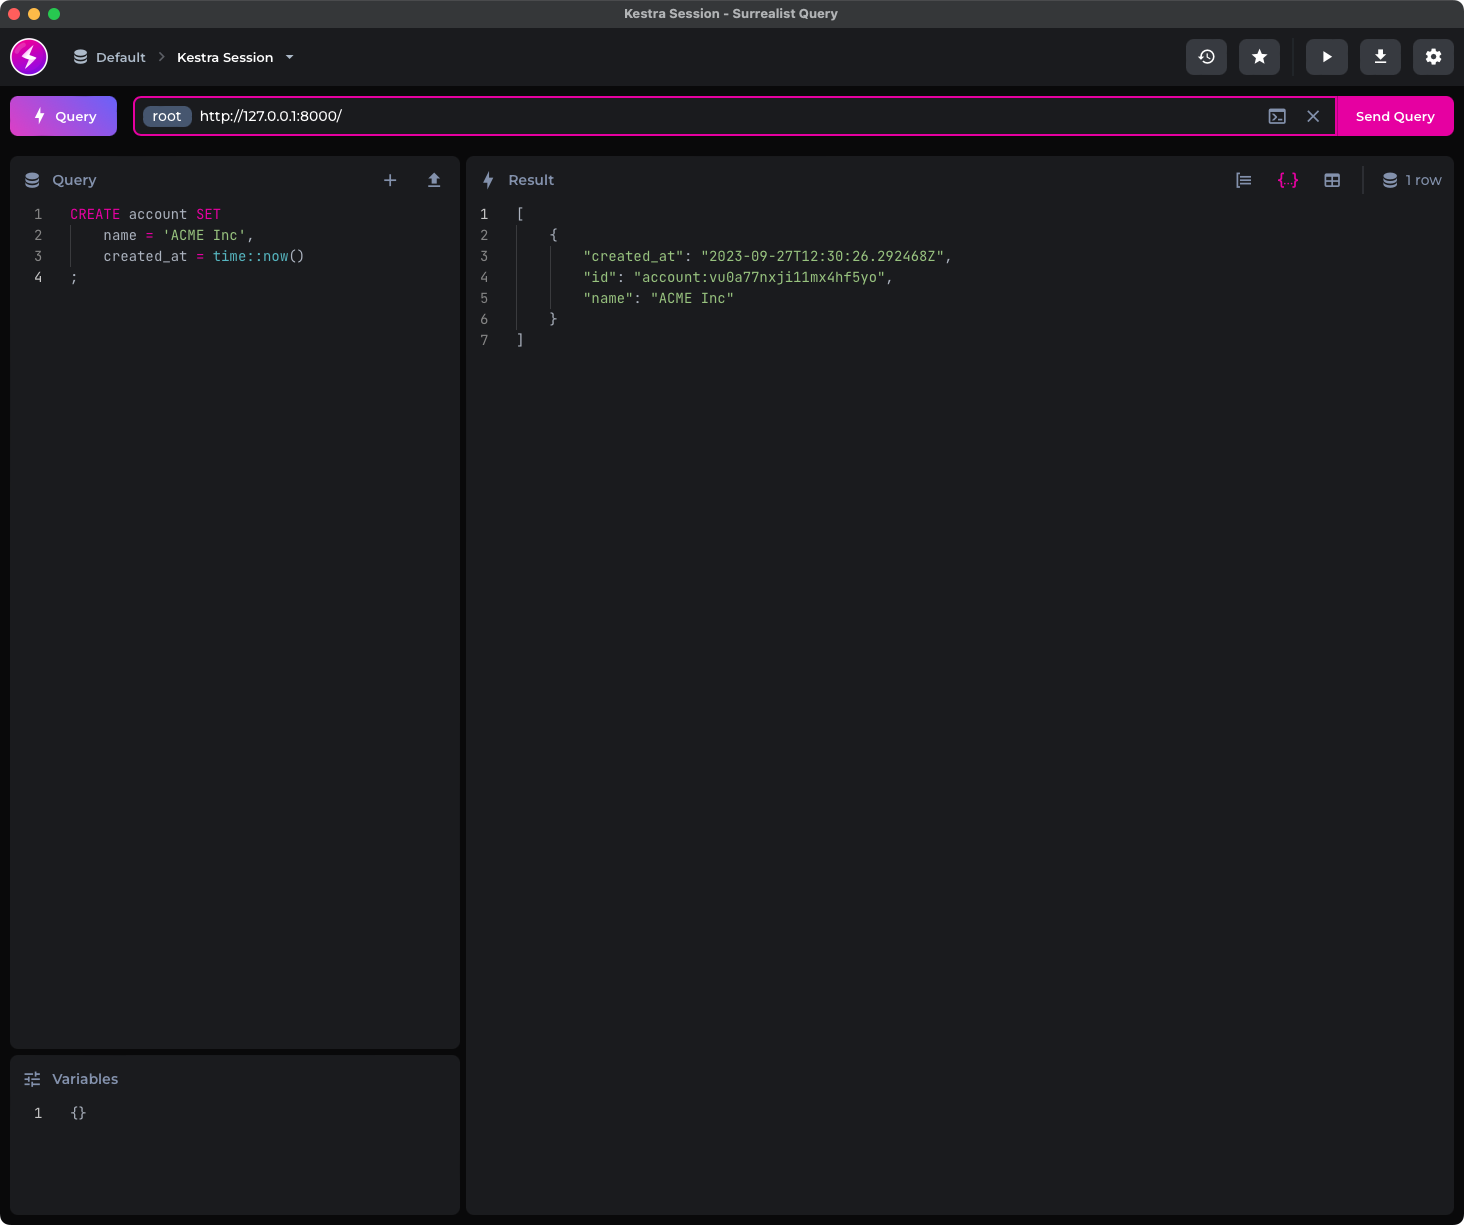
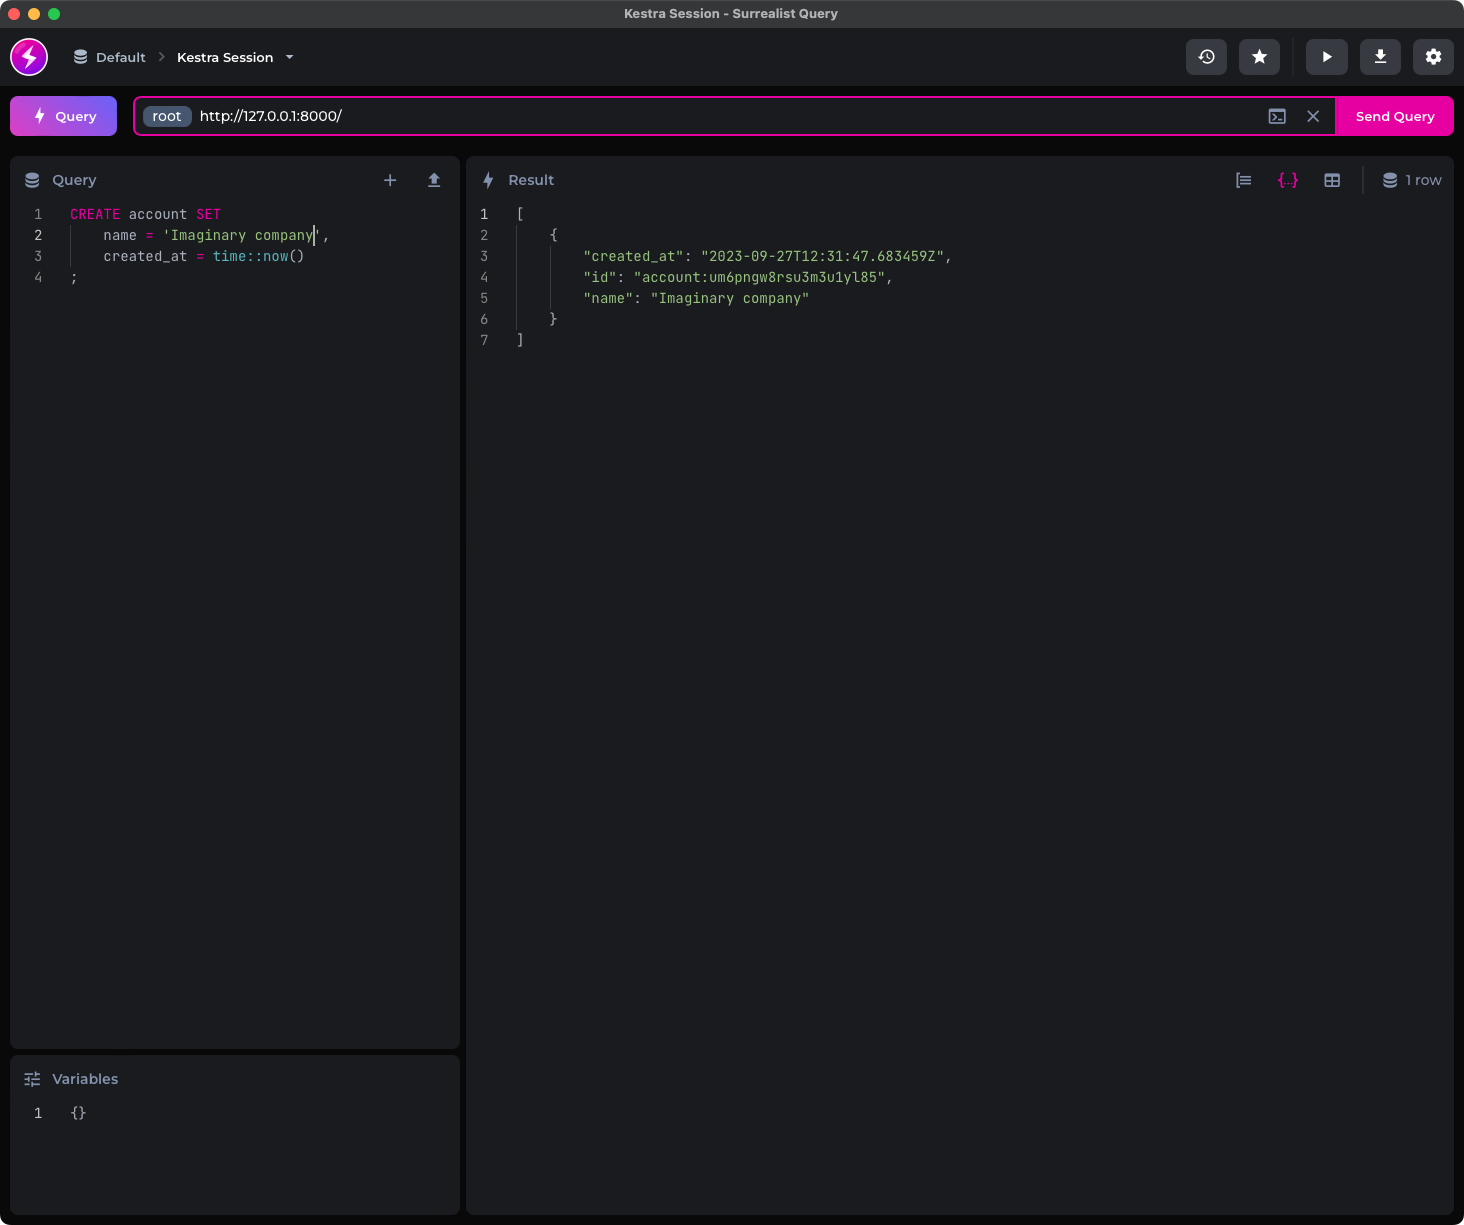
The following code snippet shows you how to use the CREATE command to create a new record of type employee with a couple of fields:
CREATE employee SET    first_name = 'John',    last_name = 'Doe',    email = 'jdoe@company.com',    department = 'IT',    created_date = time::now();
CREATE employee SET    first_name = 'Jane',    last_name = 'Janeson',    email = 'jjaneson@company.com',    department = 'Sales',    created_date = time::now();
This will give an arbitrary ID to each record. If you want to control the ID value, create the record by writing CREATE employee:<id> instead.
Anyway, run the CREATE statements individually, and here’s what you will see:
The records should now be inserted into the database, but how can we know for sure? Let’s query it next.
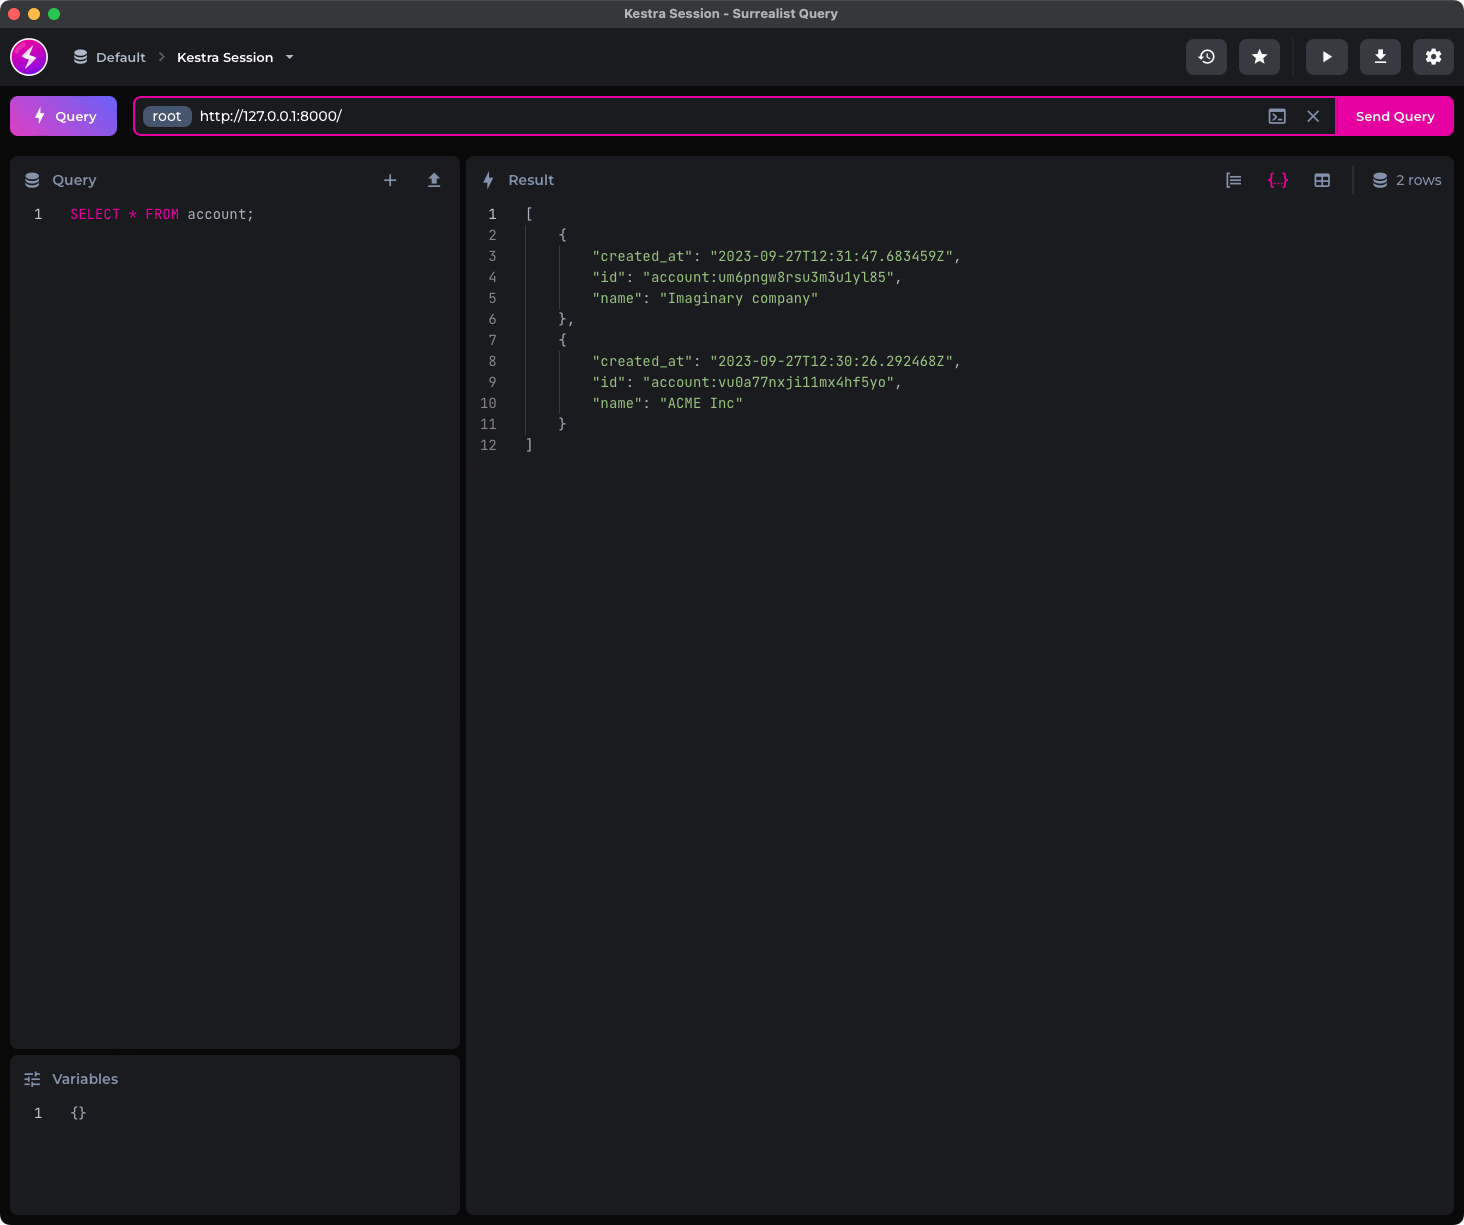
If you have at least 3 minutes of traditional SQL experience, you’ll know what the SELECT statement does. It works exactly the same in SurrealDB:
SELECT * FROM employee;You can see both records listed in JSON format:
You now know the bare minimum of SurrealDB, but just enough to explore how it works with Kestra. We’ll go over two simple data flows next, and only then will we go over a more advanced example.
We assume you already have Kestra installed and are familiar with the user interface. The rest of the article won’t dive into advanced Kestra features, so you should still be comfortable following it even if you’re new.
The latest version of Kestra comes with a SurrealDB plugin you can access through io.kestra.plugin.surrealdb.Query. It’s used to run SurrealQL commands, and expects you to provide values of the QL statement along with the database connection information.
The neat part about Kestra is that you can use pluginDefaults to set default values for a certain type of plugin. It’s a good idea to use it, especially if you plan to use one plugin type multiple times.
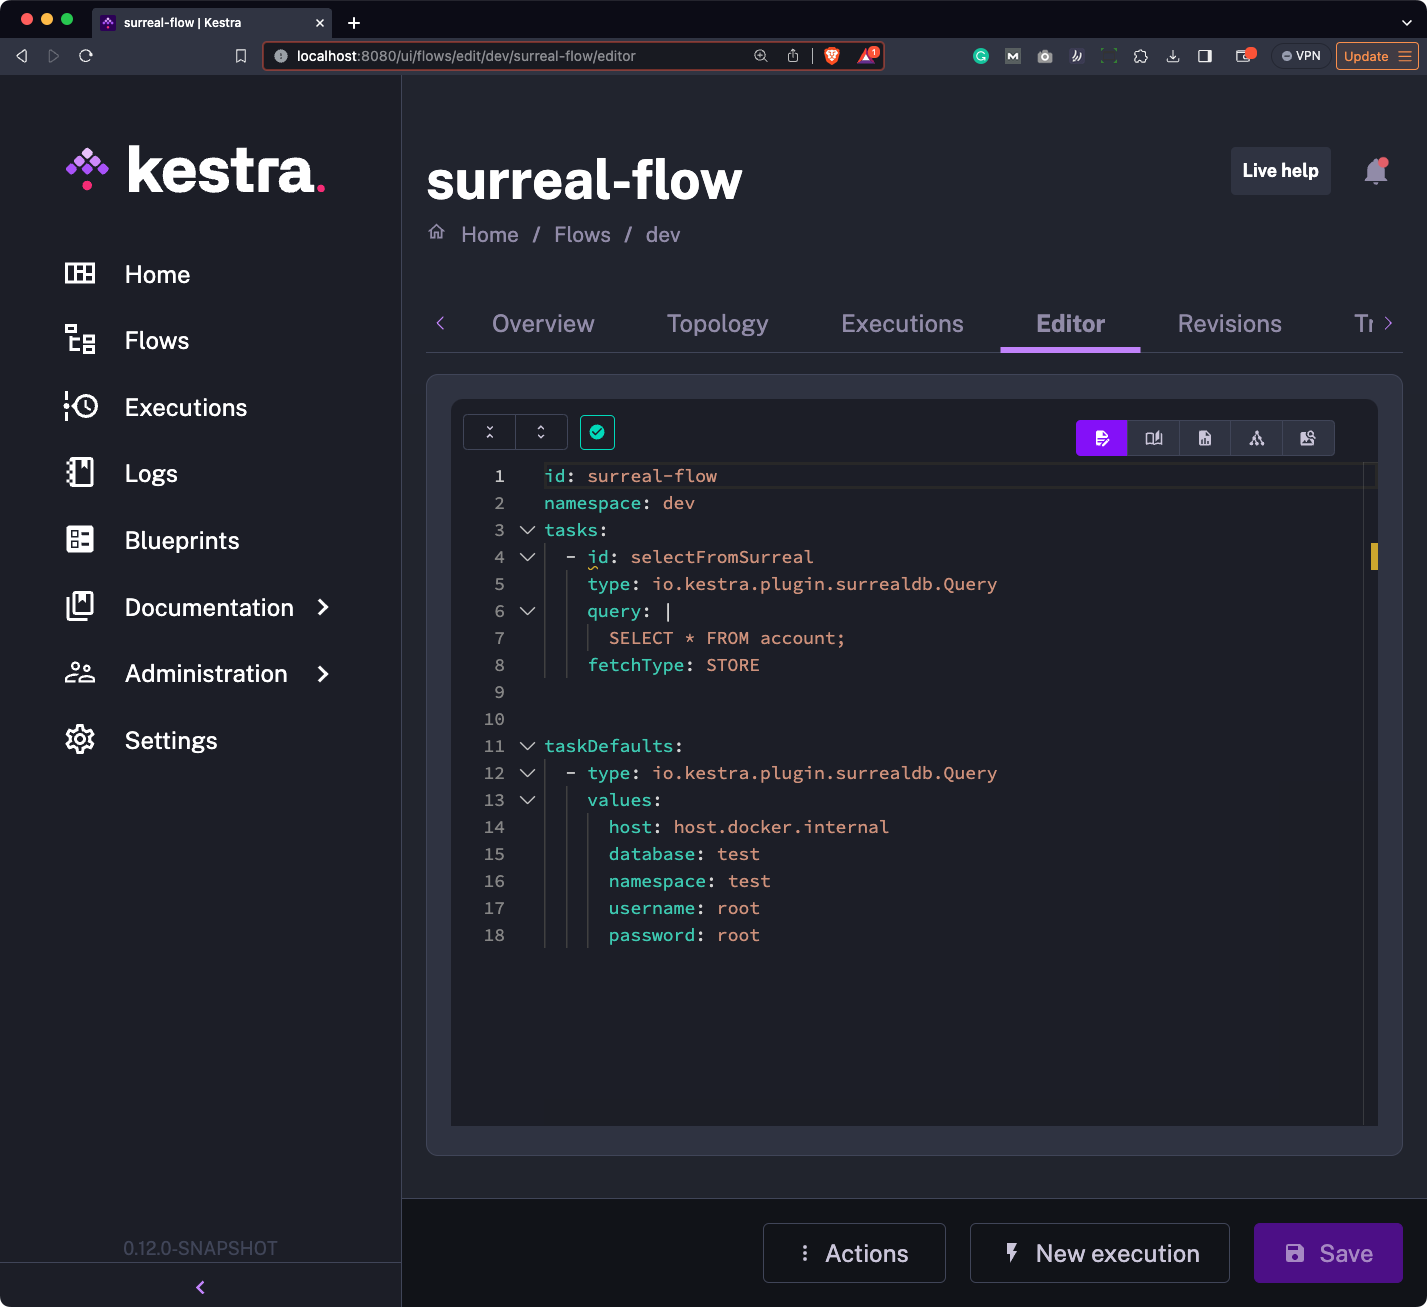
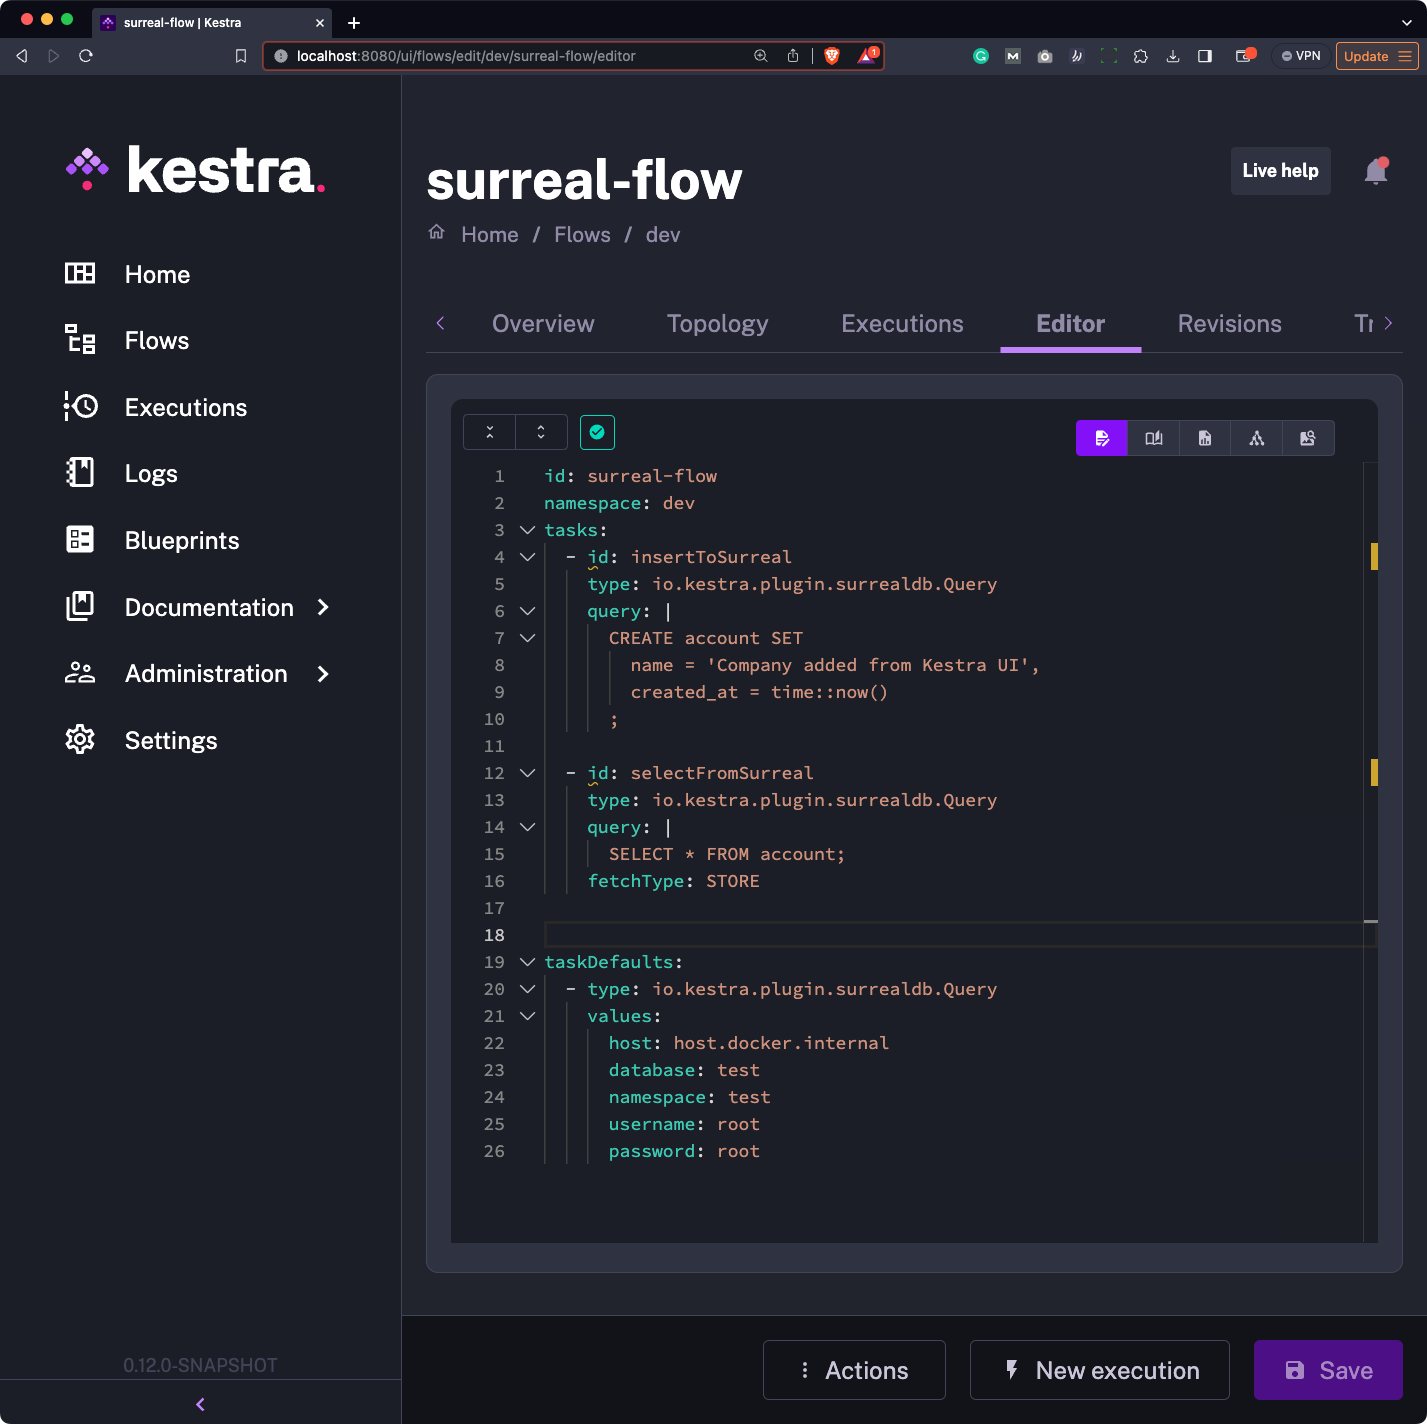
To start, go under “Flows” and create a new flow. Paste the following code:
id: surreal-flownamespace: company.teamtasks:  - id: selectFromSurreal    type: io.kestra.plugin.surrealdb.Query    query: |      SELECT * FROM employee;    fetchType: STORE
pluginDefaults:  - type: io.kestra.plugin.surrealdb.Query    values:      host: host.docker.internal      database: test      namespace: test      username: root      password: root
Long story short, we’re running a simple SELECT statement and storing all of the records in a file (fetchType: STORE). The pluginDefaults section provides a default set of reusable values for the SurrealDB plugin, which are the database connection parameters.
Note how we’re using host: host.docker.internal instead of the local database address. That’s because we’re running Kestra in a Docker container, and this is a workaround to allow it access to your computer’s local host:
Once your flow looks like ours, hit the “Save” button followed by “New execution”.
You’ll be redirected to a flow run Gantt chart in which you’ll hopefully see the single bar colored green (which means success):
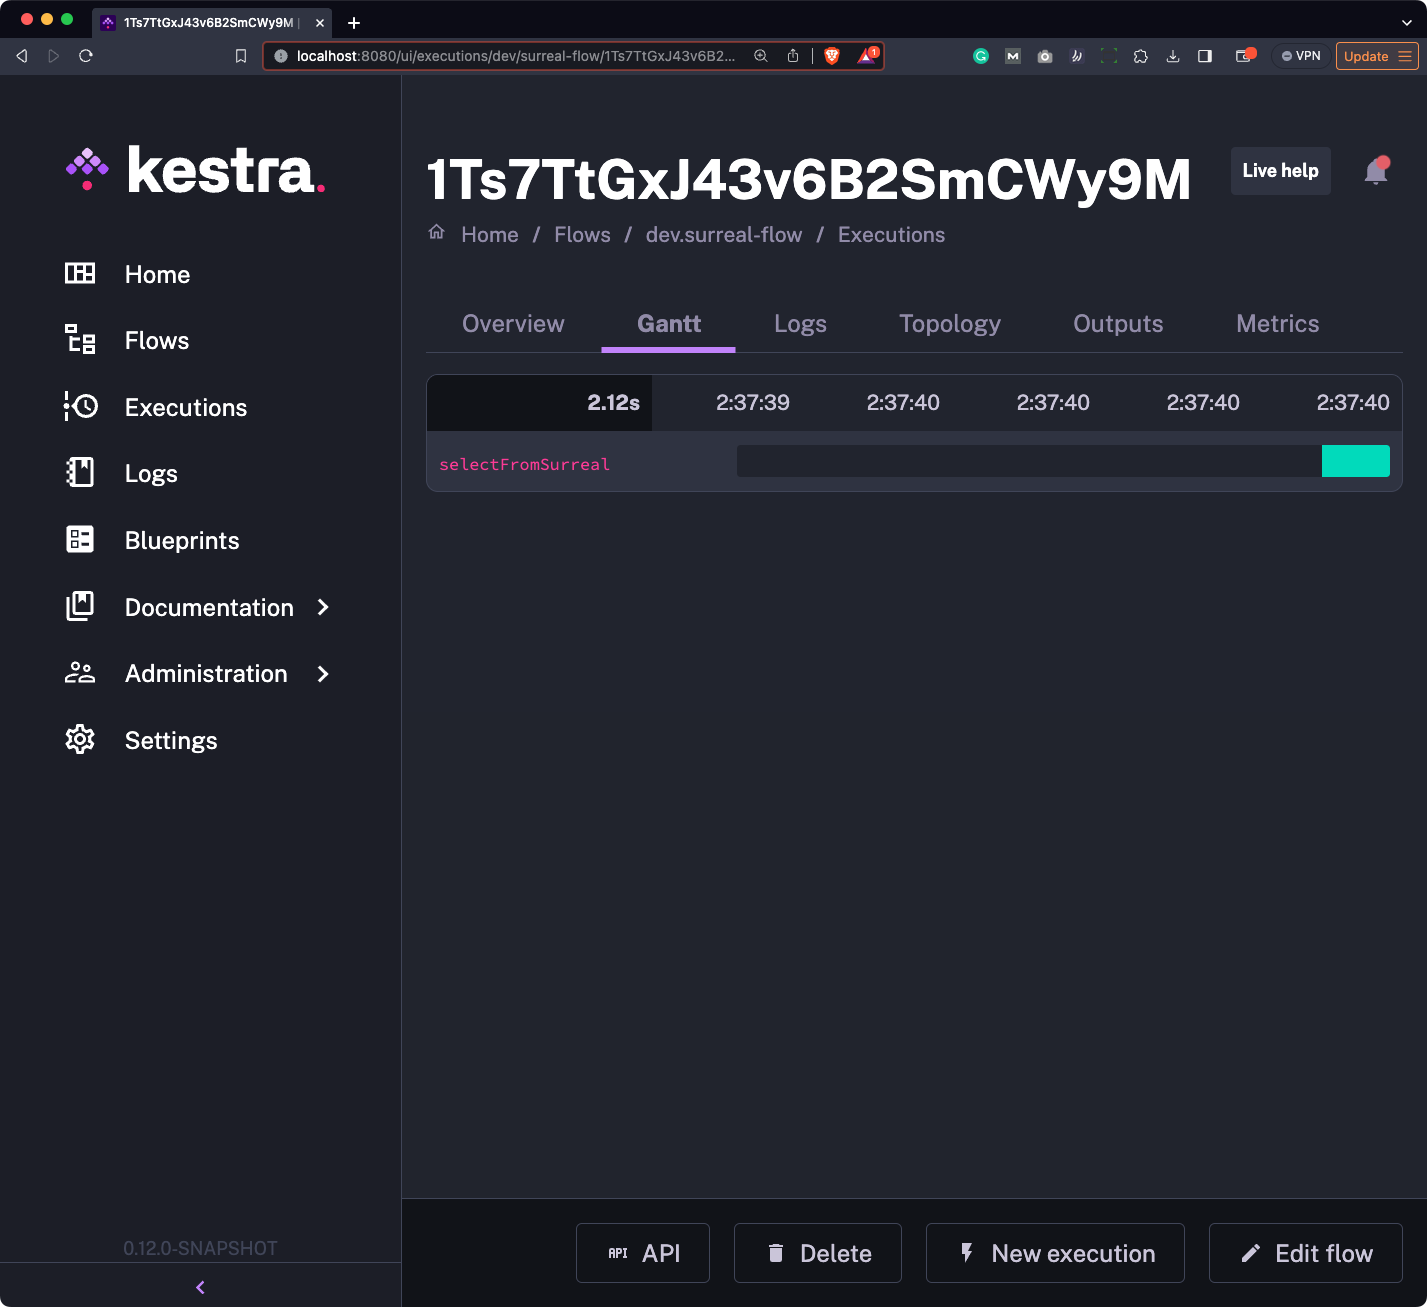
Remember how we specified fetchType: STORE in the flow code? What this means is that the records fetched from the SurrealDB will be accessible to you as a downloadable artifact.
Head over to the “Outputs” section of the execution log, and you’ll be able to both preview and download the file:
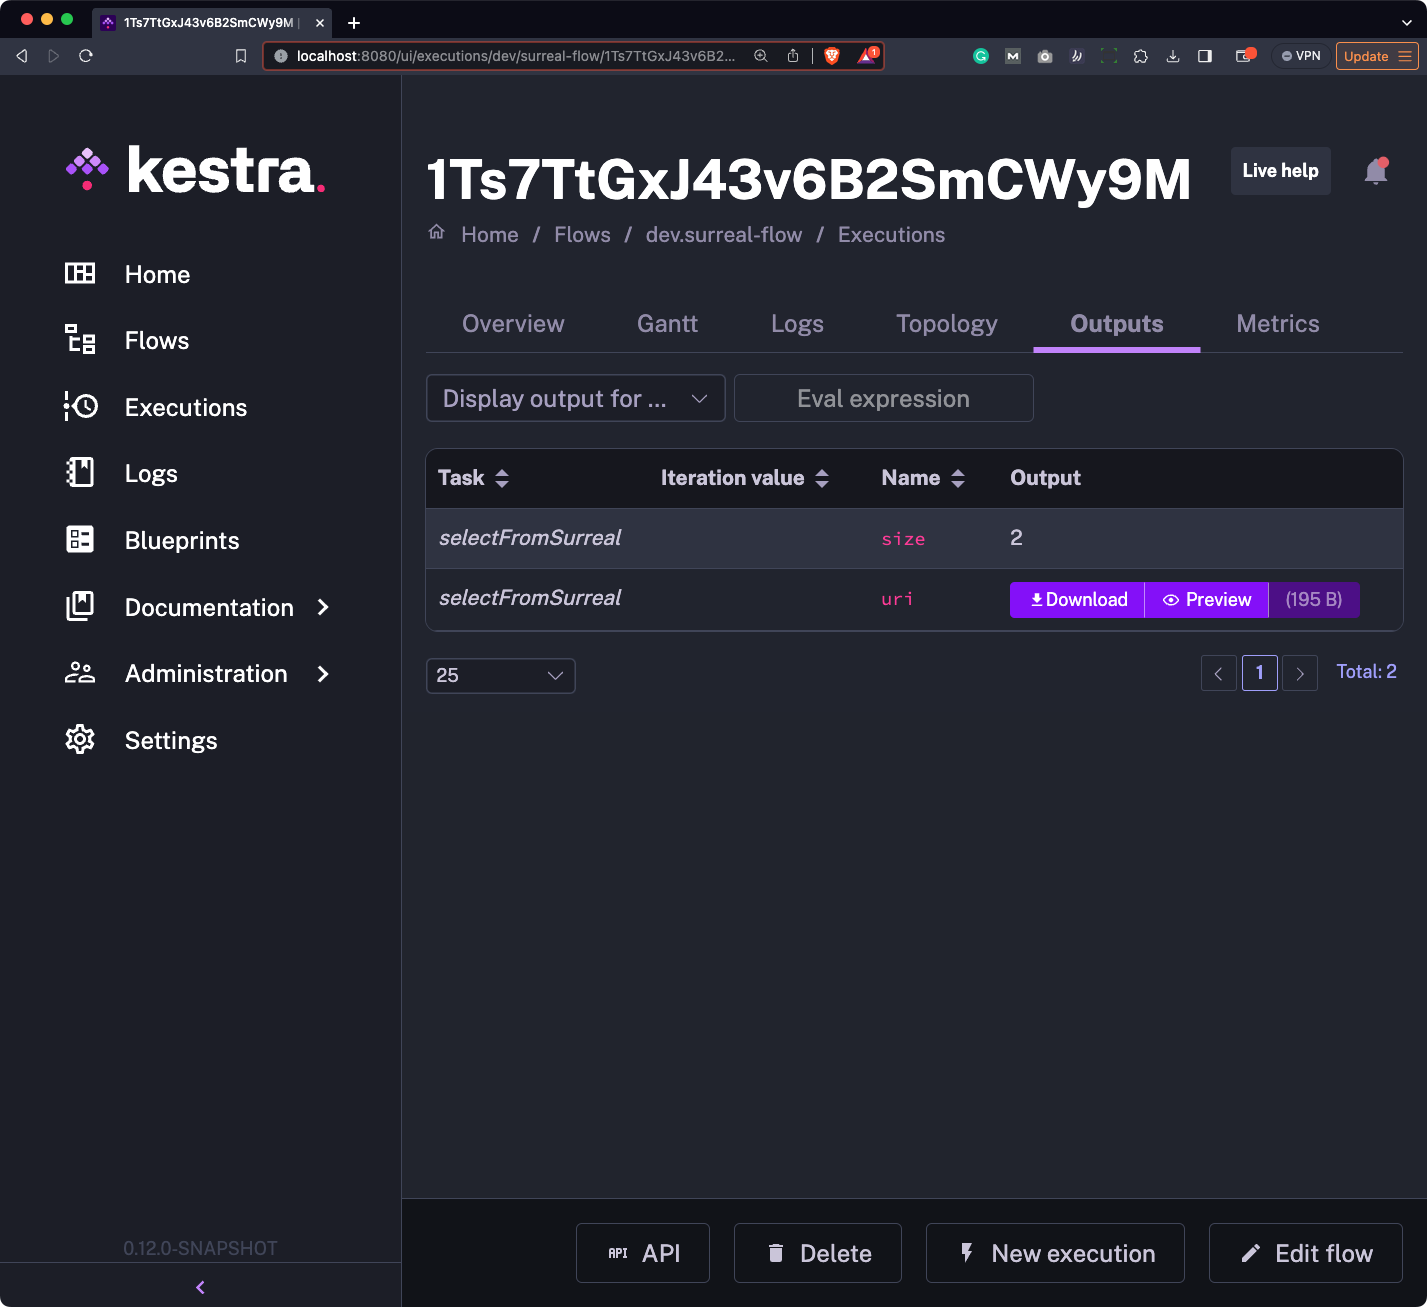
This is what it contains:
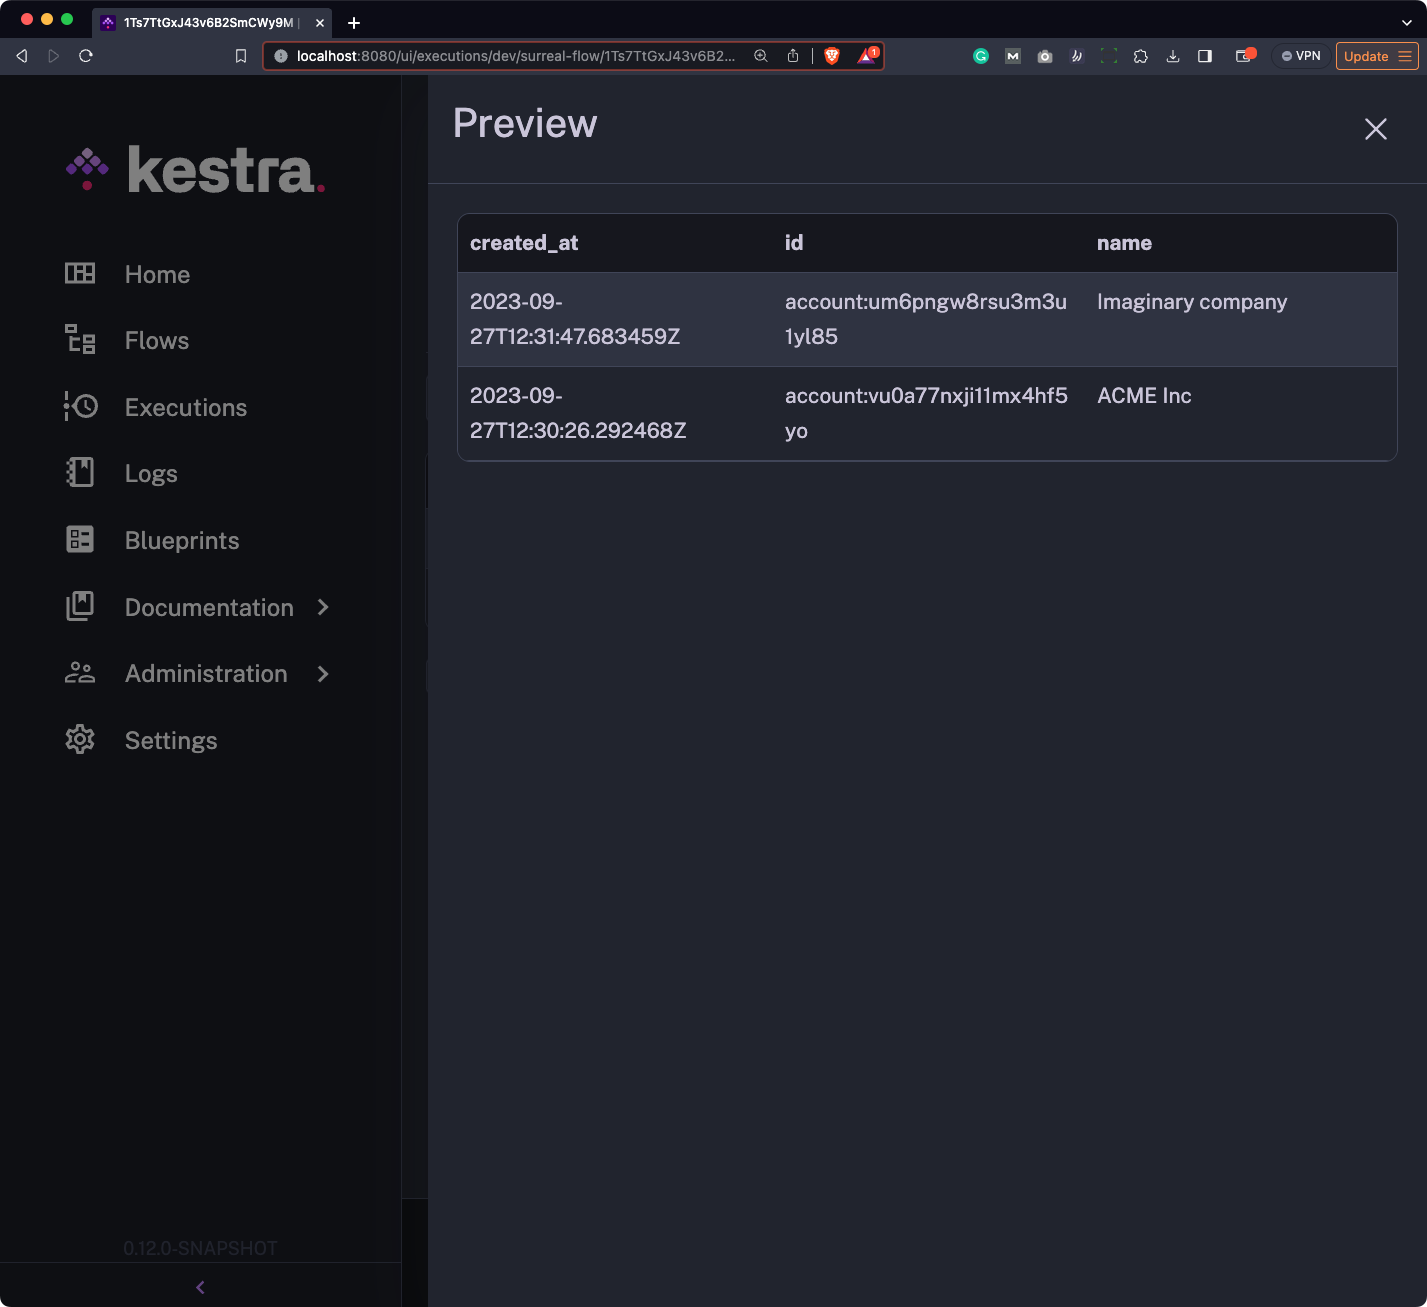
And that’s your first Kestra and SurrealDB flow. Let’s also see how to insert data.
To insert and retrieve data with Kestra and SurrealDB you’ll simply want to add yet another task with the type of io.kestra.plugin.surrealdb.Query.
There’s nothing to save here, so you can remove the fetchType argument. The only other change is the one you need to make to query. Leverage the knowledge from the previous section to write a simple CREATE statement with SurrealQL:
id: surreal-flownamespace: company.teamtasks:  - id: insertToSurreal    type: io.kestra.plugin.surrealdb.Query    query: |      CREATE employee SET        first_name = 'Bob',        last_name = 'Deal',        email = 'bdeal@company.com',        department = 'Marketing',        created_date = time::now()      ;
  - id: selectFromSurreal    type: io.kestra.plugin.surrealdb.Query    query: |      SELECT * FROM employee;    fetchType: STORE
pluginDefaults: - type: io.kestra.plugin.surrealdb.Query values: host: host.docker.internal database: test namespace: test username: root password: rootHere’s what your flow code should look like:
Run it once again - this time, you’ll see two bars, each representing an individual task:
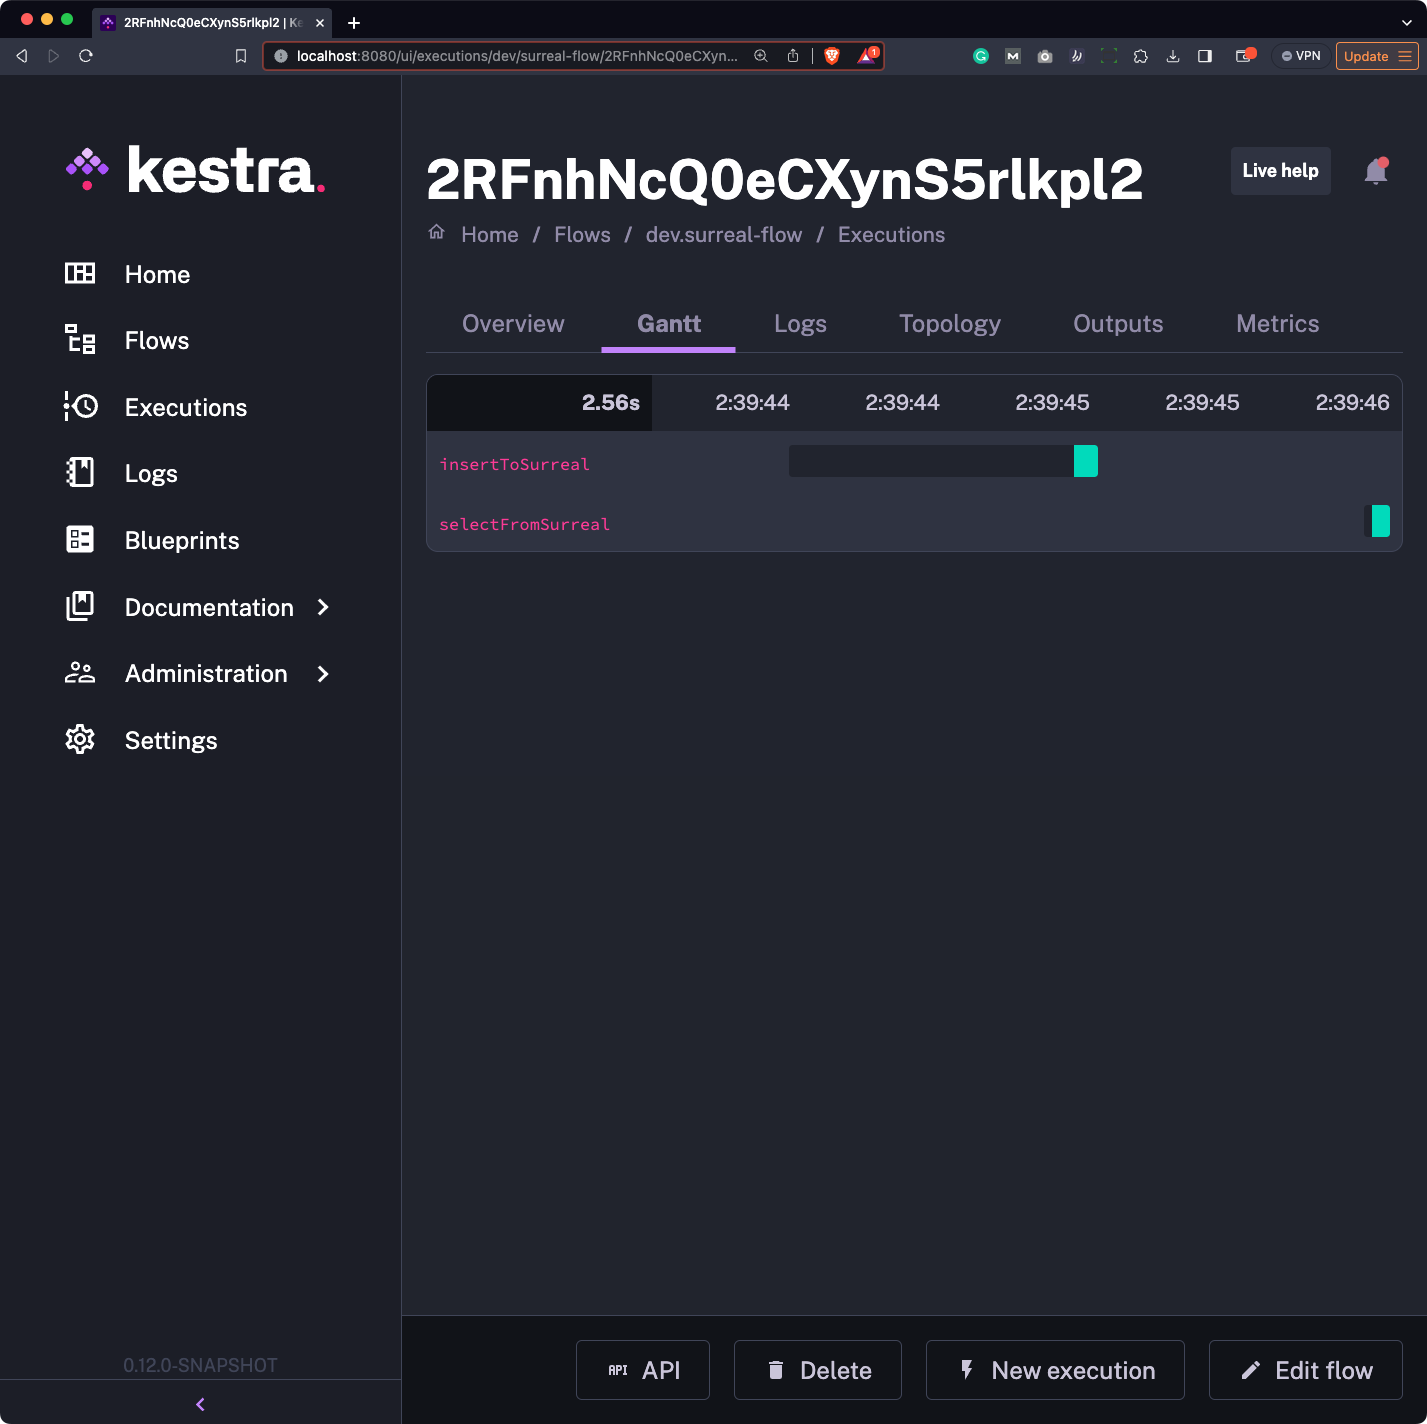
The output artifact now has three records, since we’ve inserted a new one and fetched all of them:

Up next, let’s work with a couple of “advanced” SurrealDB features to show you exactly what this database is capable of.
Here’s the thing about SurrealDB - it’s really, really versatile, especially for creating new records. This section will show you how to:
lowercase() and concat() to create derived attributes (attributes based on other attributes)WHERE and FETCH when running SELECT statementsHere’s a more detailed description.
We’ll modify the flow in a way that it uses three tasks of type io.kestra.plugin.surrealdb.Query. Here’s what each task will do:
Task 1 - createEmployee
employee and insert a new record with the ID of dario (my first name)name.first will equal to "name": {"first": "value"}string::join() functionyear_of_birth which is derived from an existing attribute ageTask 2 - createLaptop
laptop which will be linked with employeeowner attribute to employee:dario - essentially links these two recordsemployee recordTask 3 - getData
SELECT statementWHERE to filter out records based on year_of_birth (does nothing in this case since there’s only one record)FETCH to combine employee and laptop recordsEverything described so far sounds like a lot, but it actually takes more time to describe the functionality with words than it does to implement it in code.
Here’s the full contents of the YAML flow file:
id: surreal-flownamespace: company.teamtasks:  - id: createEmployee    type: io.kestra.plugin.surrealdb.Query    query: |      CREATE employee:dario SET          name.first = 'Dario',          name.last = 'Radecic',          name.full = string::join(' ', name.first, name.last),          email = string::concat(              string::lowercase(name.first),              '.',              string::lowercase(name.last),              '@company.com'          ),          age = 26,          year_of_birth = time::year() - age,          created_at = time::now()      ;
  - id: createLaptop    type: io.kestra.plugin.surrealdb.Query    query: |      CREATE laptop SET          name = "MacBook Air M2",          specs.cpu = "Apple M2 8-core",          specs.gpu = "Apple M2 8-core",          specs.ram = 8,          specs.ssd = 256,          owner = employee:dario,          employee = (SELECT VALUE id FROM employee WHERE email = 'dario.radecic@company.com' LIMIT 1)[0]      ;
  - id: getData    type: io.kestra.plugin.surrealdb.Query    query: |      SELECT * FROM employee, laptop      WHERE employee.year_of_birth >= 1995      FETCH employee, laptop      ;    fetchType: STORE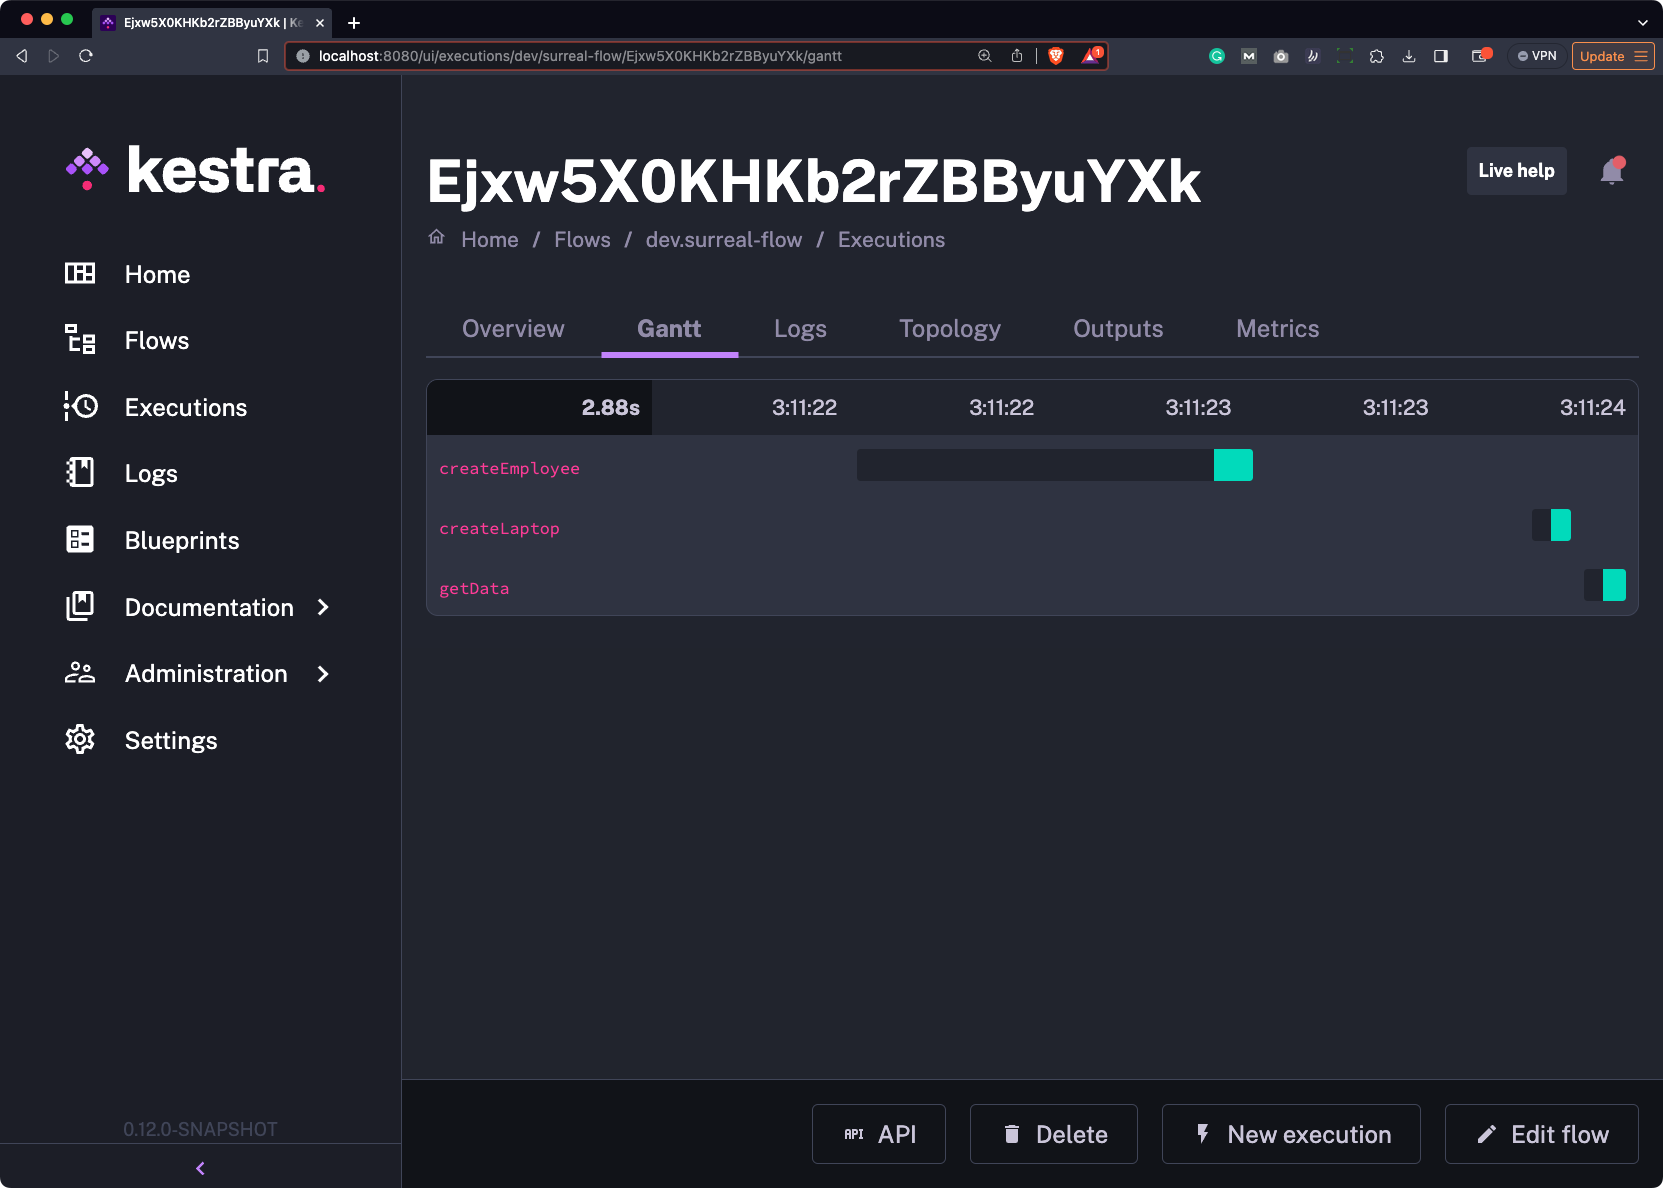
pluginDefaults: - type: io.kestra.plugin.surrealdb.Query values: host: host.docker.internal database: test namespace: test username: root password: rootLet’s run the flow to see what happens. We don’t get any errors, indicated with the individual green bars:
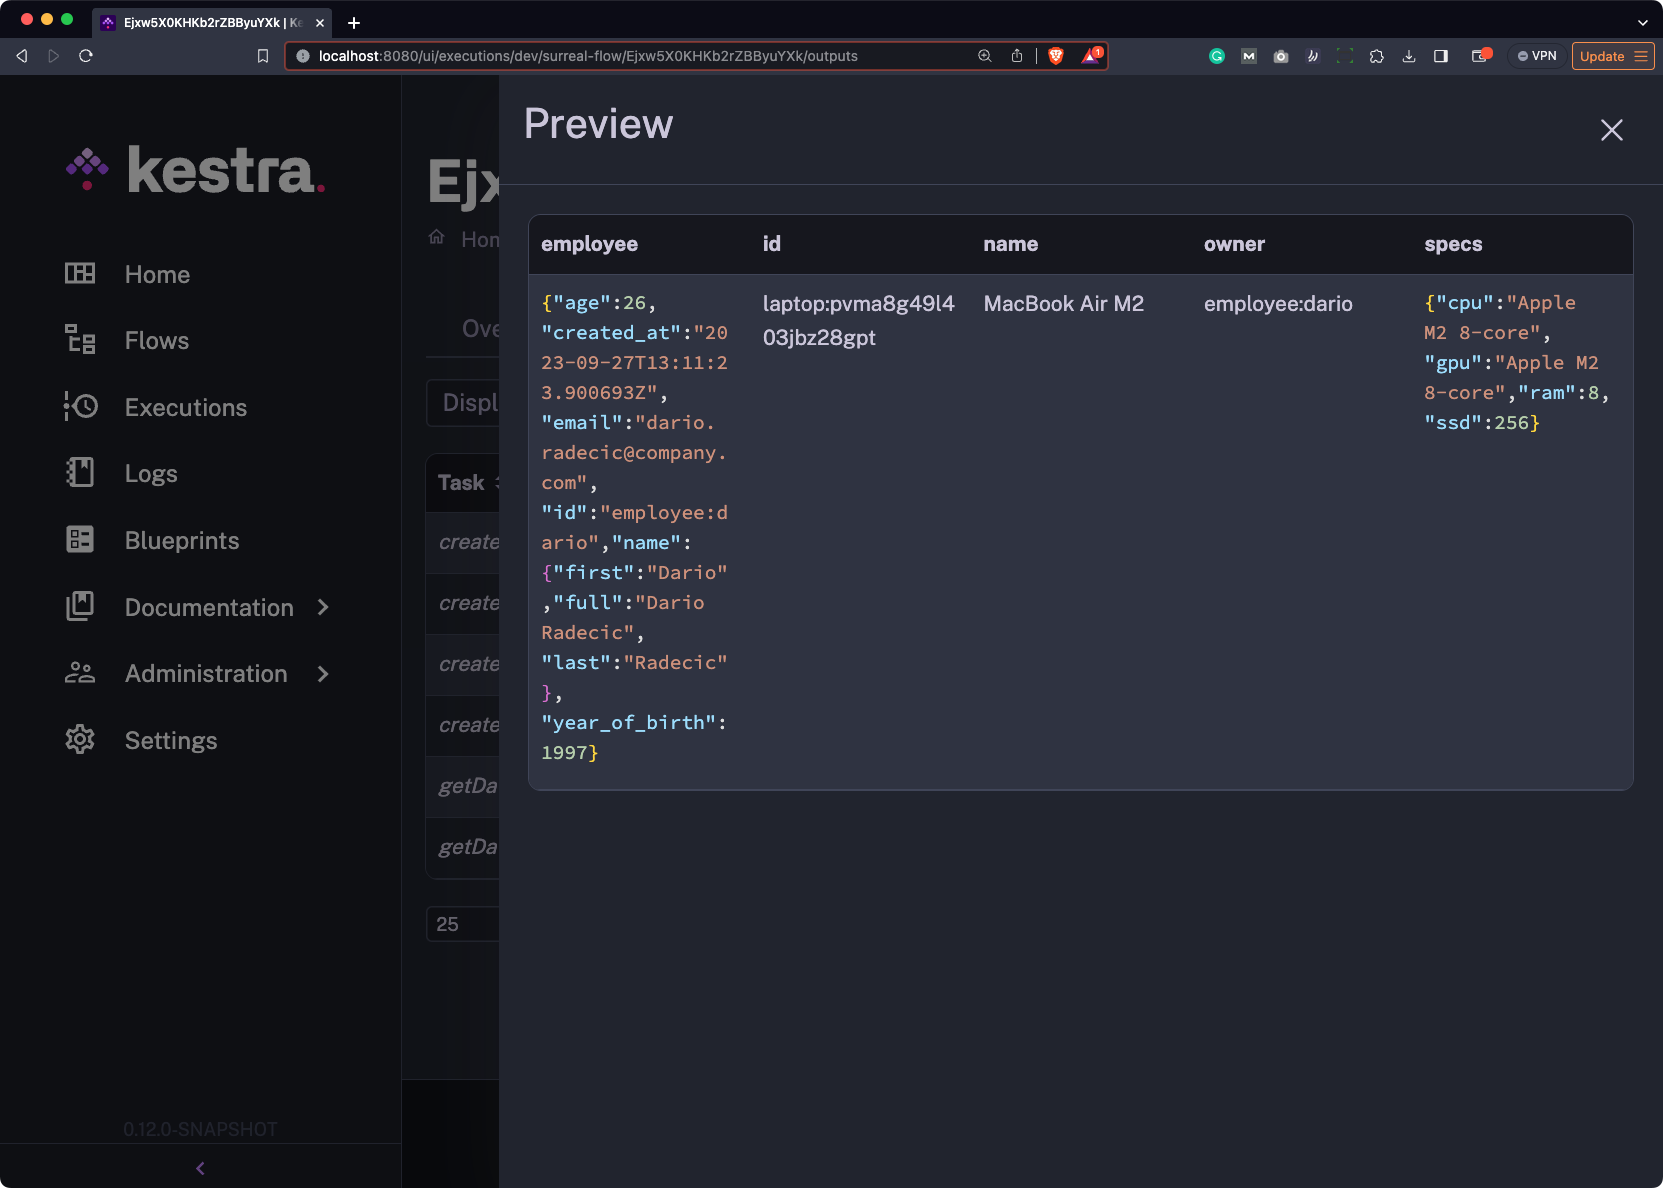
The downloadable file contains entries from both employee and laptop, as you can see from the following image:
And that’s how Kestra integrates with SurrealDB - let’s wrap things up next.
Kestra’s plugin library grows by the day, and every new release packs a ton of features attractive to both individual and enterprise users. Combine that with the fact that you don’t have to stick to a programming language to write and schedule data flows, and you’ll get the idea of why more and more users are switching from competing data platforms.
Today’s article showed you how simple the integration with SurrealDB is, and how it’s actually faster to write the code than it is to describe the functionalities in plain English - especially with the last example.
What are your thoughts on Kestra and SurrealDB? Have you used either of them before? Let us know in the comment section below.
You might also find the following articles useful:

Stay up to date with the latest features and changes to Kestra