Authors
Loïc Mathieu
Lead Software Engineer
Loïc Mathieu
Lead Software Engineer
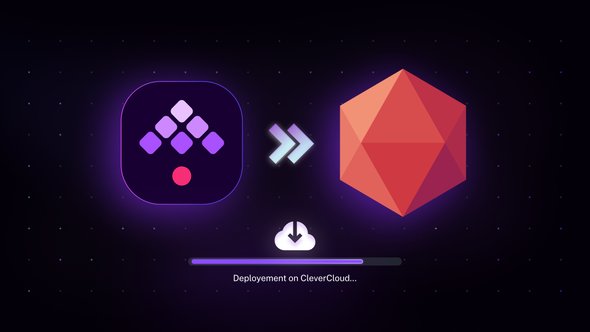
Clever Cloud is a Platform as a Service provider that uses Kestra itself. As they have deployed Kestra in Clever Cloud, I was wondering how easy it is to yourself, moreover I personally know some of the Clever Cloud developers and wanted to test their product for a long time … so let’s do it!
To deploy Kestra on Clever Cloud we used their CLI tool: Clever Tools
Prerequisite: you need a Clever Cloud account and the clevercloud CLI installed on your machine, see the Clever Cloud quickstart for setup instructions.
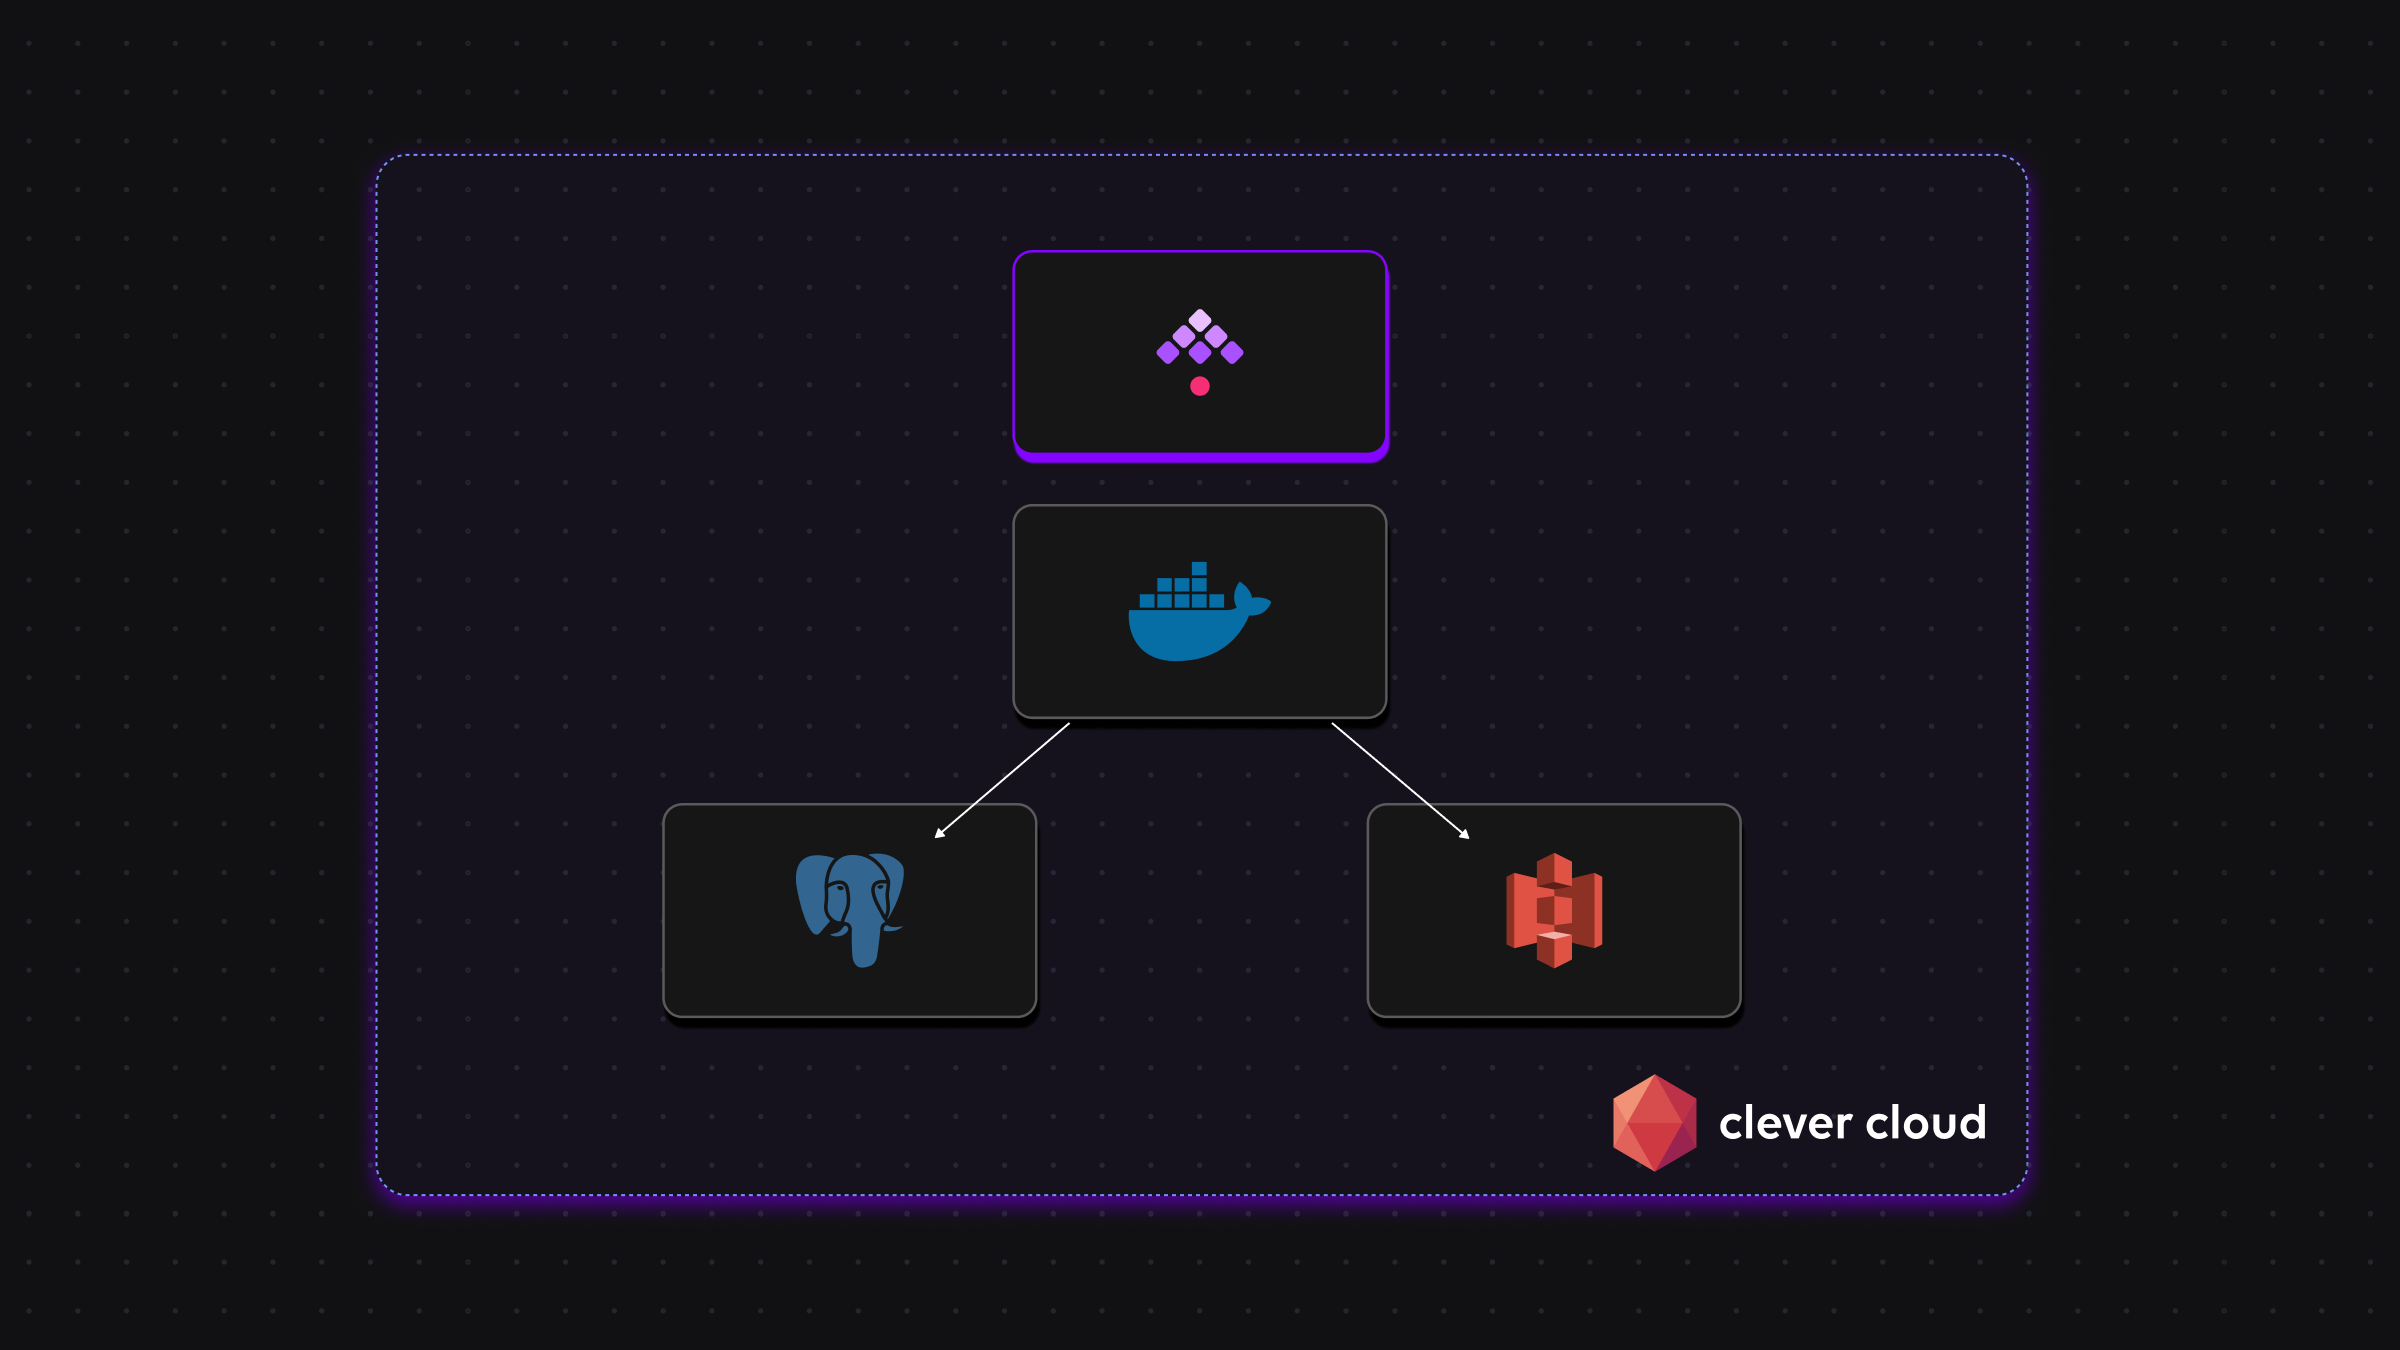
Clever Cloud offers managed S3 compatible object storages (Cellar), managed PostgreSQL databases, and managed Docker applications. We will use these three services to deploy Kestra.
Clever Cloud has a code-first approach, you deploy an application into Clever Cloud by pushing to a Git branch.
As Kestra is published as a Docker container, we will deploy it as a Docker application. So the first thing is to create a Git repository and add a Dockerfile into it.
I’m using this Dockerfile to launch the latest version of Kestra in standalone mode (all-in-one server mode):
FROM kestra/kestra:latest
CMD ["server", "standalone"]On the Clever Cloud console, click on CREATE, select an application, Create a brand new app, then select Docker.
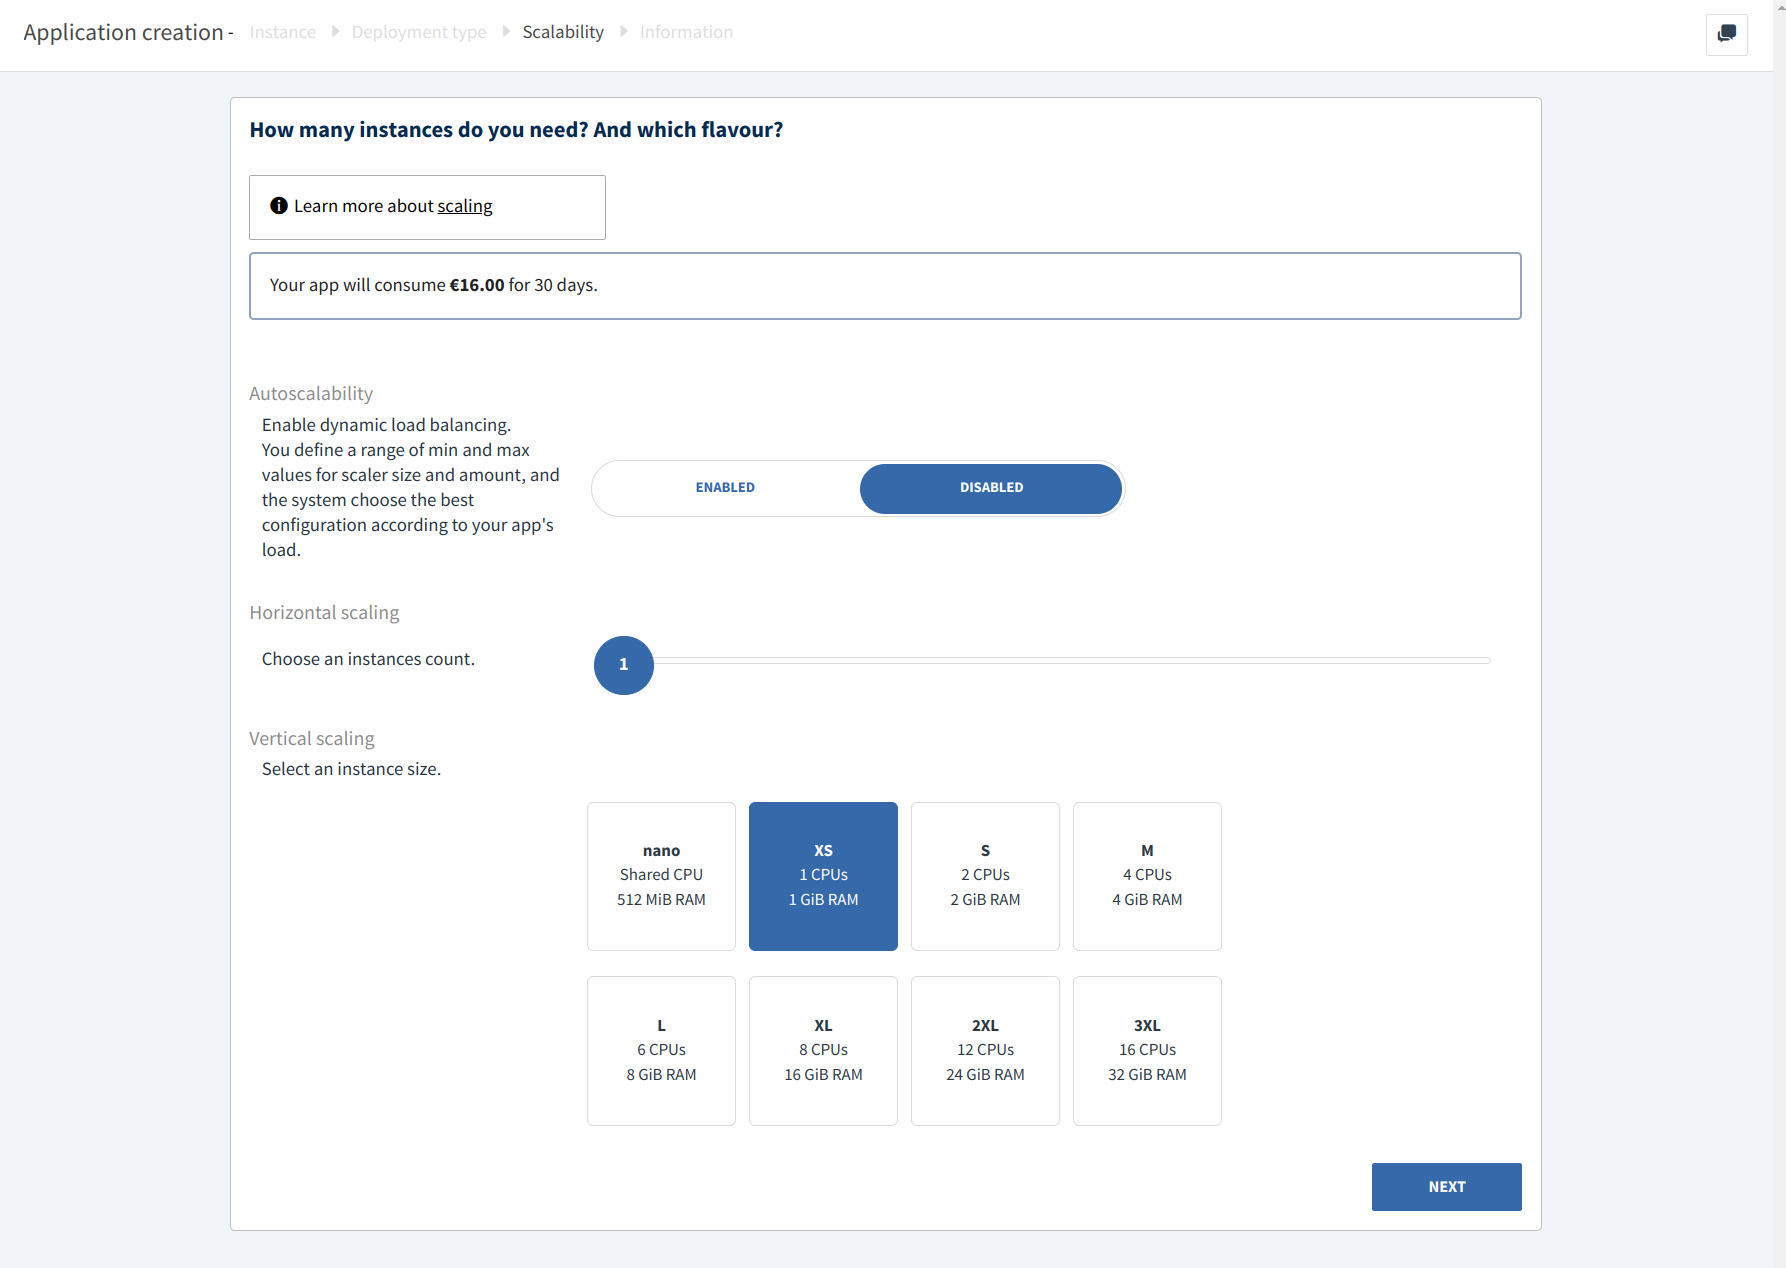
By default, Clever Cloud selects the XS instance type with 1 CPU and 1 GB of RAM. As we will start Kestra in an all-in-one process (the standalone server), it’s better to choose the S instance type with 2 CPU and 2GB of RAM. So click on Edit and select S.
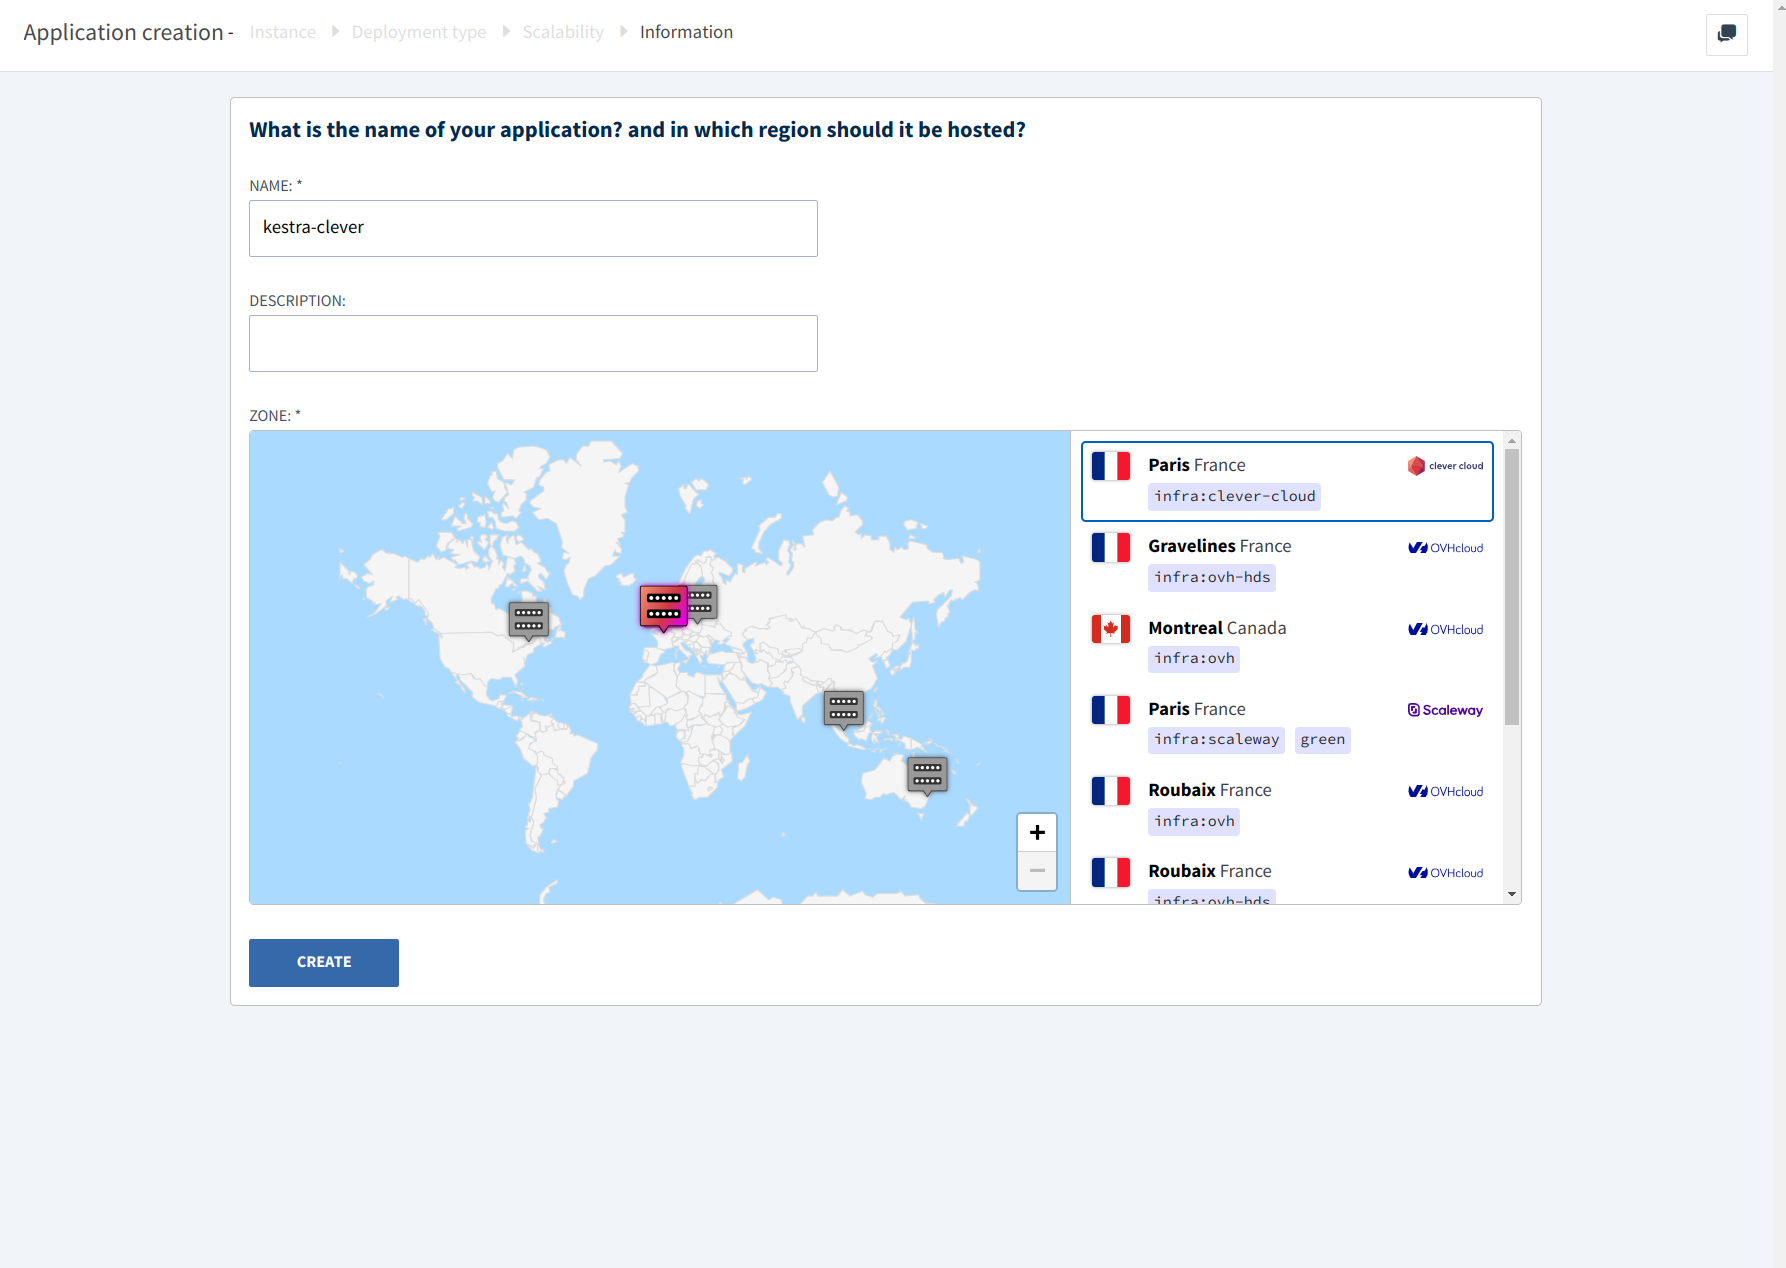
Select NEXT, then set the application name and the location. Here we will name our application kestra-clever and deploy it in the France region.
Once you select Finish, you’ll arrive to the add-ons page. We will create these later so we can select I don’t need any add-ons.
Now that we have finished the application setup, we can now configure environment variables. This is the most tricky part as you will need to configure these properly so Clever Cloud and Kestra to work together.
We will add the following environment variables:
CC_HEALTH_CHECK_PATH to the /ping URI so Clever Cloud health check uses the lightweight ping endpoint.KESTRA_CONFIGURATION to the Kestra configuration YAML file.Here is the configuration file that we will use:
datasources: # Configure Postgres with the env vars from the add-on <1> postgres: url: jdbc:postgresql://${POSTGRESQL_ADDON_HOST}:${POSTGRESQL_ADDON_PORT}/${POSTGRESQL_ADDON_DB} driverClassName: org.postgresql.Driver username: ${POSTGRESQL_ADDON_USER} password: ${POSTGRESQL_ADDON_PASSWORD}kestra: server: # Configure basic auth as Kestra will be publicly available <2> basic-auth: enabled: true username: user@domain.com password: supersecretpassword repository: type: postgres # Configure MinIO storage with the env vars from the add-on <3> storage: type: minio minio: endpoint: https://${CELLAR_ADDON_HOST} port: 80 accessKey: ${CELLAR_ADDON_KEY_ID} secretKey: ${CELLAR_ADDON_KEY_SECRET} region: US bucket: kestra-internal-storage queue: type: postgres tasks: tmpDir: path: /tmp/kestra-wd/tmp # Setup the URL to the CleverCloud host <4> url: ${APP_ID}.cleverapps.io # As the Docker engine is not accessible, configure globally the Process runner for all plugins <5> plugins: defaults: - type: io.kestra.plugin.scripts values: taskRunner: type: io.kestra.plugin.core.runner.Process${APP_ID}.cleverapps.io where APP_ID is an environment variable injected by Clever Cloud with the identifier of your application.Process task runner for all plugins using Plugins Default.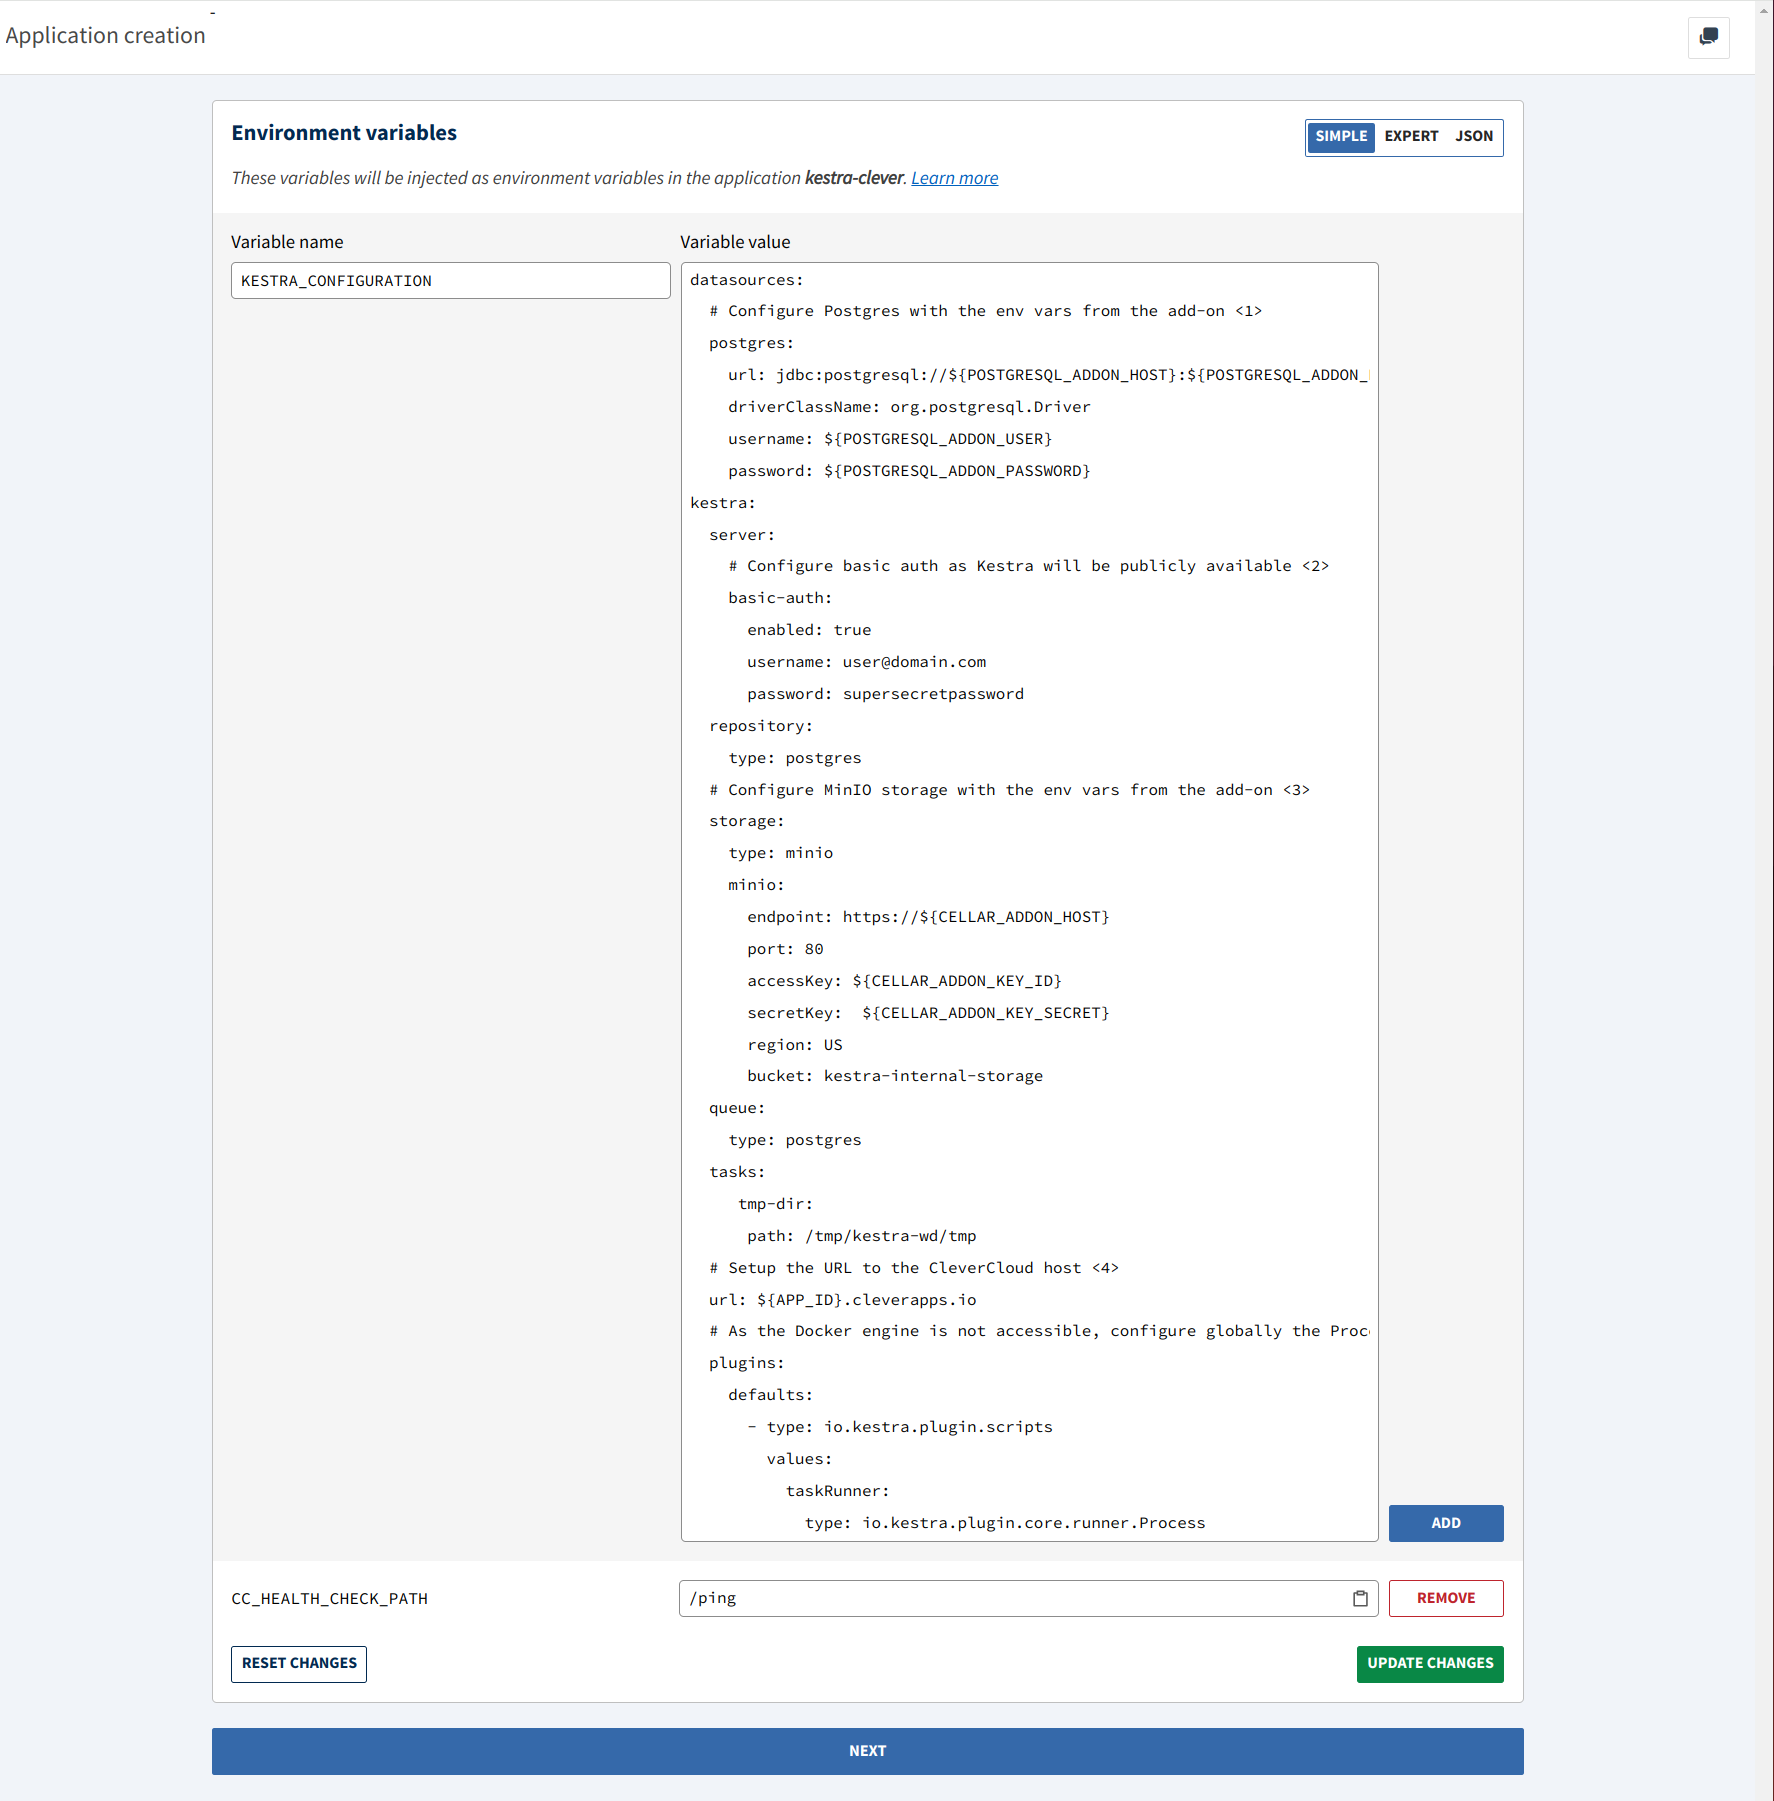
Remember to select UPDATE CHANGES before selecting NEXT to save your changes. You will arrive at a page which explains how to deploy a Docker application via git push. Follow the instructions on this page and push your Git branch to Clever Cloud.
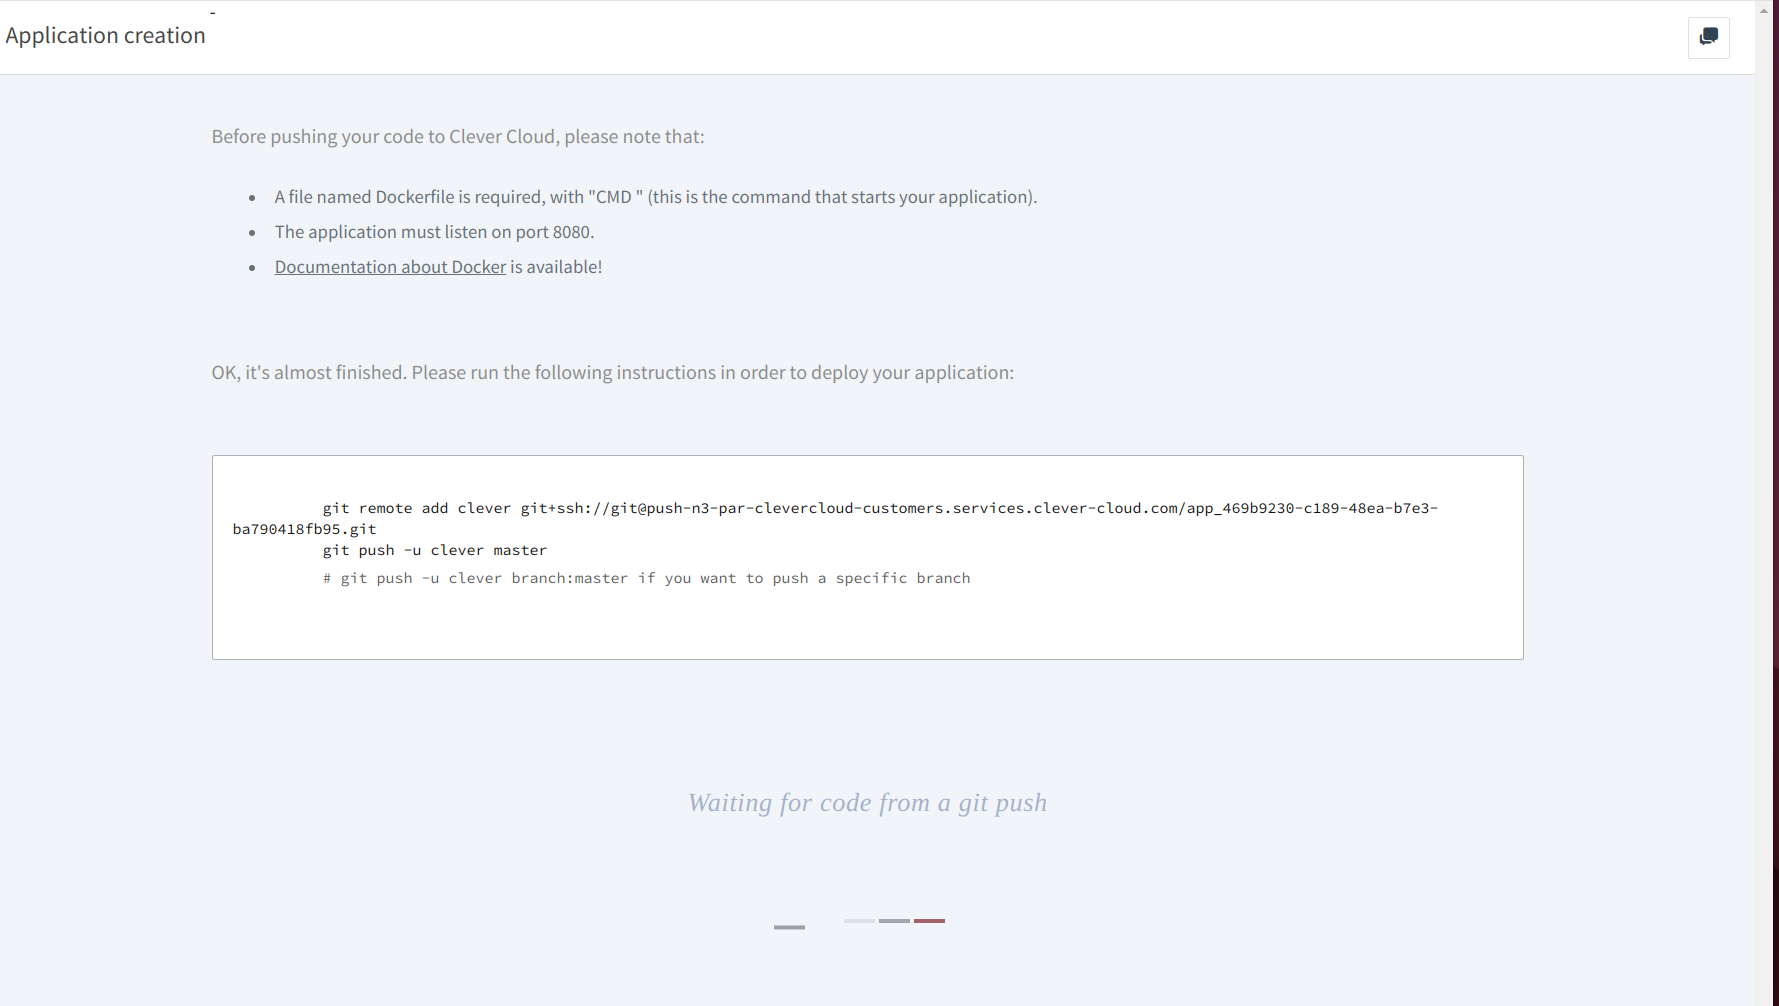
After a few seconds, the console will detect the push and switch to the logs of the deployment. As we’re missing the necessary services, you can abort the deployment.

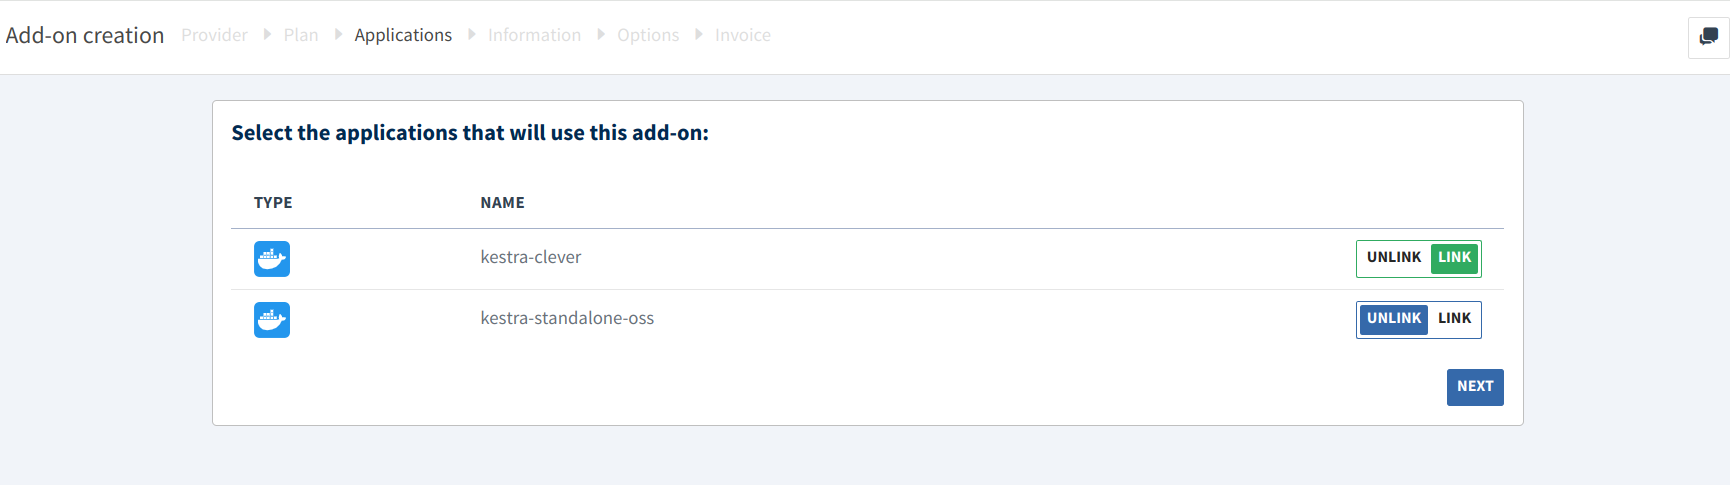
On the Clever Cloud console, select CREATE, then select an add-on then pick Cellar S3 storage.

There is only one plan available, so select NEXT, then select LINK in front of the kestra-clever to link the add-on to the application. Linking the add-on will inject environment variables to the linked application with the connection URL and credentials so it can be easily configured without needed to hardcode them. This is a very nice feature 😉.
Select NEXT, then fill in the name of the Cellar bucket and change the location if required. In our example, we created a bucket named kestra-clever in the Paris region.

After that, the console will display the Key ID and Key Secret to connect to the bucket, we will need them later, but you don’t need to copy them as we link the service to the application, so they will be injected.
On the Clever Cloud console, select CREATE, and an add-on then pick PostgreSQL.
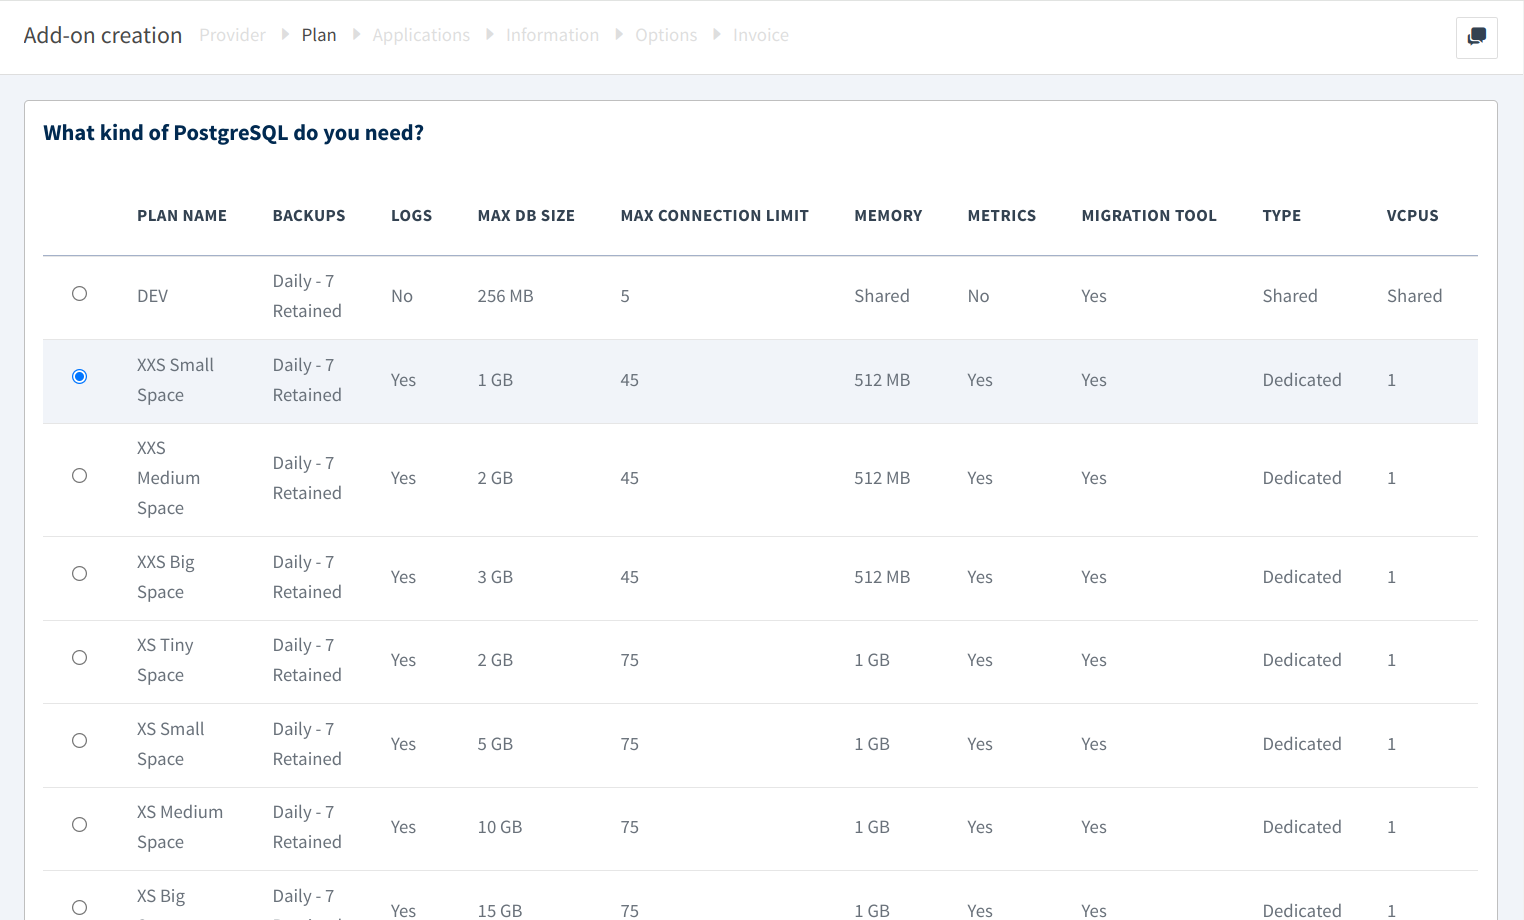
Select your plan, here I select XXS Small Space as it’s a demo environment, but for a production environment you may choose a plan with more capacity. Select NEXT, then select LINK in front of the kestra-clever to link the add-on to the application.
Select NEXT, then fill in the name of the PostgreSQL instance and change the version and location if required. In our example, we created a PostgreSQL v15 instance named kestra-clever in the Paris region.
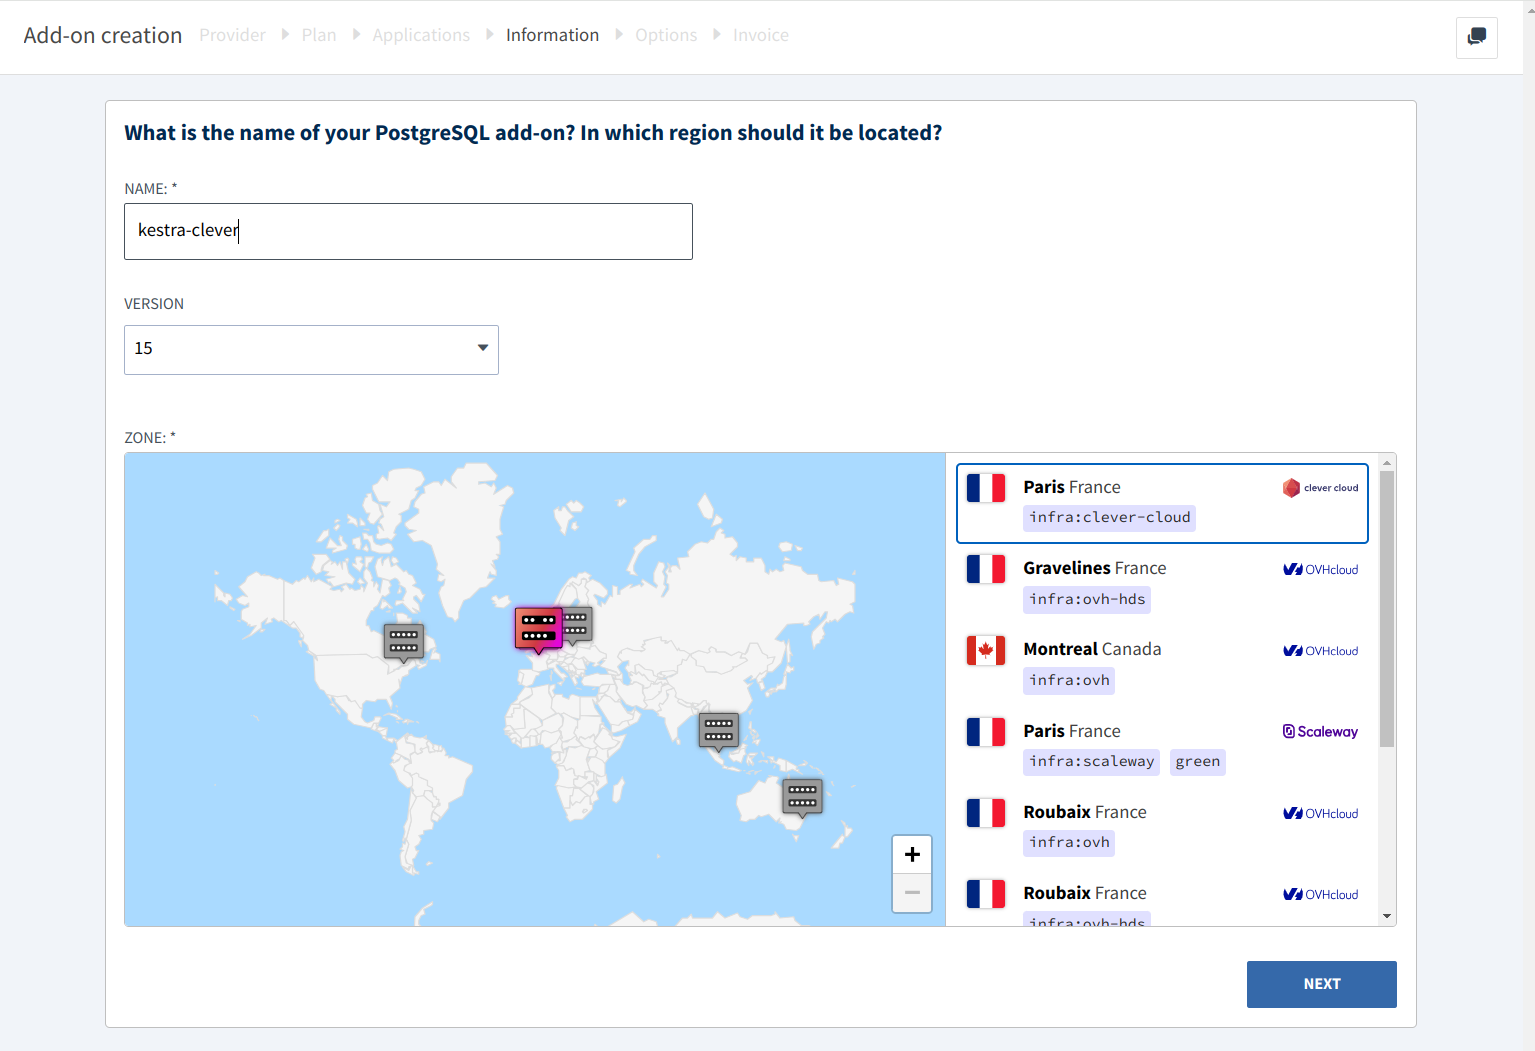
Next, the console asks if encryption at rest should be enabled, the default is disabled, depending on your security needs you may want to enable it. Click on Confirm Options.
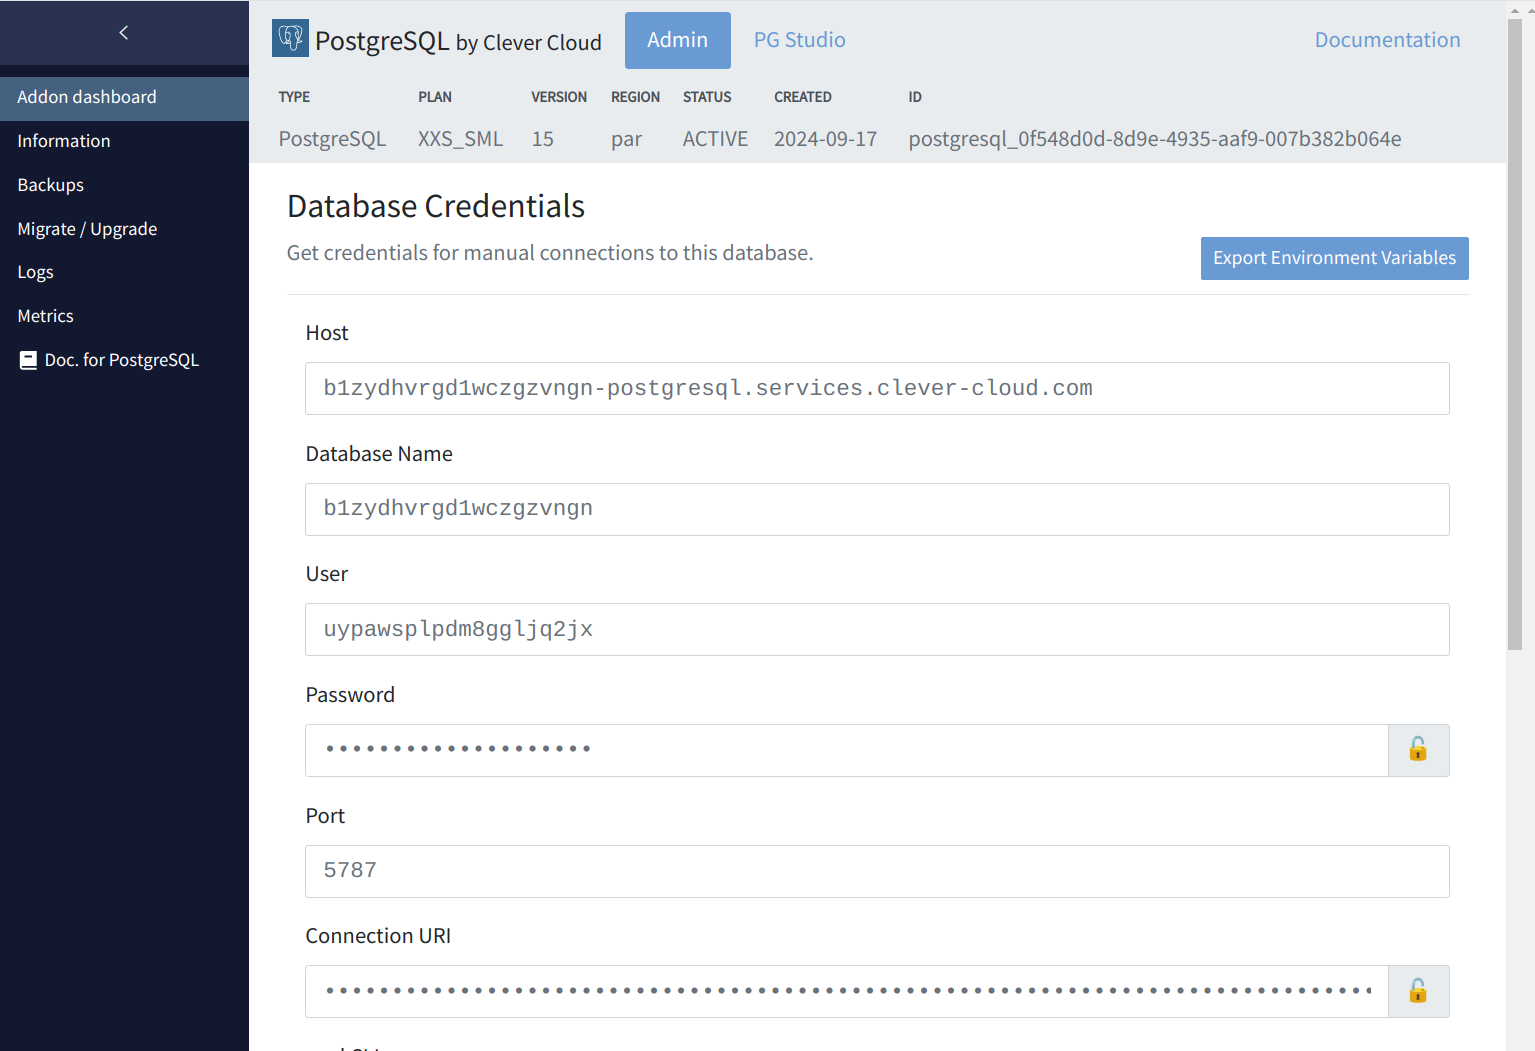
After that, the console will display the Host name, database name and authentication information to connect to PostgreSQL, we will need them later, but you don’t need to copy them as we link the service to the application, so they will be injected.
Now that everything has been created, go to your kestra-clever application and select START.
While the application is starting, you can go to the Environment variables page to see if the variables from the Cellar and PostgreSQL add-ons are correctly injected.
You can also go to the Logs page to see the deployment logs and the Kestra server logs. When Kestra is successfully started, you will see a log like the following:
2024-09-18 14:17:52,678 INFO standalone io.kestra.cli.AbstractCommand Server Running: http://453ec0e8-093f-44df-bb00-c682573bc61f:8080, Management server on port http://453ec0e8-093f-44df-bb00-c682573bc61f:8081/health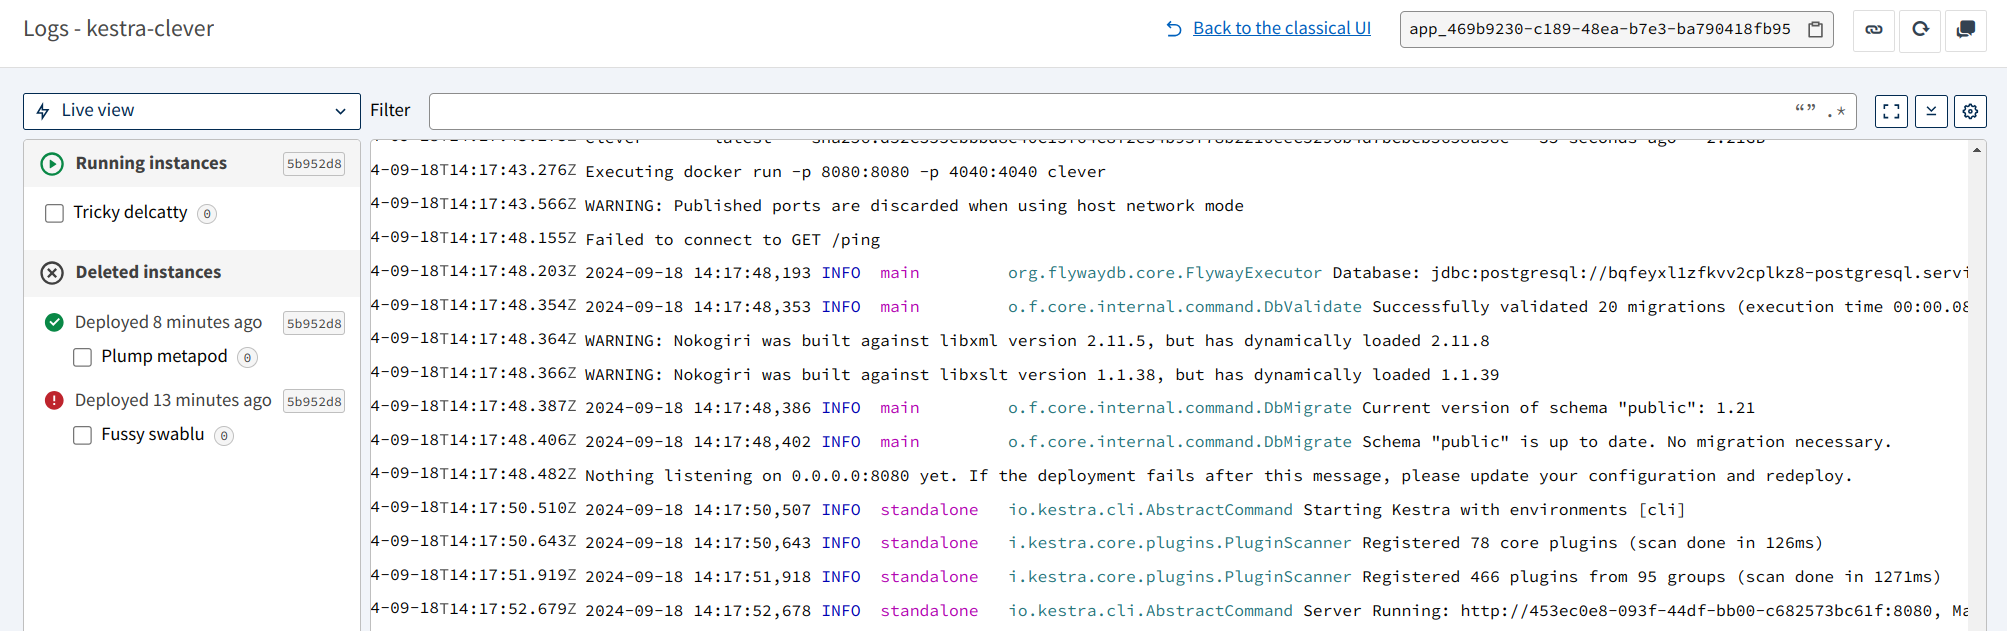
Select the link in the top right corner, Kestra should open in a new browser with a login popup!
Try deploying Kestra to Clever Cloud today and let us know what you think!
You can also read more about the Clever Cloud journey to offload billions of metrics datapoints each month with Kestra.

Stay up to date with the latest features and changes to Kestra