 AWS Batch Task Runner
Available on: >= 0.16.0
Run tasks as AWS ECS Fargate or EC2 containers using AWS Batch.
To launch tasks on AWS Batch, there are three main concepts you need to be aware of:
- Compute environment — mandatory, it won't be created by the task. The compute environment is the infrastructure type for your tasks. It can be either an ECS Fargate or EC2 environment.
- Job Queue — optional, it will be created by the task if not specified. Creating a queue takes some time to set up, so be aware that this adds some latency to the script’s runtime.
- Job — created by the task runner; holds information about which image, commands, and resources to run on. In AWS ECS terminology, it’s the task definition for the ECS task.
To get started quickly, follow the instructions from this blueprint to provision all resources required to run containers on ECS Fargate.
How does it work
In order to support inputFiles, namespaceFiles, and outputFiles, the AWS Batch task runner currently relies on multi-containers ECS jobs and creates three containers for each job:
- A before-container that uploads input files to S3.
- The main container that fetches input files into the
{{ workingDir }}directory and runs the task. - An after-container that fetches output files using
outputFilesto make them available from the Kestra UI for download and preview.
Since we don't know the working directory of the container in advance, we always need to explicitly define the working directory and output directory when using the AWS Batch runner, e.g. use cat {{ workingDir }}/myFile.txt rather than cat myFile.txt.
A full flow example
id: aws_batch_runner
namespace: company.team

tasks:
  - id: scrape_environment_info
    type: io.kestra.plugin.scripts.python.Commands
    containerImage: ghcr.io/kestra-io/pydata:latest
    taskRunner:
      type: io.kestra.plugin.aws.runner.Batch
      region: eu-central-1
      accessKeyId: "{{ secret('AWS_ACCESS_KEY_ID') }}"
      secretKeyId: "{{ secret('AWS_SECRET_KEY_ID') }}"
      computeEnvironmentArn: "arn:aws:batch:eu-central-1:707969873520:compute-environment/kestraFargateEnvironment"
      jobQueueArn: "arn:aws:batch:eu-central-1:707969873520:job-queue/kestraJobQueue"
      executionRoleArn: "arn:aws:iam::707969873520:role/kestraEcsTaskExecutionRole"
      taskRoleArn: arn:aws:iam::707969873520:role/ecsTaskRole
      bucket: kestra-product-de
    commands:
      - python {{ workingDir }}/main.py
    namespaceFiles:
      enabled: true
    outputFiles:
      - "environment_info.json"
    inputFiles:
      main.py: |
        import platform
        import socket
        import sys
        import json
        from kestra import Kestra

        print("Hello from AWS Batch and kestra!")

        def print_environment_info():
            print(f"Host's network name: {platform.node()}")
            print(f"Python version: {platform.python_version()}")
            print(f"Platform information (instance type): {platform.platform()}")
            print(f"OS/Arch: {sys.platform}/{platform.machine()}")

            env_info = {
                "host": platform.node(),
                "platform": platform.platform(),
                "OS": sys.platform,
                "python_version": platform.python_version(),
            }
            Kestra.outputs(env_info)

            filename = '{{ workingDir }}/environment_info.json'
            with open(filename, 'w') as json_file:
                json.dump(env_info, json_file, indent=4)

        if __name__ == '__main__':
          print_environment_info()
For a full list of properties available in the AWS Batch task runner, check the AWS plugin documentation or explore the same in the built-in Code Editor in the Kestra UI.
How to Run Tasks on AWS ECS Fargate
How to use aws.runner.Batch to run your tasks on AWS ECS Fargate.
Before you begin
Before you start, you need to have the following:
- An AWS account.
- A Kestra instance in a version 0.16.0 or later with AWS credentials stored as secrets or environment variables within the Kestra instance.
There are two versions of this tutorial:
- Terraform: provision all necessary resources using a simple
terraform applycommand. - AWS Management Console: create the necessary resources step by step from the AWS Console.
Terraform setup
Follow the instructions specified in the aws-batch/README.md within the terraform-deployments repository to provision all necessary resources using Terraform. You can also use the following blueprint that will create all necessary resources for you as part of a single Kestra workflow execution.
Here is a list of resources that will be created:
- AWS Security Group: a security group for AWS Batch jobs with egress to the internet (required to be able to download public Docker images in your script tasks).
- AWS IAM Roles and Policies: IAM roles and policies for AWS Batch and ECS Task Execution, including permissions for S3 access (S3 is used to store input and output files for container access).
- AWS Batch Compute Environment: a managed ECS Fargate compute environment named
kestraFargateEnvironment. - AWS Batch Job Queue: a job queue named
kestraJobQueuefor submitting batch jobs.
AWS Management Console setup
Create the ecsTaskExecutionRole IAM role
To use AWS Batch, we need an Execution Role that will allow AWS Batch to create and manage resources on our behalf.
- Open the IAM console.
- In the navigation menu, choose Roles.
- Choose Create role.
- In the Select trusted entity, choose Custom trust policy and paste the following `Trust policy JSON:
json
{
  "Version": "2012-10-17",
  "Statement": [
    {
      "Sid": "",
      "Effect": "Allow",
      "Principal": {
        "Service": "ecs-tasks.amazonaws.com"
      },
      "Action": "sts:AssumeRole"
    }
  ]
}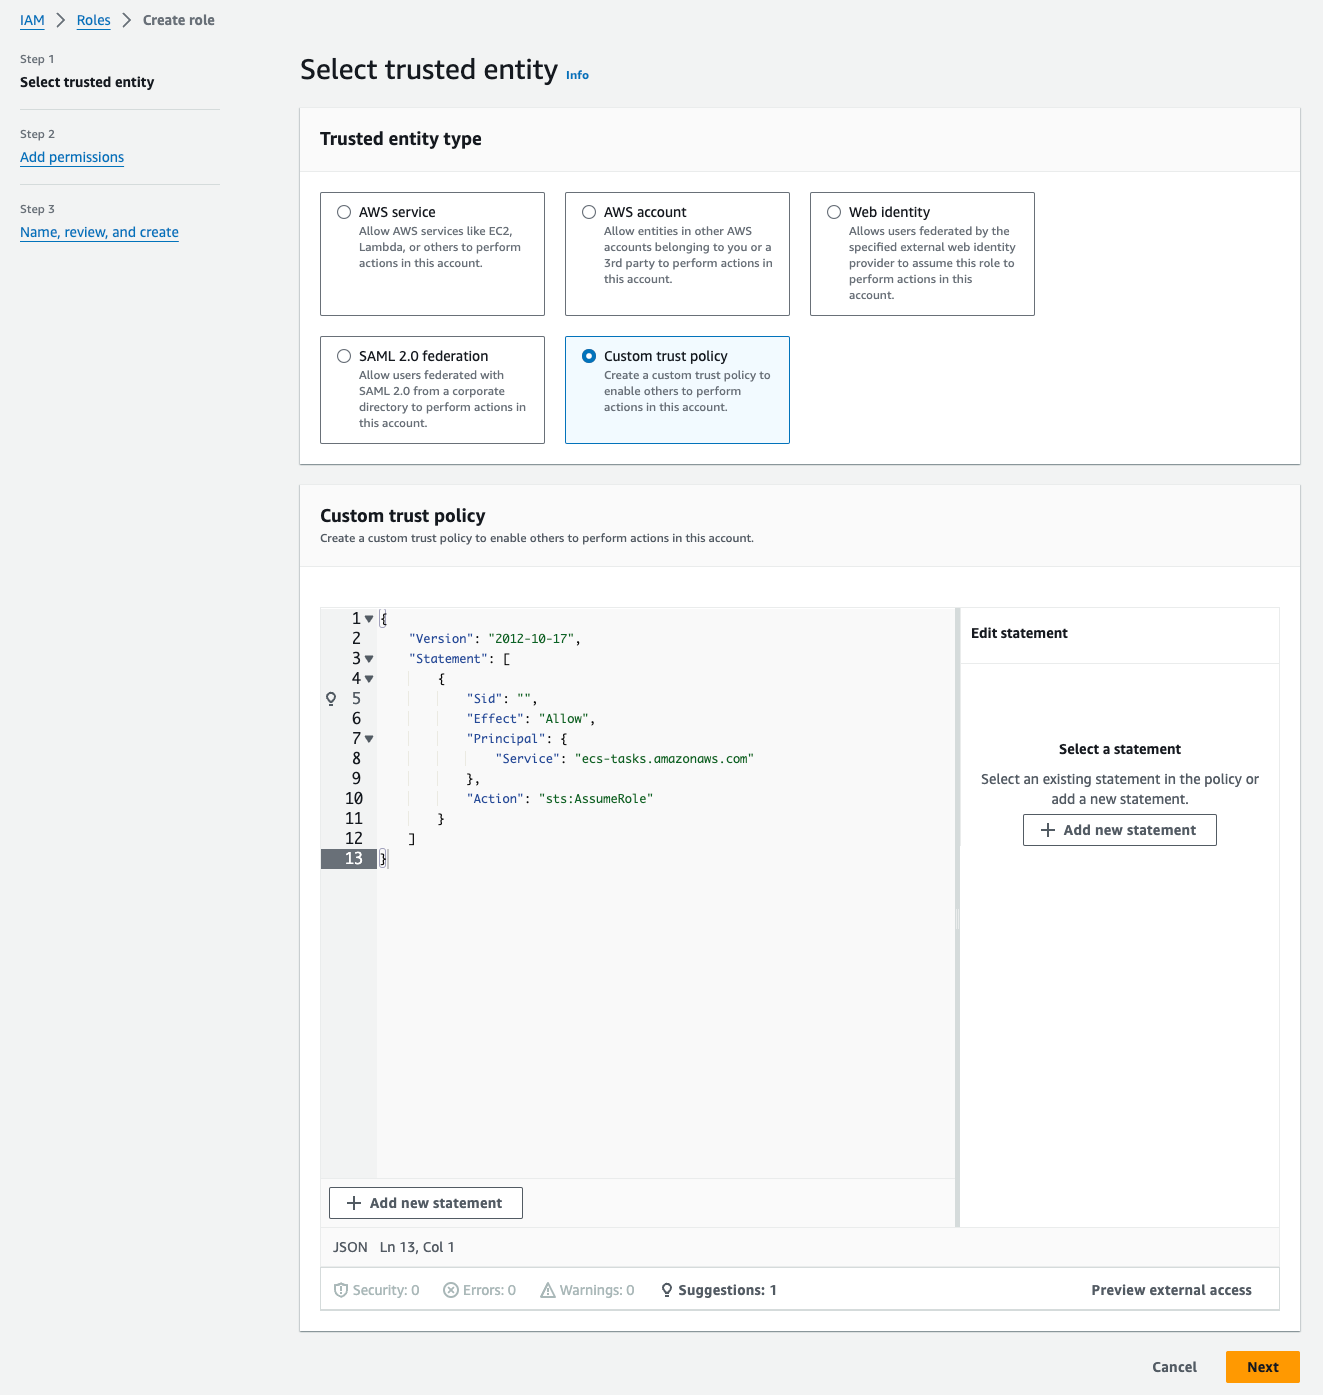
- Click on Next and add the
AmazonECSTaskExecutionRolePolicy. - Then, for Role Name, enter
ecsTaskExecutionRole - Finally, click on Create role.
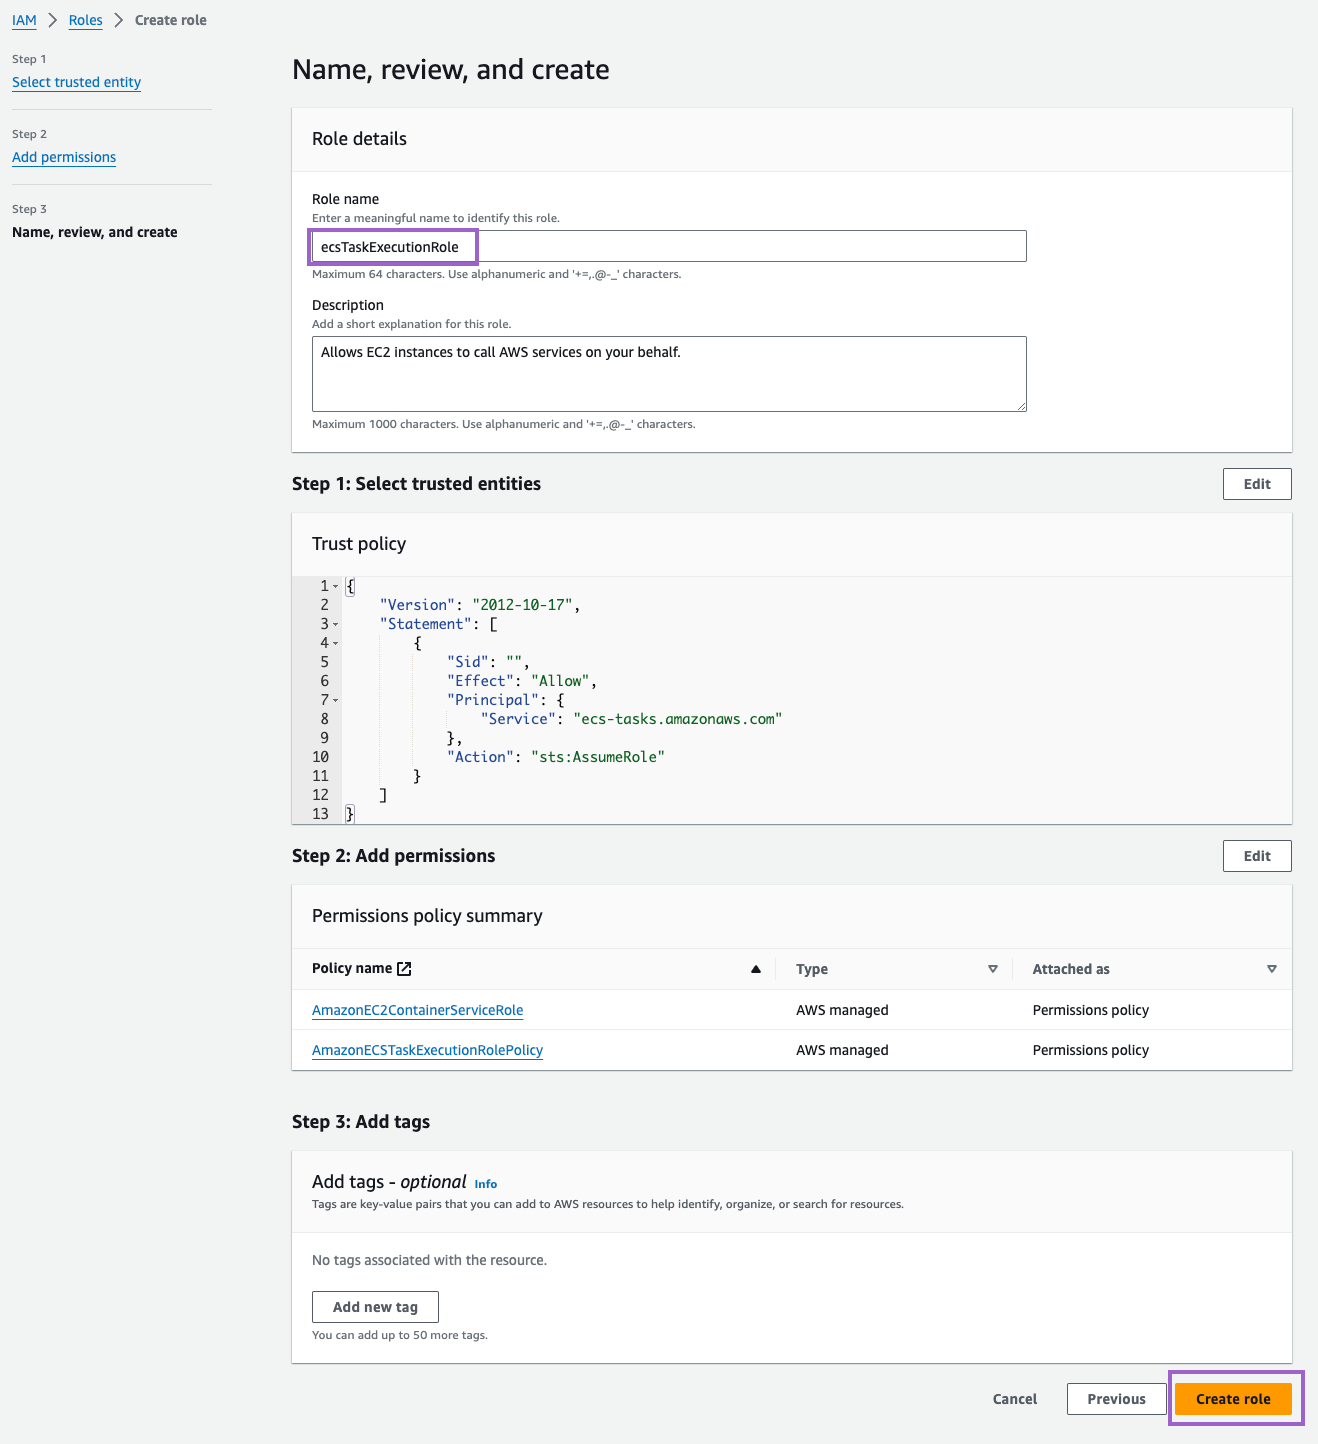
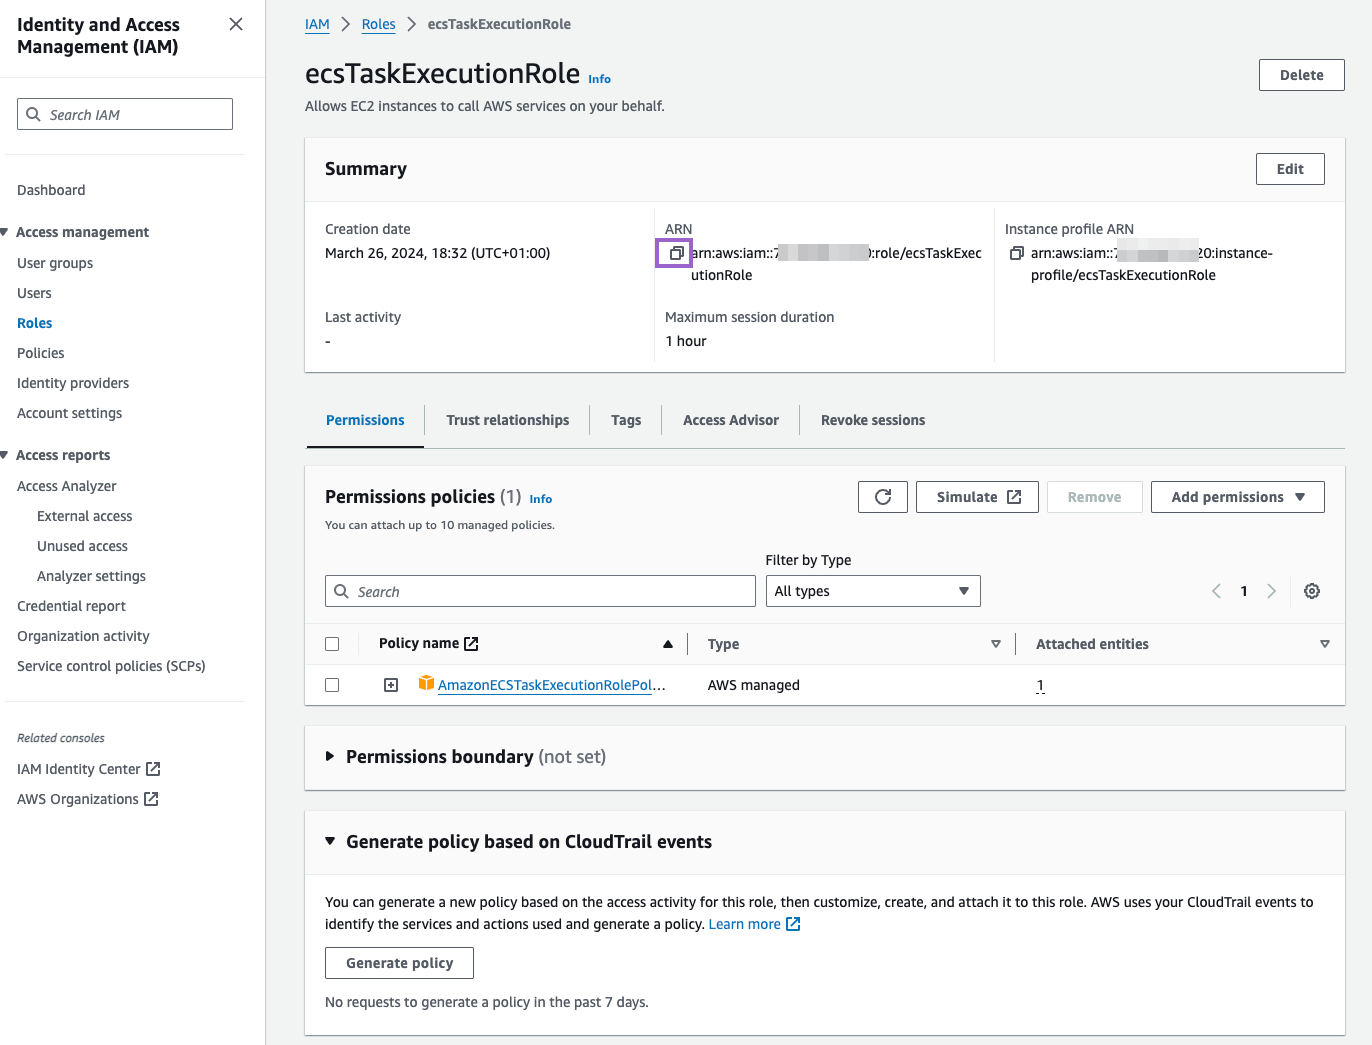
Make sure to copy the ARN of the role. You will need it later.
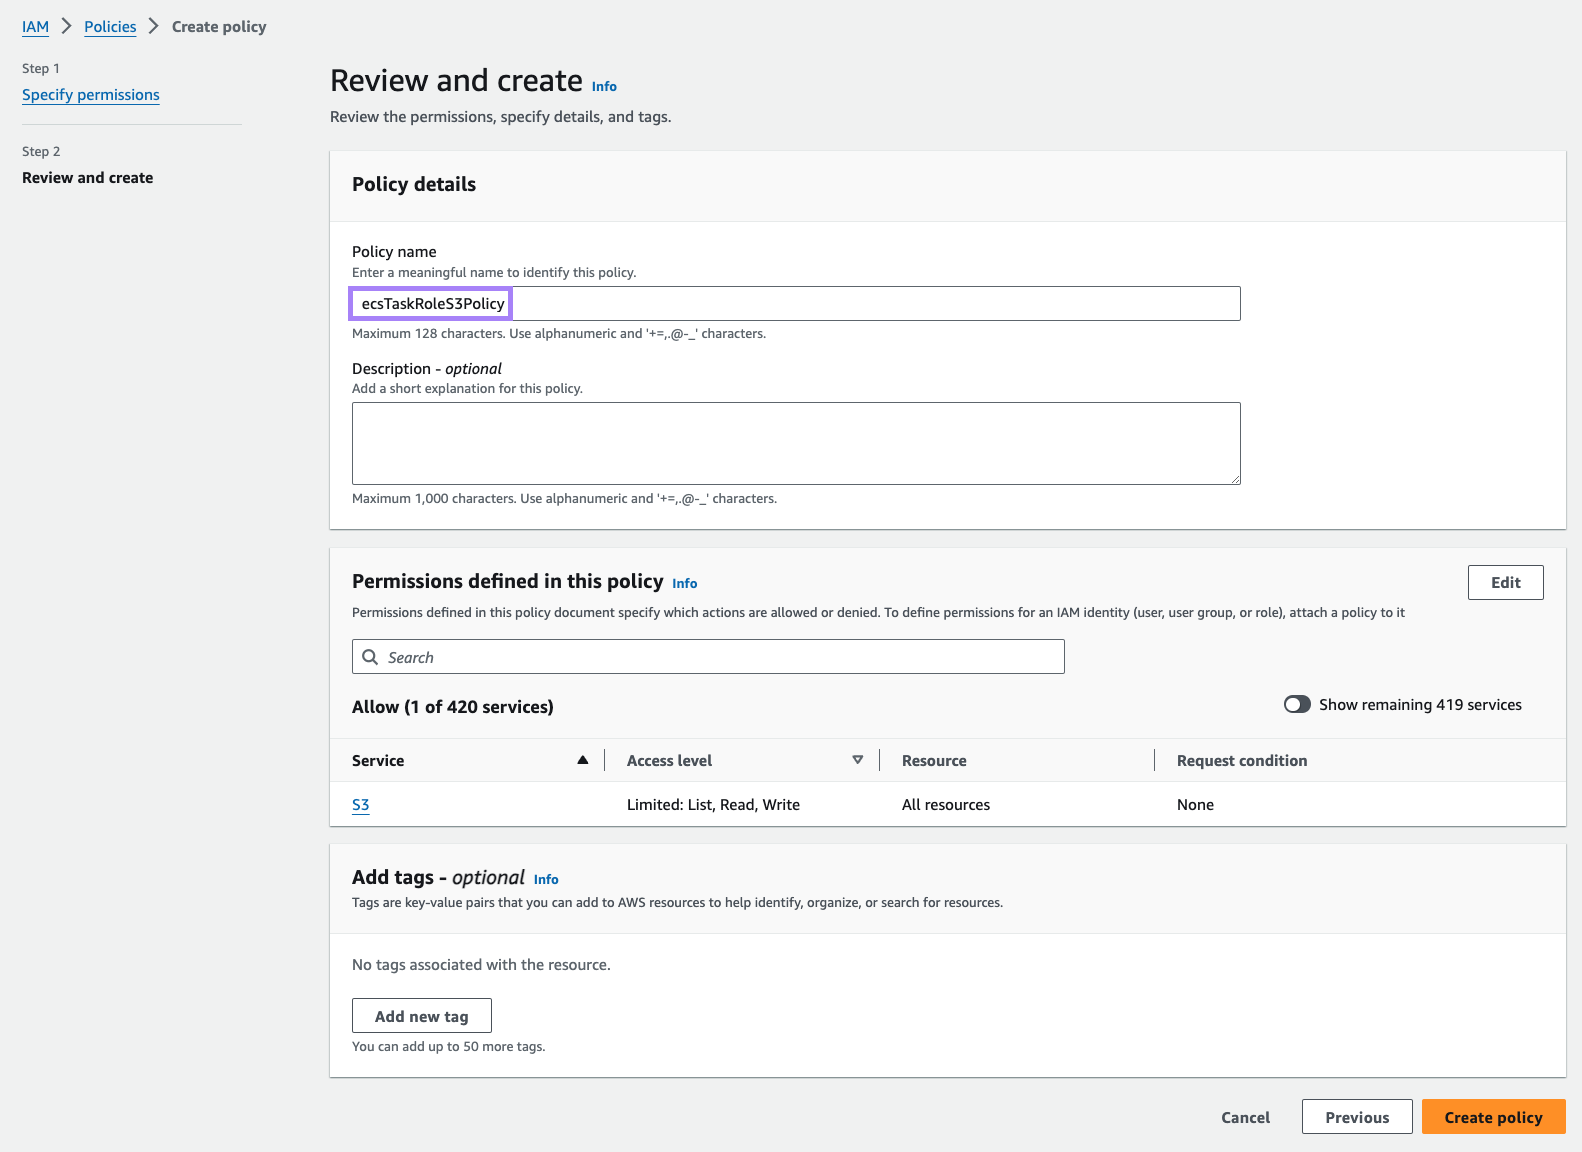
Create the ecsTaskRole IAM role
On top of the Execution Role, we will also need a Task Role that includes S3 access permissions to store files.
First, we'll need to create a policy the role can use for accessing S3.
- Open the IAM console.
- In the navigation menu, choose Policies.
- Select JSON and paste the following into the
Policy editor:json{ "Version": "2012-10-17", "Statement": [ { "Action": [ "s3:GetObject", "s3:PutObject", "s3:DeleteObject", "s3:ListBucket" ], "Effect": "Allow", "Resource": "*" } ] }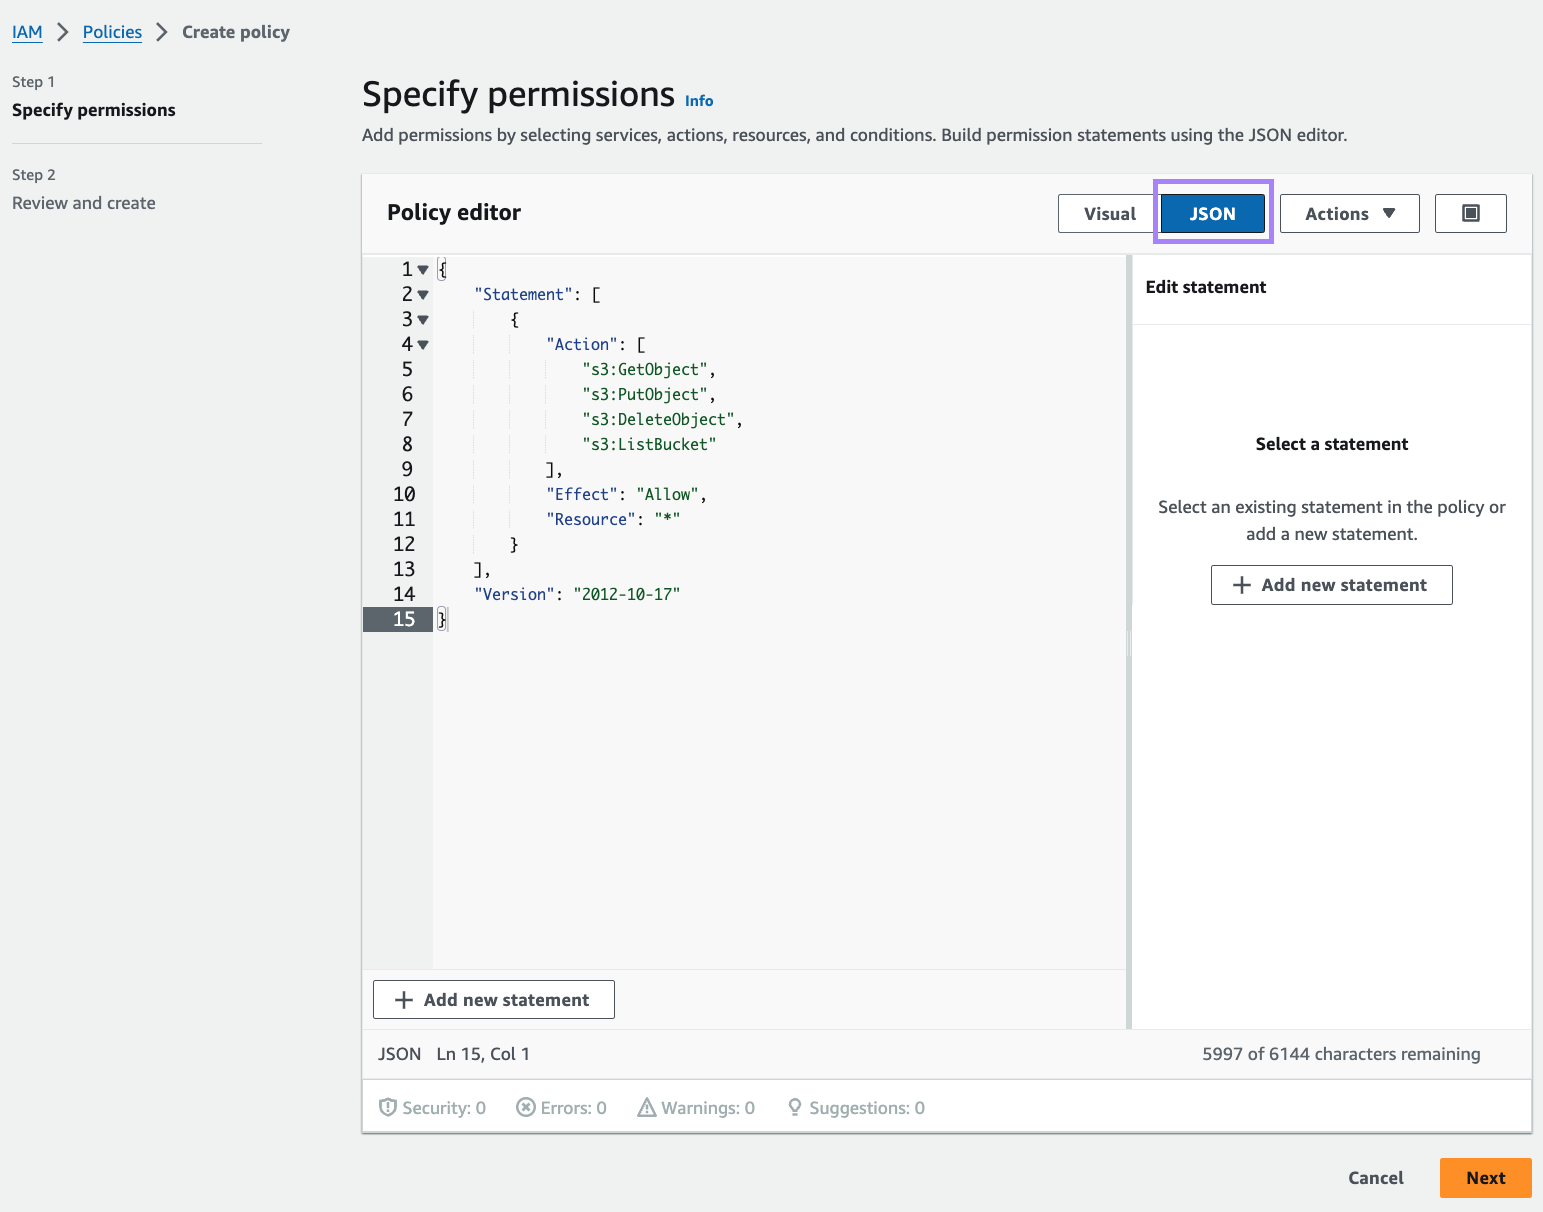
- Select Next and type in a name for the policy, such as
ecsTaskRoleS3Policy. - Once you're done, select Create policy.
Now we're ready to make our role. This is very similar to the previous role, but we need to add our new policy too:
- Open the IAM console.
- In the navigation menu, choose Roles.
- Choose Create role.
- In the Select trusted entity, choose Custom trust policy and paste the following `Trust policy JSON:
json
{ "Version": "2012-10-17", "Statement": [ { "Sid": "", "Effect": "Allow", "Principal": { "Service": "ecs-tasks.amazonaws.com" }, "Action": "sts:AssumeRole" } ] } - Click on Next
- Search for the new policy and check the box on the left. Once you've done this, select Next.

- Then, for Role Name, enter
ecsTaskRole - Finally, click on Create role.
AWS Batch setup
Go to the AWS Batch console.
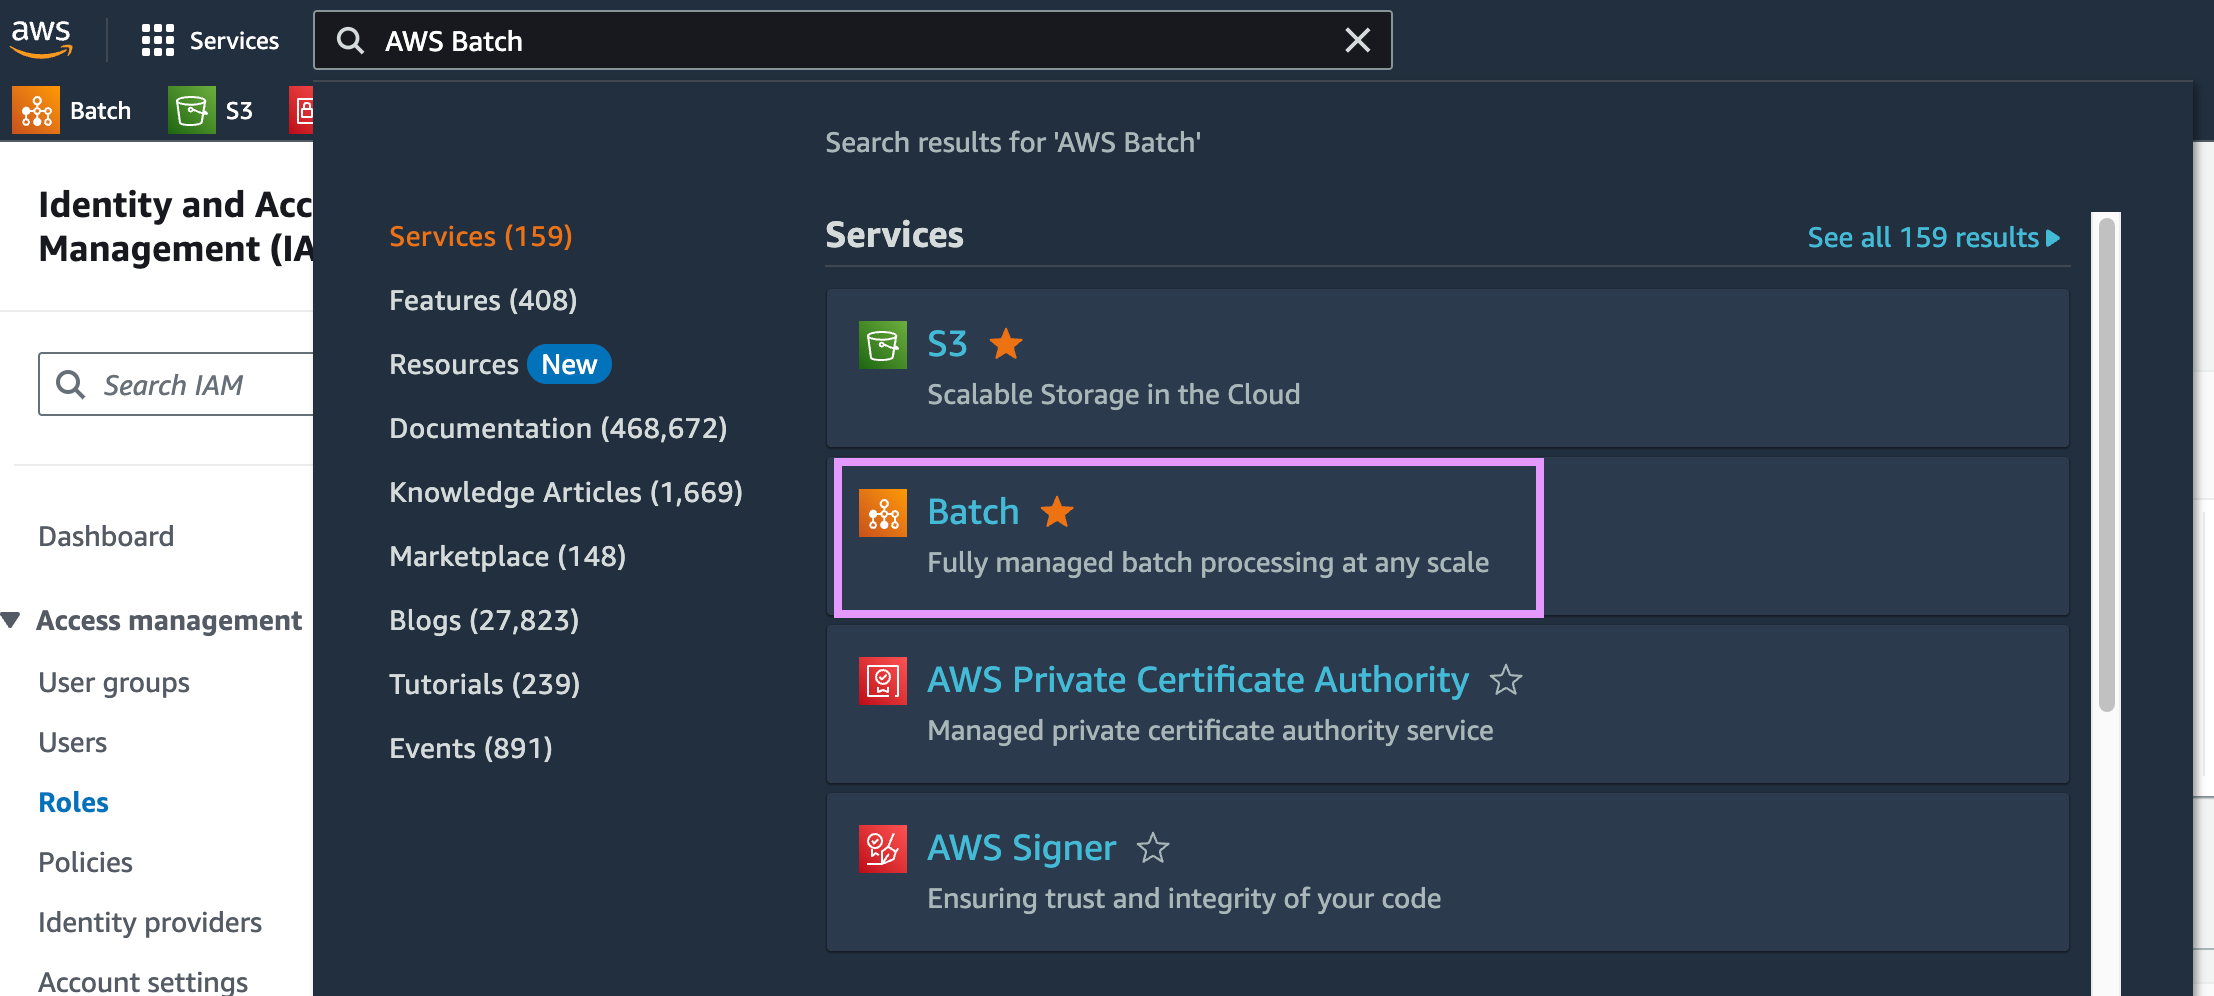
Then, click on "Get Started". If you don't see the "Get Started" button, add #firstRun to the URL:
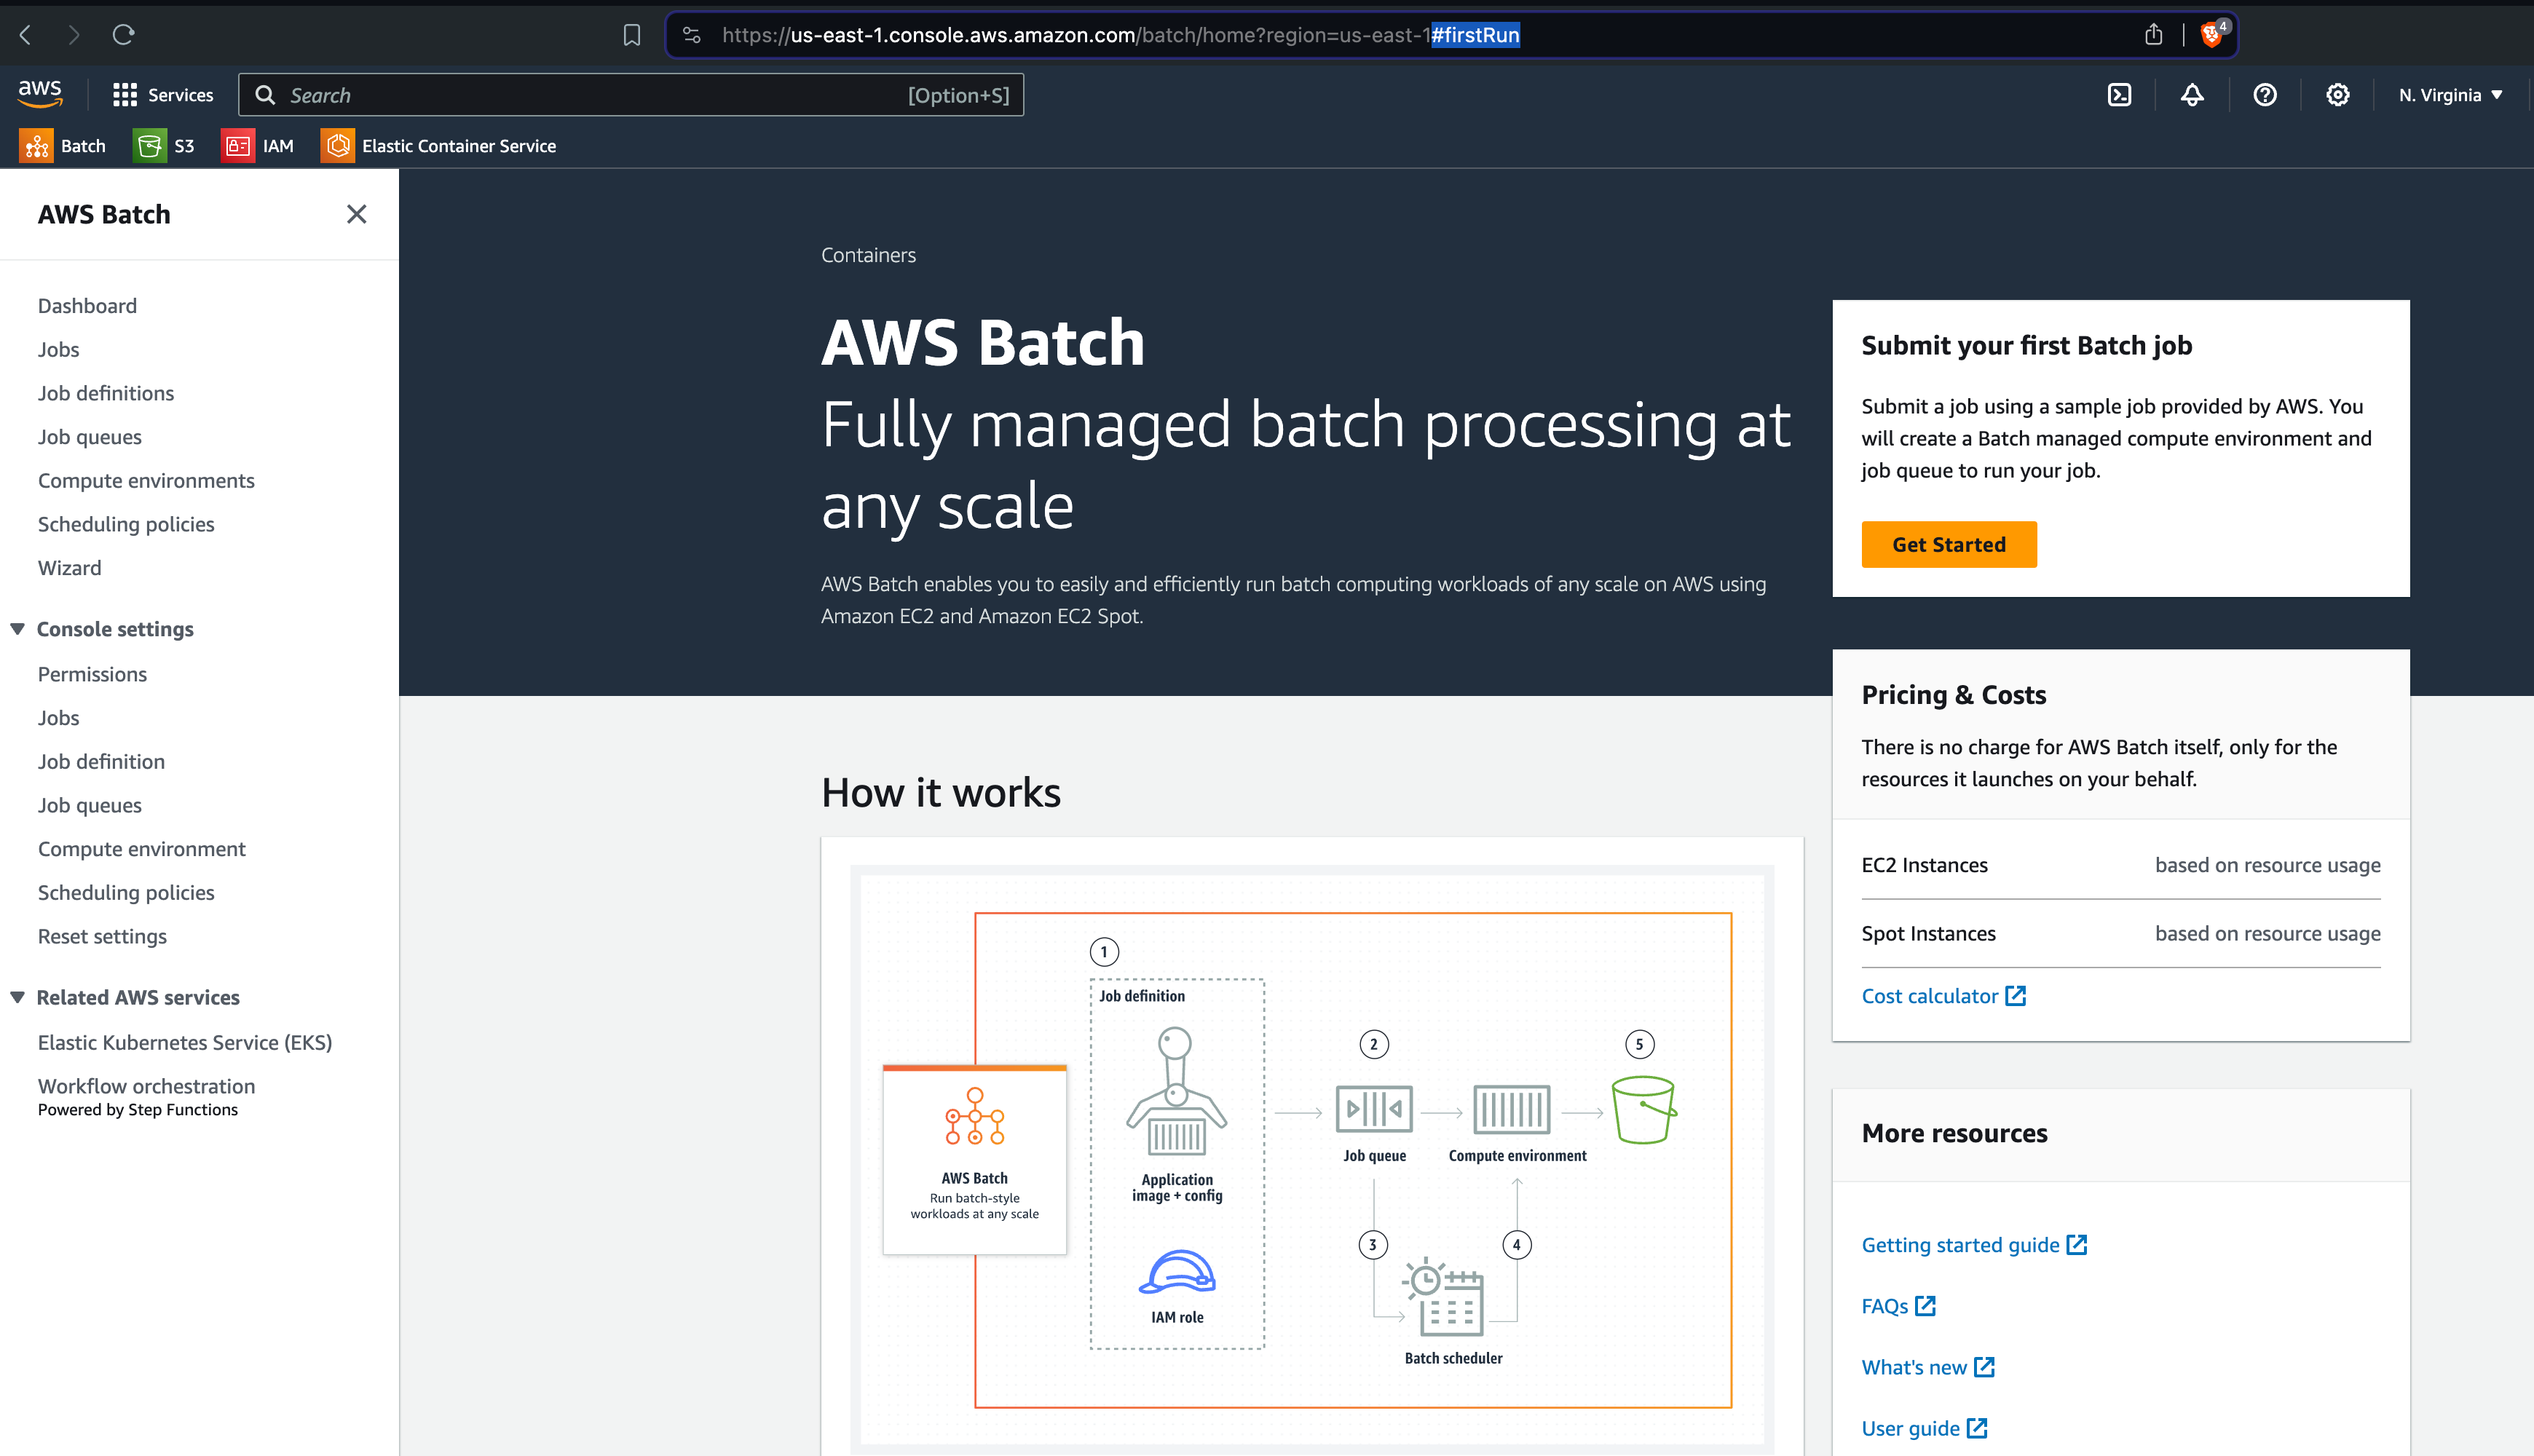
This will launch a Wizard that will guide you through the process of creating a new compute environment.
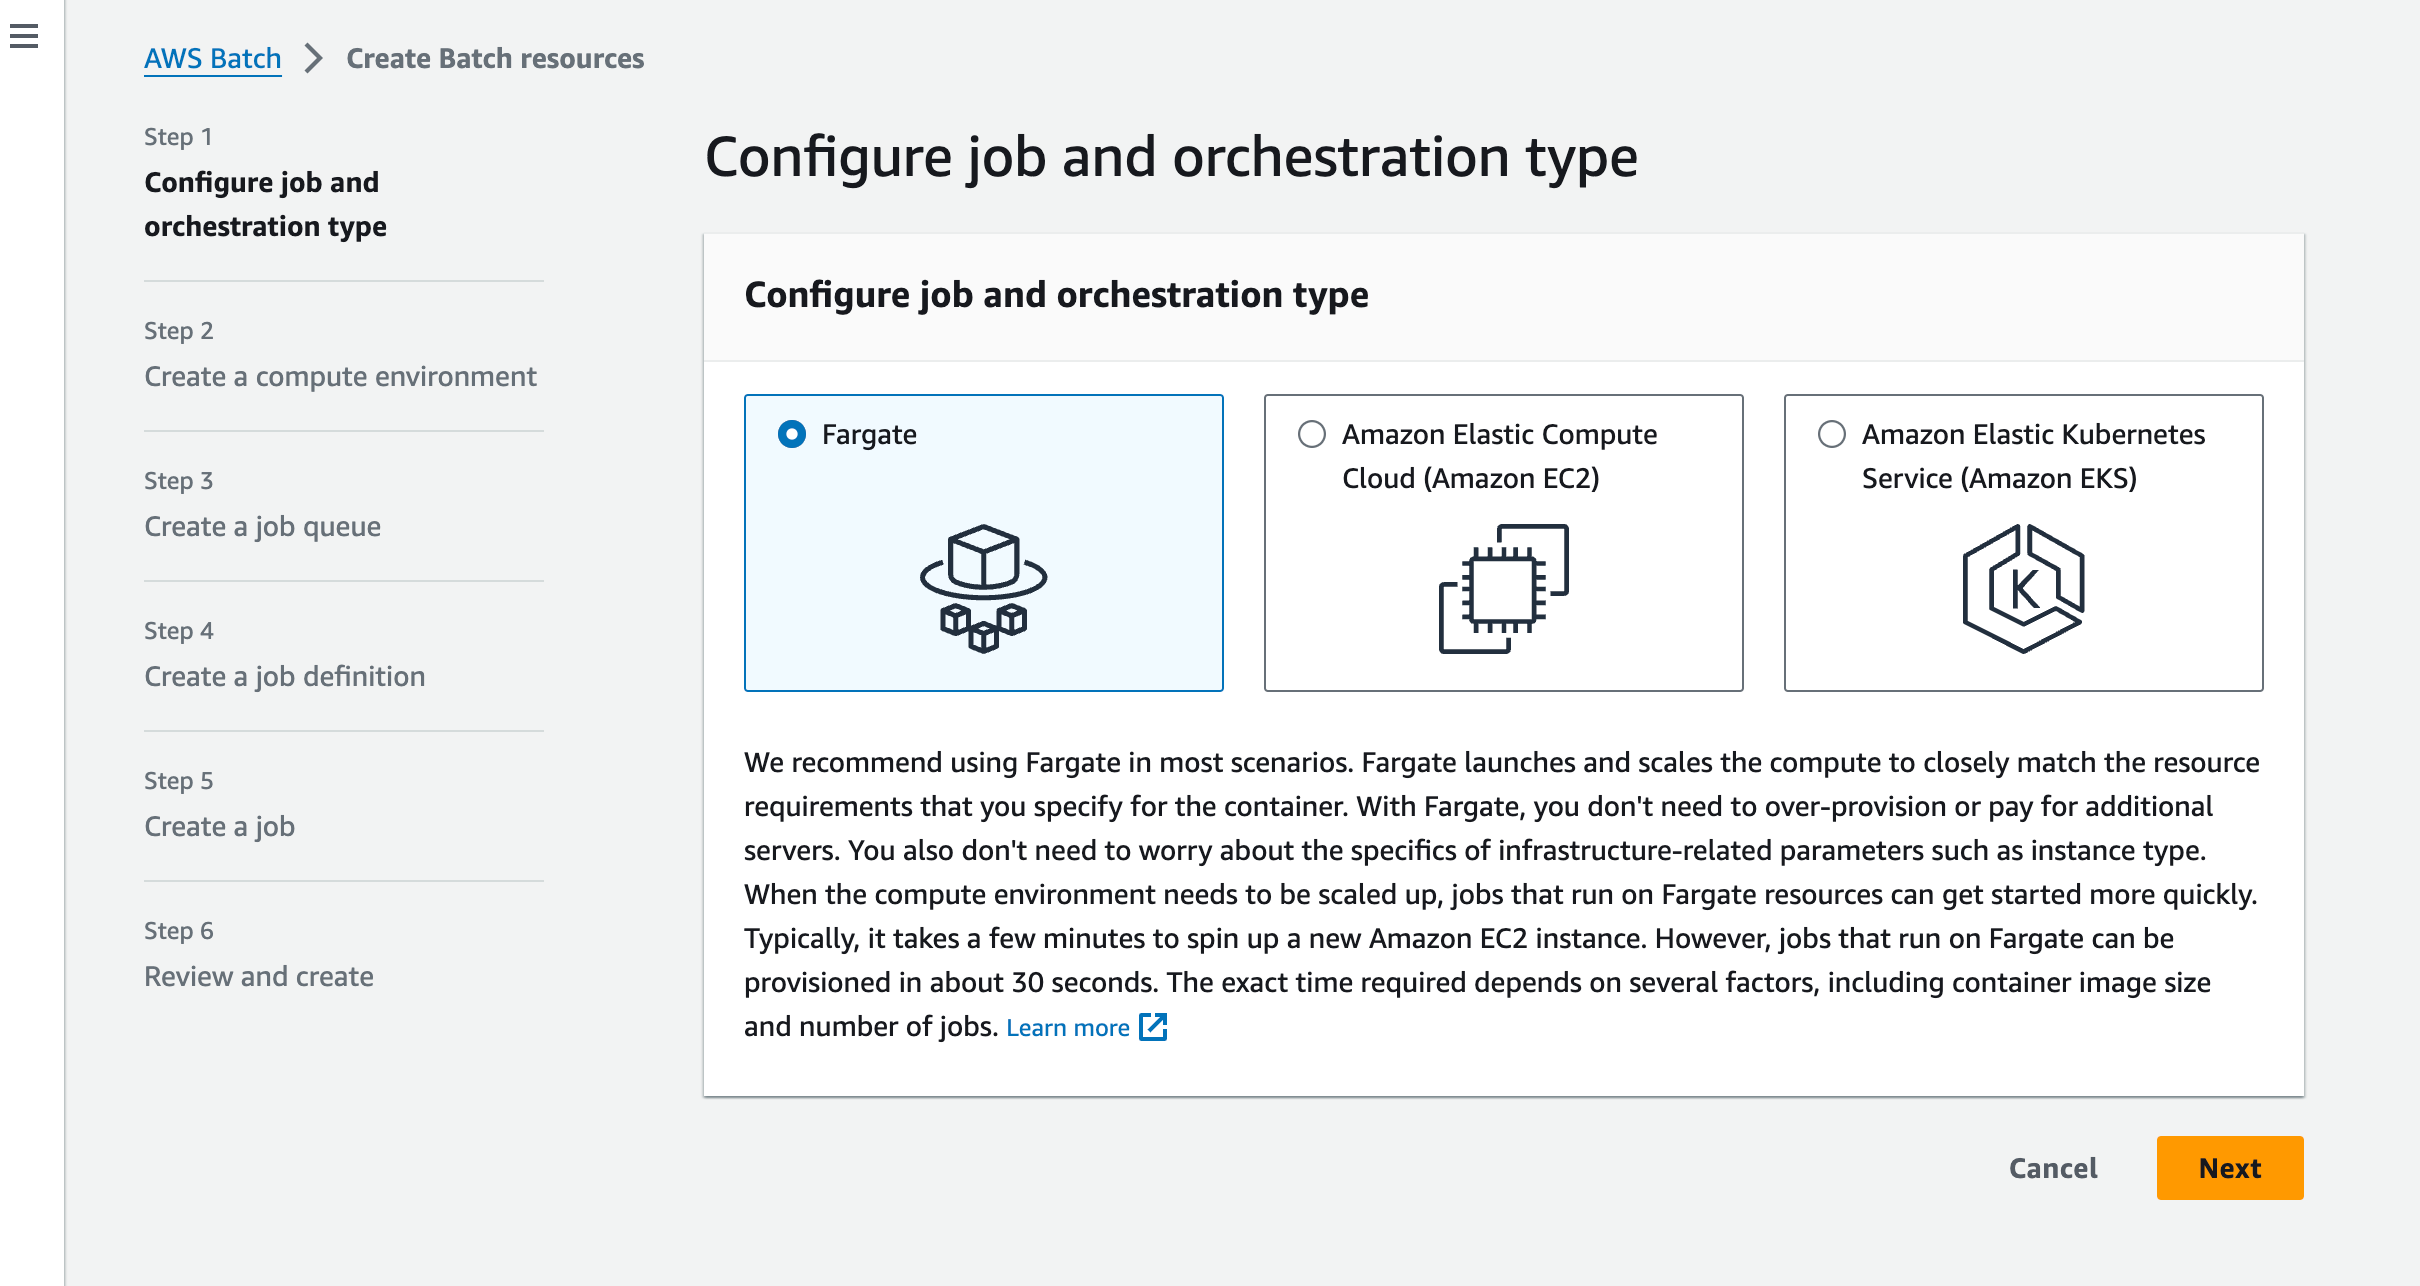
You should see the following text recommending the use of Fargate:
"We recommend using Fargate in most scenarios. Fargate launches and scales the compute to closely match the resource requirements that you specify for the container. With Fargate, you don't need to over-provision or pay for additional servers. You also don't need to worry about the specifics of infrastructure-related parameters such as instance type. When the compute environment needs to be scaled up, jobs that run on Fargate resources can get started more quickly. Typically, it takes a few minutes to spin up a new Amazon EC2 instance. However, jobs that run on Fargate can be provisioned in about 30 seconds. The exact time required depends on several factors, including container image size and number of jobs. Learn more."
We will follow that advice and use Fargate for this tutorial.
Step 1: Select Orchestration type
Select Fargate and click on Next.
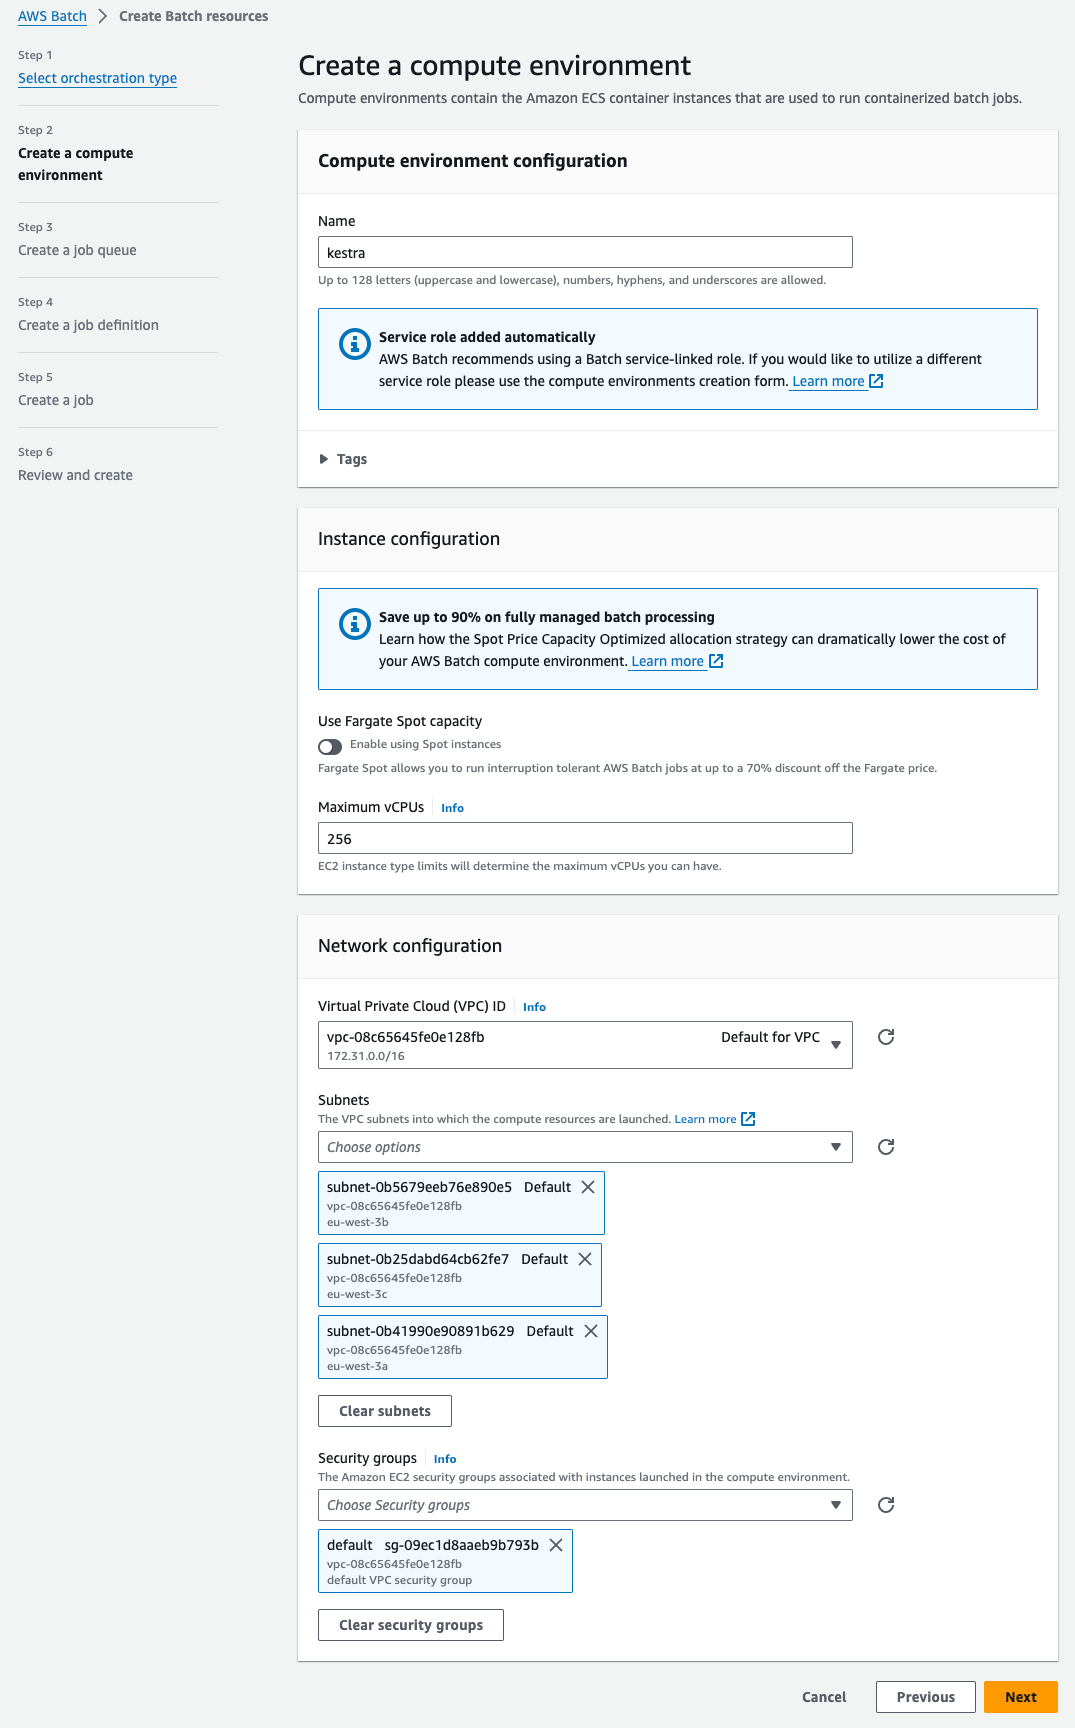
Step 2: Create a compute environment
Add a name for your compute environment — here, we chose "kestra". You can keep the default settings for everything. Select the VPC and subnets you want to use — you can use the default VPC and subnets and the default VPC security group. Then, click on Next.
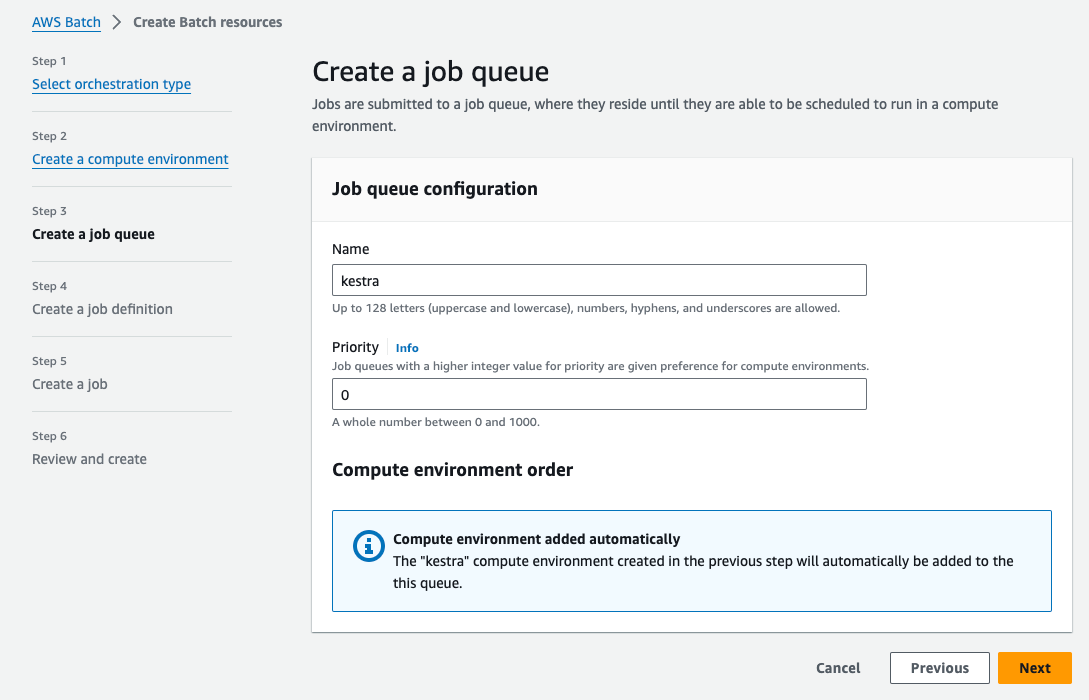
Step 3: Create a job queue
Now we can create a job queue. Here, we also name it "kestra". You can keep the default settings. Then, click on Next:
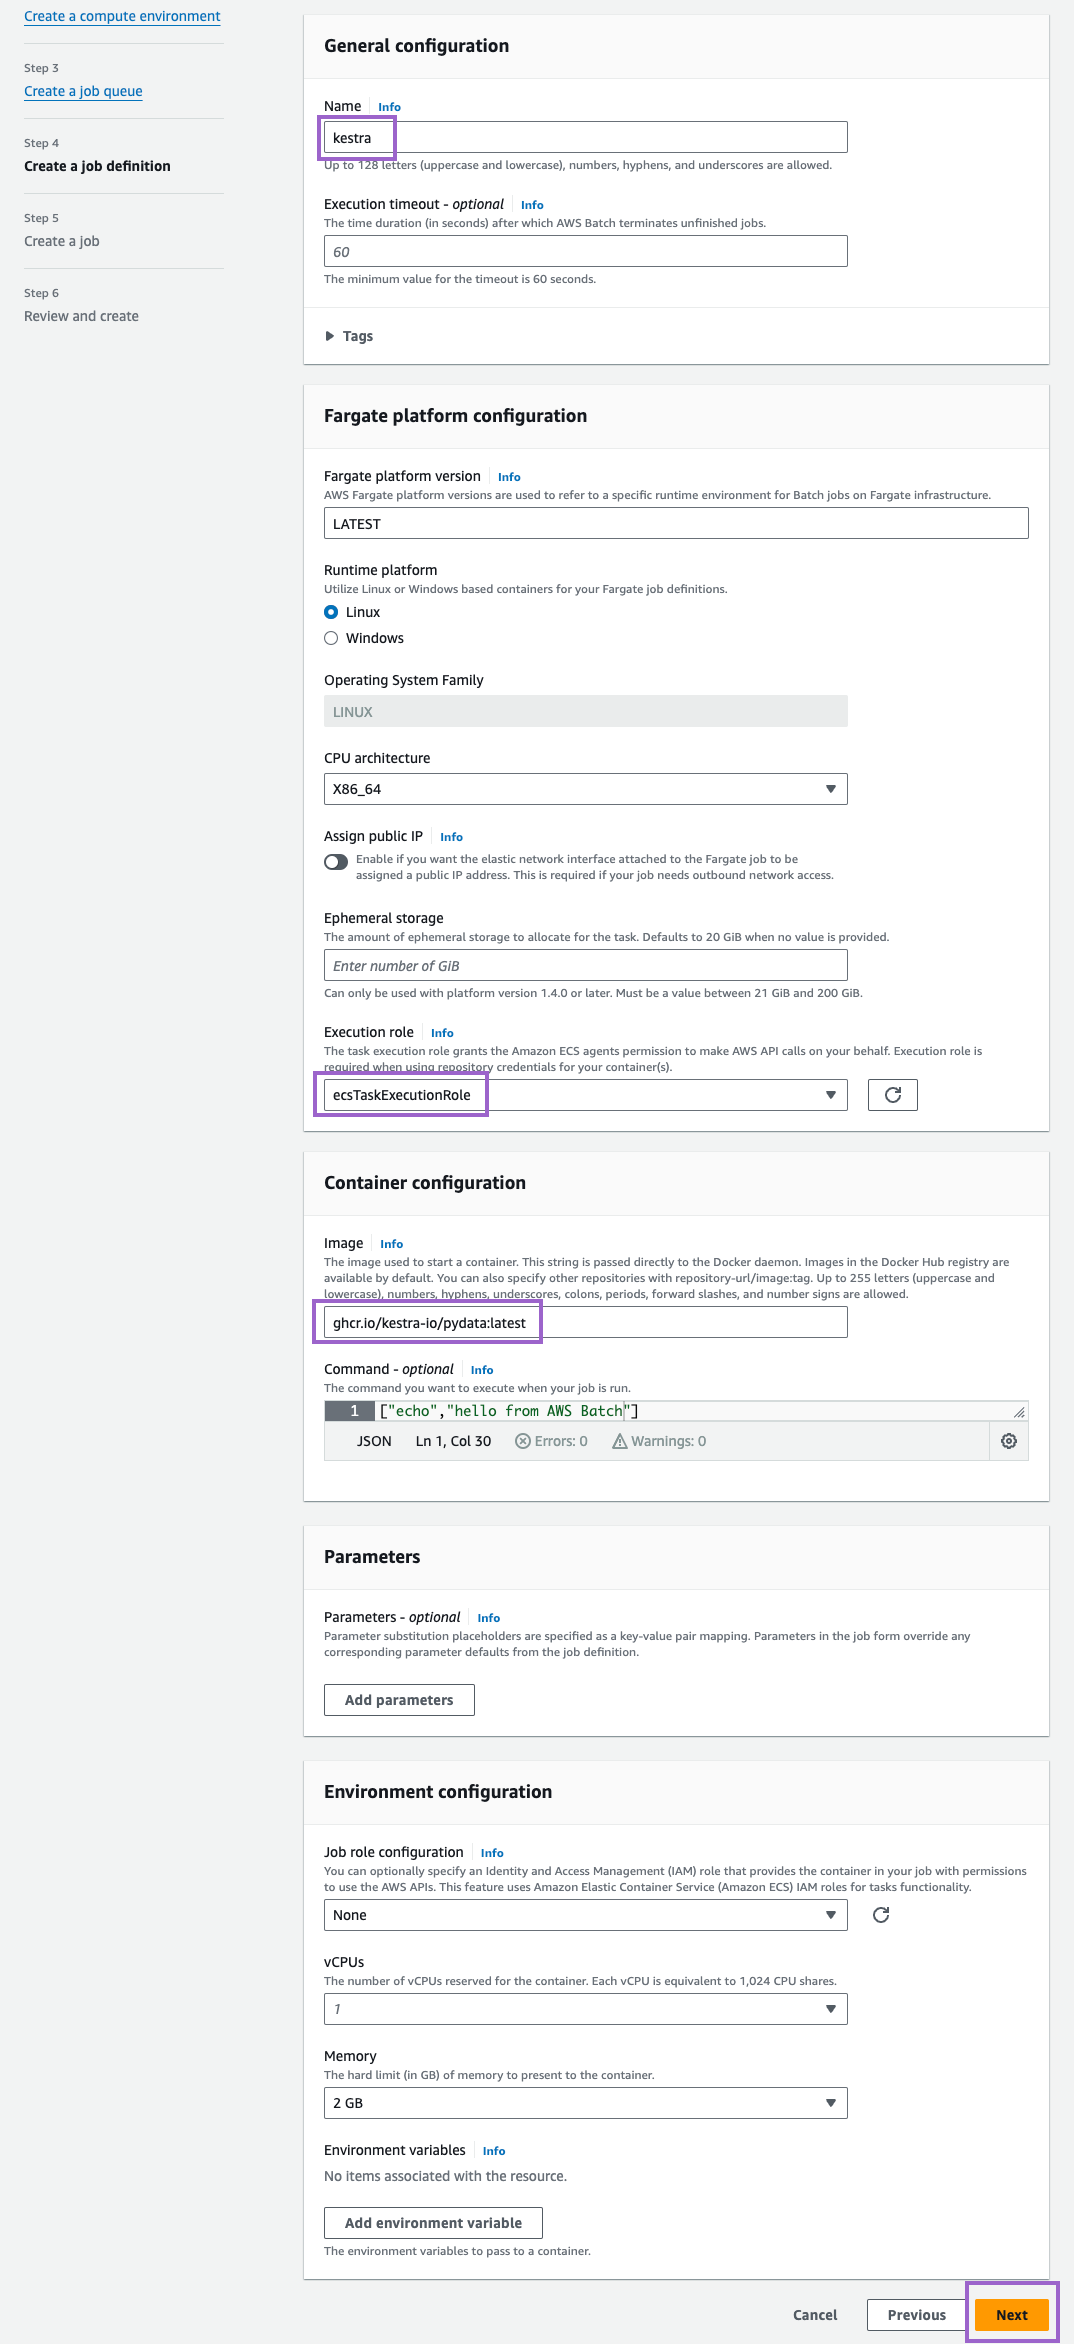
Step 4: Create a job definition
Finally, create a job definition. Here, we name it also "kestra". Under Execution role, select the role we created earlier (ecsTaskExecutionRole). Besides that, you can keep default settings for everything else (we adjusted the image to ghcr.io/kestra-io/pydata:latest but that's totally optional). Then, click on Next:
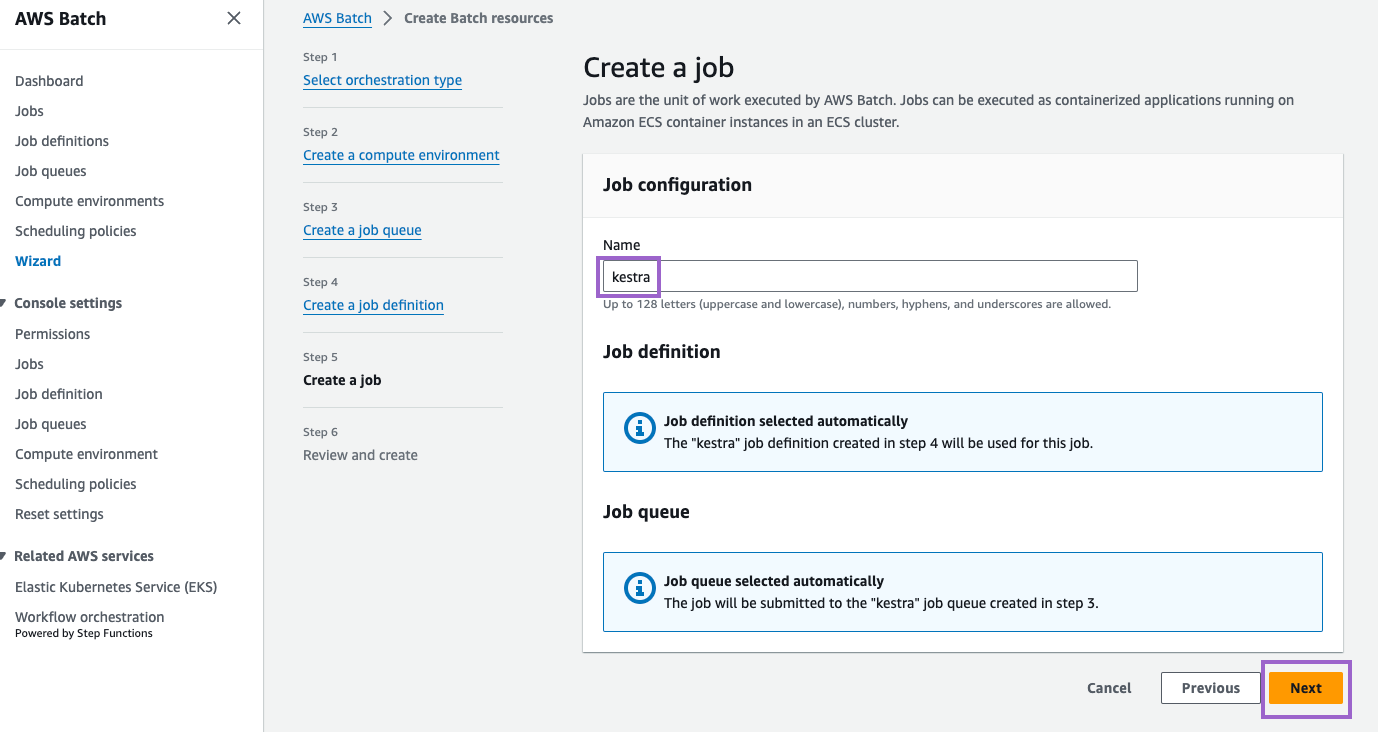
Step 5: Create a job
Finally, create a job. Here, we name it "kestra". Then, click on Next for a final review:
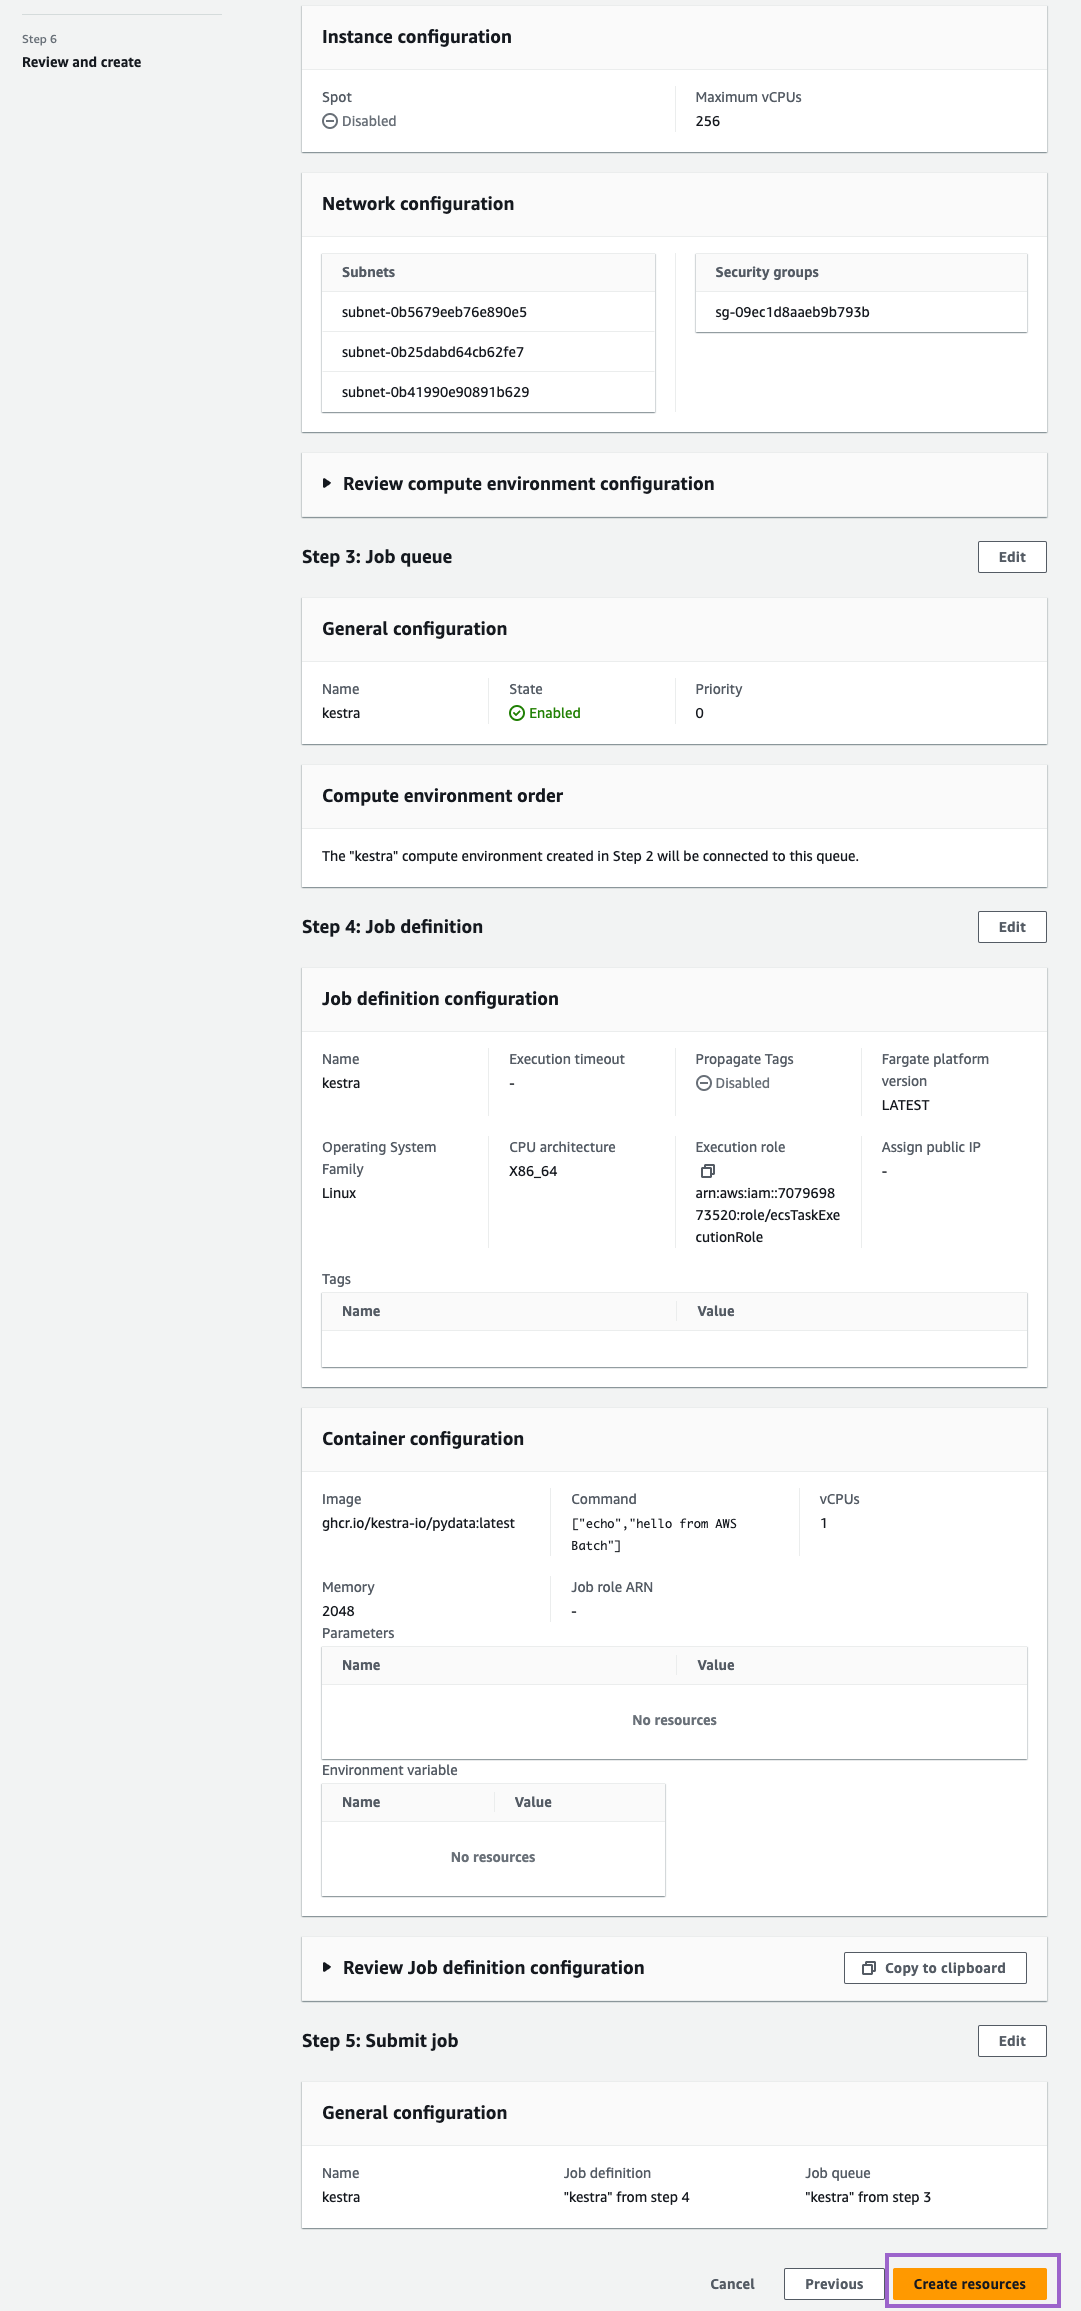
Step 6: Review and create
Review your settings and click on Create resources:
Once you see this message, you are all set:
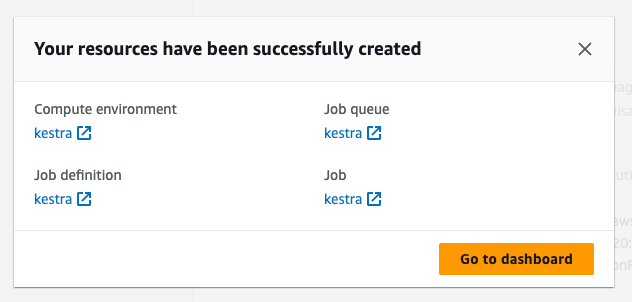
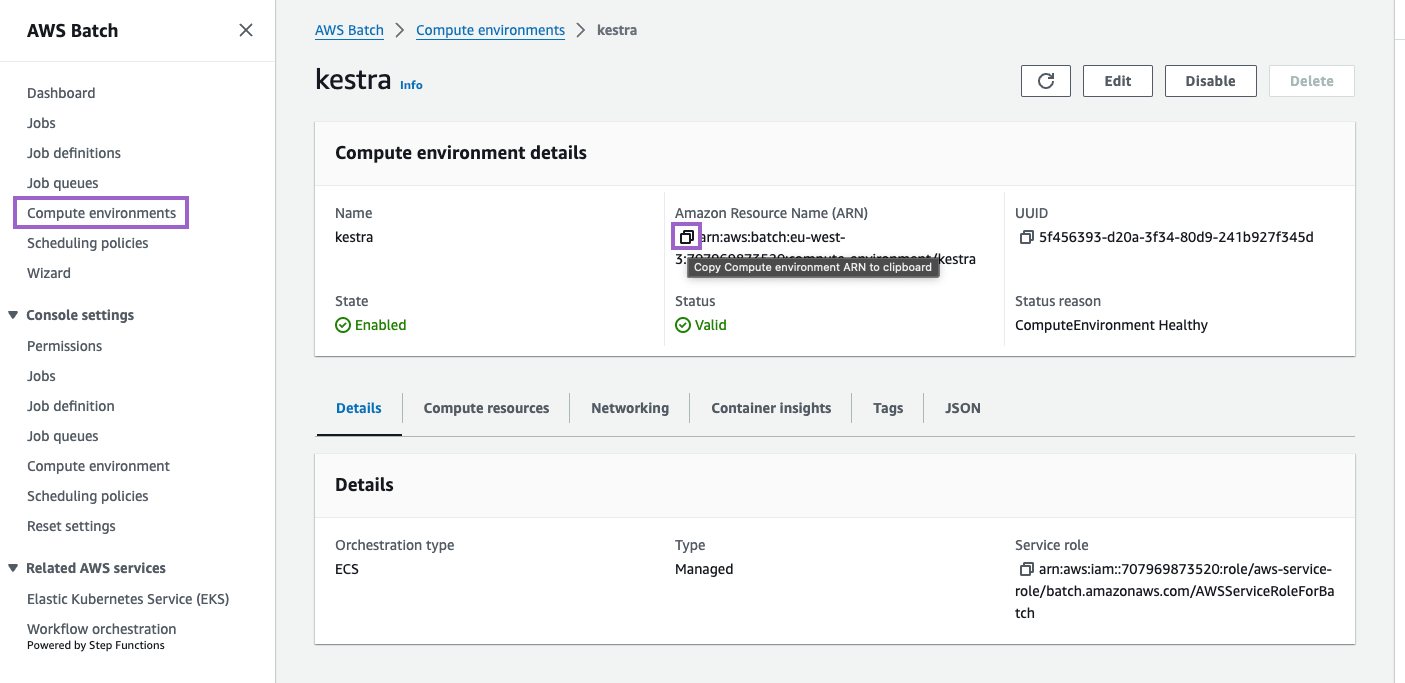
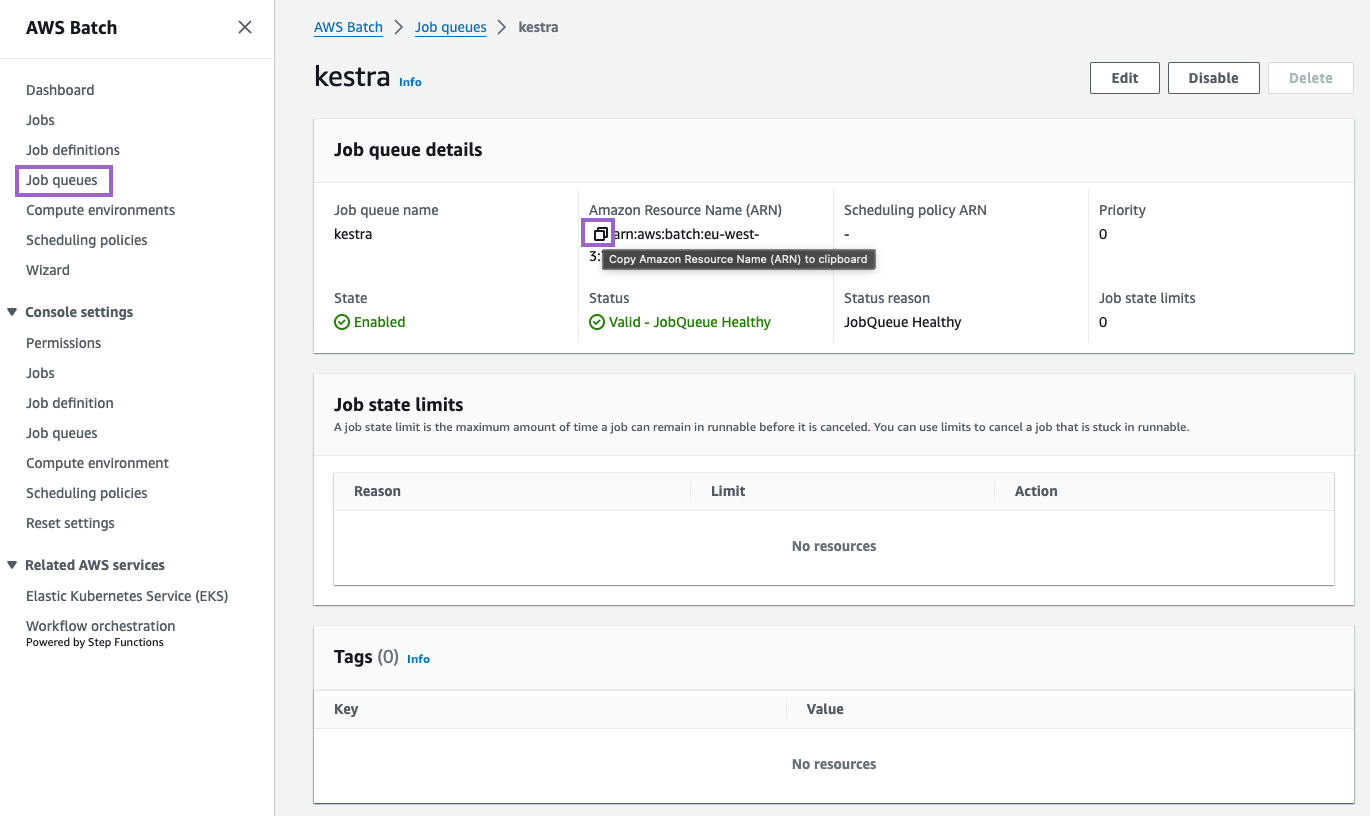
Copy and apply the ARN to your Kestra configuration
Copy the ARN of the compute environment and job queue. You will need to add these to your Kestra configuration.
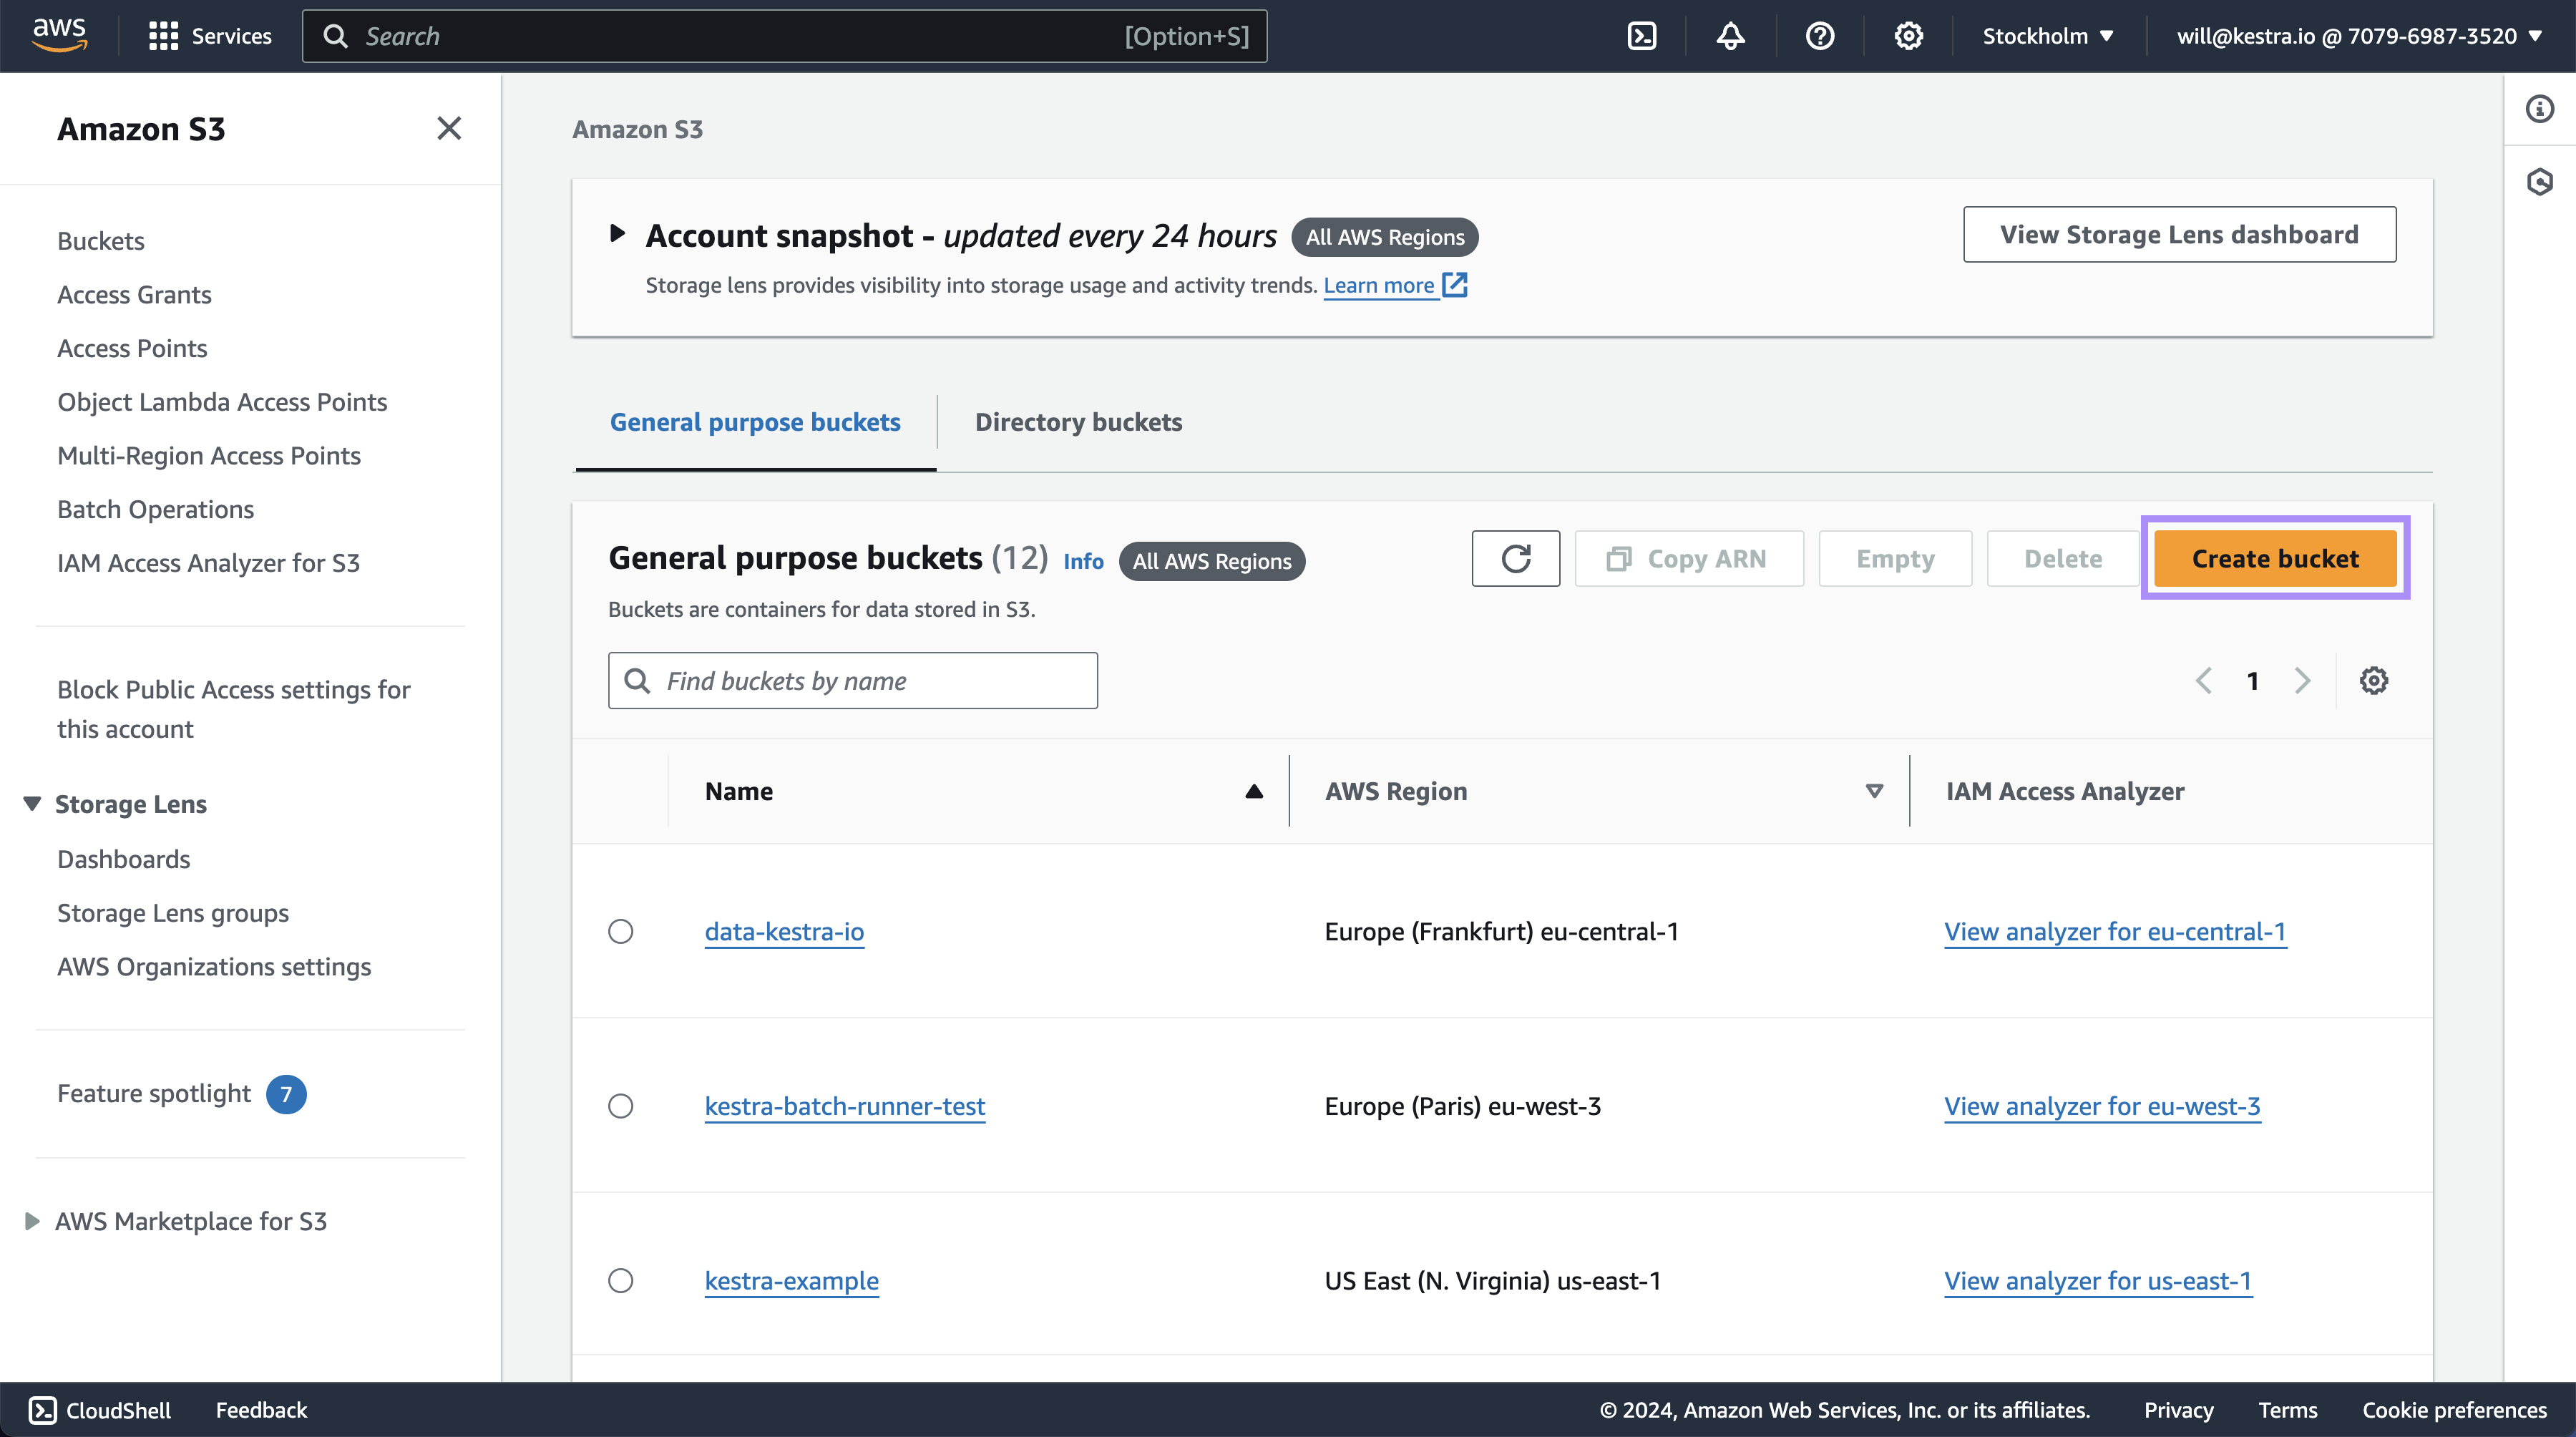
Create an S3 Bucket
Last thing we'll need is an S3 storage bucket. To do this, select S3 from Services then select Create bucket.
Next you'll need to add a name and leave everything else as a default value.
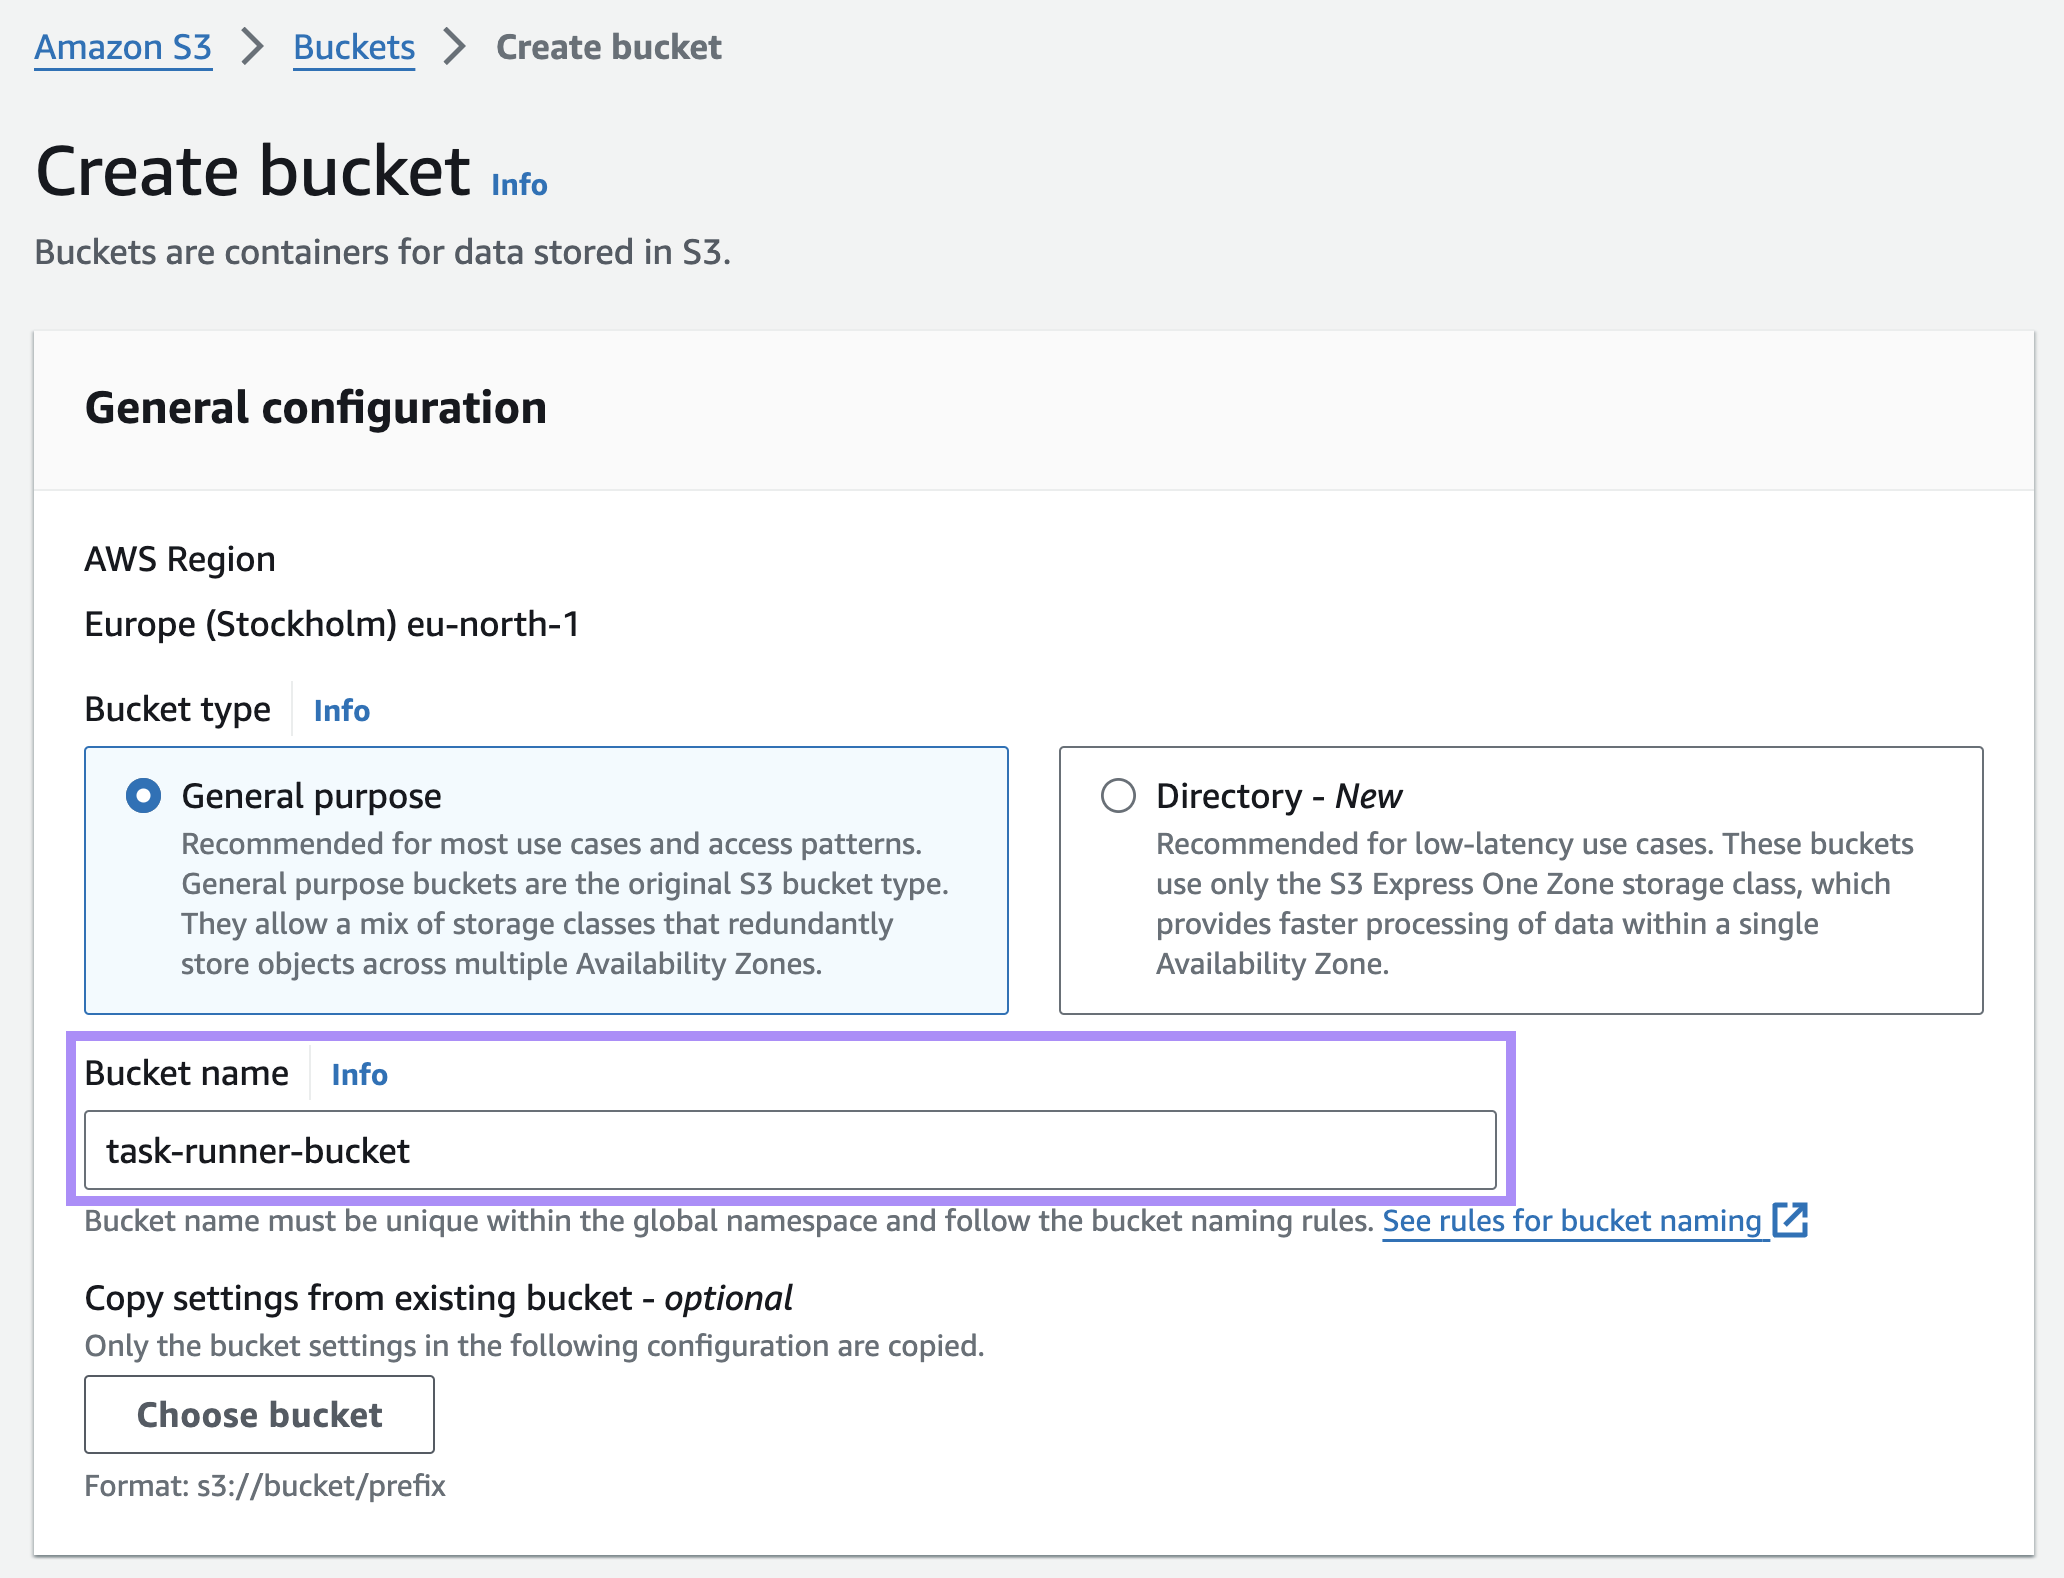
Scroll to the bottom and select Create bucket.
Now that we have a bucket, we'll need to add the name into Kestra.
Run your Kestra task on AWS ECS Fargate
Fill in the ARNs of the compute environment and job queue in your Kestra configuration. Here is an example of a flow that uses the aws.runner.Batch to run a Python script on AWS ECS Fargate to get environment information and print it to the logs:
id: aws_batch_runner
namespace: company.team

variables:
  compute_environment_arn: arn:aws:batch:us-east-1:123456789:compute-environment/kestra
  job_queue_arn: arn:aws:batch:us-east-1:123456789:job-queue/kestra
  execution_role_arn: arn:aws:iam::123456789:role/ecsTaskExecutionRole
  task_role_arn: arn:aws:iam::123456789:role/ecsTaskRole

tasks:
  - id: send_data
    type: io.kestra.plugin.scripts.python.Script
    containerImage: ghcr.io/kestra-io/pydata:latest
    taskRunner:
      type: io.kestra.plugin.aws.runner.Batch
      region: us-east-1
      accessKeyId: "{{ secret('AWS_ACCESS_KEY_ID') }}"
      secretKeyId: "{{ secret('AWS_SECRET_KEY_ID') }}"
      computeEnvironmentArn: "{{ vars.compute_environment_arn }}"
      jobQueueArn: "{{ vars.job_queue_arn}}"
      executionRoleArn: "{{ vars.execution_role_arn }}"
      taskRoleArn: "{{ vars.task_role_arn }}"
      bucket: kestra-us
    script: |
      import platform
      import socket
      import sys

      print("Hello from AWS Batch and kestra!")

      def print_environment_info():
          print(f"Host's network name: {platform.node()}")
          print(f"Python version: {platform.python_version()}")
          print(f"Platform information (instance type): {platform.platform()}")
          print(f"OS/Arch: {sys.platform}/{platform.machine()}")

          try:
              hostname = socket.gethostname()
              ip_address = socket.gethostbyname(hostname)
              print(f"Host IP Address: {ip_address}")
          except socket.error as e:
              print("Unable to obtain IP address.")


      if __name__ == '__main__':
          print_environment_info()
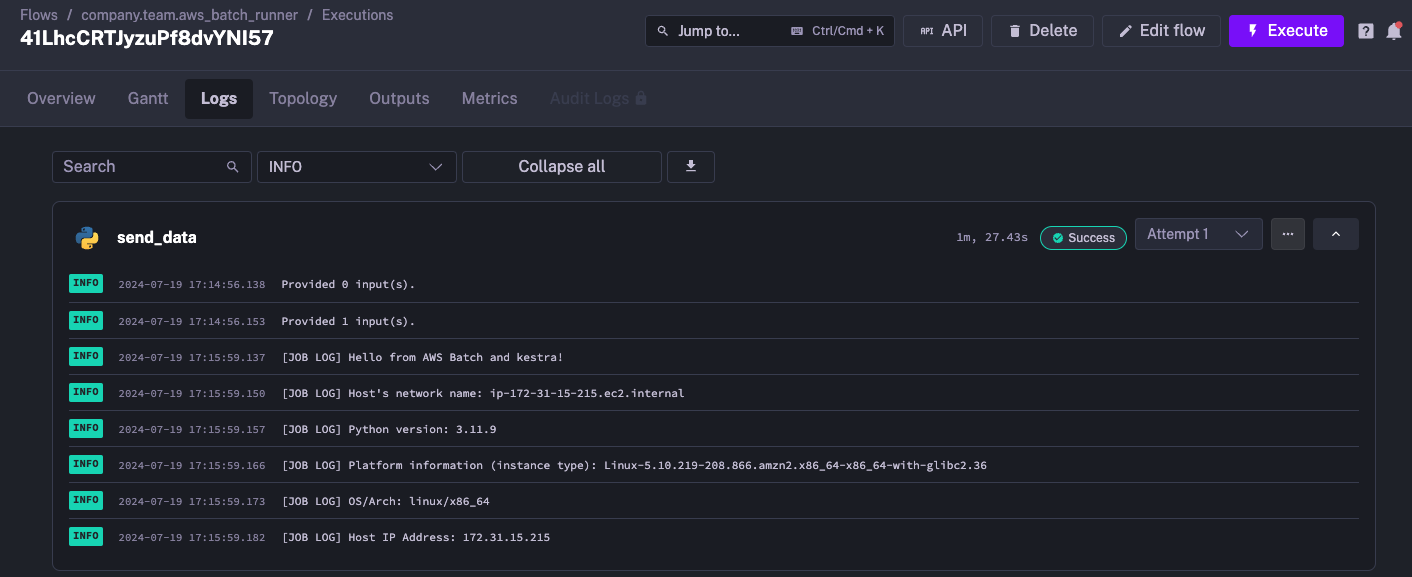
When we execute this task, we can see the environment information inside of the logs generated by the Python script:
Was this page helpful?