 Google Batch Task Runner
Available on: Enterprise Edition>= 0.18.0
Run tasks as containers on Google Cloud VMs.
How to use the Google Batch task runner
This task runner will deploy the container for the task to a specified Google Cloud Batch VM.
To launch the task on Google Cloud Batch, there are three main concepts you need to be aware of:
- Machine Type — a mandatory property indicating the compute machine type to which the task will be deployed. If no
reservationis specified, a new compute instance will be created for each batch which can add around a minute of latency. - Reservation — an optional property allowing you to set up a reservation for a given virtual machine and avoid the time needed to create a new compute instance for each task.
- Network Interfaces — an optional property; if not specified, it will use the
defaultinterface if not specified otherwise.
How does Google Batch task runner work
In order to support inputFiles, namespaceFiles, and outputFiles, the Google Batch task runner will do the following:
- mount a volume from a GCS bucket
- upload input files to the bucket before launching the container
- download output files from the bucket after the container has finished running.
Since we don't know the working directory of the container in advance, you need to explicitly define the working directory and output directory when using the GCP Batch runner, e.g. use python {{ workingDir }}/main.py rather than python main.py.
A full flow example
id: gcp_batch_runner
namespace: company.team

variables:
  region: europe-west9

tasks:
  - id: scrape_environment_info
    type: io.kestra.plugin.scripts.python.Commands
    containerImage: ghcr.io/kestra-io/pydata:latest
    taskRunner:
      type: io.kestra.plugin.ee.gcp.runner.Batch
      projectId: "{{ secret('GCP_PROJECT_ID') }}"
      region: "{{ vars.region }}"
      bucket: "{{ secret('GCS_BUCKET')}}"
      serviceAccount: "{{ secret('GOOGLE_SA') }}"
    commands:
      - python {{ workingDir }}/main.py
    namespaceFiles:
      enabled: true
    outputFiles:
      - "environment_info.json"
    inputFiles:
      main.py: |
        import platform
        import socket
        import sys
        import json
        from kestra import Kestra

        print("Hello from GCP Batch and kestra!")

        def print_environment_info():
            print(f"Host's network name: {platform.node()}")
            print(f"Python version: {platform.python_version()}")
            print(f"Platform information (instance type): {platform.platform()}")
            print(f"OS/Arch: {sys.platform}/{platform.machine()}")

            env_info = {
                "host": platform.node(),
                "platform": platform.platform(),
                "OS": sys.platform,
                "python_version": platform.python_version(),
            }
            Kestra.outputs(env_info)

            filename = '{{ workingDir }}/environment_info.json'
            with open(filename, 'w') as json_file:
                json.dump(env_info, json_file, indent=4)

        if __name__ == '__main__':
          print_environment_info()
For a full list of properties available in the Google Batch task runner, check the GCP plugin documentation or explore the same in the built-in Code Editor in the Kestra UI.
Full step-by-step guide: setting up Google Batch from scratch
Before you begin
Before you start, you need to have the following:
- A Google Cloud account.
- A Kestra instance in a version 0.16.0 or later with Google credentials stored as secrets or environment variables within the Kestra instance.
Google Cloud Console Setup
Create a project
If you don't already have a project, create one with a name of your choice.
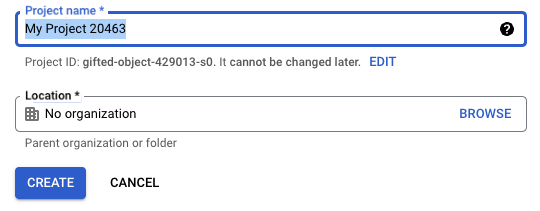
Once you've done this, make sure your project is selected in the menu bar.

Enable Batch API
Inside of the Cloud Console, you'll need to go to APIs and search for Batch API. Once you've got to it, you'll need to enable it so that Kestra can create Batch Jobs.
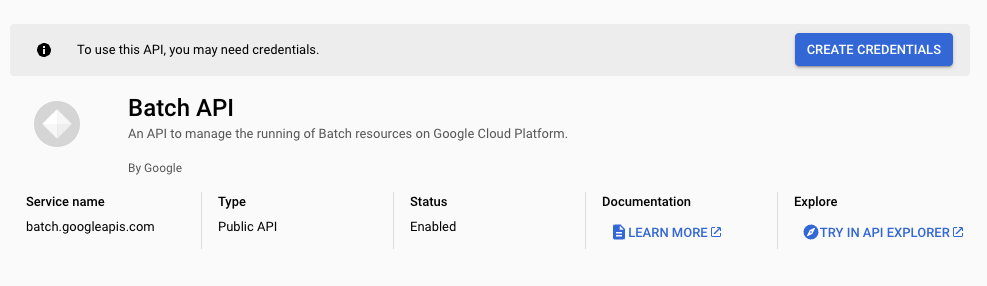
After you've enabled it, you'll be prompted to make credentials for it so you can integrate it with your application.
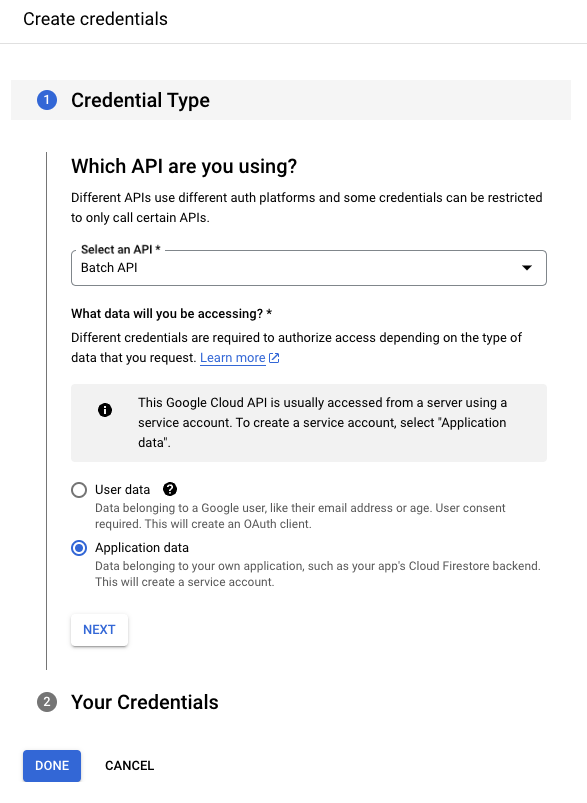
Create the Service Account
Now that the Batch API is enabled, we can proceed with creating credentials so we can access GCP directly inside of Kestra. Following the prompt after enabling the Batch API, we will be asked to select the type of data we will be using. In this case, it's Application data which will create a Service Account for us to use.
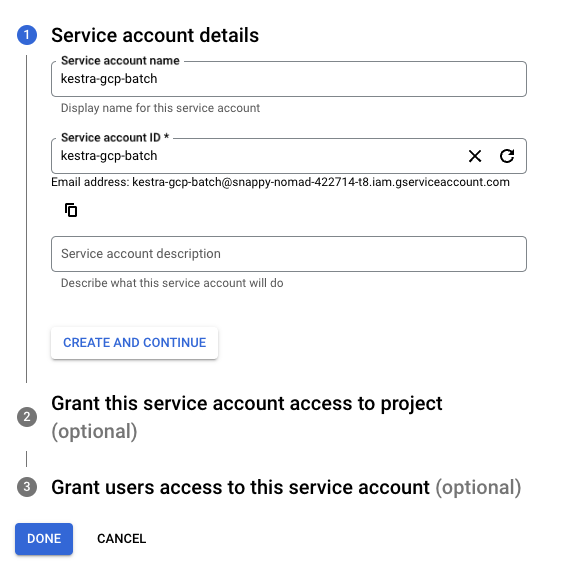
After you've selected this, you'll need to give a name to your service account. Name it something memorable, as we'll need to type this into Kestra later.
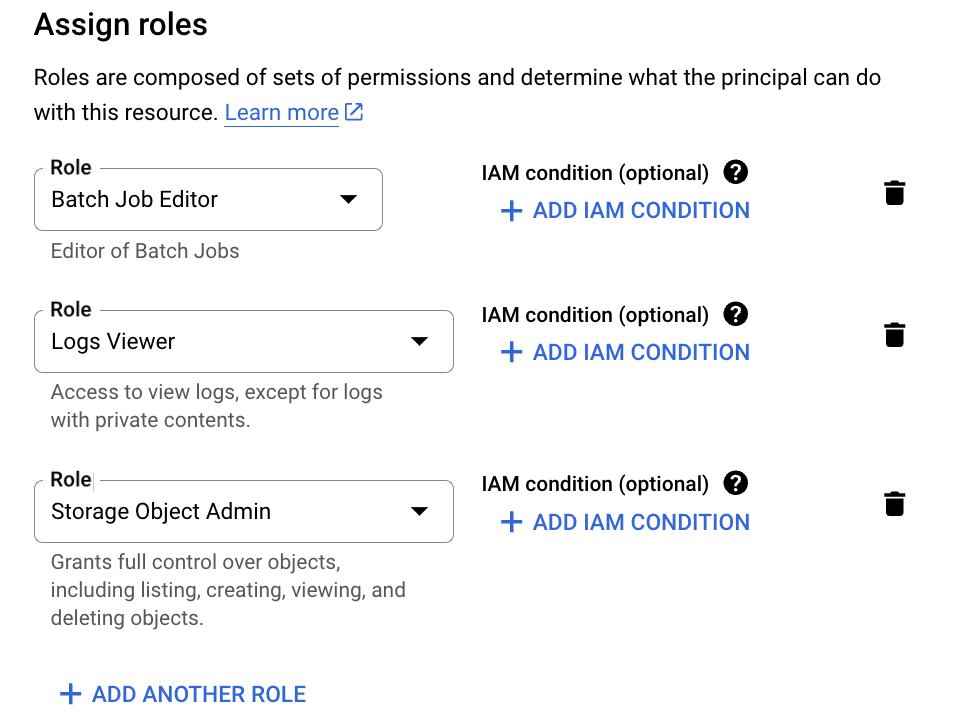
Once you've given it a name, make sure to select the following roles:
- Batch Job Editor
- Logs Viewer
- Storage Object Admin
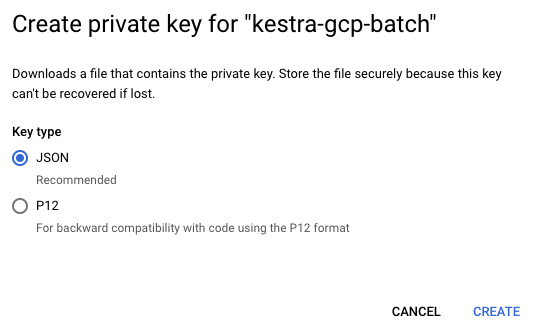
Afterwards, we will need to make credentials for our service account so we can add these into Kestra. To do so, select our service account and select Keys then Add Key.
Make sure to select JSON as the Key type so we can either add it as a secret or directly into our flow.
Check out this guide on how to add your service account into Kestra as a secret.
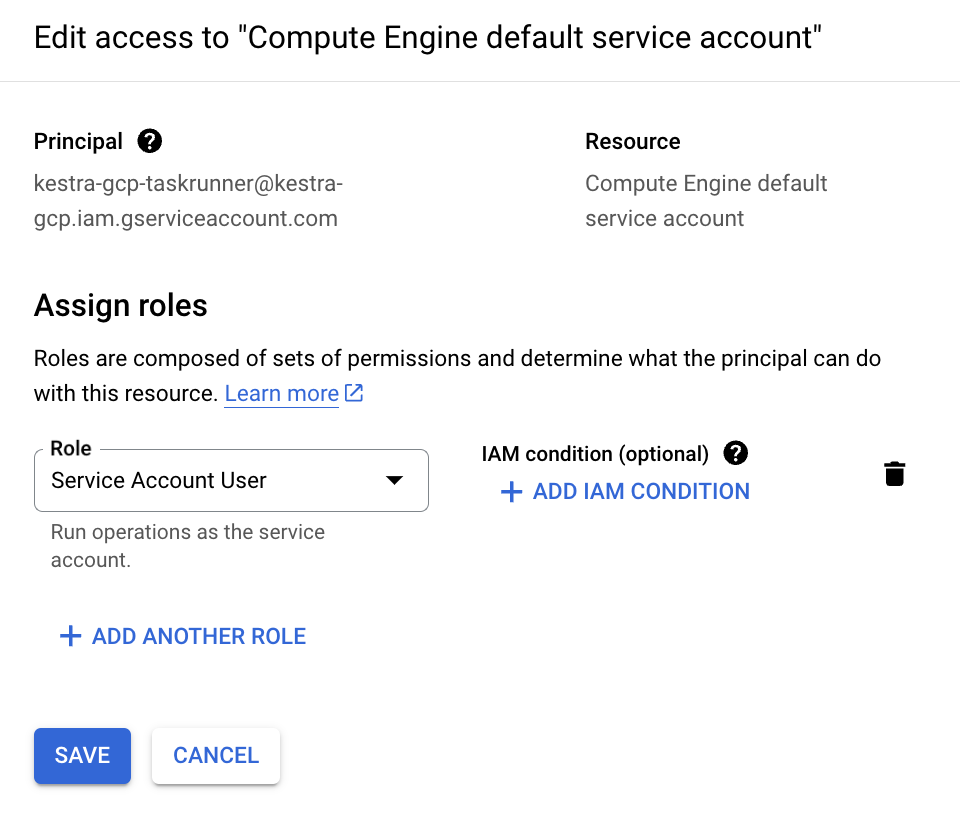
We'll also need to make sure our service account can access the Compute Engine default service account so it can create jobs.
To do this, we can go to IAM & Admin, then Service Accounts. On this page, we can select the compute engine service account, select Permissions and then Grant Access. On this page, we want to add our original Service account as a Service Account User role. Once we've done this, we can select Save.
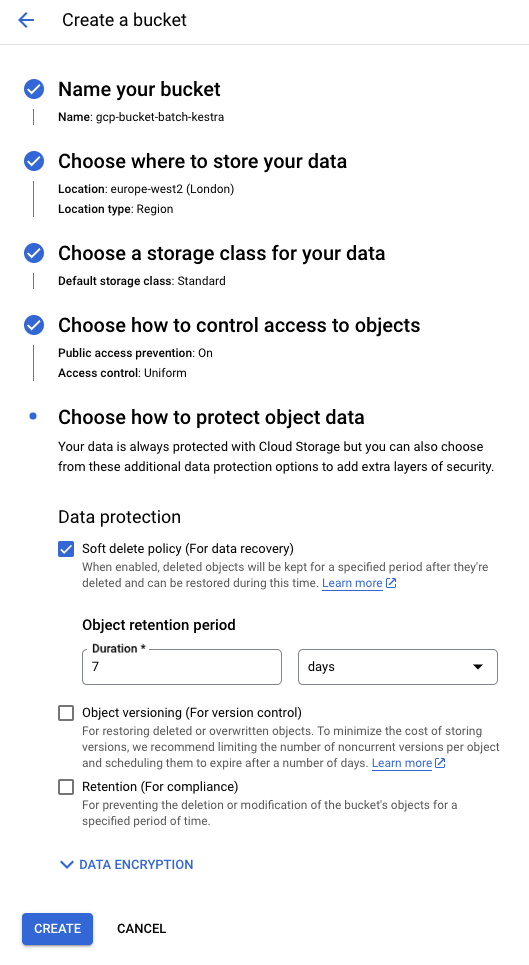
Create Bucket
Head to the search bar and type "Bucket" to find GCS Bucket. Now create a new bucket! You'll be prompted to set a name, region and various other permissions. For now, we can leave these all to default.
Creating our Flow
Below is an example flow that will run a Python file called main.py on a GCP Batch Task Runner. At the top of the io.kestra.plugin.scripts.python.Commands task, there are the properties for defining our Task Runner:
containerImage: ghcr.io/kestra-io/kestrapy:latest
taskRunner:
  type: io.kestra.plugin.ee.gcp.runner.Batch
  projectId: "{{ secret('GCP_PROJECT_ID') }}"
  region: "{{ vars.region }}"
  bucket: "{{ secret('GCS_BUCKET') }}"
  serviceAccount: "{{ secret('GOOGLE_SA') }}"
This is where we can enter the details for GCP such as the projectId, region, bucket, as well as serviceAccount. We can add these all as secrets.
id: gcp_batch_runner
namespace: company.team

variables:
  region: europe-west2

tasks:
  - id: scrape_environment_info
    type: io.kestra.plugin.scripts.python.Commands
    containerImage: ghcr.io/kestra-io/kestrapy:latest
    taskRunner:
      type: io.kestra.plugin.ee.gcp.runner.Batch
      projectId: "{{ secret('GCP_PROJECT_ID') }}"
      region: "{{ vars.region }}"
      bucket: "{{ secret('GCS_BUCKET') }}"
      serviceAccount: "{{ secret('GOOGLE_SA') }}"
    commands:
      - python {{ workingDir }}/main.py
    namespaceFiles:
      enabled: true
    outputFiles:
      - "environment_info.json"
    inputFiles:
      main.py: |
        import platform
        import socket
        import sys
        import json
        from kestra import Kestra

        print("Hello from GCP Batch and kestra!")

        def print_environment_info():
            print(f"Host's network name: {platform.node()}")
            print(f"Python version: {platform.python_version()}")
            print(f"Platform information (instance type): {platform.platform()}")
            print(f"OS/Arch: {sys.platform}/{platform.machine()}")

            env_info = {
                "host": platform.node(),
                "platform": platform.platform(),
                "OS": sys.platform,
                "python_version": platform.python_version(),
            }
            Kestra.outputs(env_info)

            filename = '{{workingDir}}/environment_info.json'
            with open(filename, 'w') as json_file:
                json.dump(env_info, json_file, indent=4)

        print_environment_info()
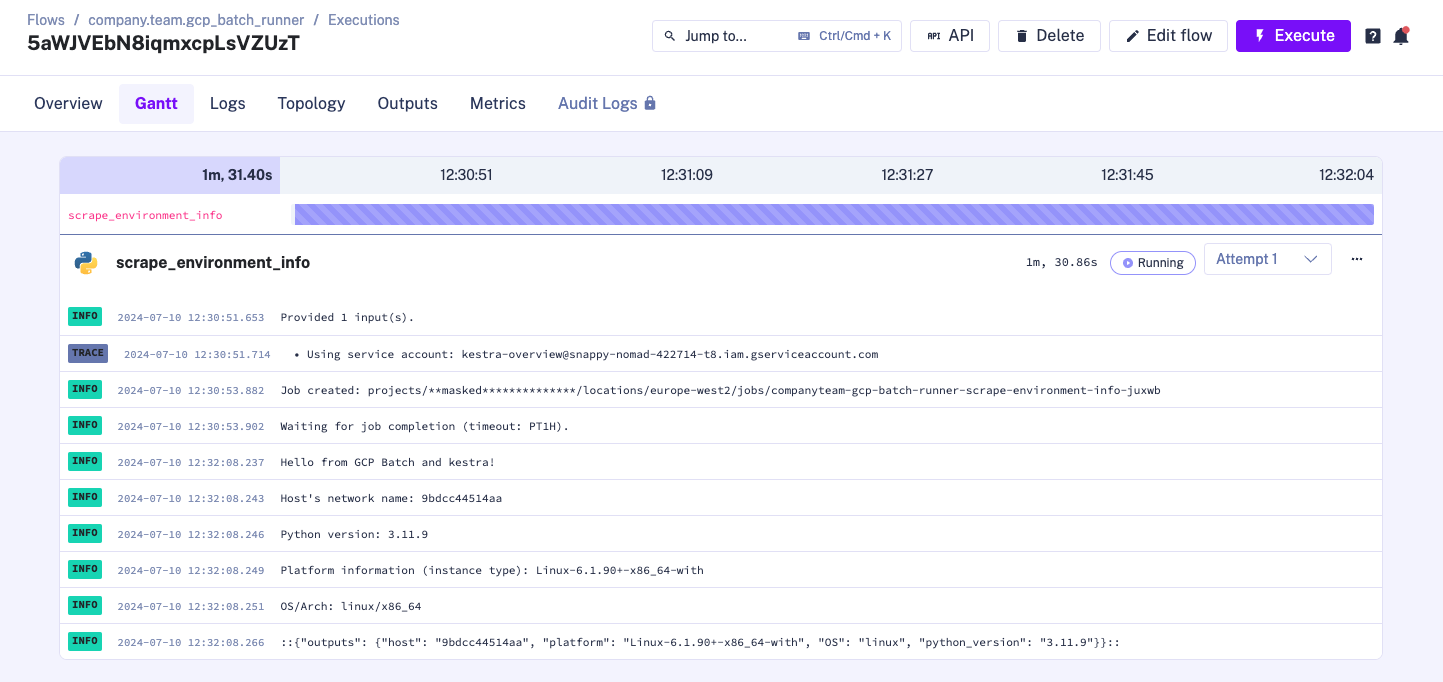
When we press execute, we can see that our task runner is created in the Logs.
We can also go to the GCP Console and see our task runner has been created:

Once the task has completed, it will automatically close down the runner on Google Cloud.
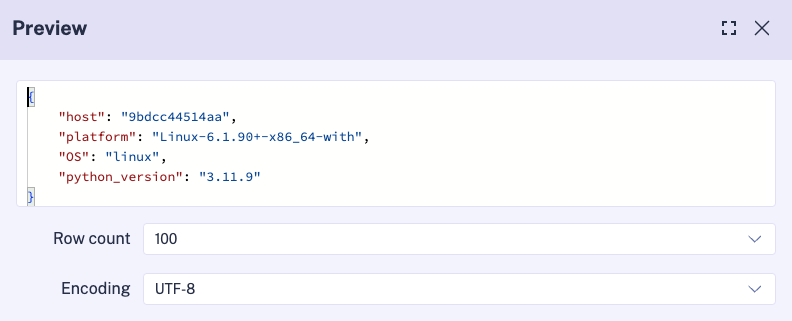
We can also view the outputs generated in the Outputs tab in Kestra, which contains information about the Google Batch task runner generated from our Python script:
Was this page helpful?