Install Kestra on Azure VM with PostgreSQL and Blob Storage
For the complete documentation index, see llms.txt. For a full content snapshot, see llms-full.txt. Append.mdto anykestra.io/docs/*URL for plain Markdown.
Install Kestra on an Azure VM with Azure Database for PostgreSQL as the database backend and Azure Blob Storage as the internal storage backend.
Prefer an Azure-native option? You can deploy Kestra directly from the Azure Marketplace listing.
Deploy Kestra on an Azure VM with Azure Database
Prerequisites:
- Basic command-line interface (CLI) skills.
- Familiarity with Azure and PostgreSQL.
Create an Azure VM
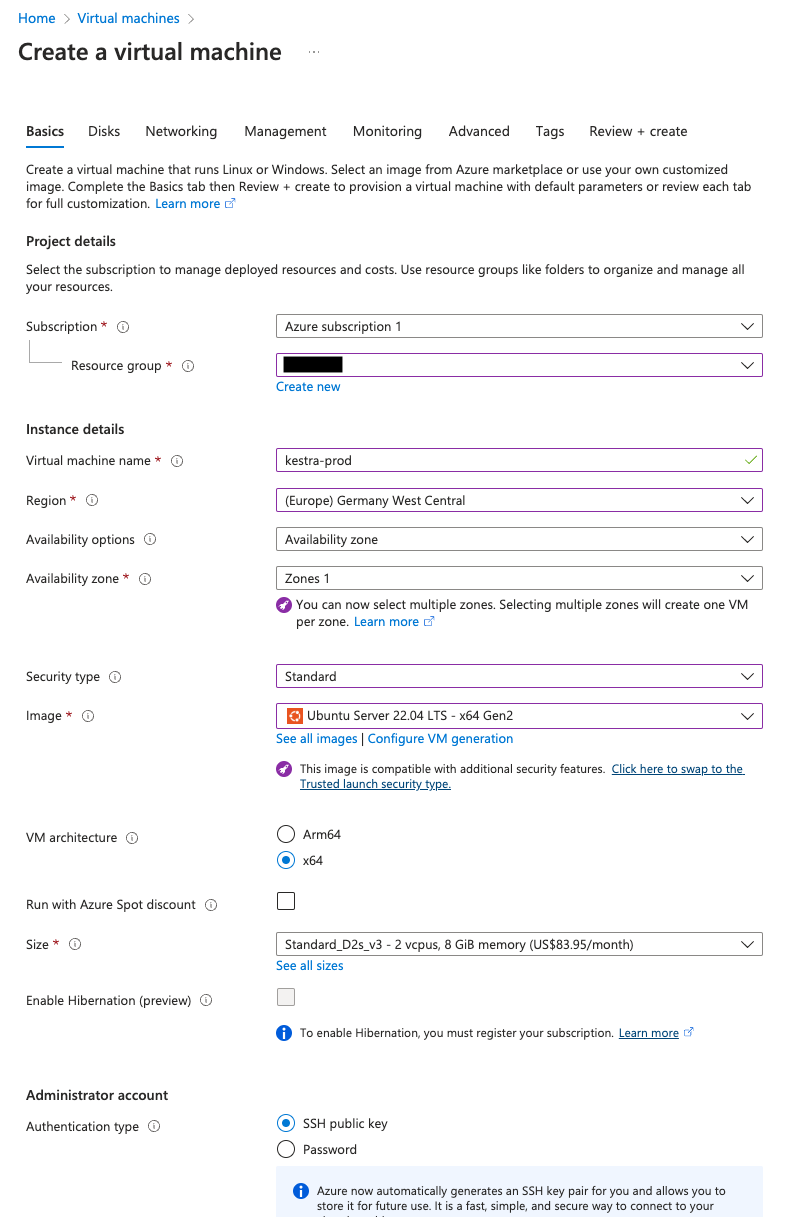
First, create a virtual machine using Azure Virtual Machines. To do so, go to the Azure portal and choose Virtual Machines.
- Click Create and select Azure Virtual Machine.
- Choose an appropriate Subscription and Resource Group.
- Give a name for your VM, and choose a Region where it should be launched.
- For Availability options, choose Availability zone, and keep the default availability zone.
- For Image, choose Ubuntu Server 22.04 LTS - x64 Gen2, and x64 as the VM architecture.
- Kestra requires at least 4GiB of memory and 2 vCPUs to run correctly. Choosing the Size as Standard_D2s_v3 is a good starting point.
- Select SSH public key as the Authentication type.
- You can keep the default
azureuseras the Username. - For SSH public key source, you can select Generate new key pair and provide an appropriate name for the key pair.
- For Public inbound ports, choose Allow selected ports and from the Select inbound ports dropdown, select HTTPS and SSH.
- Click Review + Create.
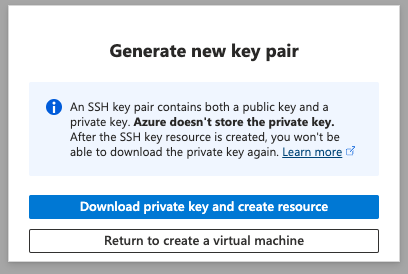
- You can now review the configurations and click on Create. On the Generate new key pair popup, click Download private key and create resource.

Wait until the virtual machine is up and running.

Install Docker
In your terminal, run the following commands to SSH into the virtual machine:
chmod 400 <your-key-pair.pem>ssh -i <your-key-pair.pem> azureuser@<your-VM-public-IP>Kestra can be started using a .jar binary or Docker. In this guide, we’ll use Docker for a quick setup:
- Install Docker on the Azure VM instance. You can find the last updated instruction on the Docker website.
- Install Docker Compose.
To check your installation, run sudo docker version and sudo docker compose version. You’re now ready to download and launch the Kestra server.
Install Kestra
Download the official Docker-Compose file:
curl -o docker-compose.yml \https://raw.githubusercontent.com/kestra-io/kestra/develop/docker-compose.ymlUse an editor such as Vim to modify the docker-compose.yml, set basic authentication to true, and configure your basic authentication credentials to secure your Kestra instance.
kestra: server: basic-auth: username: admin@kestra.io # it must be a valid email address password: kestraNext, use the following command to start the Kestra server:
sudo docker compose up -dAllow external traffic
Kestra is now running and the Kestra server exposes traffic on the 8080 port. To connect through your web browser, update the inbound traffic rules in the Azure security group.
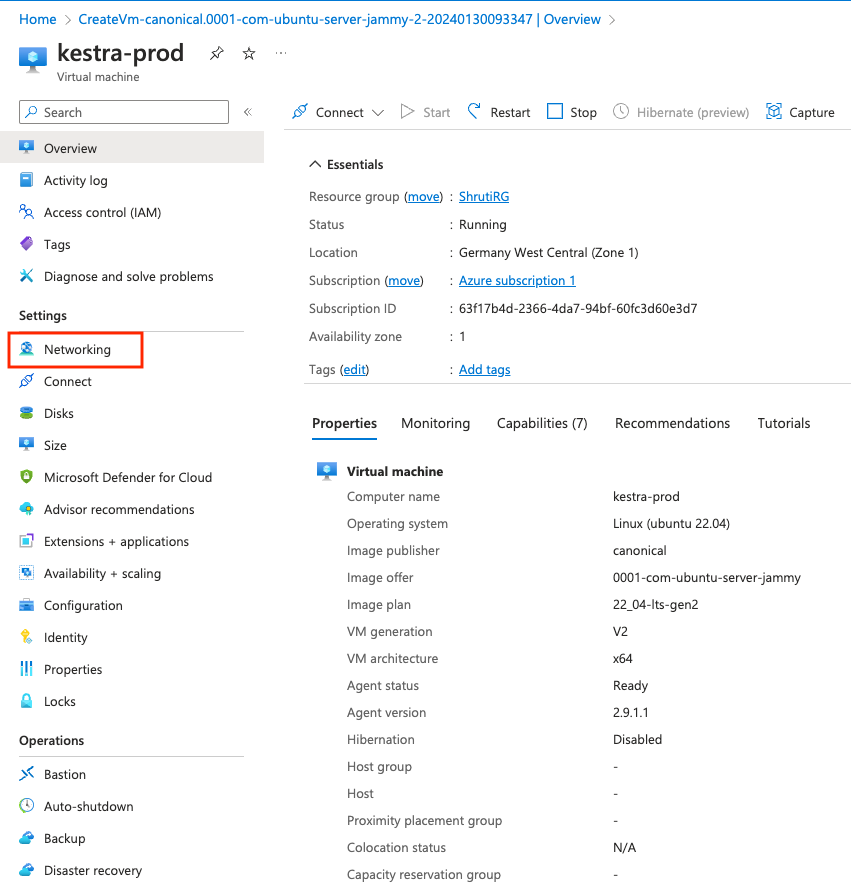
- Go to the Virtual Machines console and select the recently created virtual machine.
- On the left-side navigation menu, click Networking.
- Under Inbound port rules tab, click the Add inbound port rule button.
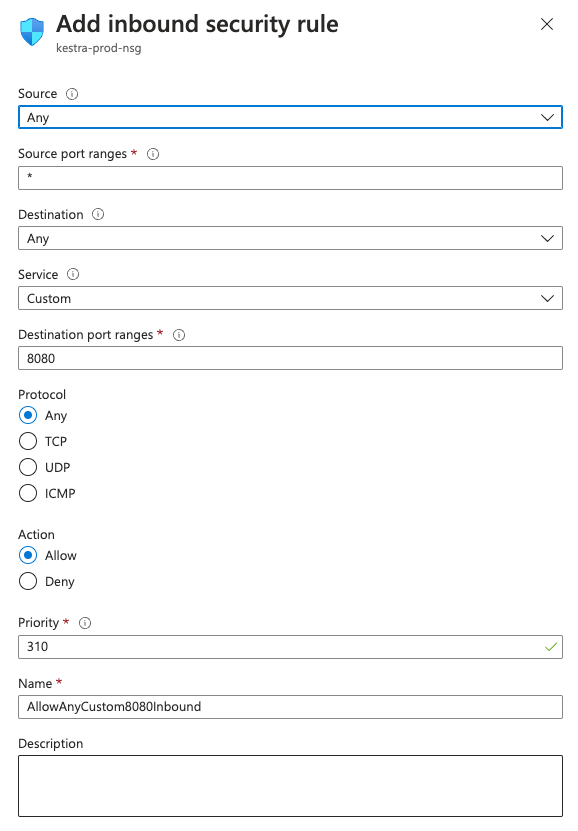
- In the Add inbound security rule page, put Destination port ranges as
8080. You can keep the default values for the remaining properties. Finally, click Add at the bottom of the page.
If you want to only allow traffic coming from your local machine, set the Source to your own IP address. To open the instance to the entire Internet, leave it as Any.
If you haven’t set up basic authentication, your Kestra instance will be publicly accessible to anyone without authentication.
You can now access your Kestra instance and start developing flows.
Launch Azure Database
This first installation relies on a PostgreSQL database running alongside the Kestra server on the VM instance (see the PostgreSQL service running in Docker Compose).
For a simple proof of concept (PoC), you can keep the PostgreSQL database running in Docker.
However, for a production-grade installation, we recommend a managed database service such as Azure Database for PostgreSQL servers.
Launch a database using Azure Database for PostgreSQL servers
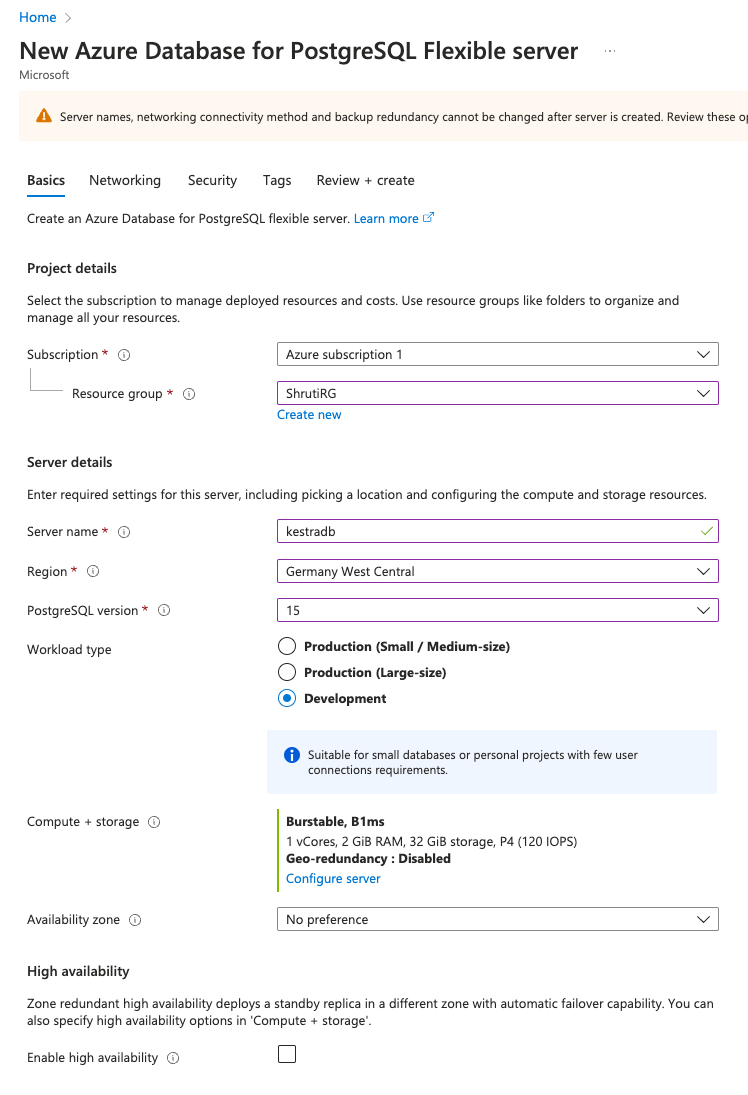
- Go to the Azure Database for PostgreSQL servers.
- Click on Create Azure Database for PostgreSQL server (Kestra also supports MySQL, but PostgreSQL is recommended).
- Choose an appropriate Subscription and Resource Group.
- Put an appropriate Server name and select the preferred Region.
- Choose the latest PostgreSQL version. We recommend version 17.
- Select the Workload type as per your requirement.
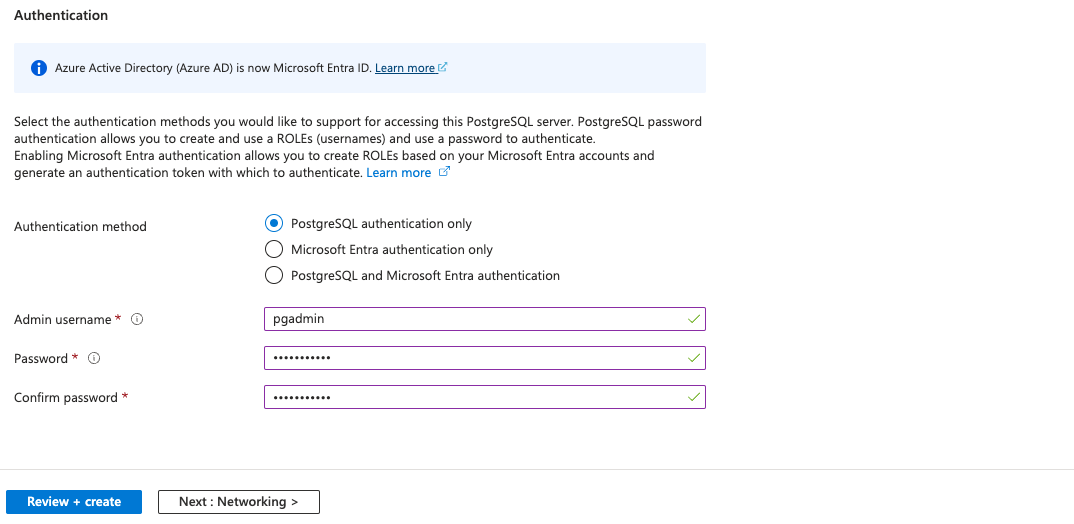
- Choose Authentication method as PostgreSQL authentication only.
- Provide an appropriate Admin username and Password and re-write the password in Confirm password.
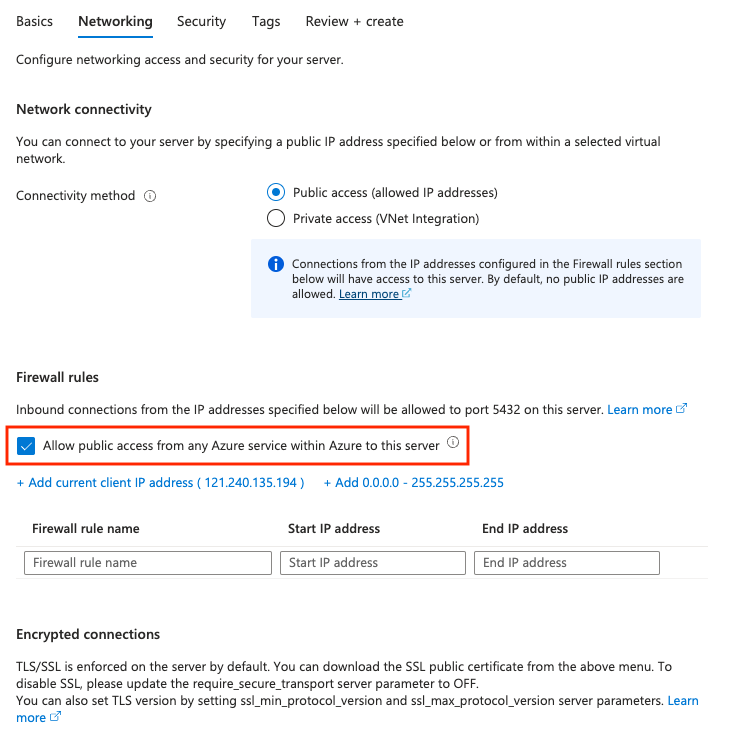
- Click Next: Networking.
- Check the select box for Allow public access from any Azure service within Azure to this server.
- Click Review + Create. Review the configurations and click Create.
- Wait for the database to be provisioned.
Create a Kestra database
- Go to the database overview page and click Databases from the left-side navigation menu.
- Click Add.
- Put an appropriate database name and click Save at the top.
Update Kestra configuration
In the docker-compose.yml file, edit the datasources property of the Kestra service to point Kestra to your Azure database:
datasources: postgres: url: jdbc:postgresql://<your-db-external-endpoint>:5432/<db_name> driver-class-name: org.postgresql.Driver username: <your-username> password: <your-password>Because you now use the “Azure Database for PostgreSQL servers” service, you don’t need the PostgreSQL Docker service anymore. Remove it from the docker-compose.yml file.
For the changes to take effect, restart the Docker services with sudo docker compose restart or sudo docker compose up -d.
Configure Azure Blob Storage
By default, internal storage is implemented using the local file system. This section guides you how to change the storage backend to Blob Storage to ensure more reliable, durable, and scalable storage.
- Go to the Storage Accounts.
- Click Create.
- Choose an appropriate Subscription and Resource Group.
- Put an appropriate Storage account name and select the preferred Region.
- Select Performance and Redundancy as per your requirement.
- Click Review and post reviewing the configurations, click Create.
- Click on the newly created storage account.
- On the storage account overview page, click Containers from the left-side navigation menu.
- Click the Create button at the top to create a new container.
- Put an appropriate name for the container and click Create. A new container will be created.
- Now, click Access keys from the left-side navigation menu.
- For one of the keys, either key1 or key2, click Show for the Connection string and click the Copy to clipboard button.
- Make a note of the connection string for later use. We will require this for configuring the storage backend.
- Edit the Kestra storage configuration in the
docker-compose.ymlfile.
kestra: storage: type: azure azure: container: "<your-container>" endpoint: "https://<your-storage-account>.blob.core.windows.net/" connection-string: "<your-connection-string>"For the changes to take effect, restart the Docker services with sudo docker compose restart or sudo docker compose up -d.
For more information on Azure Blob storage configuration, check out the Runtime and Storage configuration guide.
Next steps
This setup provides a simple starting point for running Kestra in production on a single machine. For a deployment to a distributed Kubernetes cluster, check the Azure AKS deployment guide.
Reach out via Slack if you encounter any issues or have any questions regarding deploying Kestra to production.
Also, check the CI/CD guide to automate your workflow deployments based on changes in Git.
Was this page helpful?