Install Kestra on a DigitalOcean Droplet with Managed DB and Spaces
For the complete documentation index, see llms.txt. For a full content snapshot, see llms-full.txt. Append.mdto anykestra.io/docs/*URL for plain Markdown.
Install Kestra on a DigitalOcean Droplet with Managed Database as the database backend.
Prerequisites
- Basic knowledge about using a command line interface
- Basic knowledge about DigitalOcean and PostgreSQL
Create a DigitalOcean Droplet
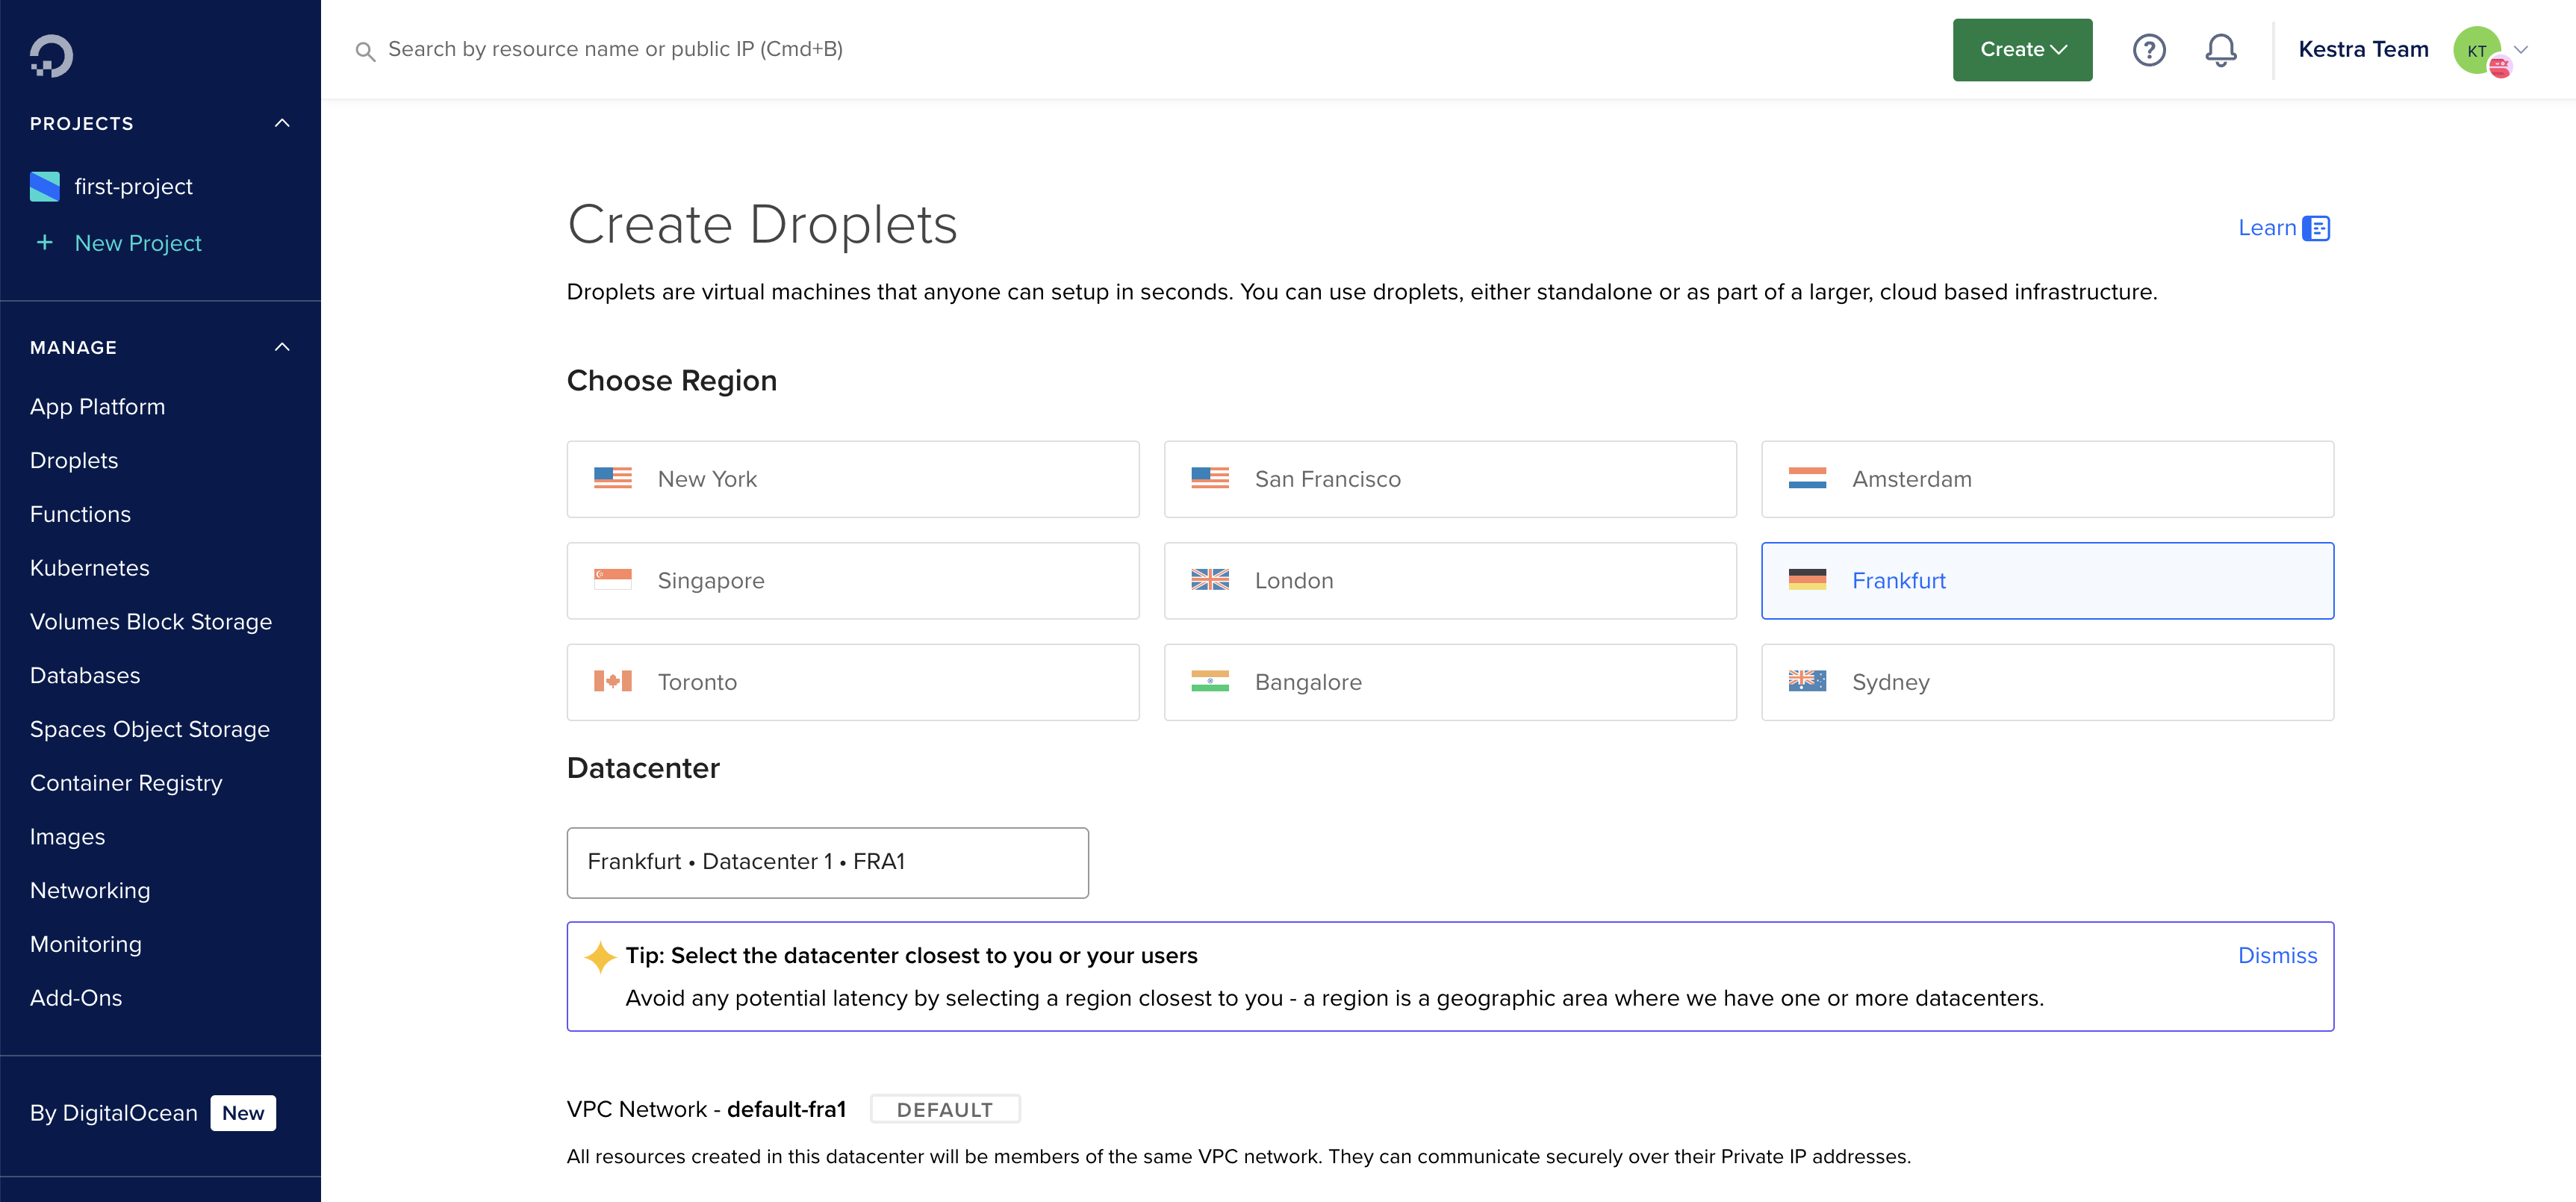
Go to the DigitalOcean portal and choose Droplets from the left navigation bar.
- On the Droplets page, click Create Droplet.
- Choose an appropriate region.
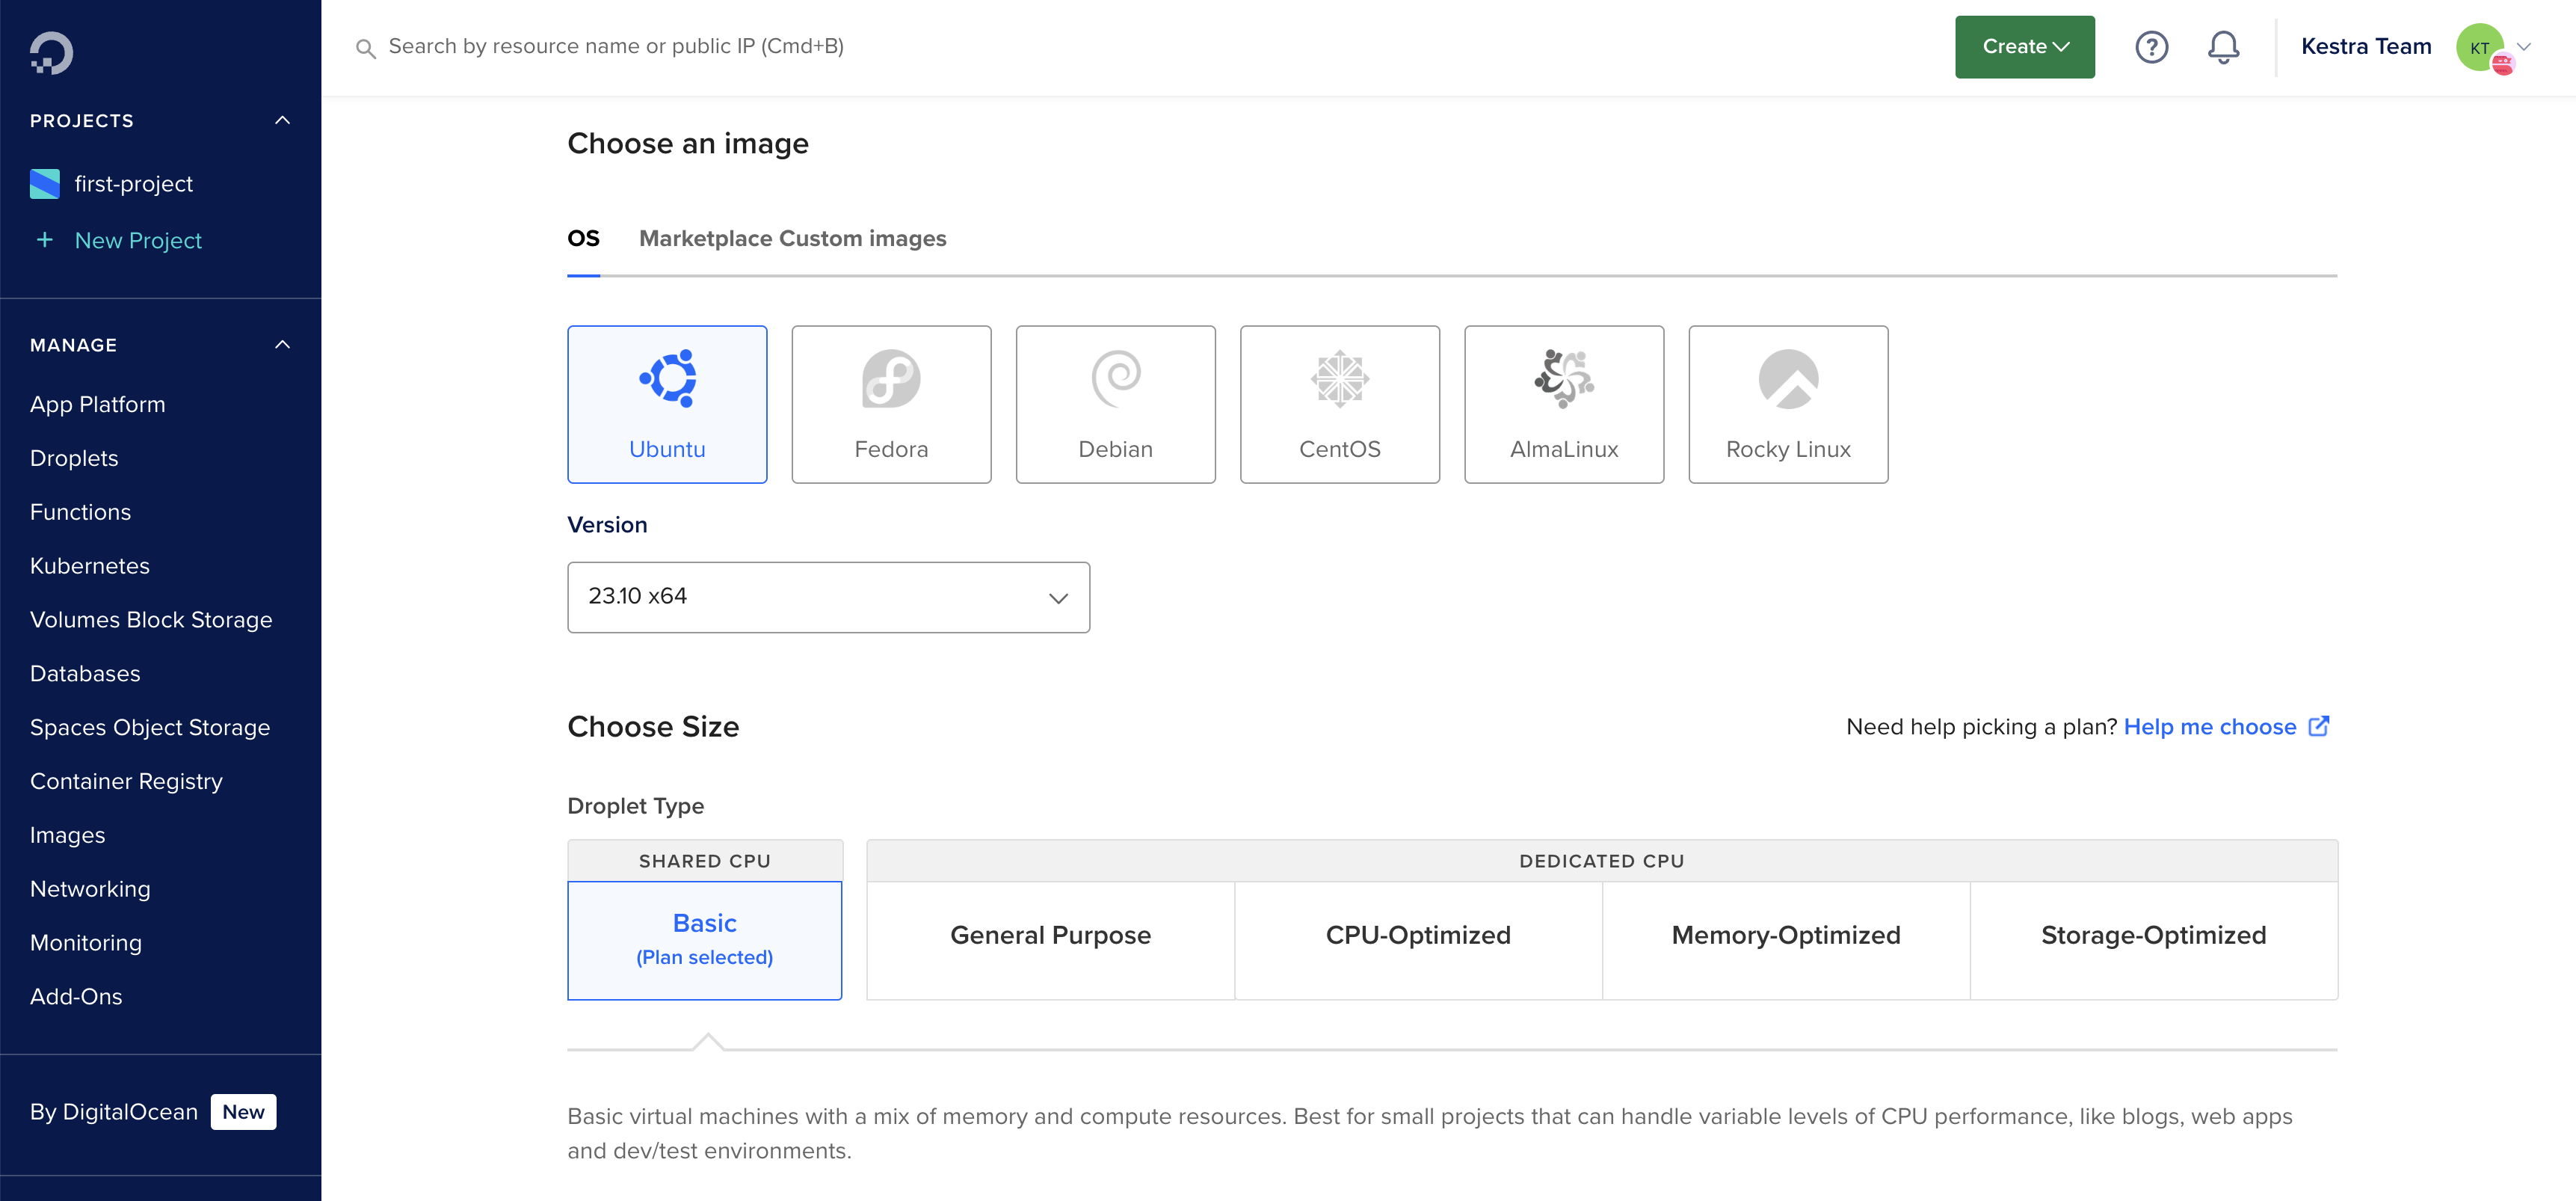
- Choose
Ubuntuas the OS image with the latest version. - Kestra requires at least 4 GiB of memory and 2 vCPUs. The
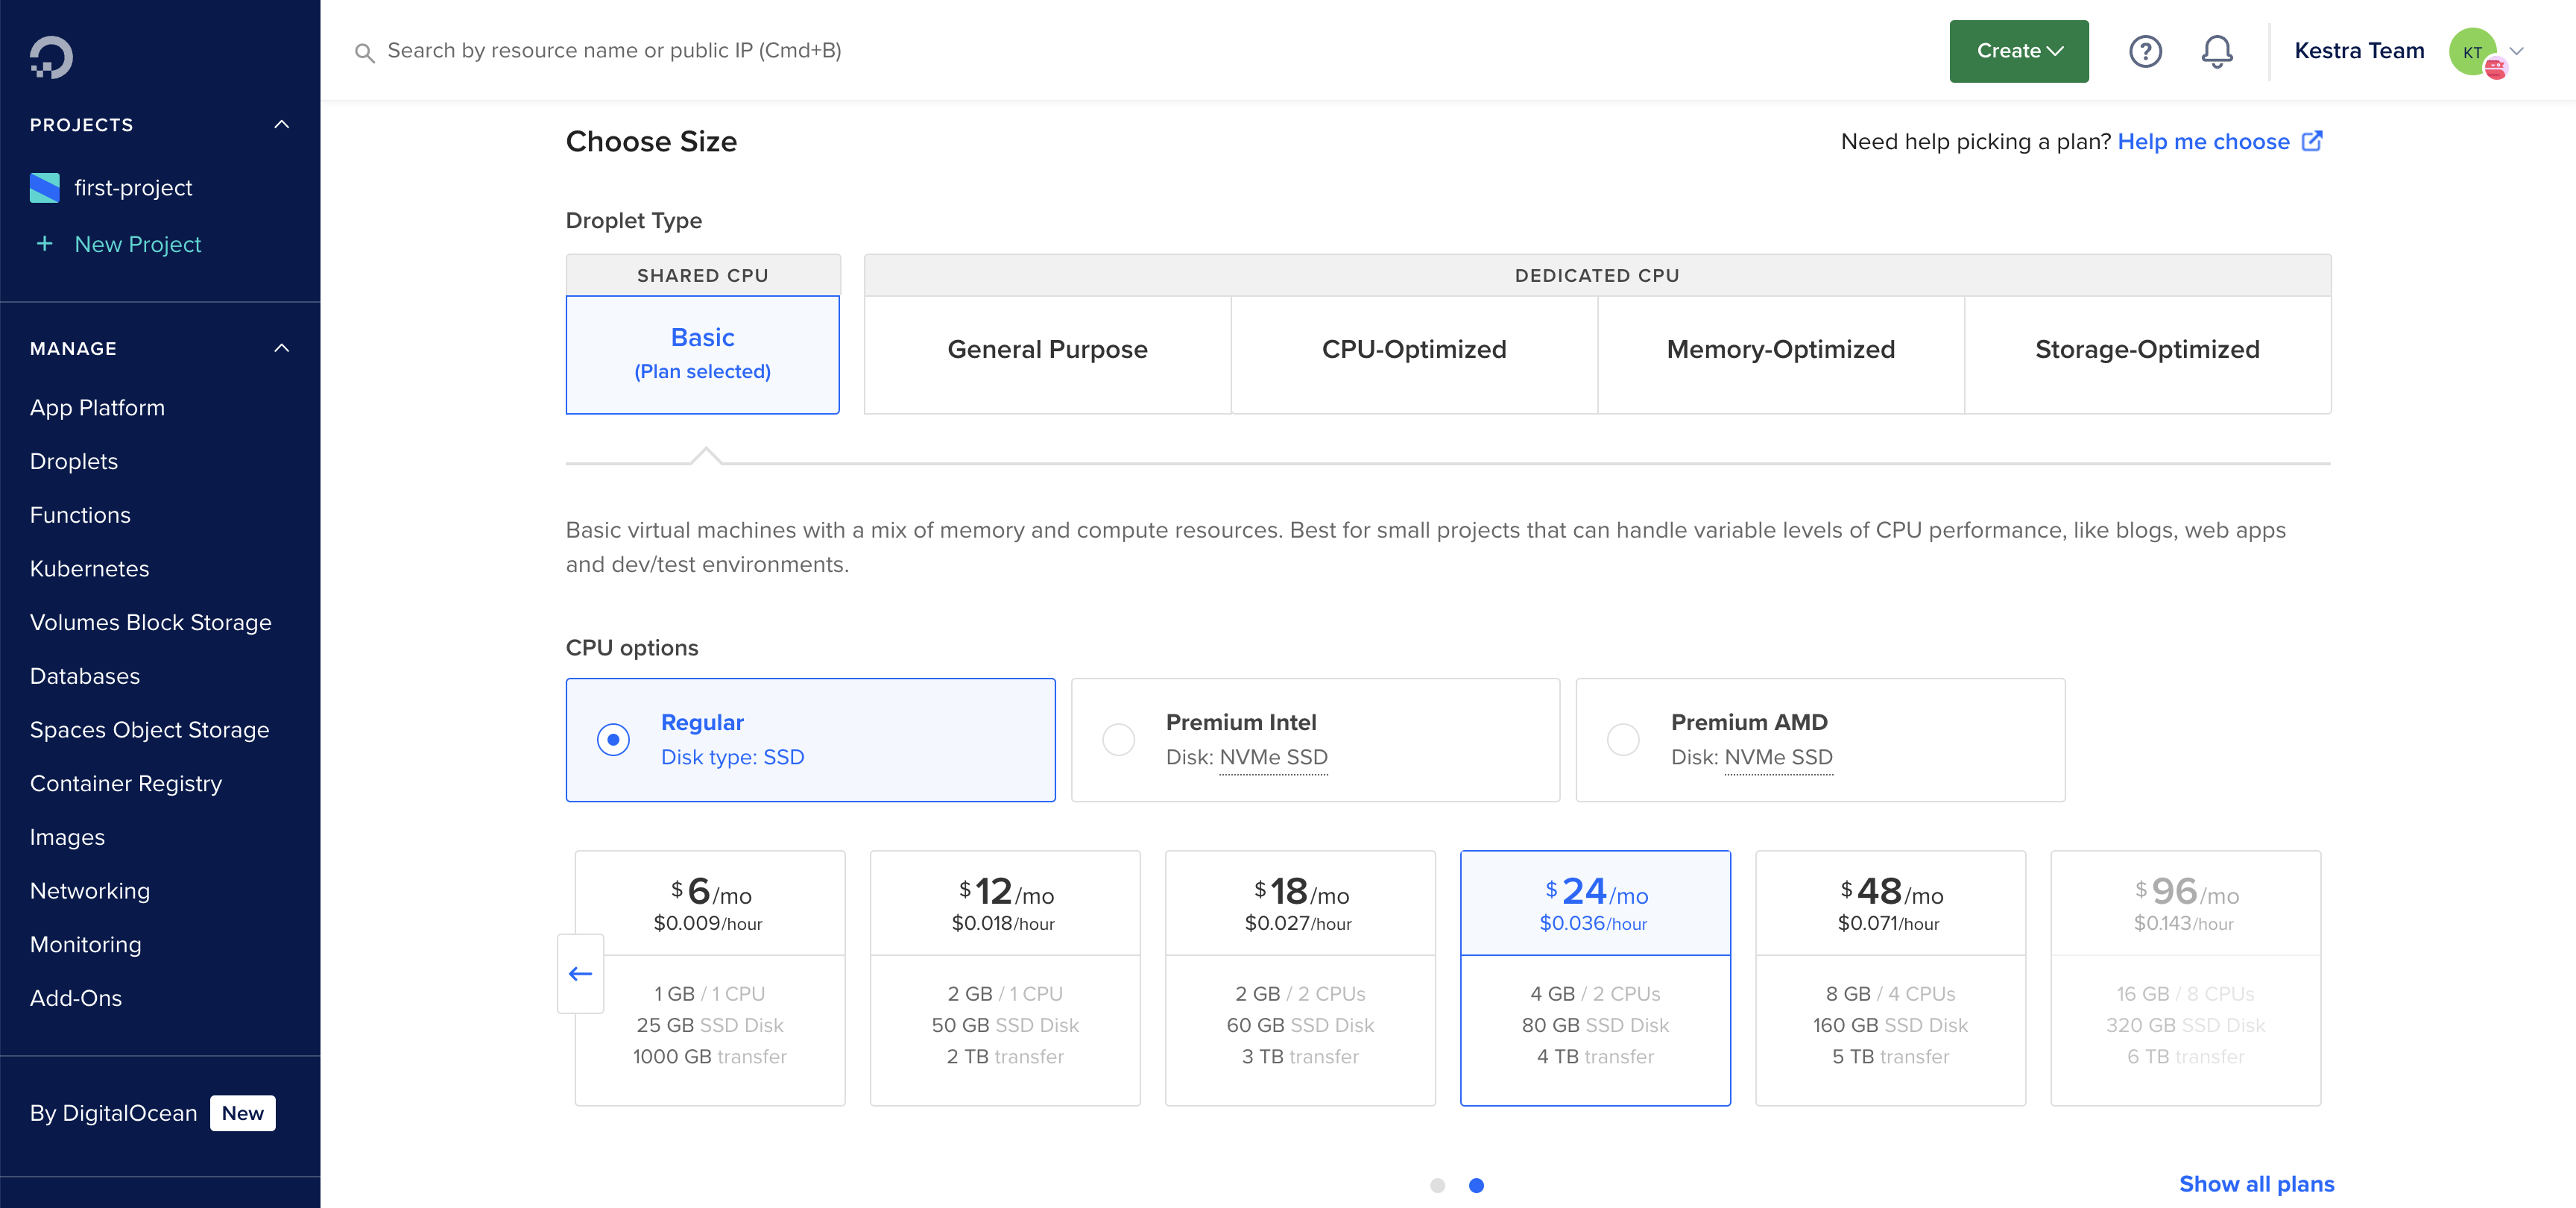
Basicplan withRegularCPU and 4 GiB / 2 vCPU is a good starting point. - You can choose an appropriate authentication method: SSH Key or Password based.
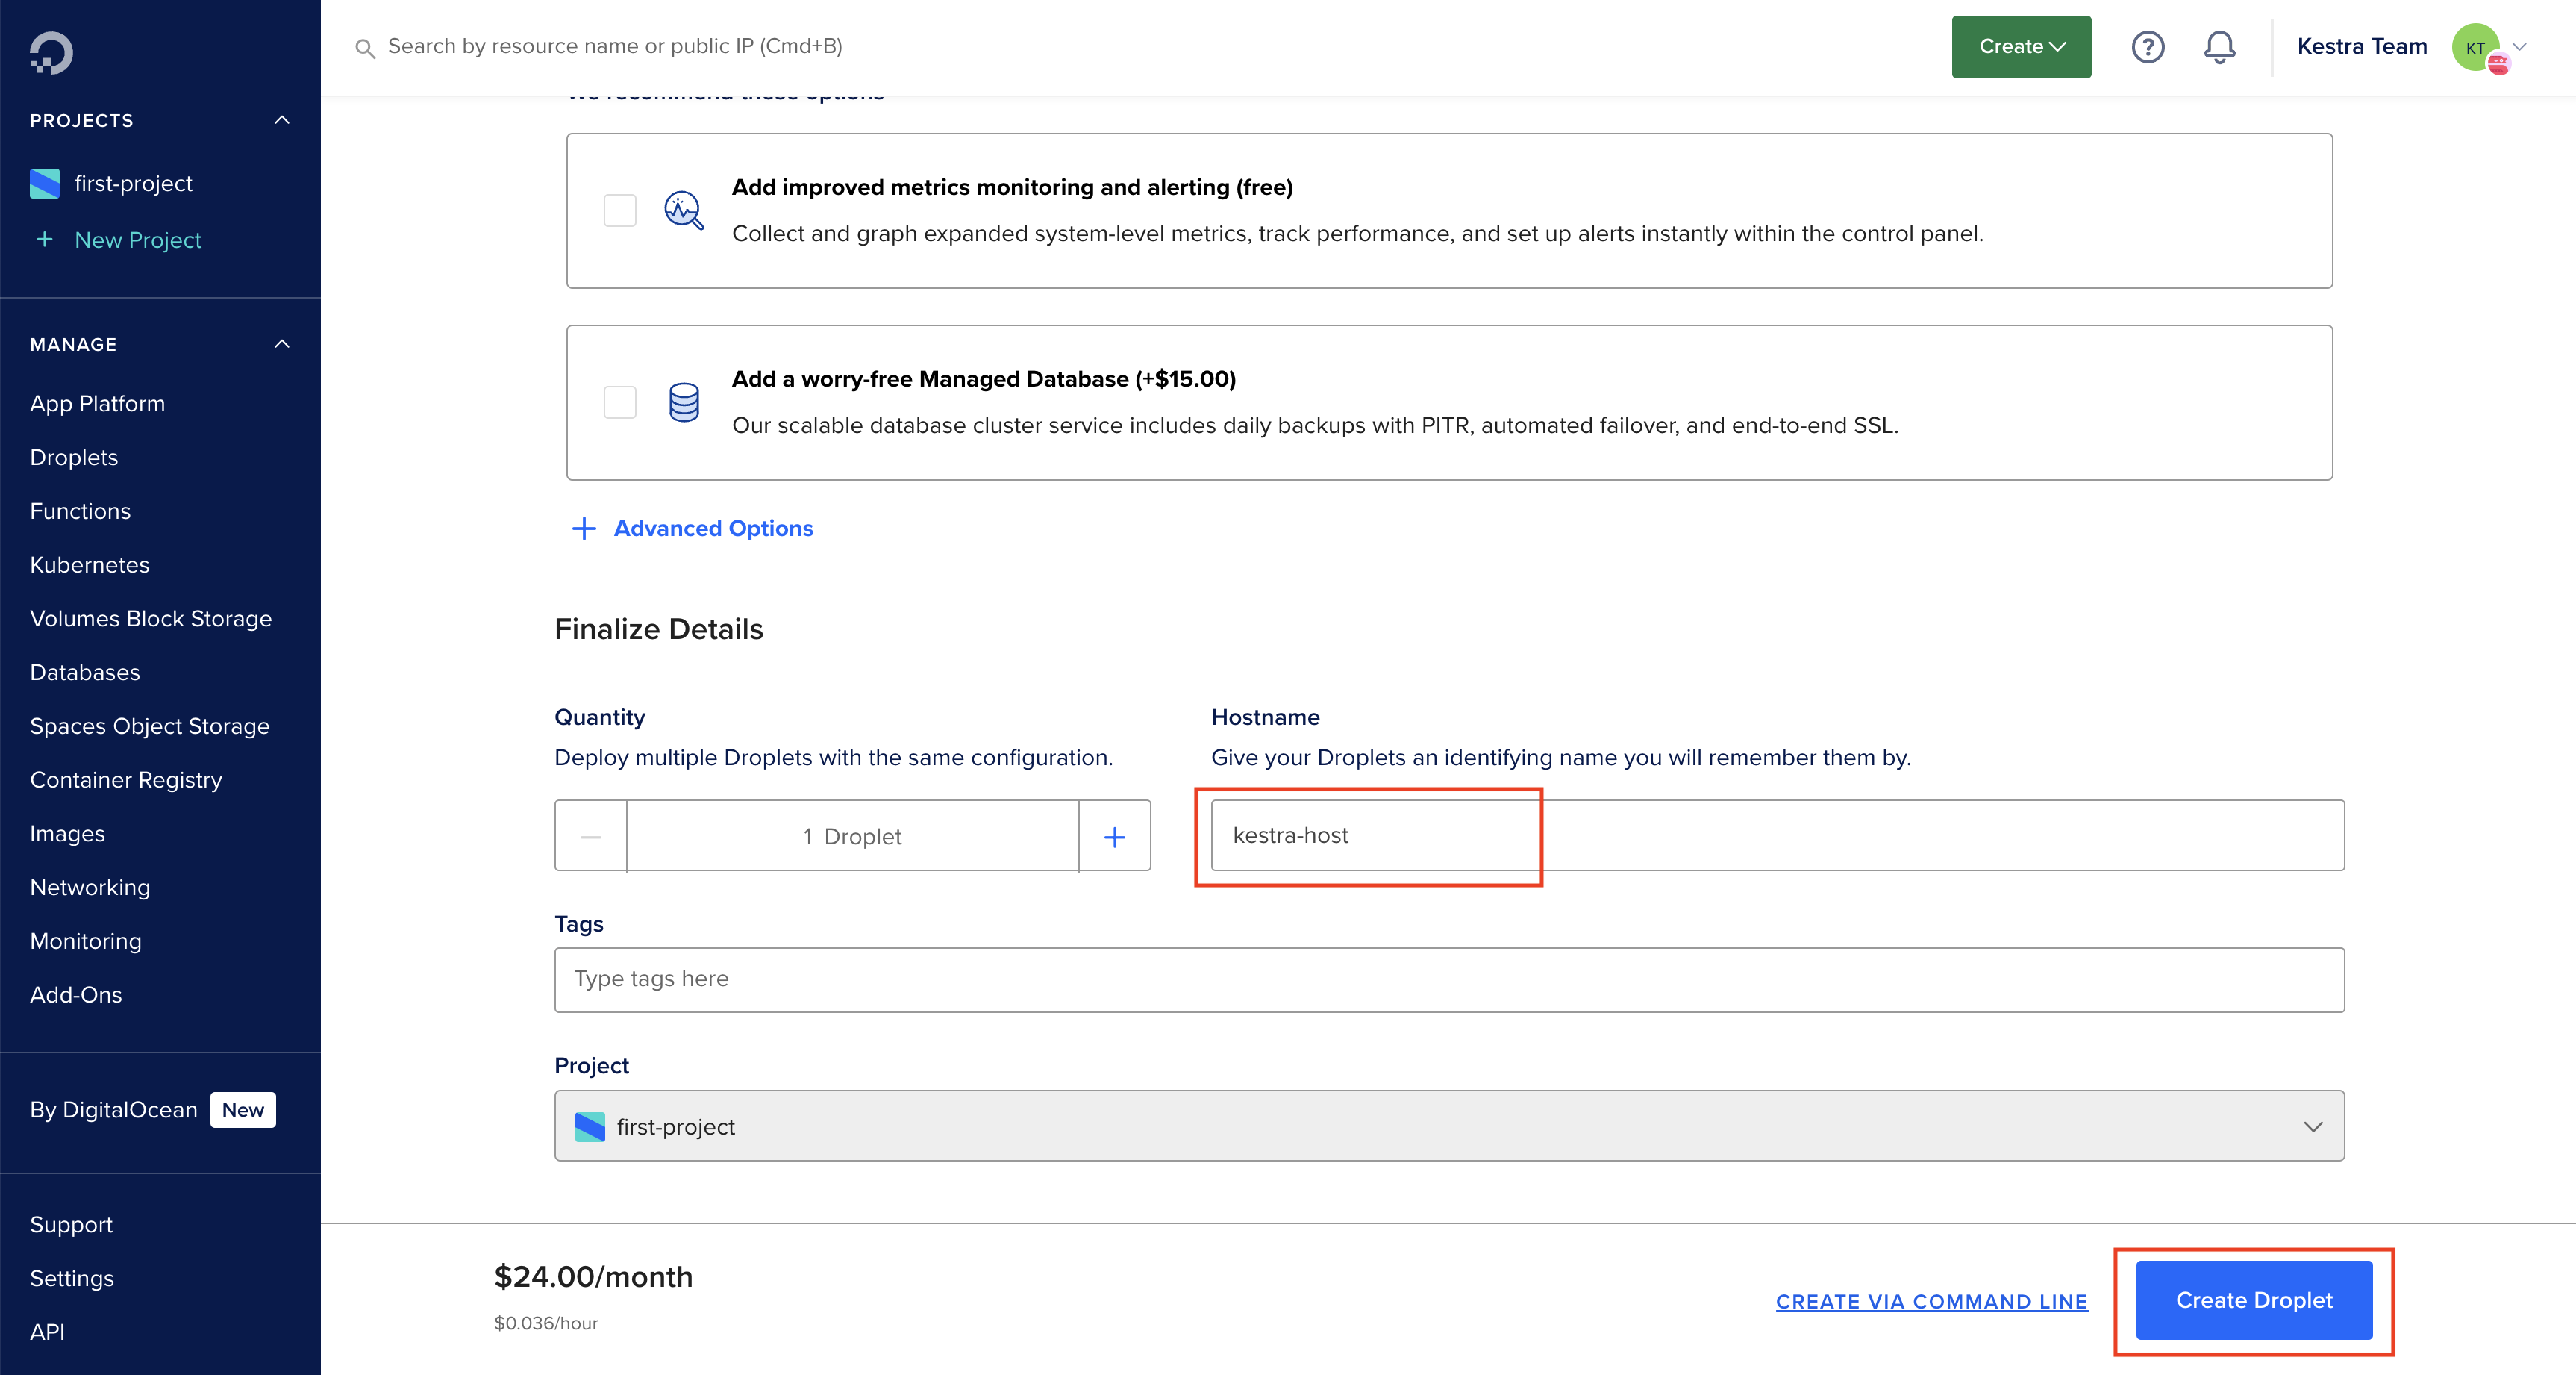
- Provide an appropriate hostname and click on the
Create Dropletbutton at the bottom.
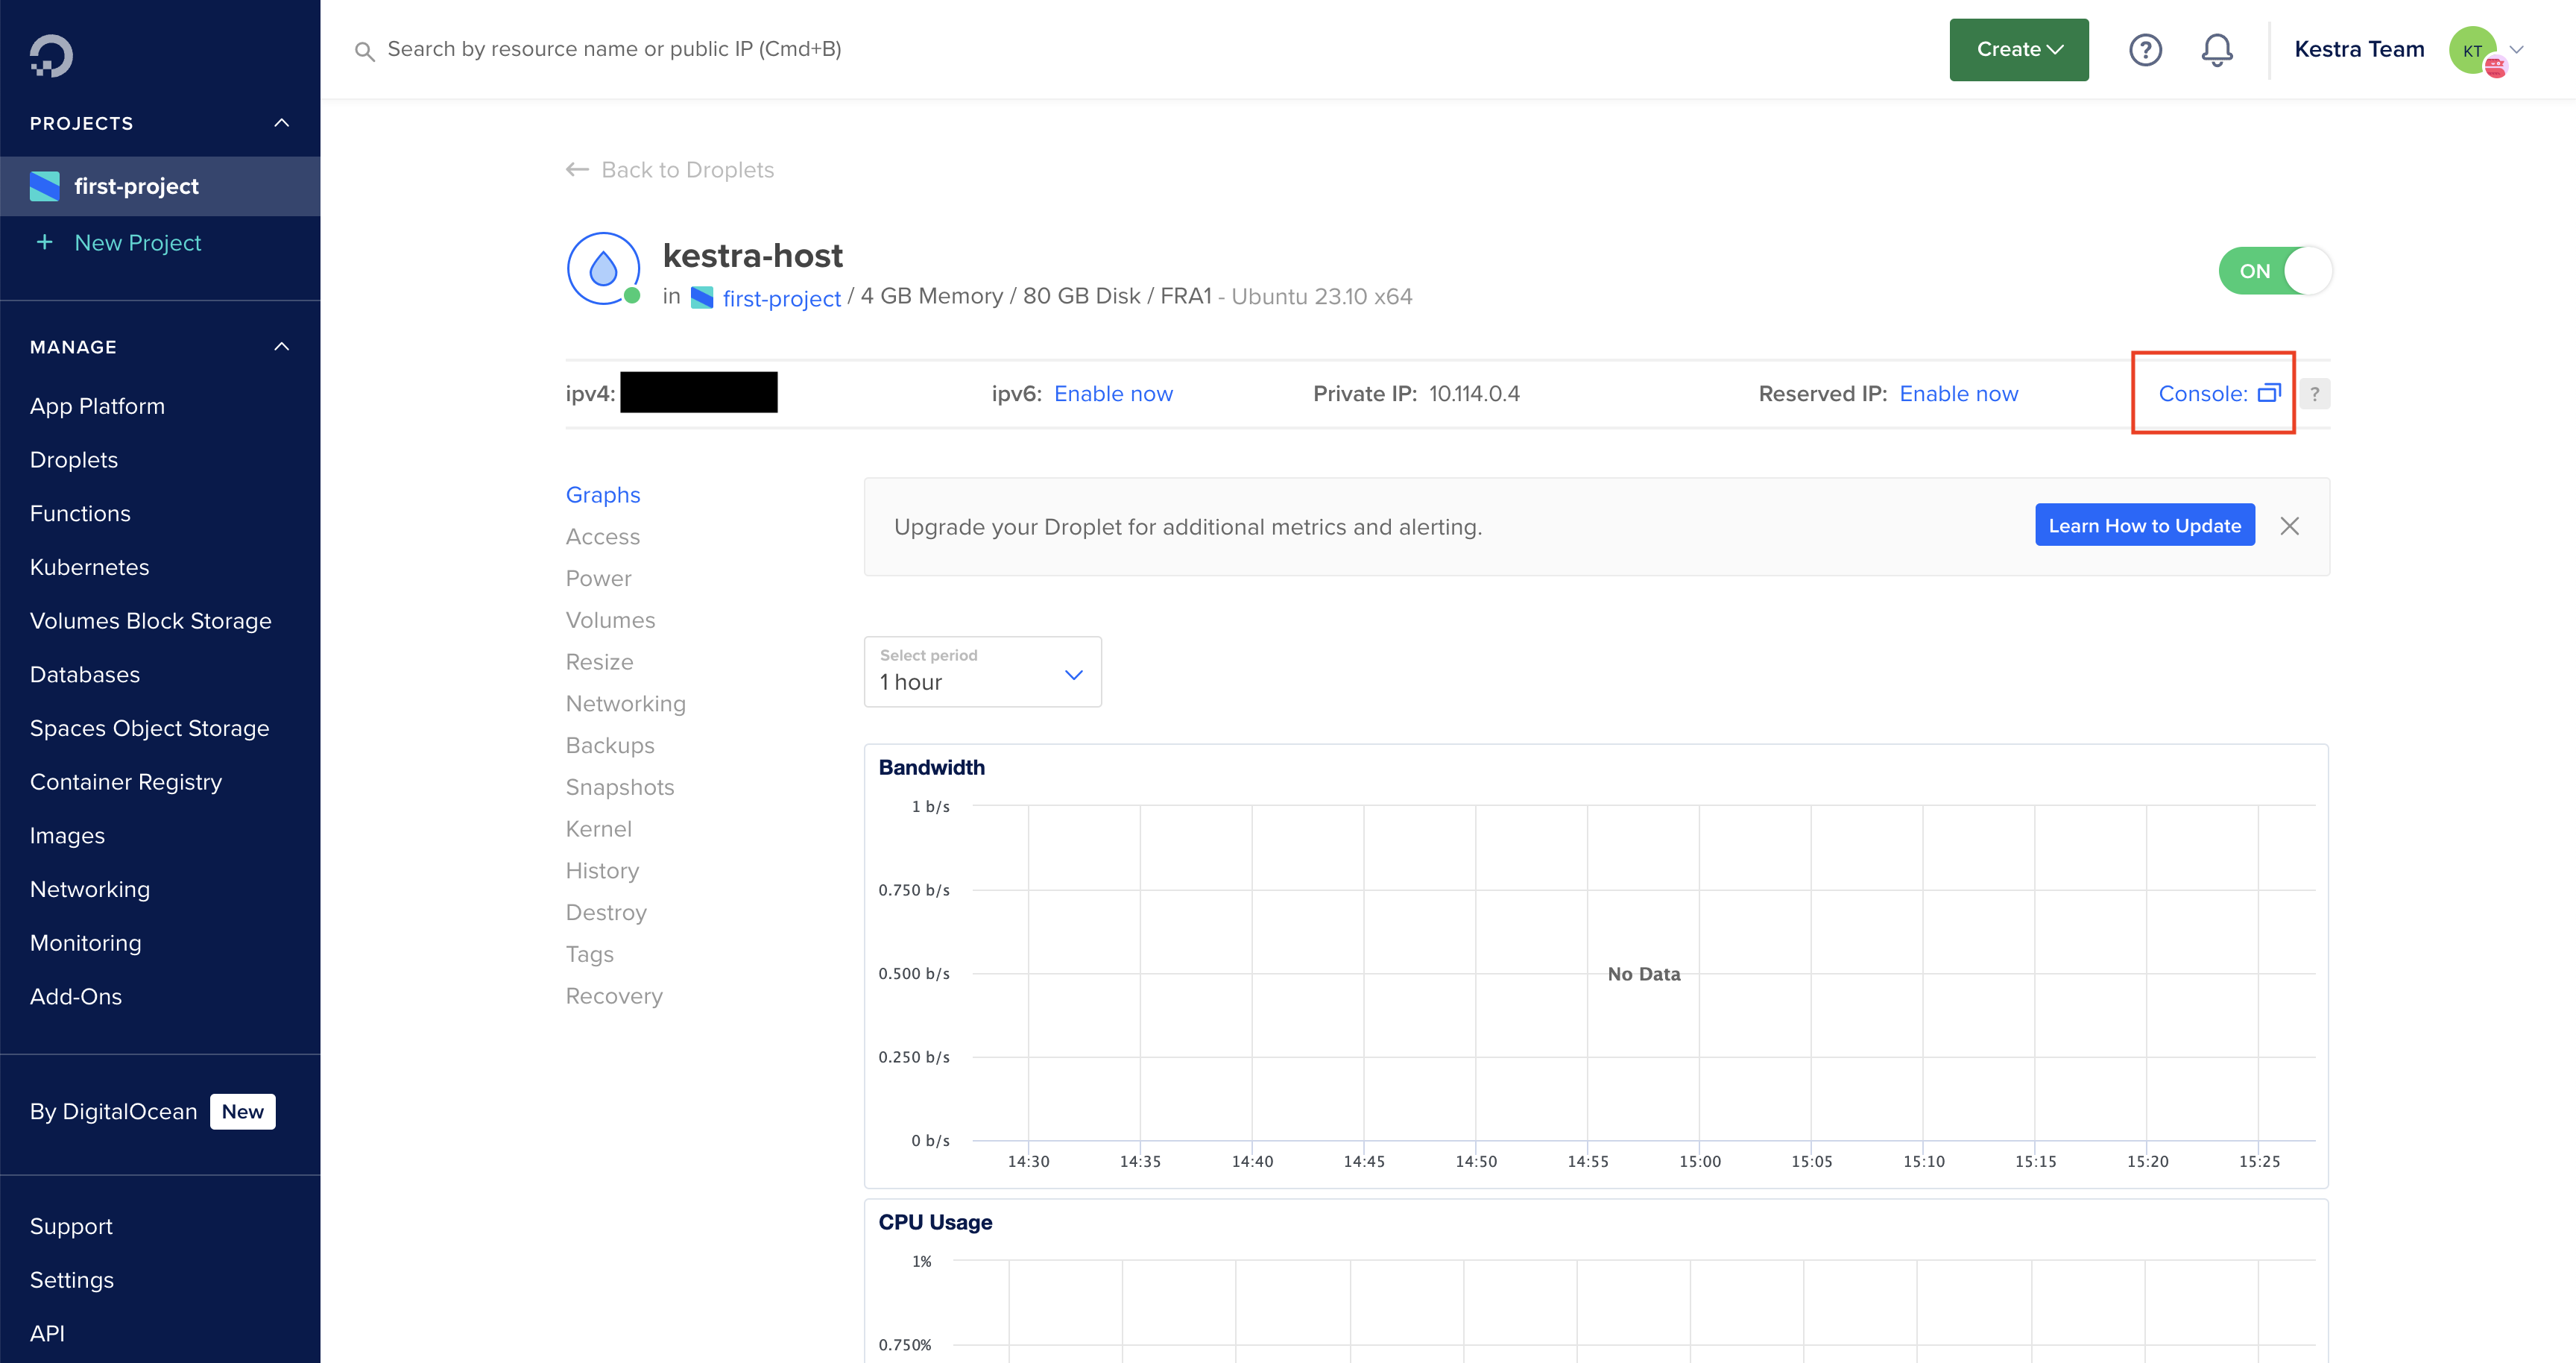
Wait until the virtual machine is up and running. From the Droplets page, you can navigate to the recently created Droplet. From here, you can open the machine’s console by clicking on the Console button at the top.
Install Docker
Once in the console terminal, you can run the commands to install Kestra.
Kestra can be started directly from a .jar binary or using Docker. We use Docker here for a quick setup:
- Install Docker on the Droplet. You can find the last updated instruction on the Docker website.
- Install docker compose.
To check your installation, run sudo docker version and sudo docker compose version. You’re now ready to download and launch the Kestra server.
Install Kestra
Download the official Docker-Compose file:
curl -o docker-compose.yml https://raw.githubusercontent.com/kestra-io/kestra/develop/docker-compose.ymlUse an editor such as Vim to modify the docker-compose.yml, set basic authentication to true, and configure your basic authentication credentials to secure your Kestra instance.
kestra: server: basic-auth: enabled: true username: admin@kestra.io # it must be a valid email address password: kestraNext, use the following command to start the Kestra server:
sudo docker compose up -dYou can now access the Kestra UI at http://<public_droplet_ip>:8080 and start developing flows.
Launch DigitalOcean Database
This first installation relies on a PostgreSQL database running alongside the Kestra server - on the VM instance (see the PostgreSQL service running thanks to the docker-compose).
For a simple proof of concept (PoC), you can keep the PostgreSQL database running in Docker.
However, for a production-grade installation, we recommend a managed database service such as DigitalOcean Database.
Launch a PostgreSQL database using DigitalOcean Database
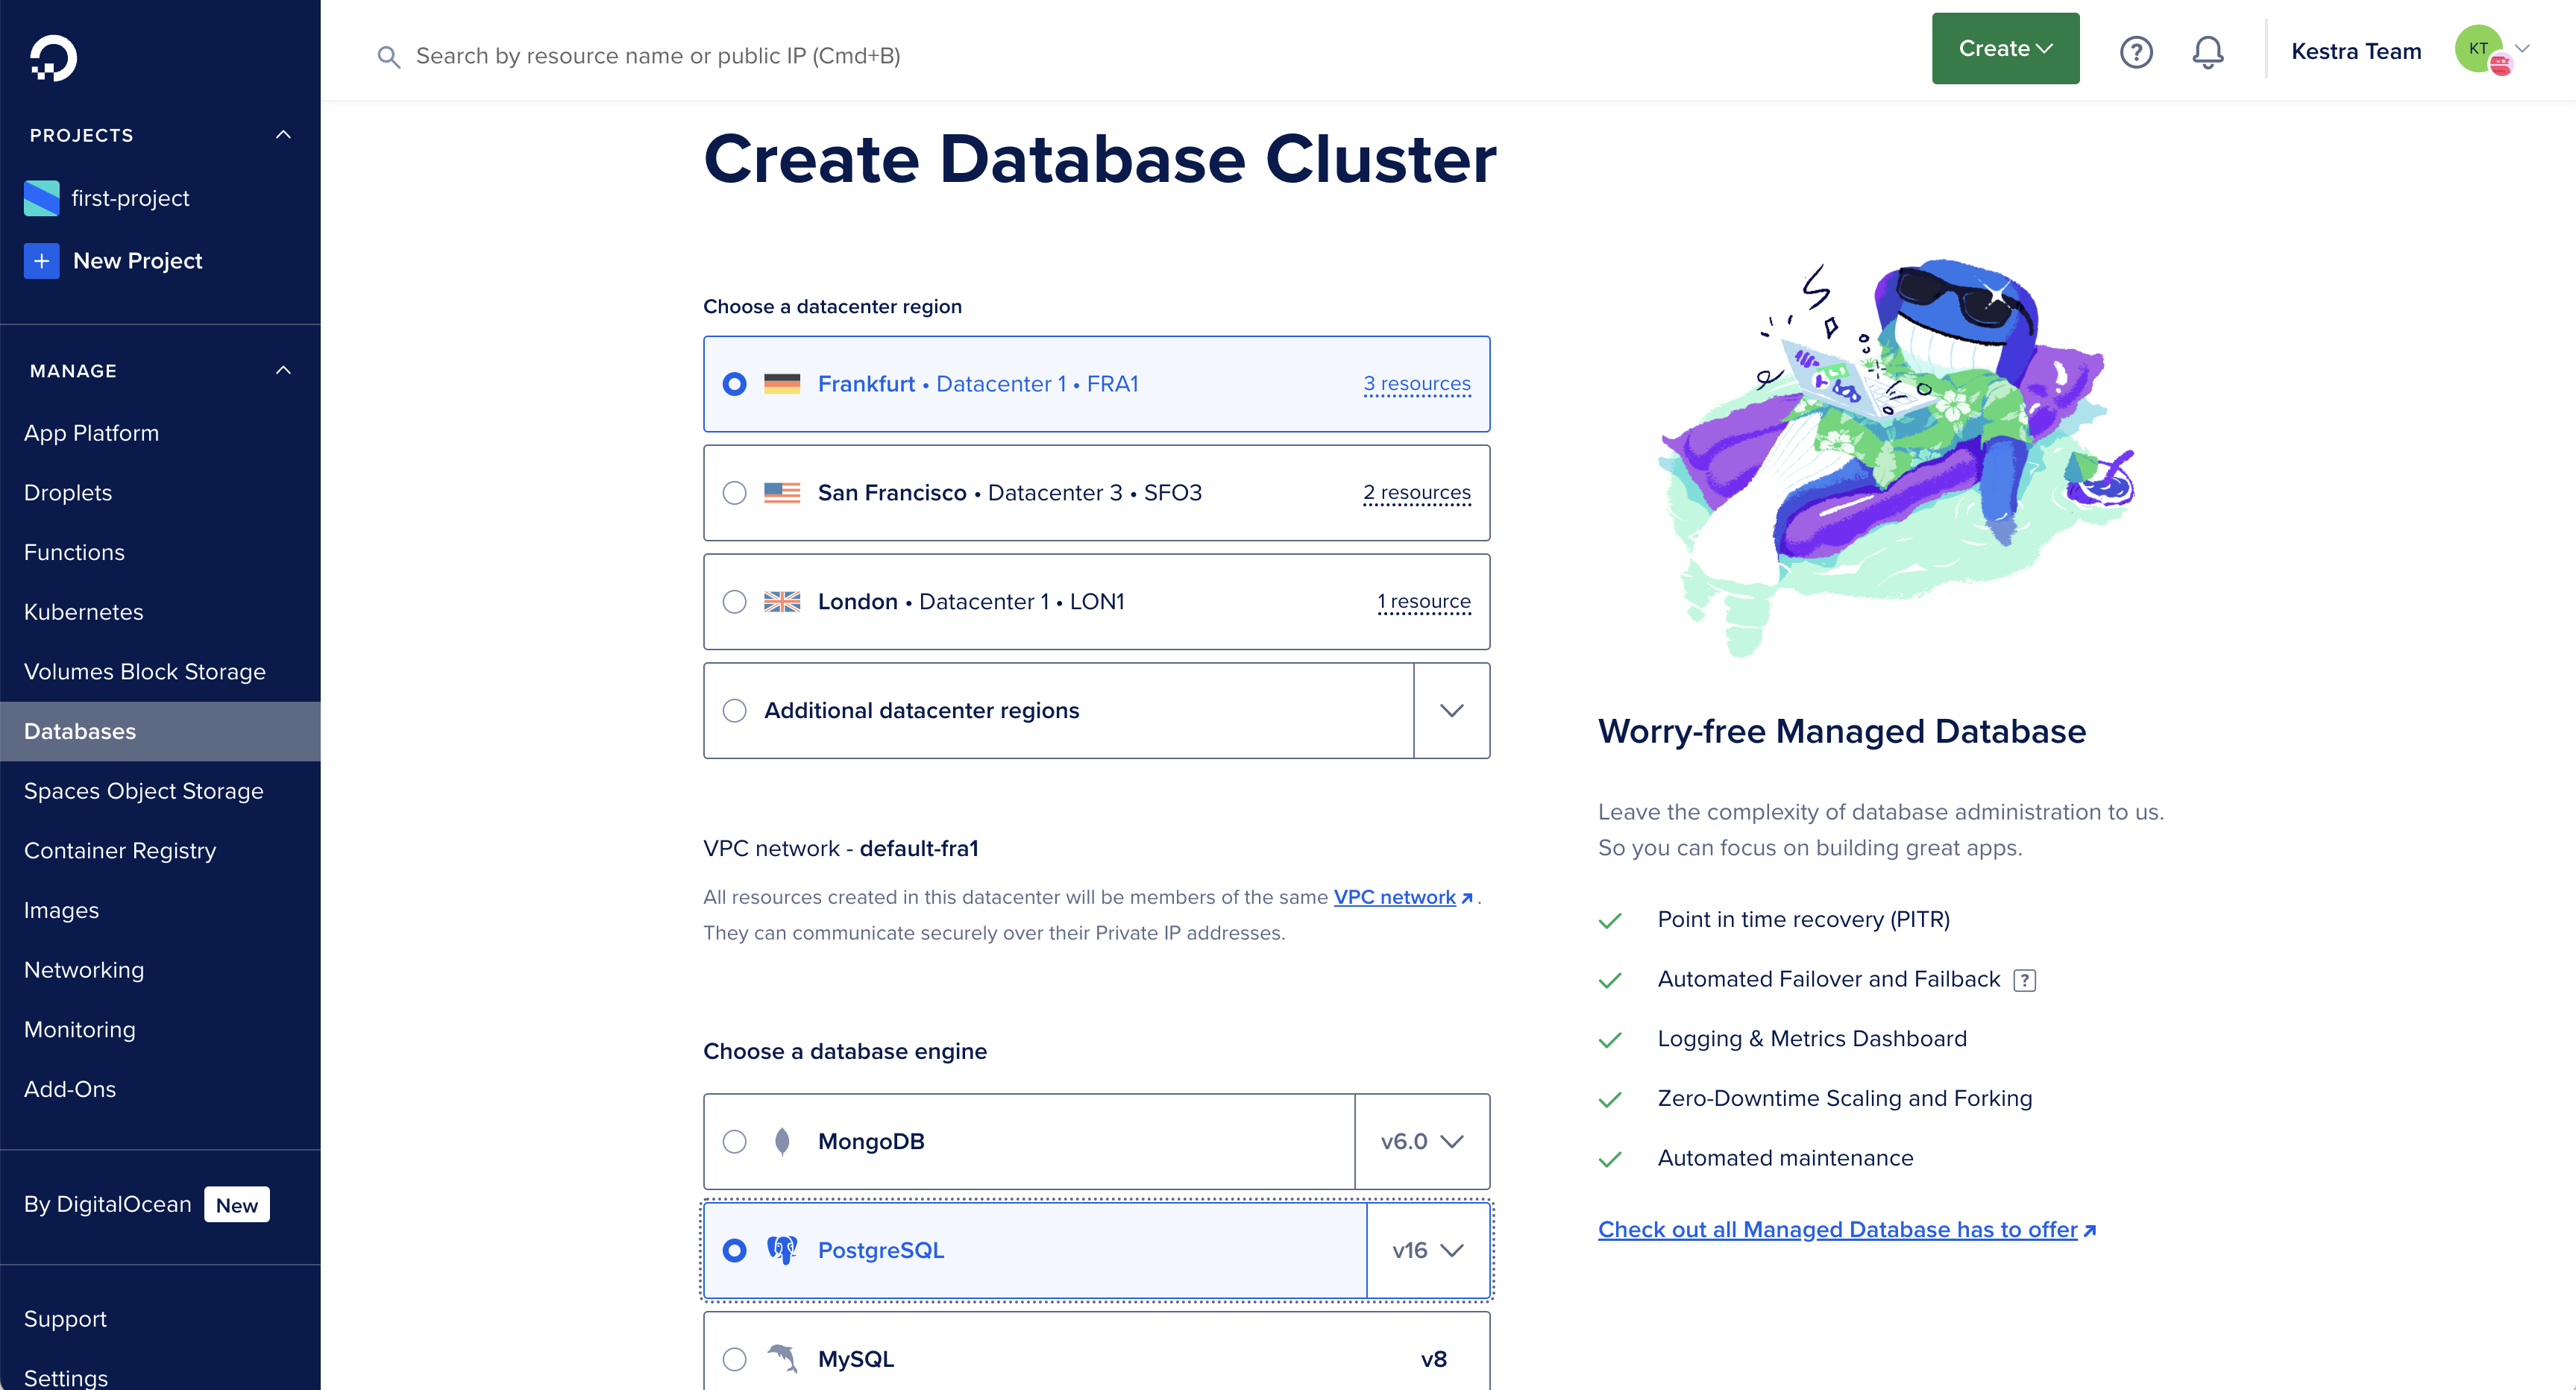
- Go to the DigitalOcean Databases.
- Click on
Create Databasebutton on the top. - Choose an appropriate region and select
PostgreSQLas the database engine (Kestra also supports MySQL, but PostgreSQL is recommended). - Choose the database configuration as per your requirement.
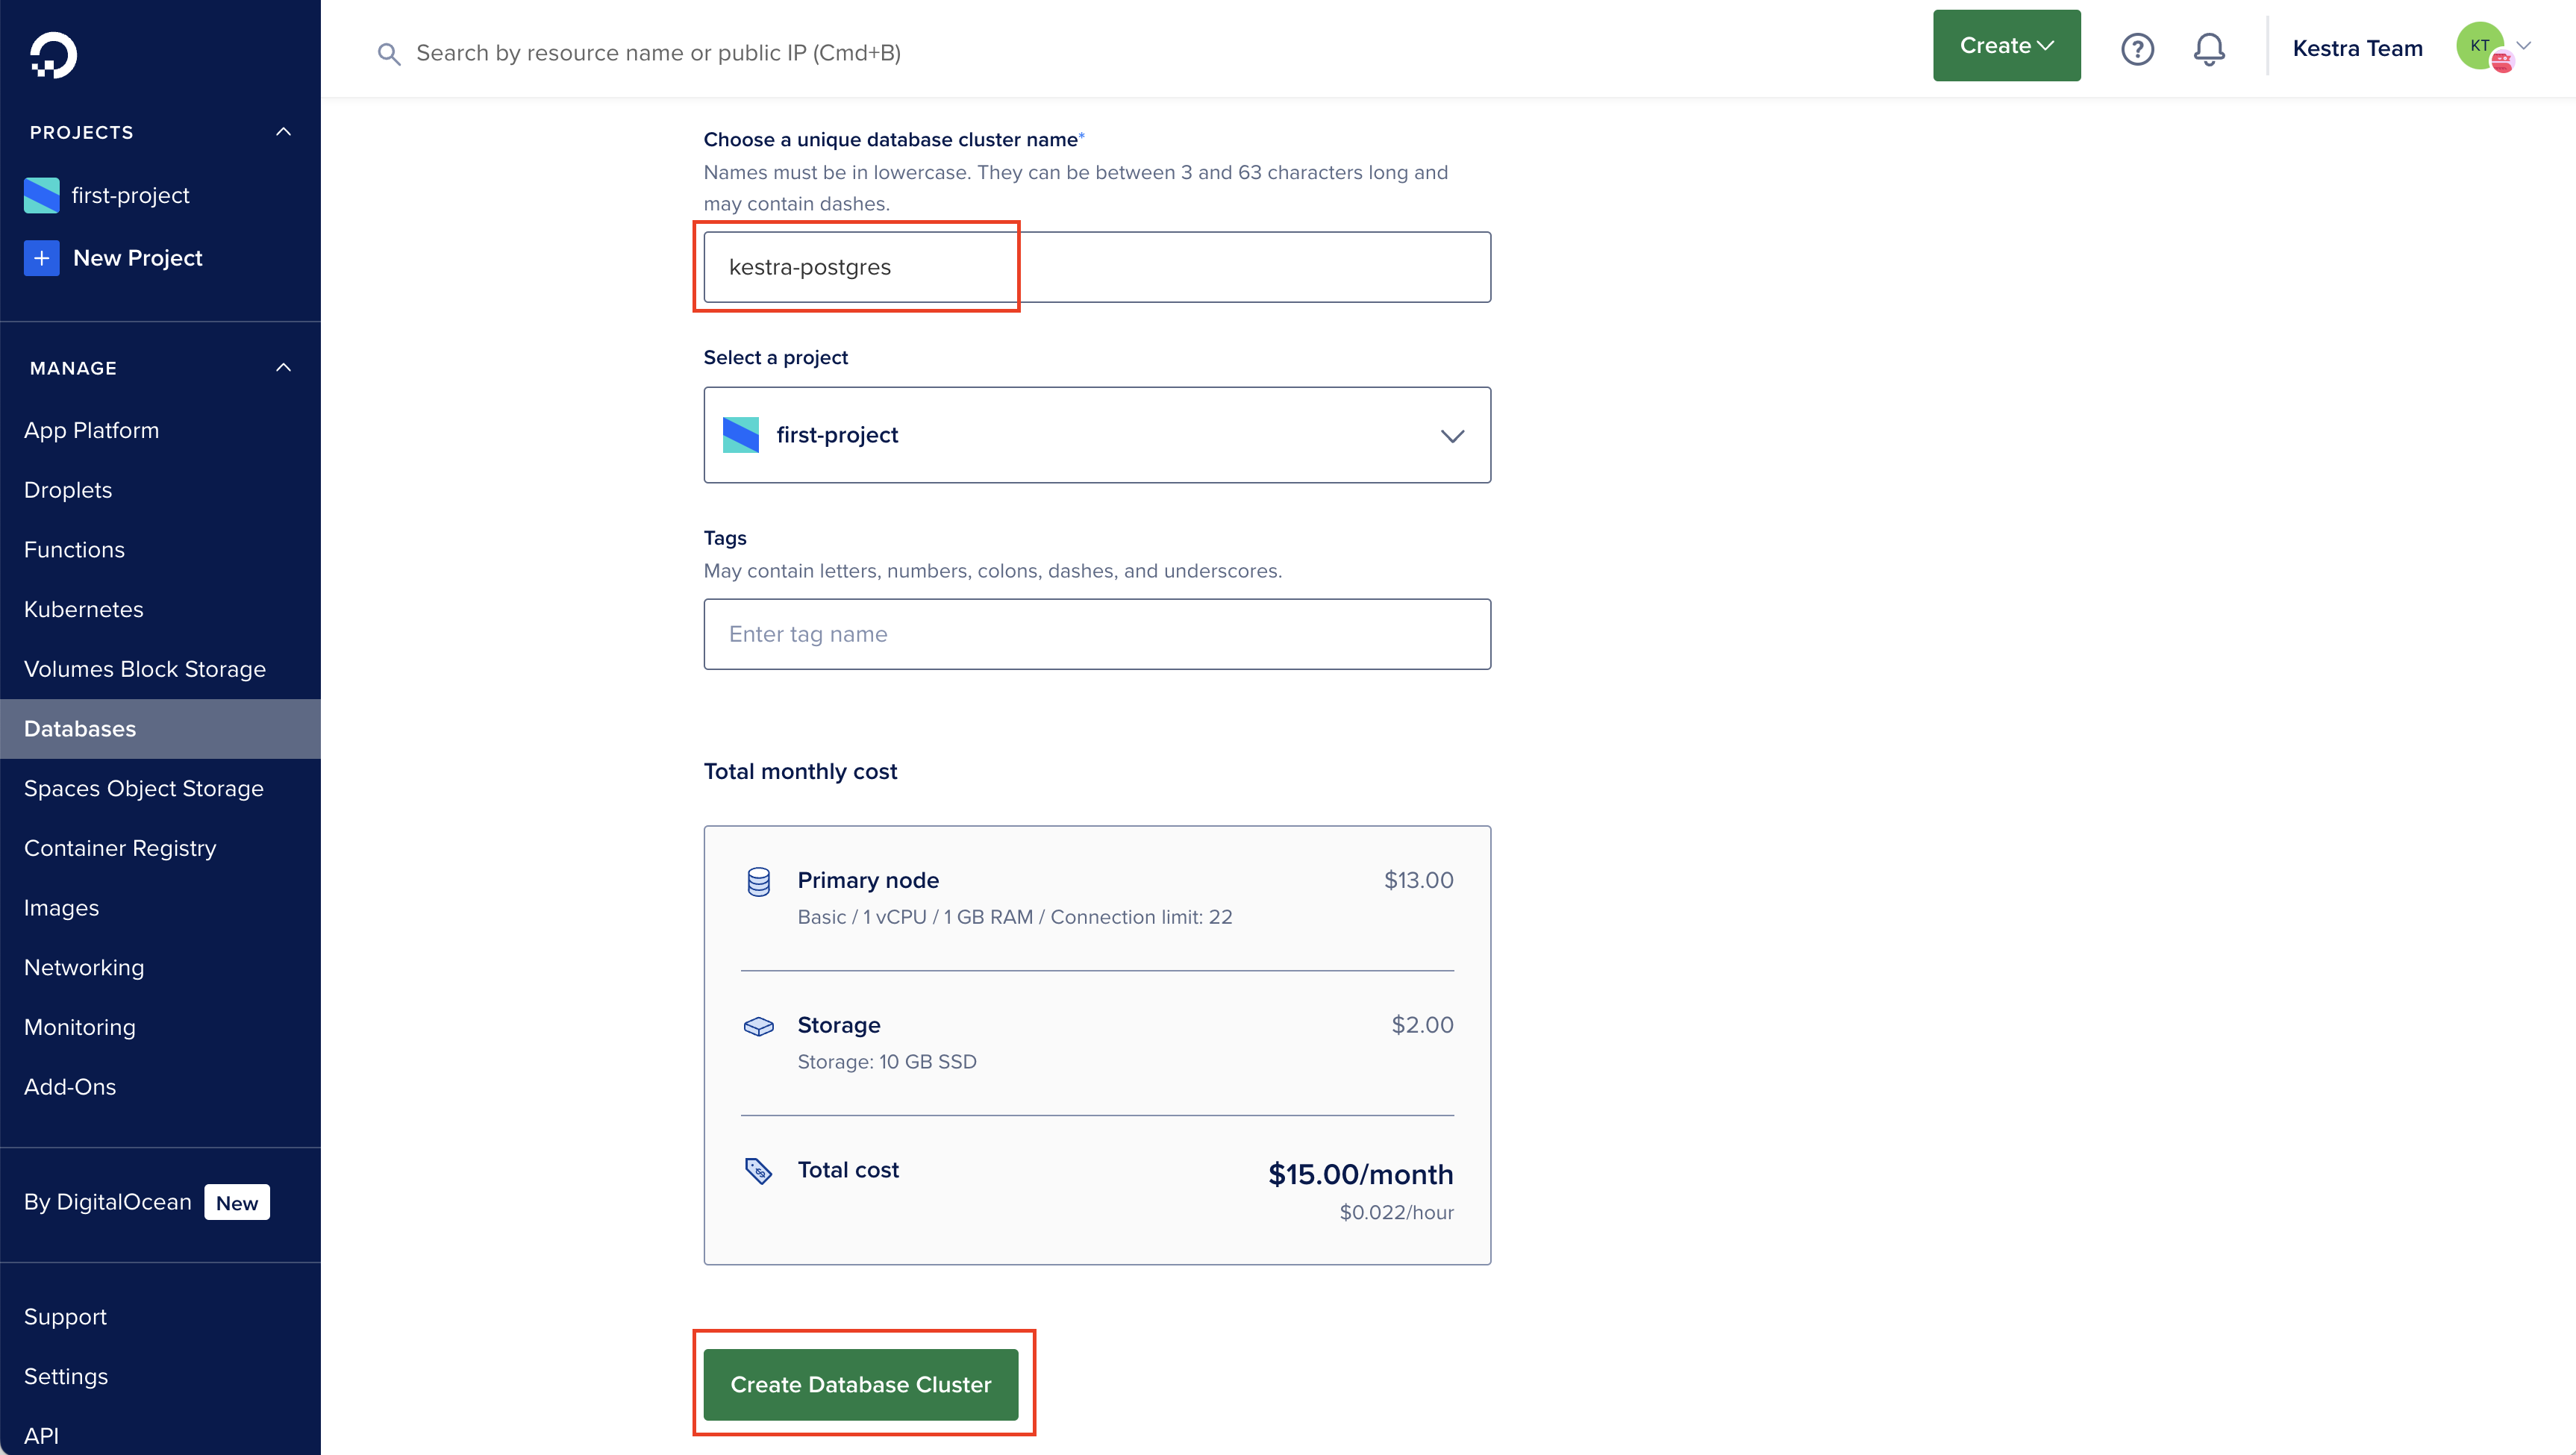
- Provide an appropriate database cluster name.
- Click on the
Create Database Clusterbutton at the bottom of the page. - Wait for the database to be provisioned. Generally, this takes around 5 minutes.

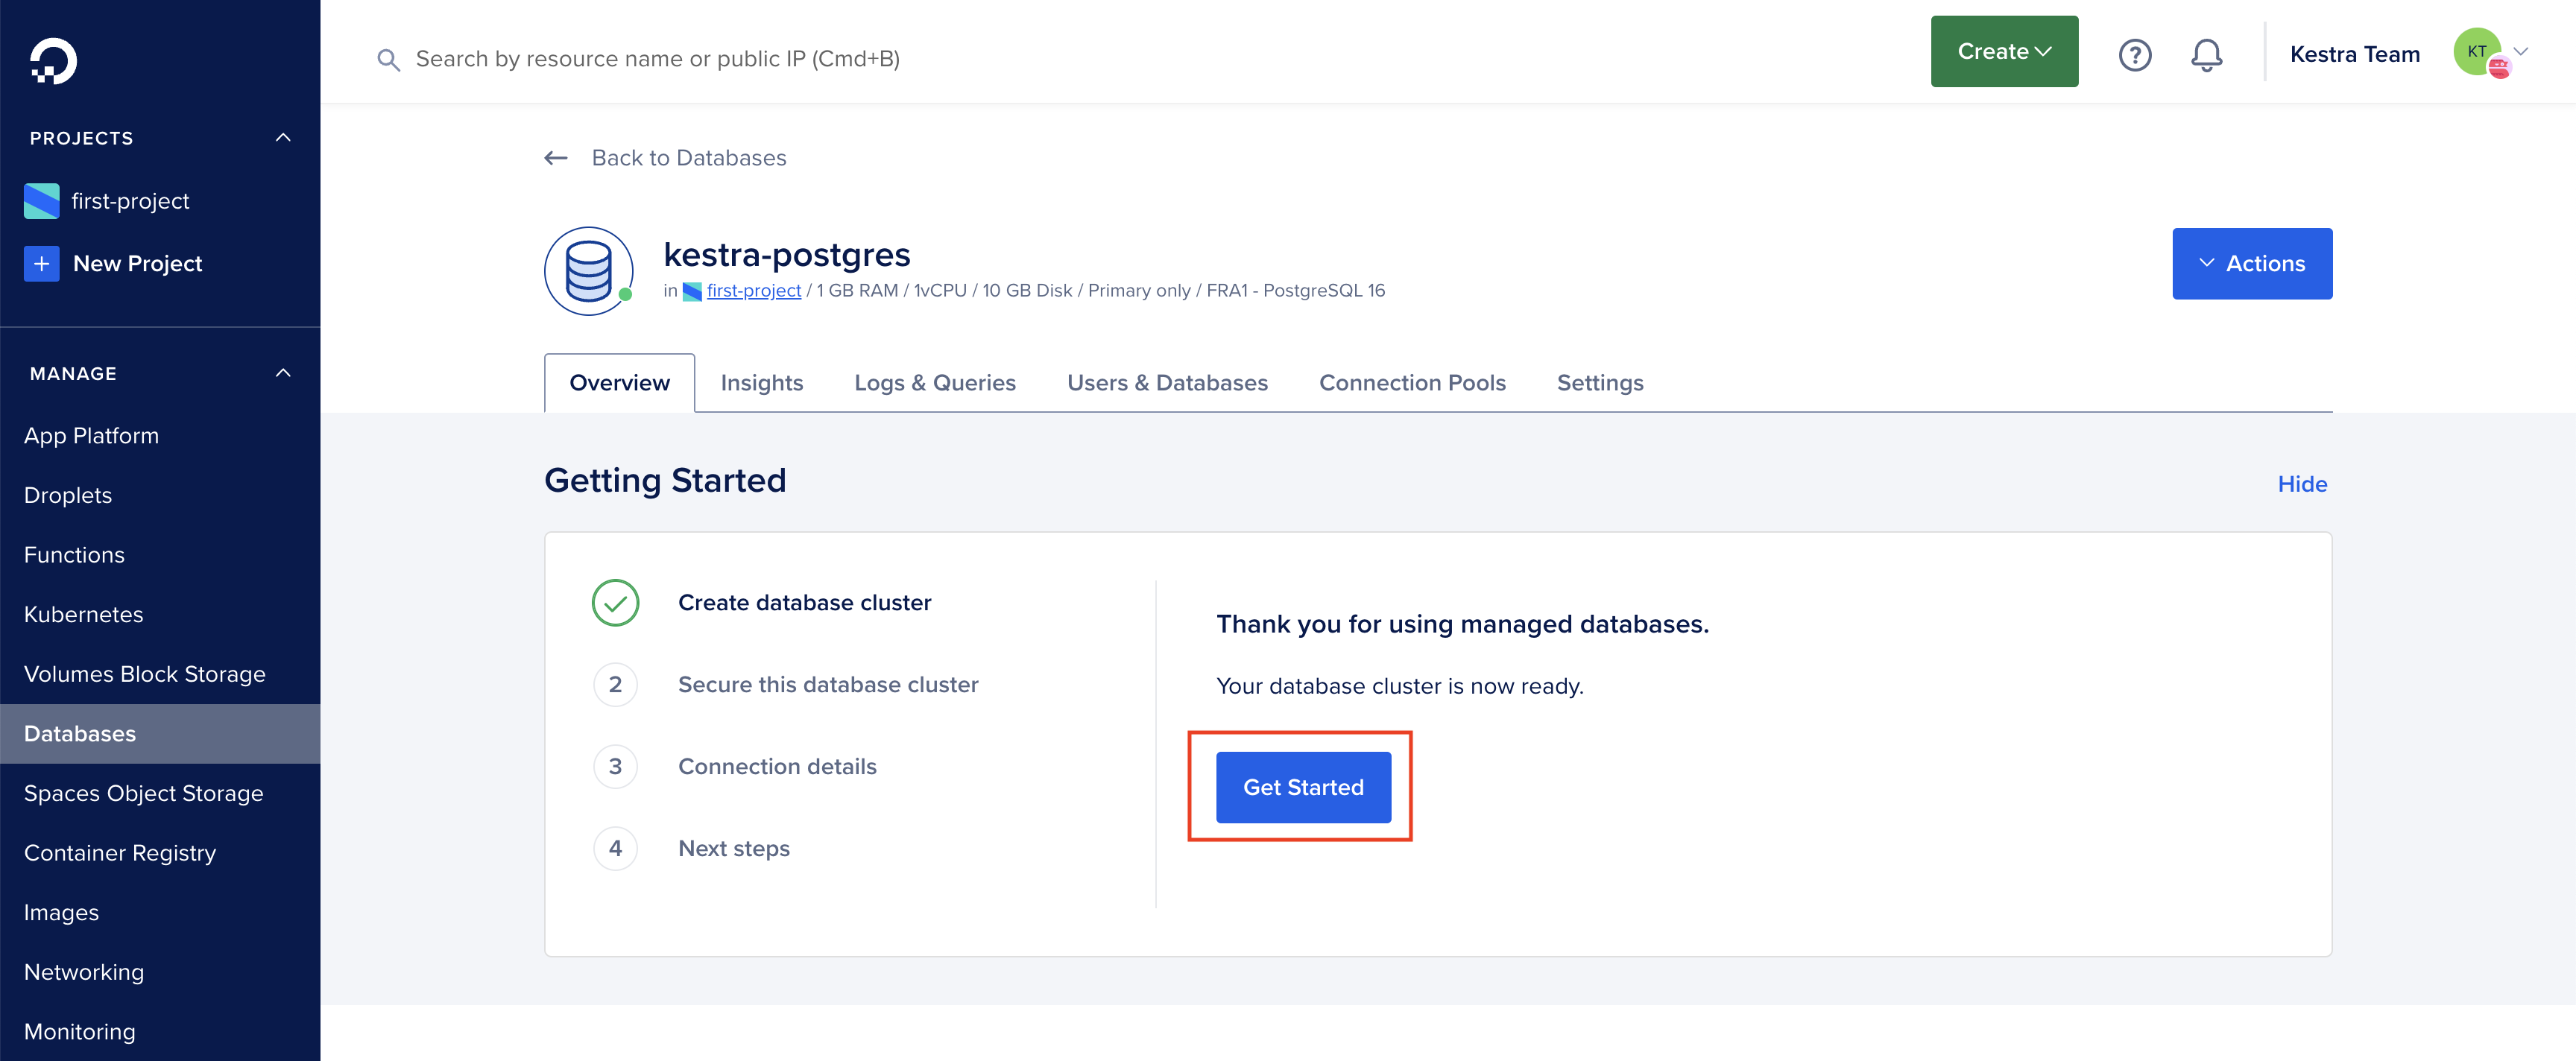
- Once the database is ready, you can click on the
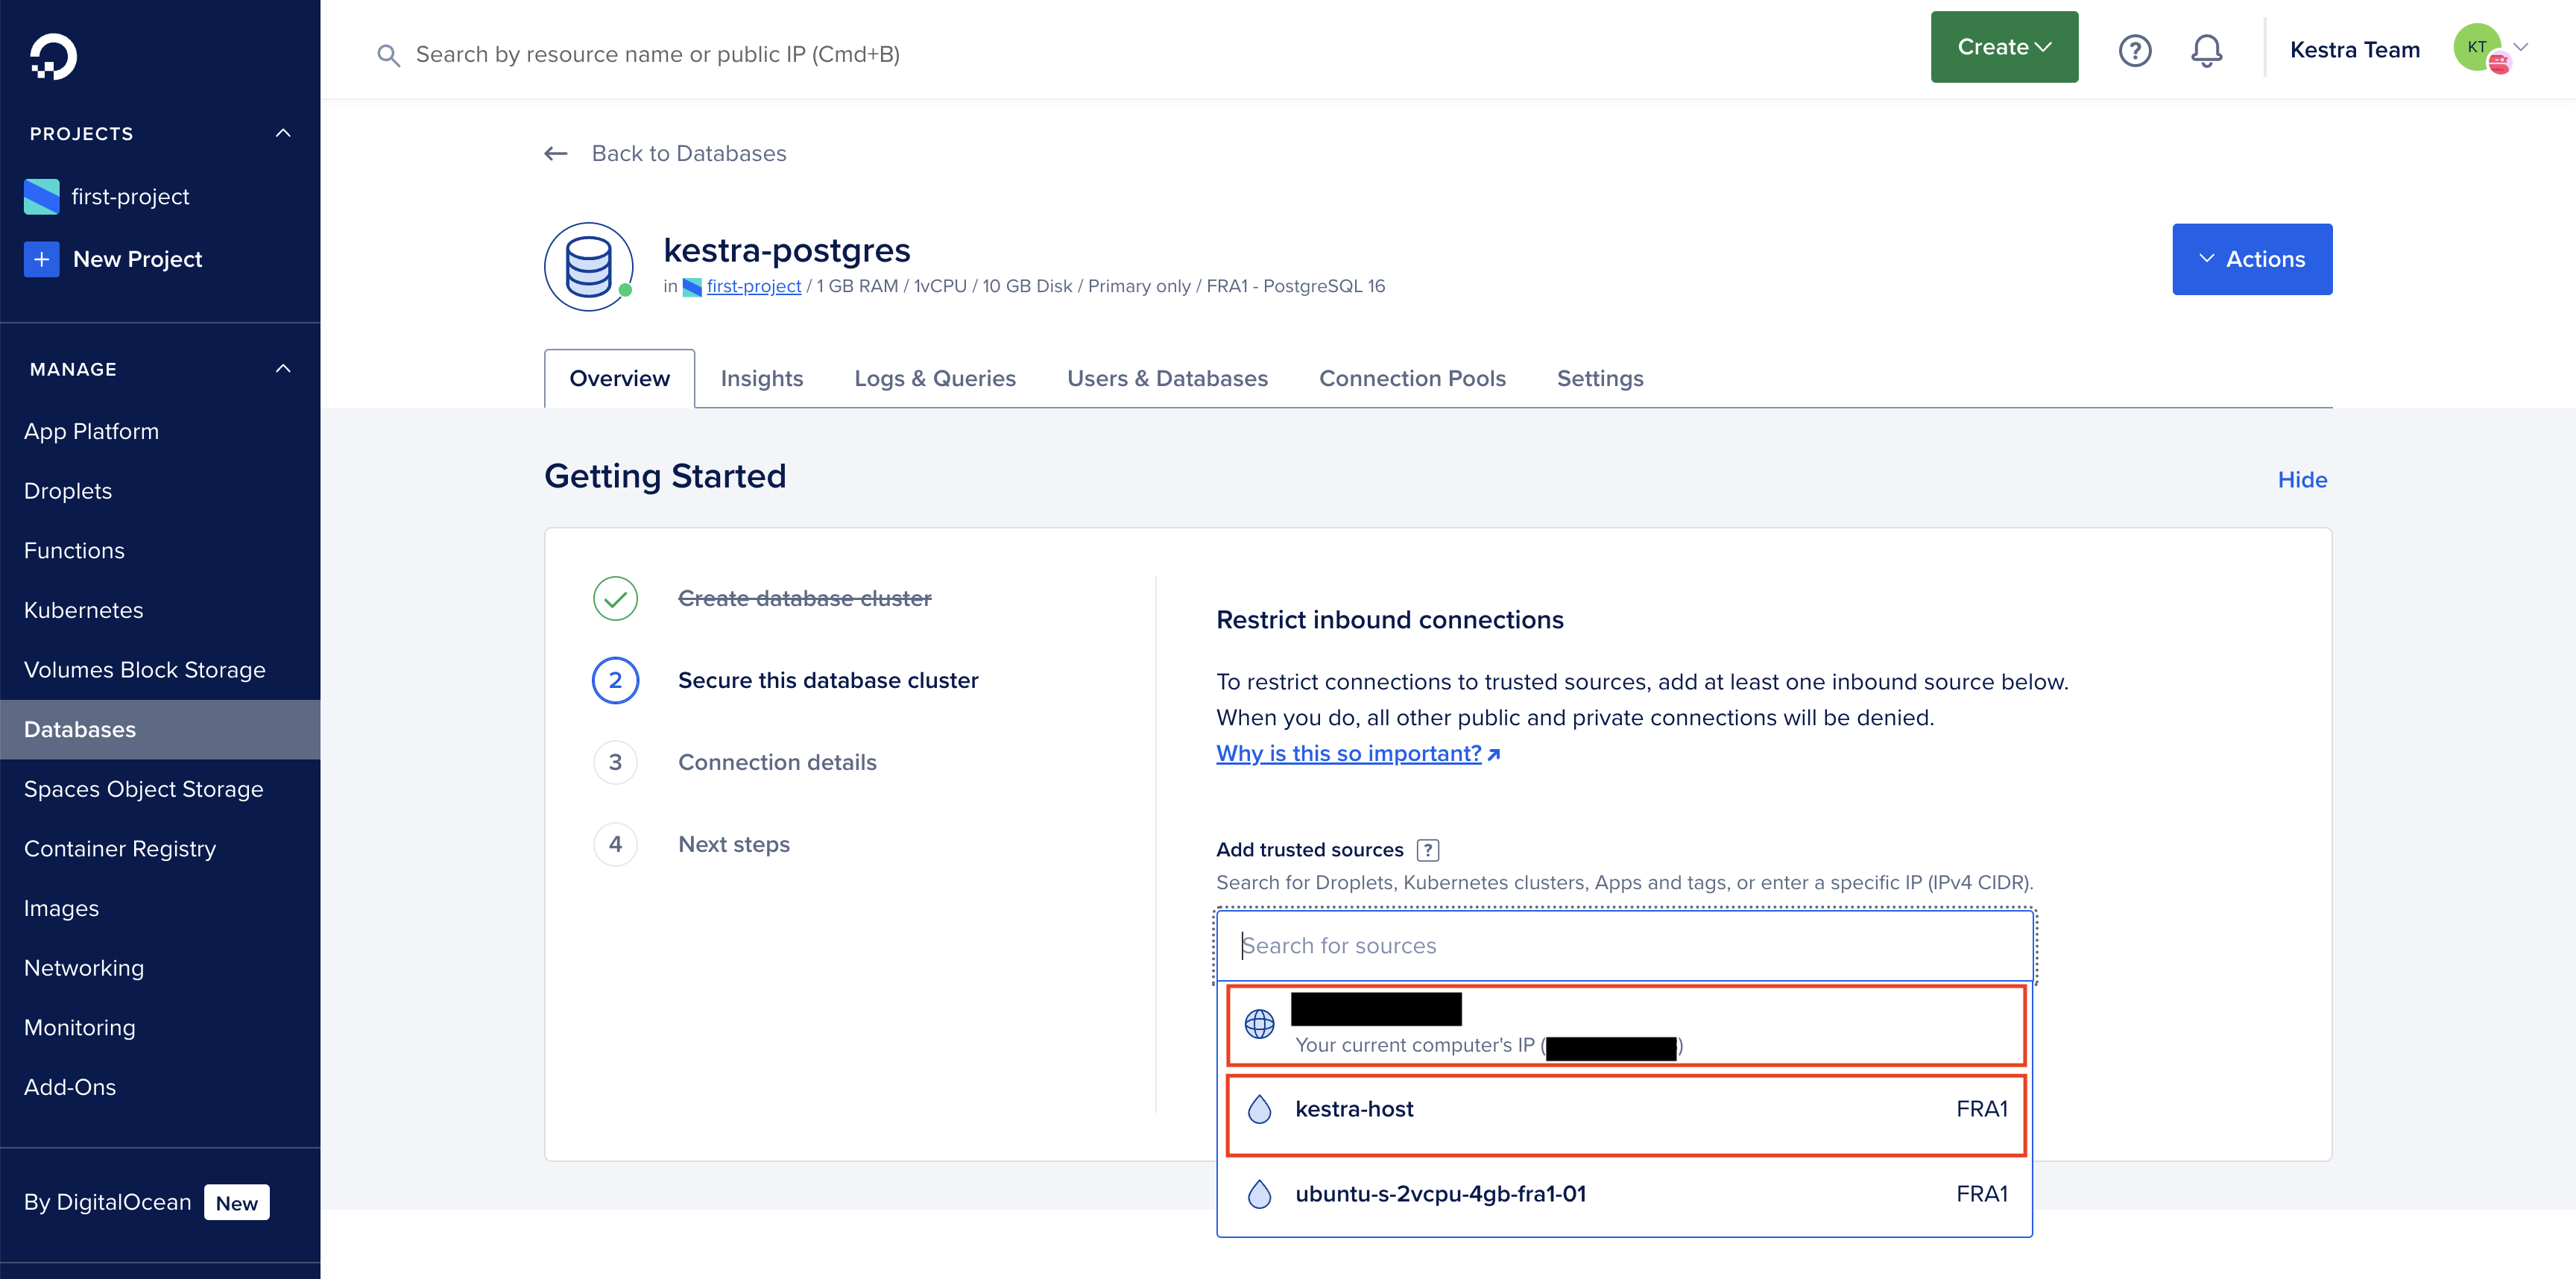
Get Startedbutton. - In the
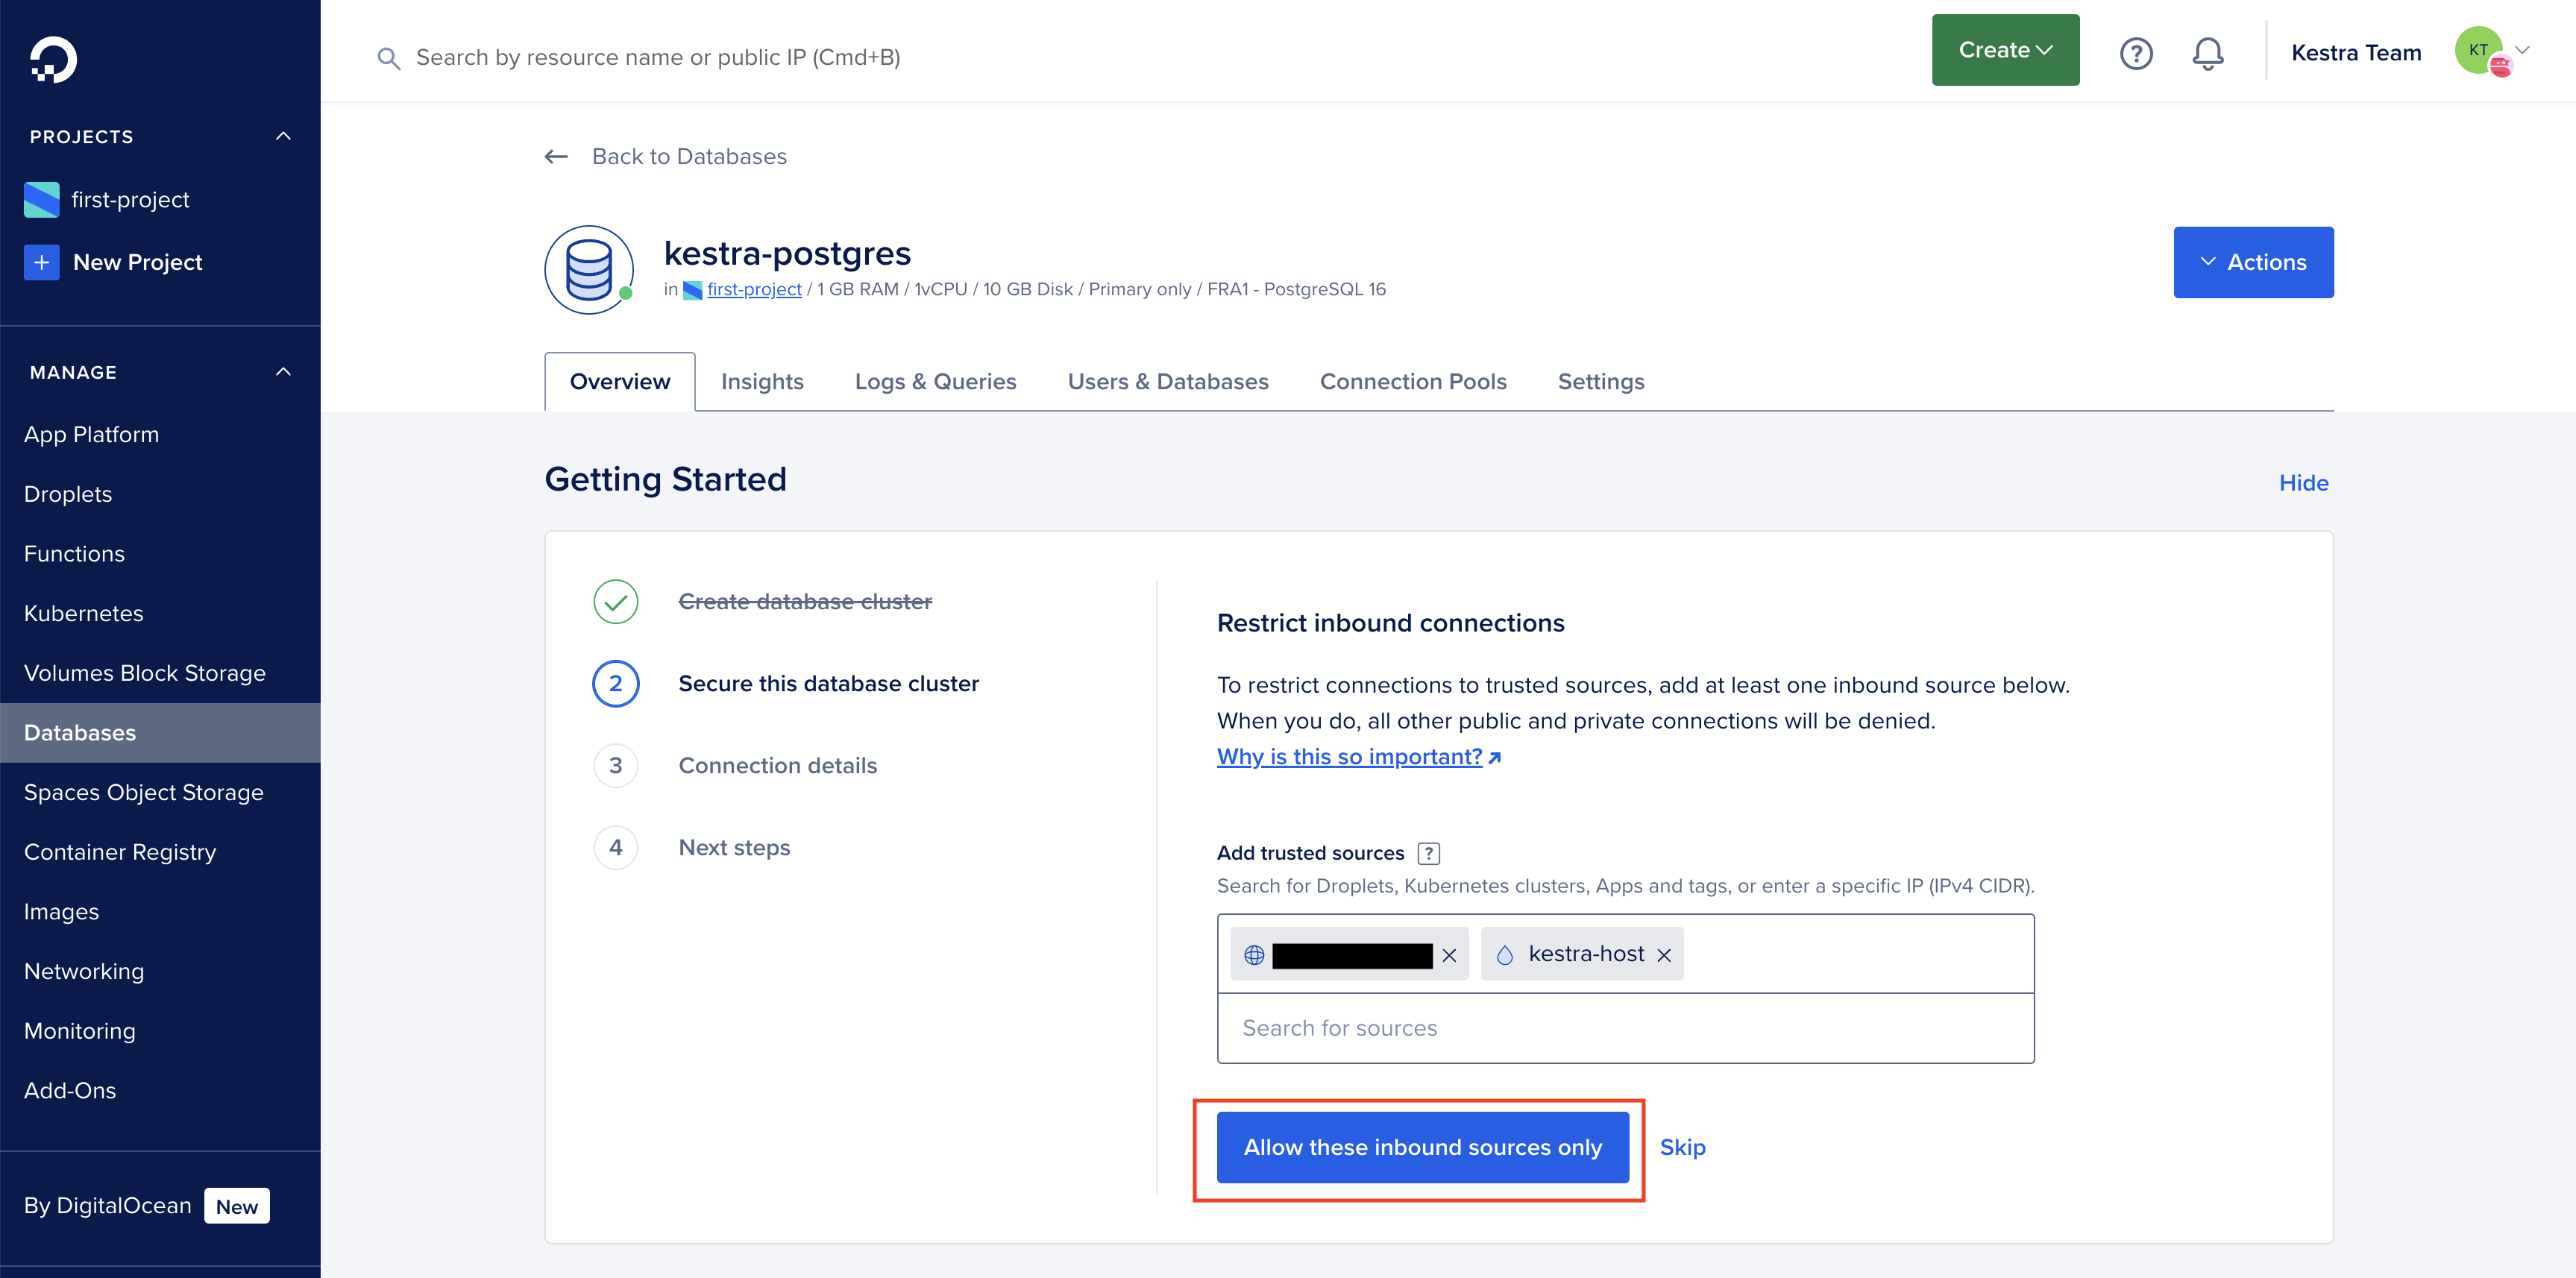
Add trusted sourcesdropbox, you can select your computer (in case you want to connect to this database from the PostgreSQL client running on your computer) and thekestra-hostdroplet created in the earlier section. - Click on
Allow these inbound sources only. - On this page, ensure
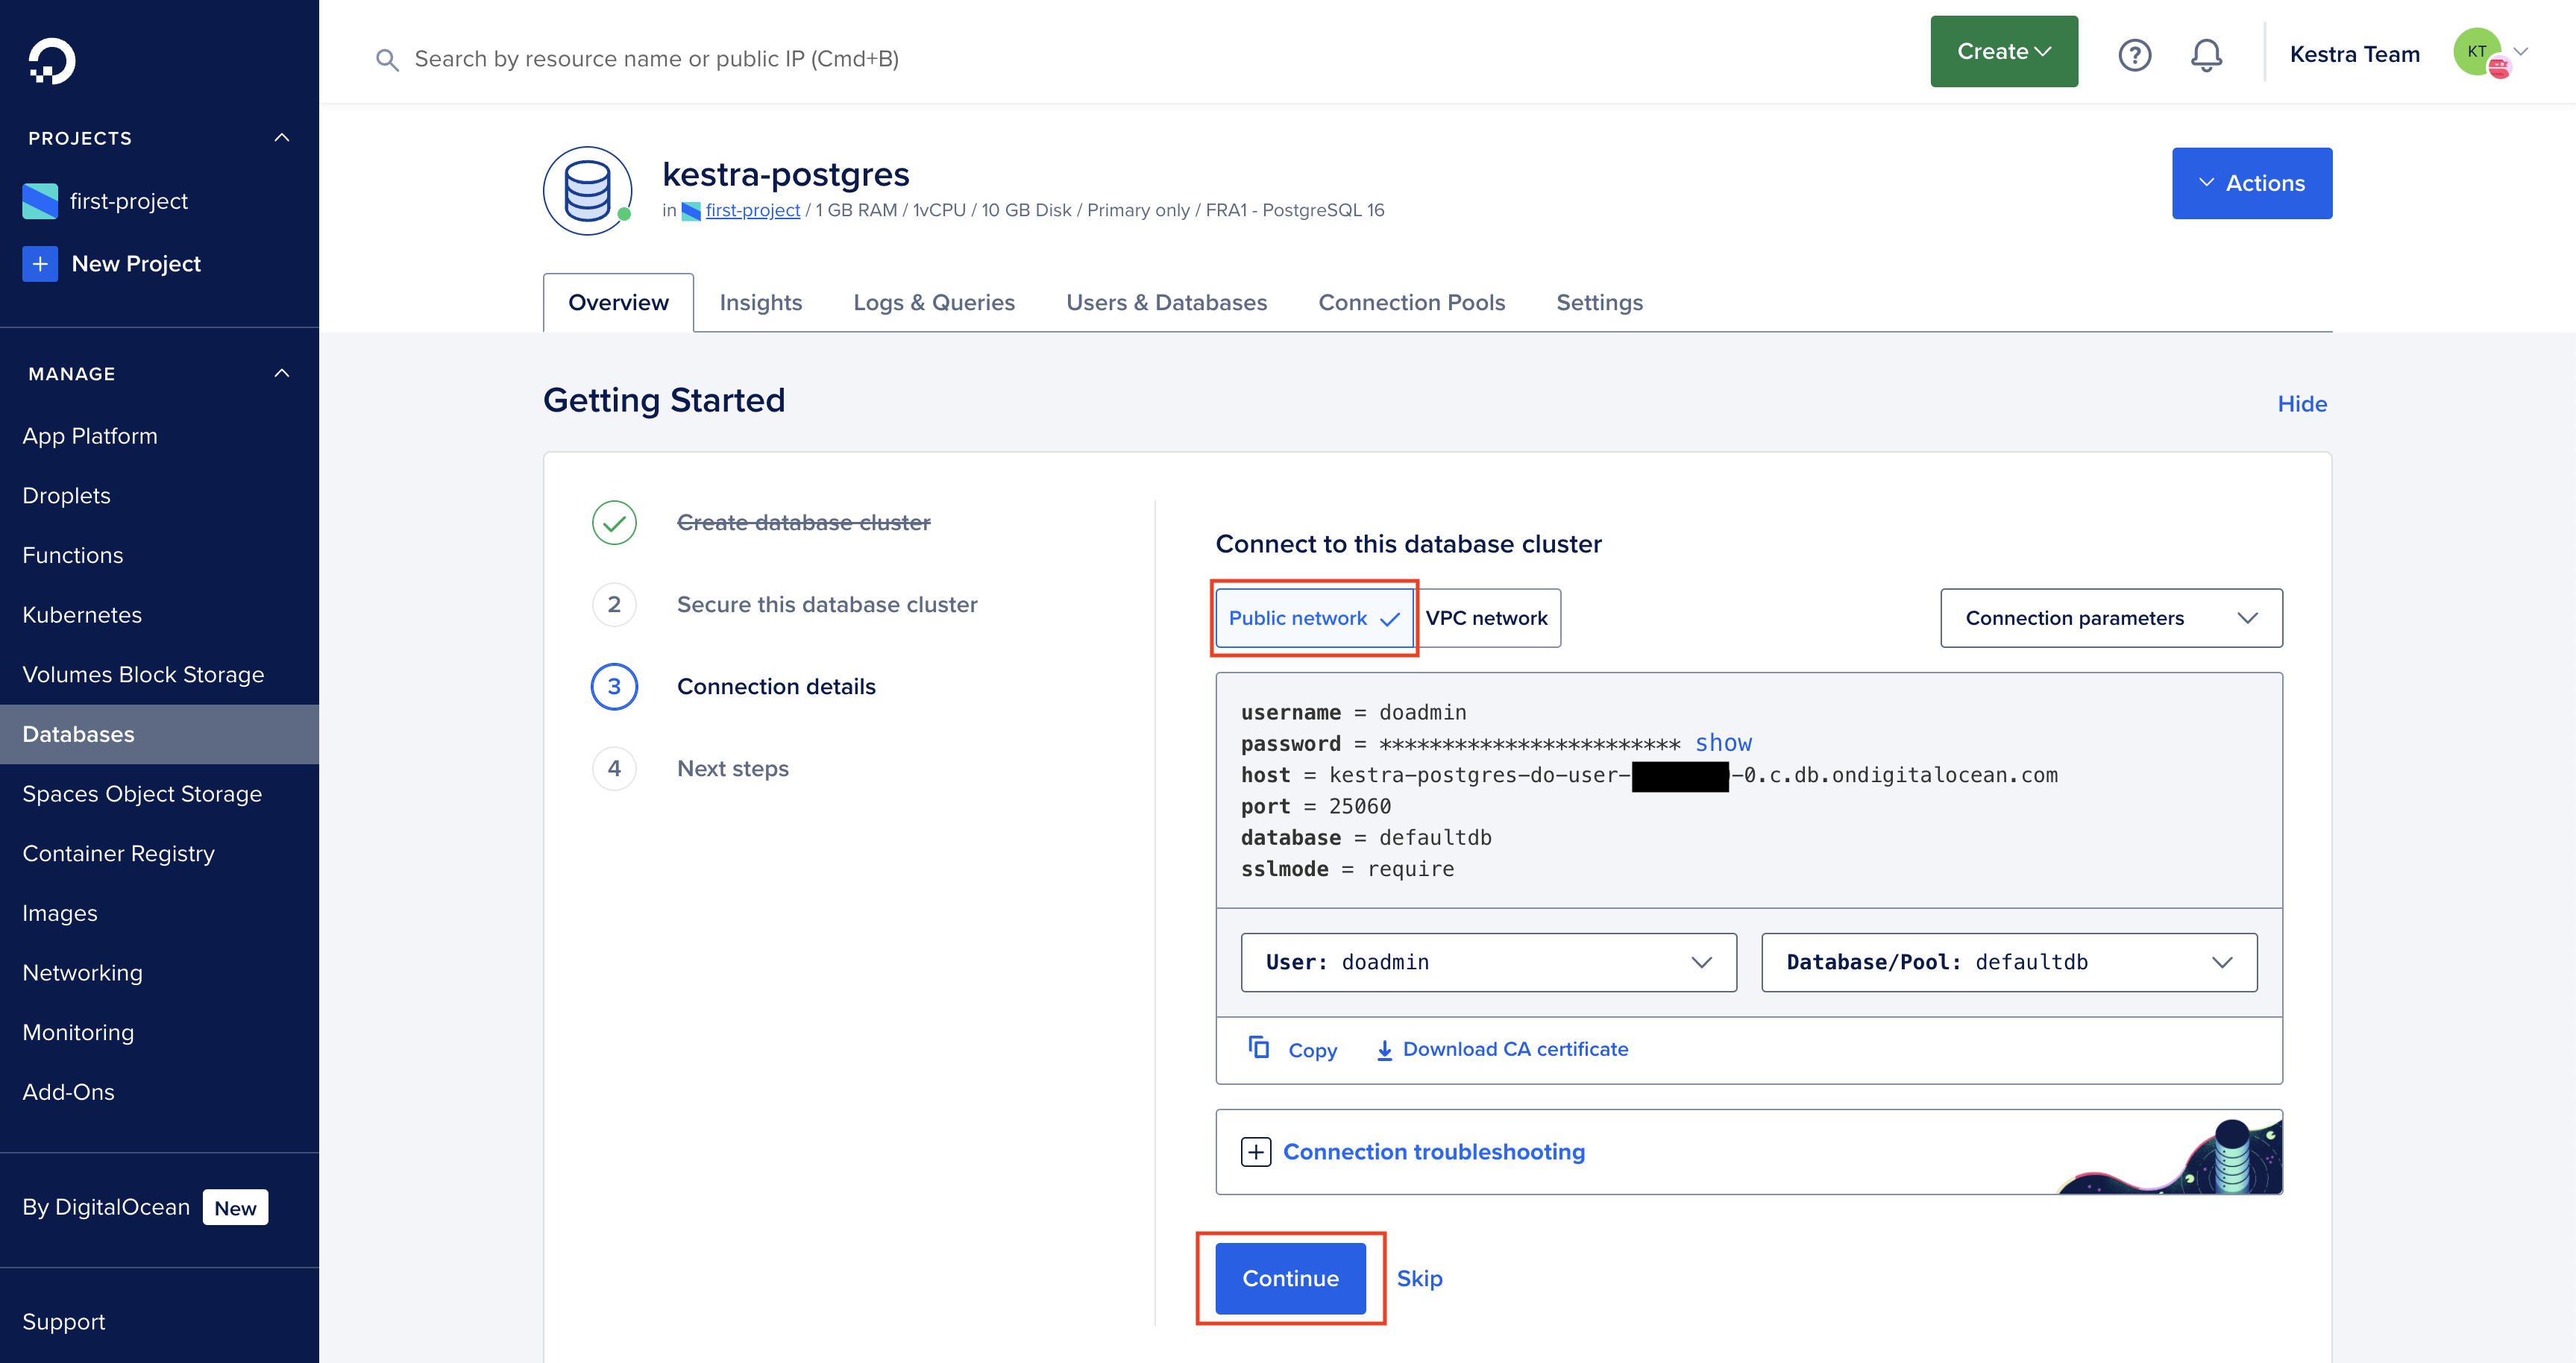
Public networkis selected on the top. Take a note of the Connection Details that appear, and click onContinue. - On the next page, click on
Great, I'm donebutton.
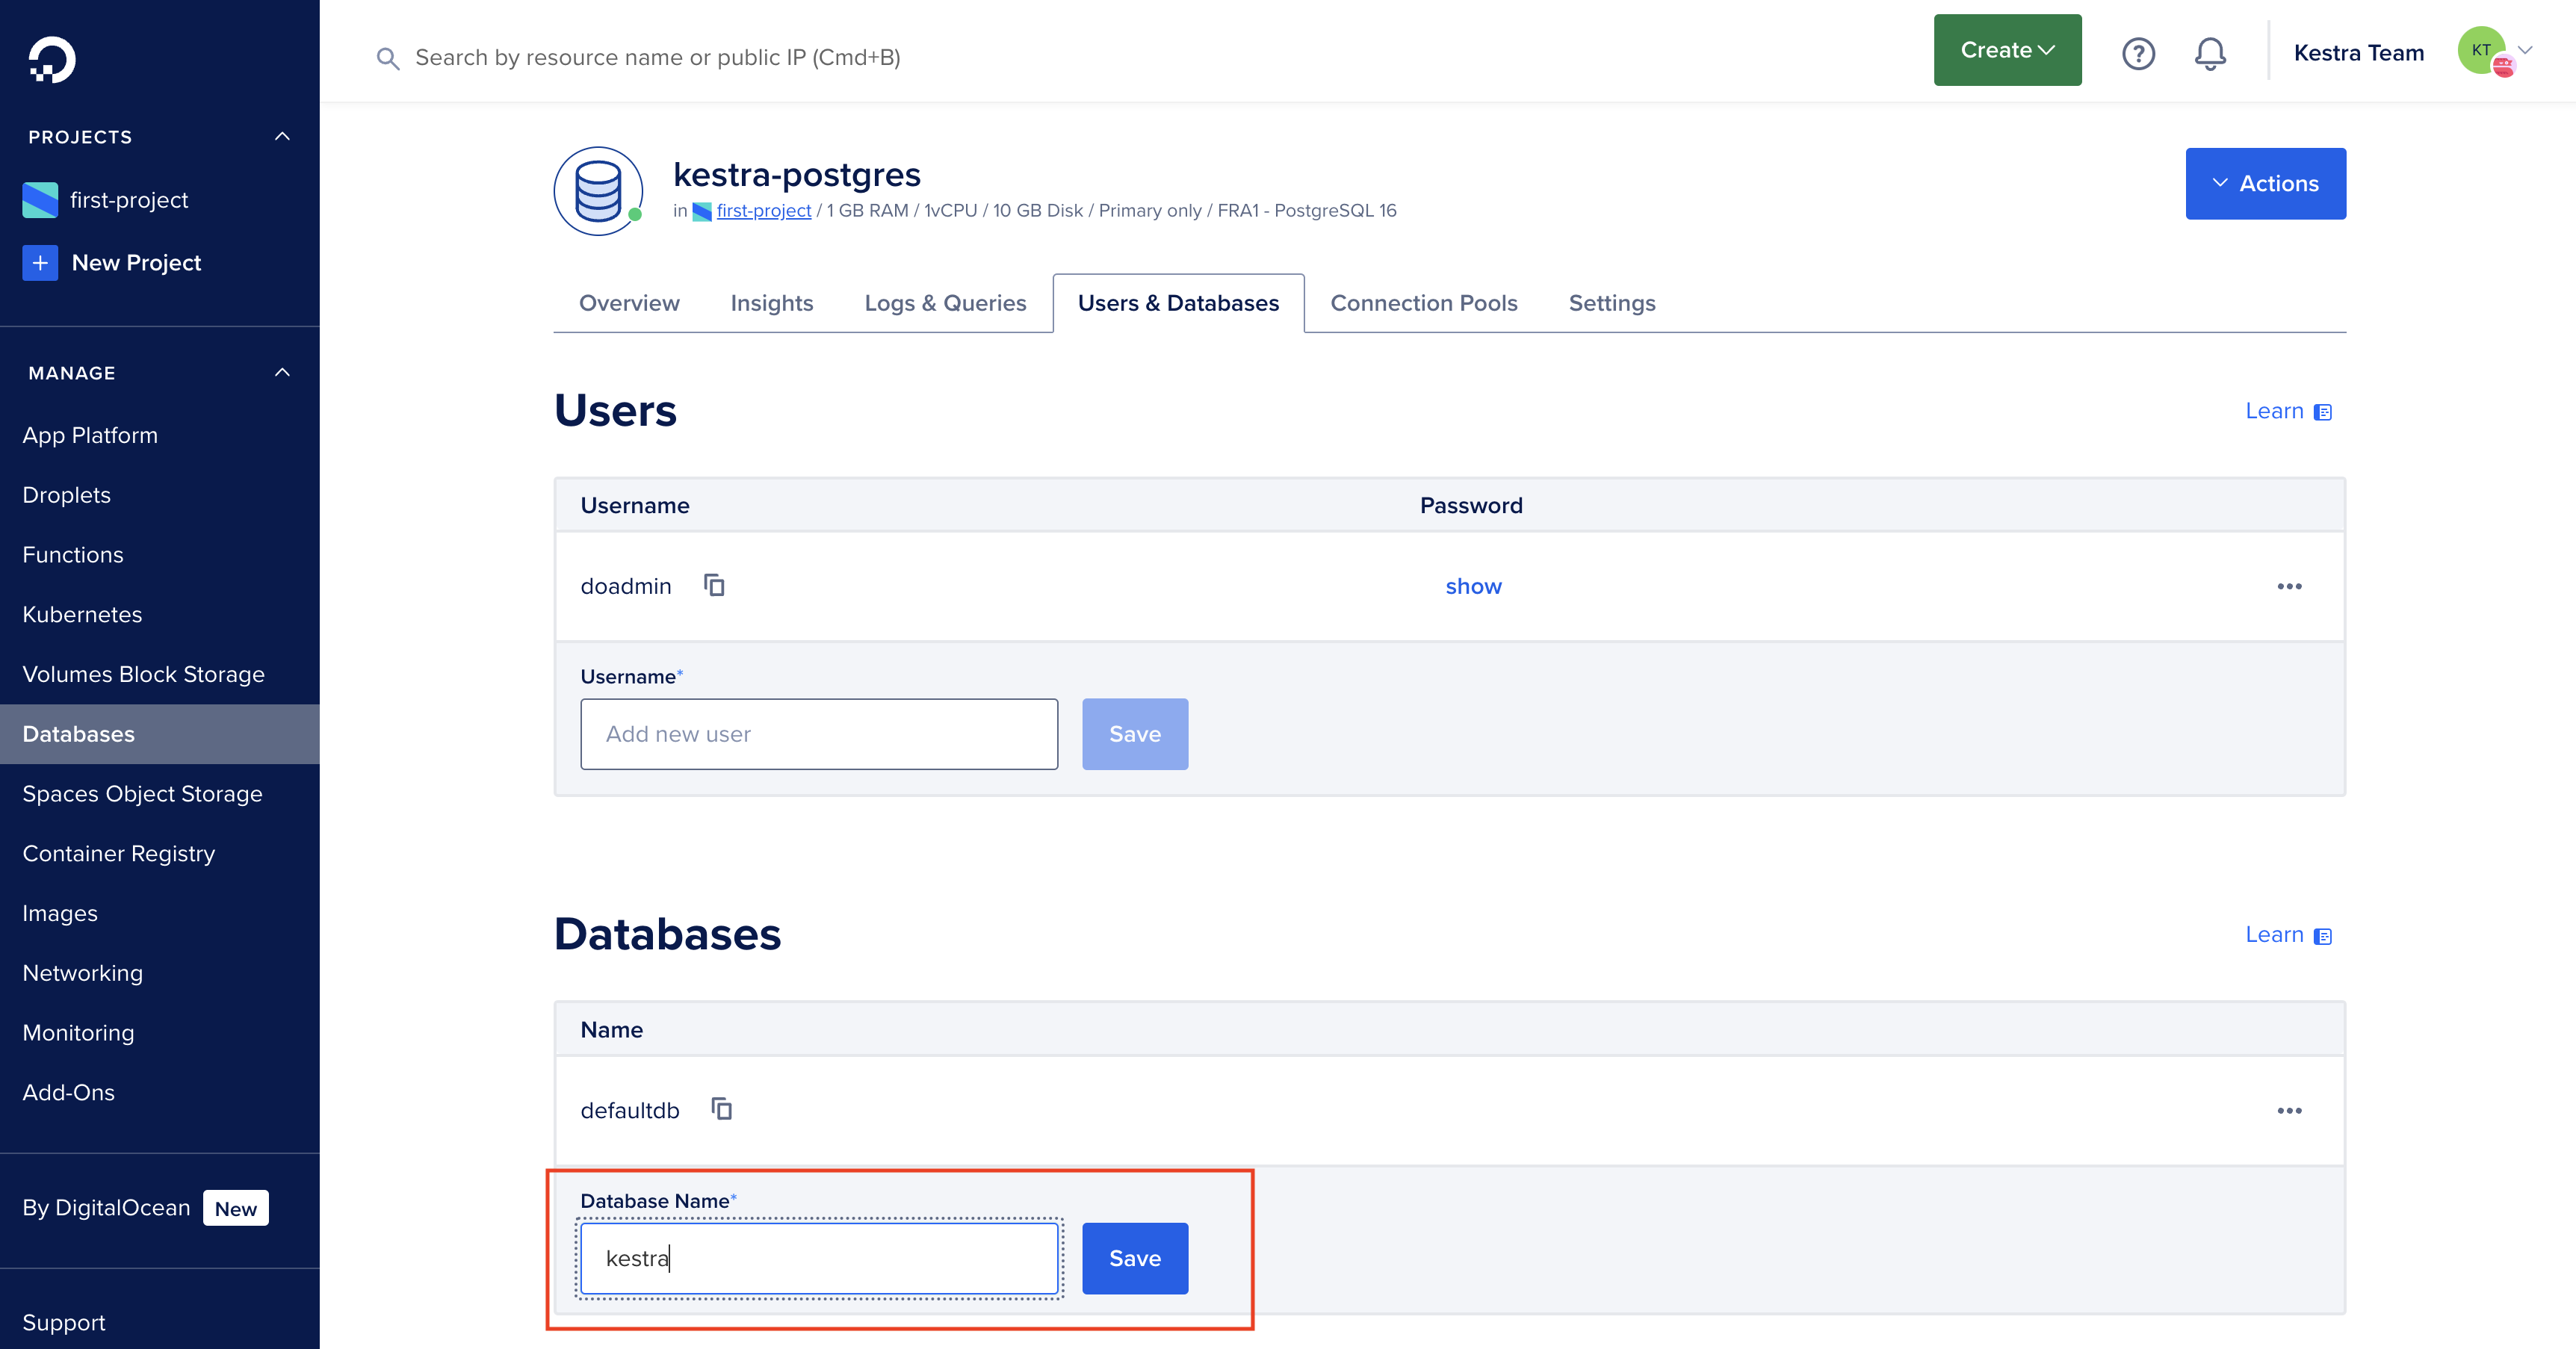
Create a Kestra database
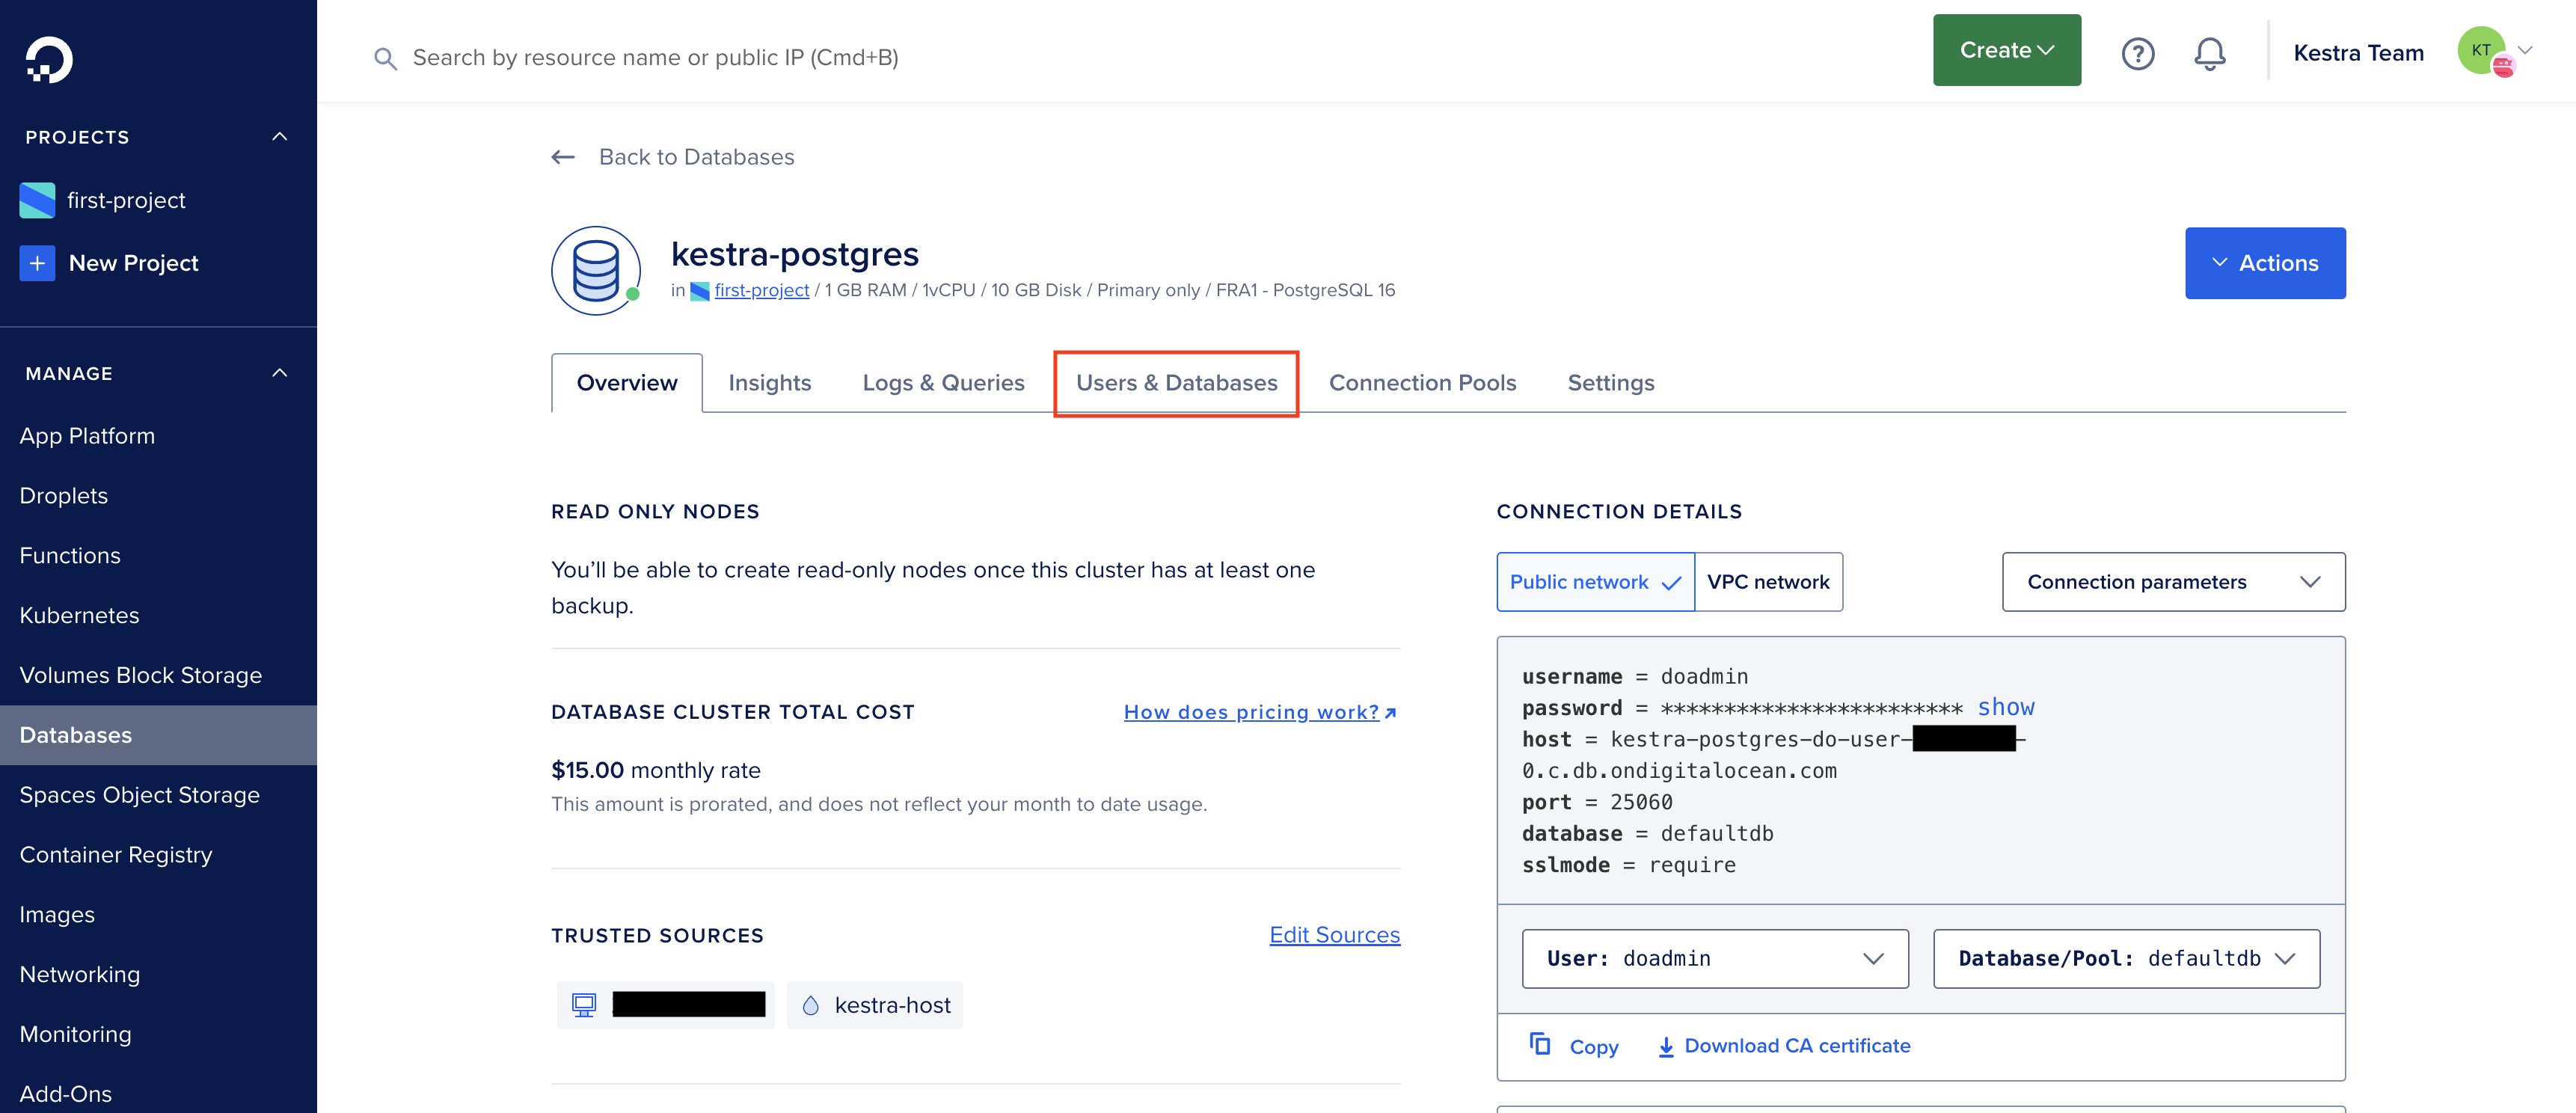
- Go to the database overview page and navigate to
Users & Databasestab. - Under
Databases, type an appropriate database name and click onSave.
Update Kestra configuration
In the docker-compose configuration, edit the datasources property of the Kestra service to point Kestra to your DigitalOcean database:
datasources: postgres: url: jdbc:postgresql://<your-db-host>:25060/<db_name> driver-class-name: org.postgresql.Driver username: doadmin password: <your-password>Because you now use the database powered by “DigitalOcean Database”, you don’t need the PostgreSQL Docker service anymore. Remove it from the docker-compose.yml file.
You’ll also need to delete the depends_on section at the end of the YAML file:
depends_on: postgres: condition: service_startedTo apply the changes, restart the docker services with sudo docker compose restart or sudo docker compose up -d.
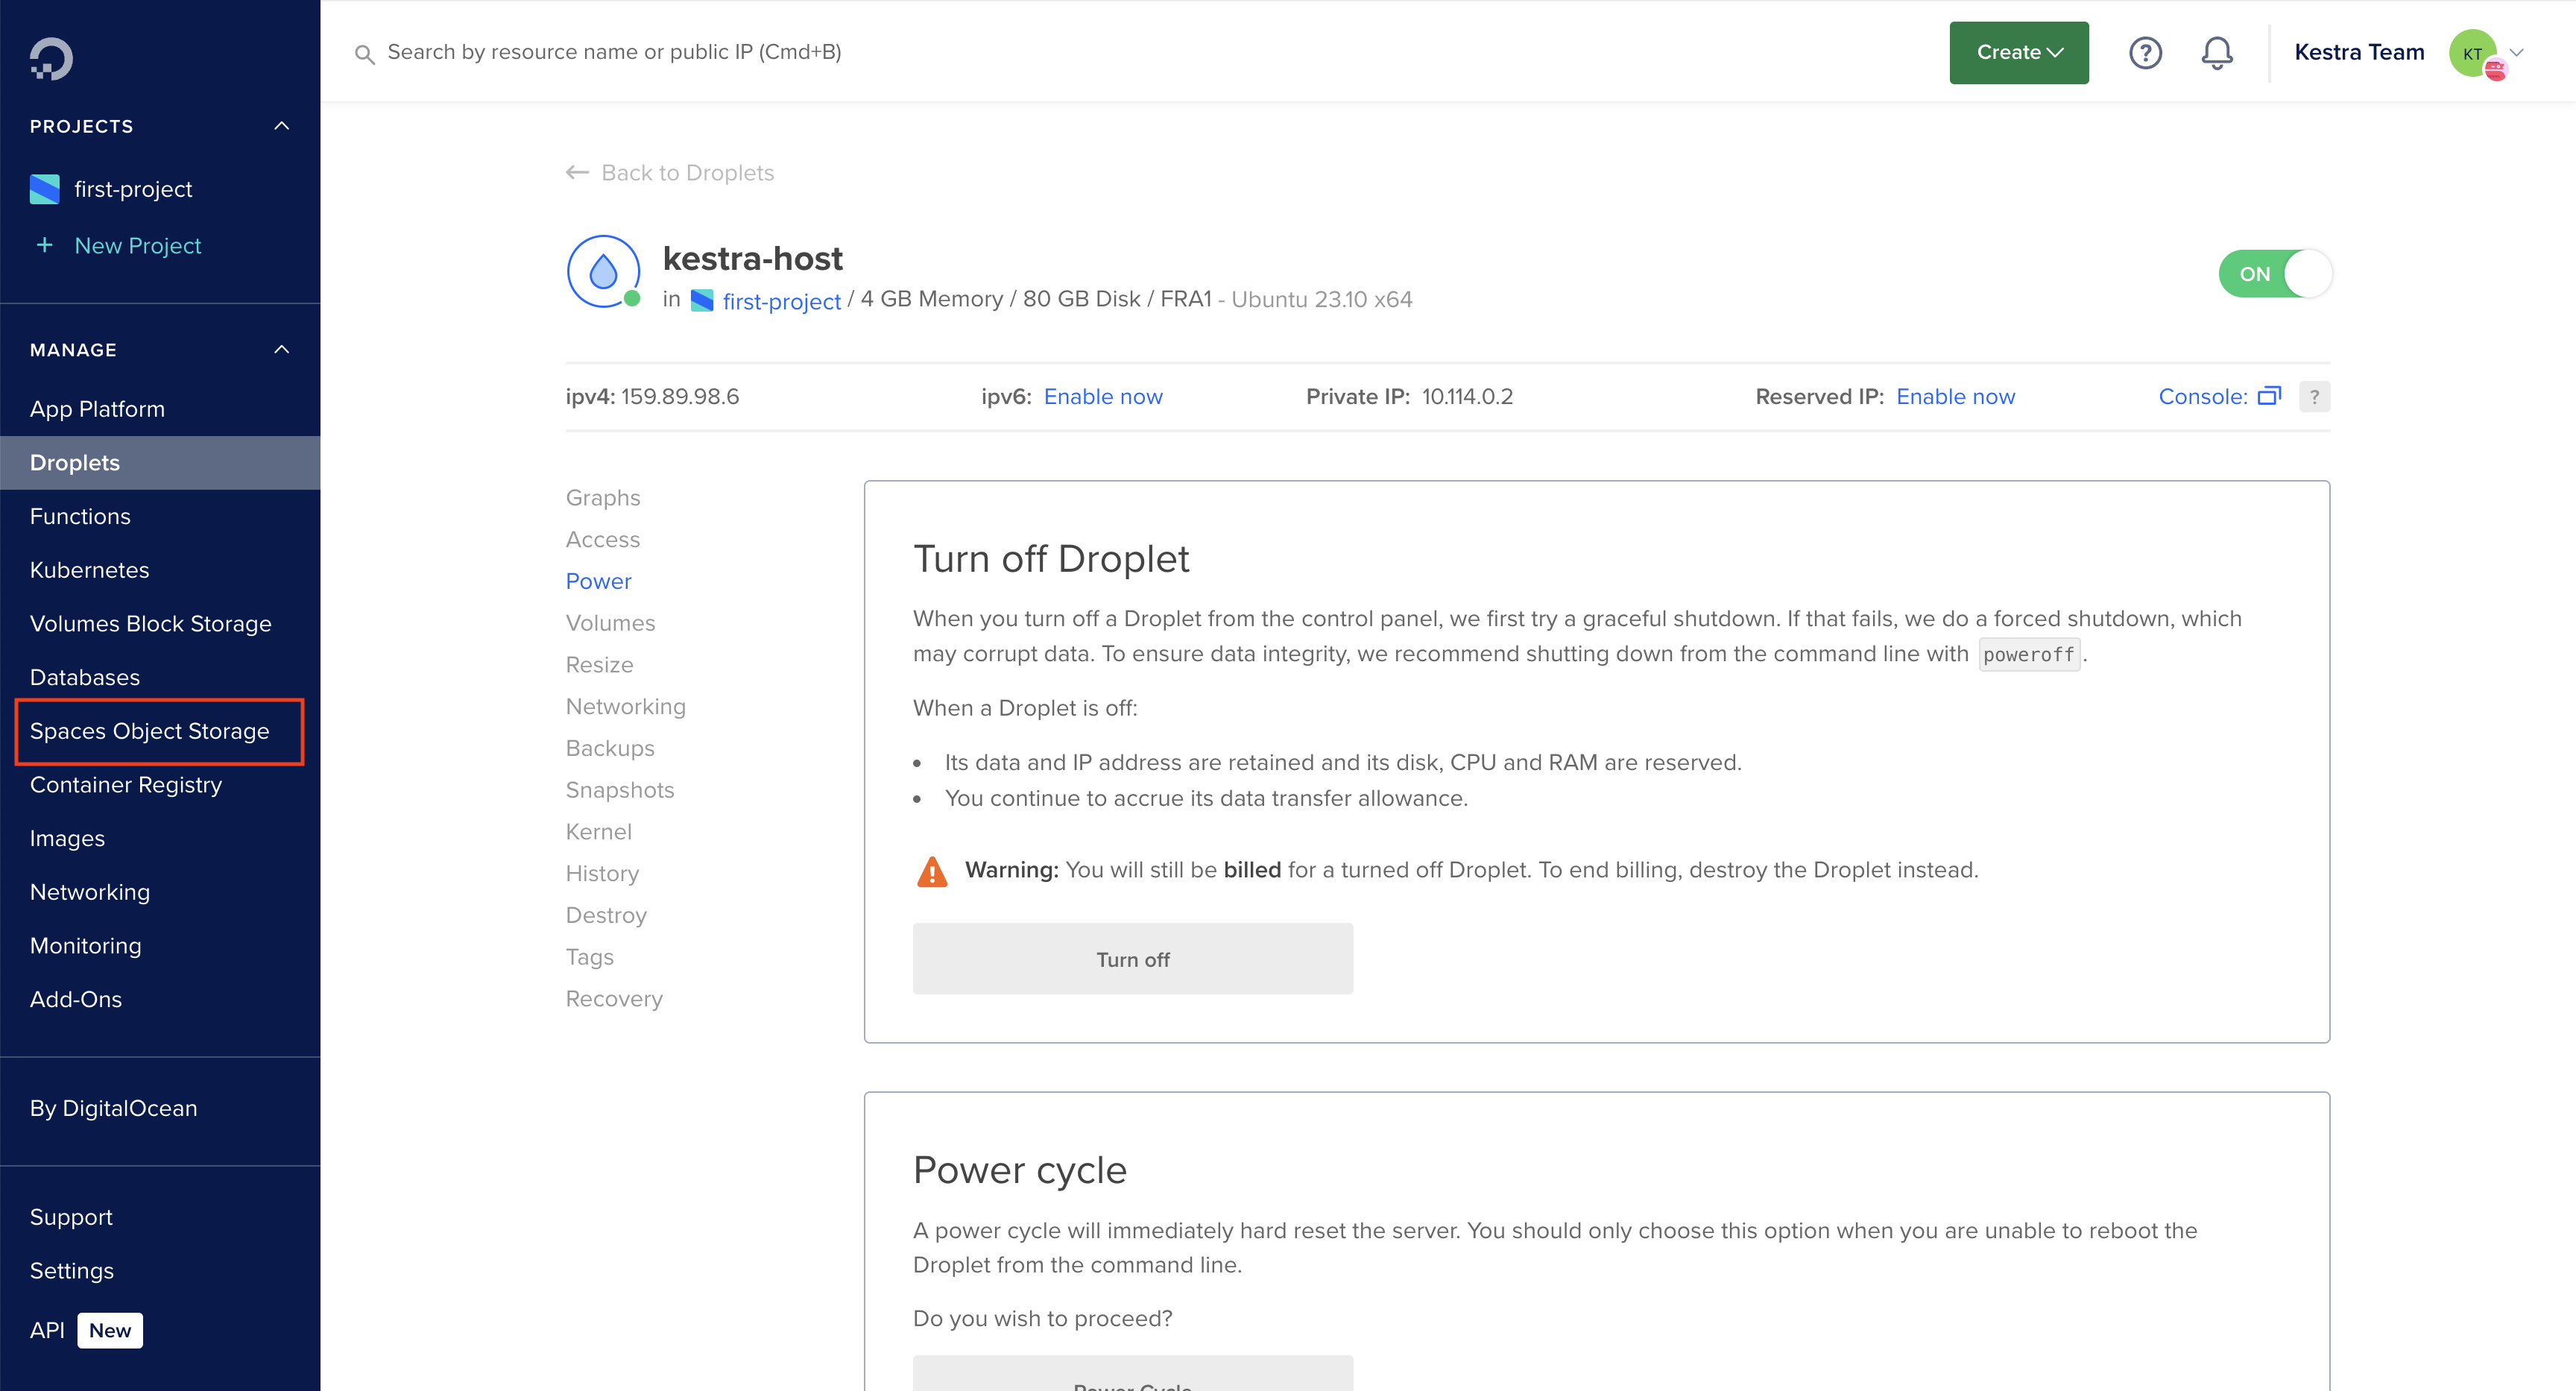
Configure Spaces Object Storage
By default, internal storage is implemented using the local file system. This section guides you how to change the storage backend to Spaces Object Storage to ensure more reliable, durable, and scalable storage.
First, we create the access key and secret key that can be used to connect to Spaces Object Storage.
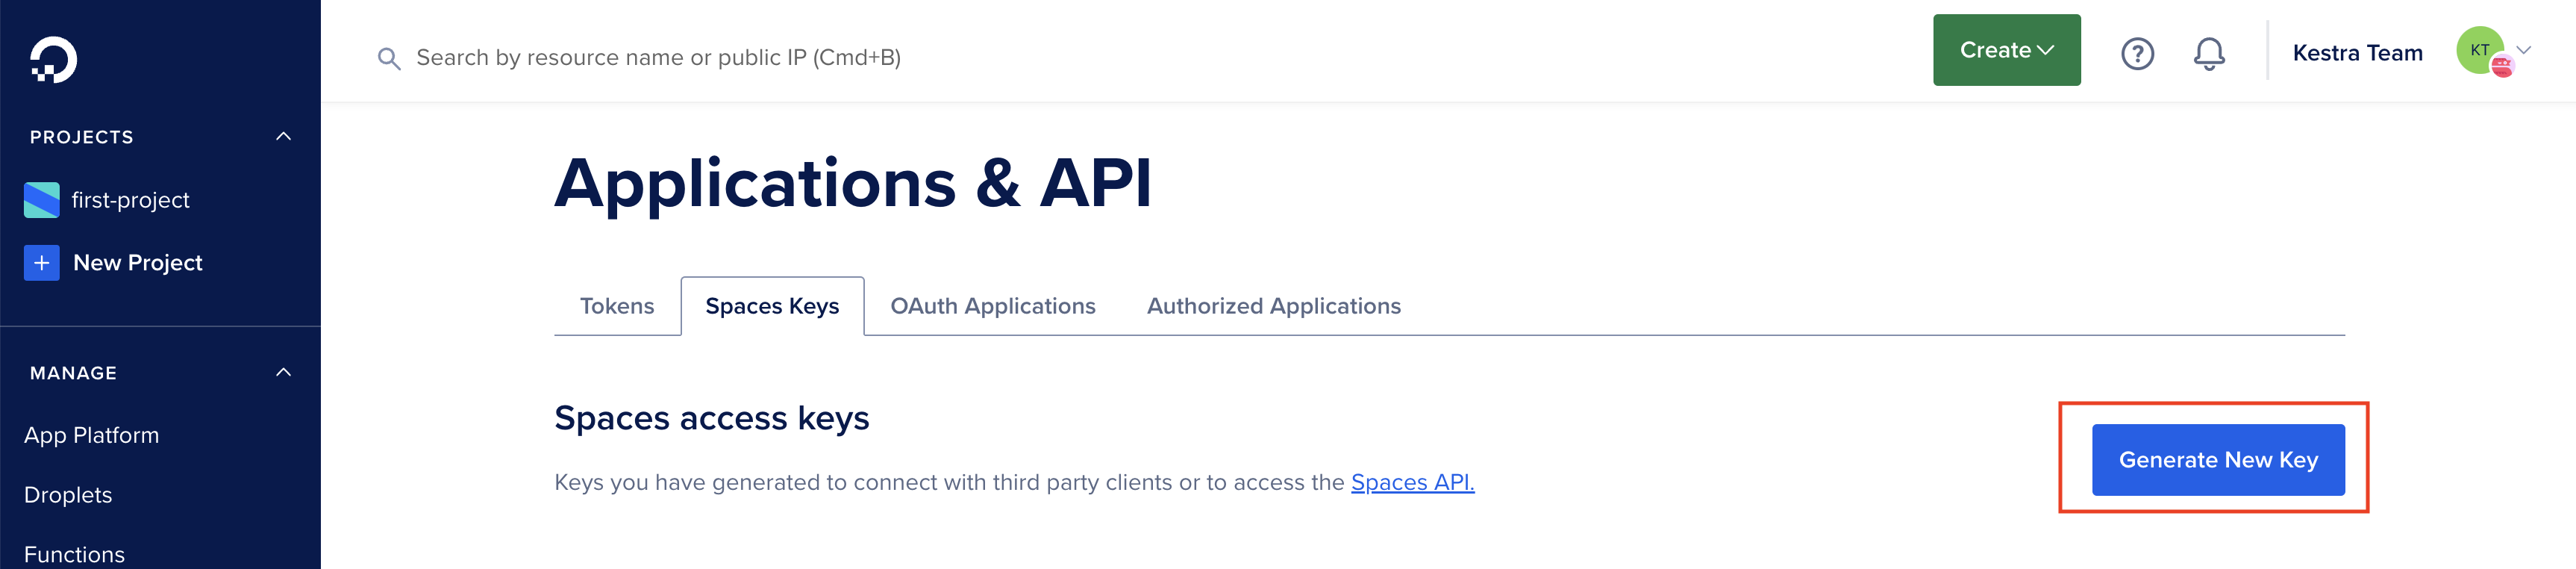
- Navigate to the
APIfrom the left navigation menu. - Go to the
Spaces Keystab. - Click on
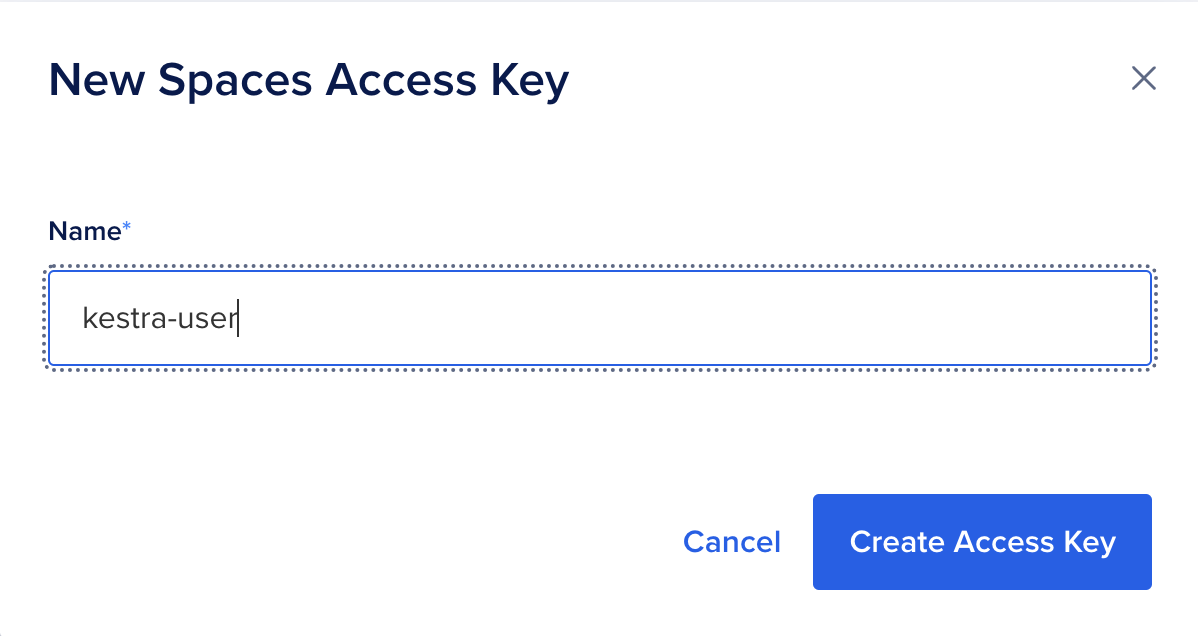
Generate New Keybutton. - Provide an appropriate name for the spaces access key and click on
Create Access Key. - A new access key with the given name will be generated. Take a note of the secret key as you will not be able to retrieve it later.
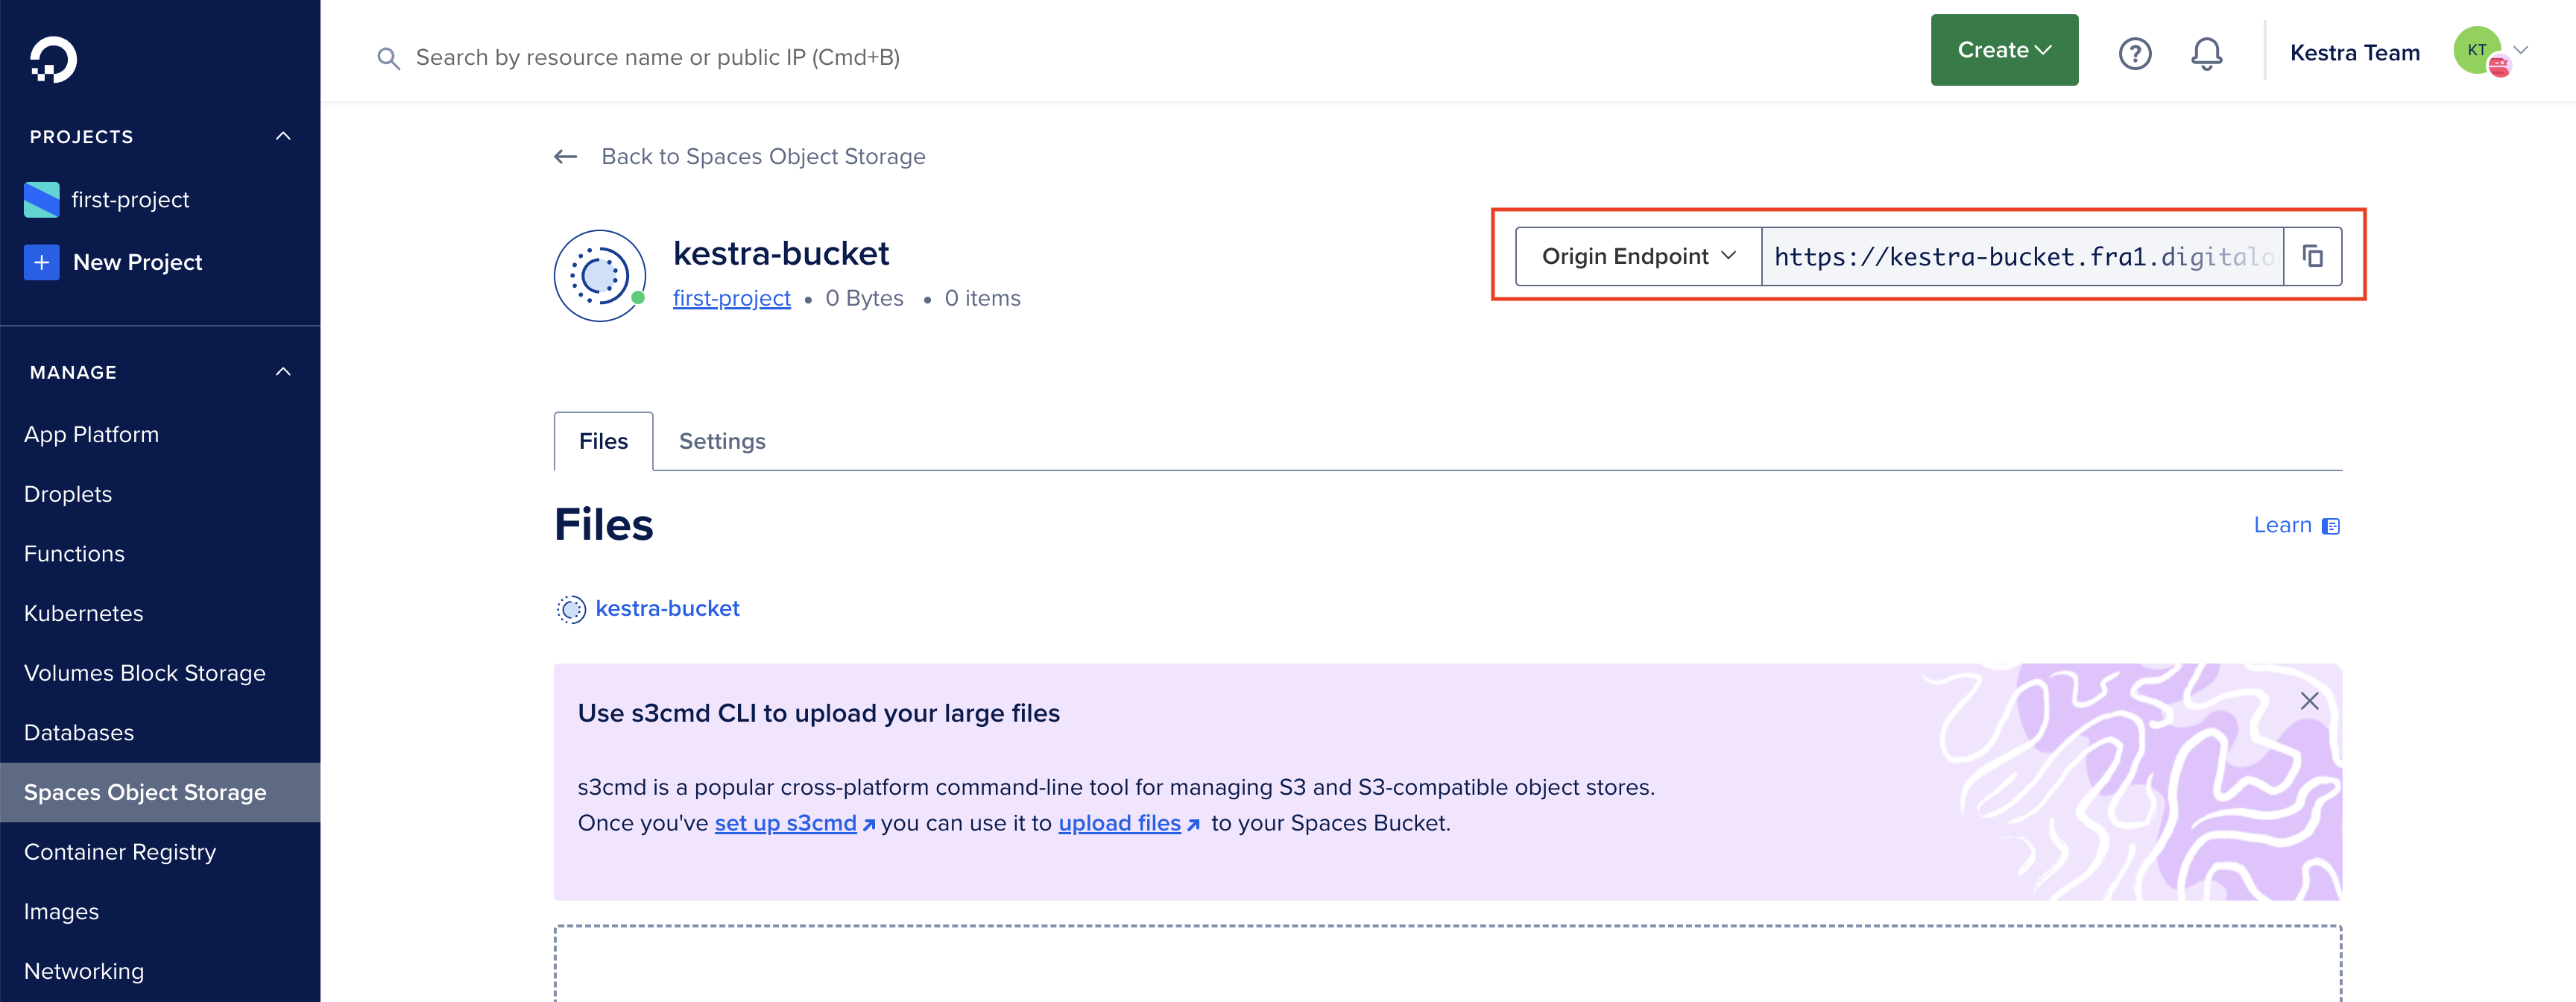
Let’s create a bucket in the Spaces Object Storage.
- Go to the Spaces Object Storage. You can also navigate to the Spaces Object Storage from the left navigation menu.
- Click on
Create Spaces Bucketbutton. - Choose an appropriate data center region.
- Put an appropriate unique Spaces Bucket name and select the corresponding project in which the Spaces Bucket needs to be created.
- Click on
Create a Spaces Bucketat the bottom to create the Spaces Bucket. - Once the bucket is created, you can go to the bucket’s page and note down the
Original Endpoint. - Edit the Kestra storage configuration in the
docker-compose.ymlfile.
kestra: storage: type: minio minio: endpoint: "<bucket-original-endpoint>" port: "443" secure: true access-key: "<spaces-access-key>" secret-key: "<spaces-secret-key>" region: "FRA1" bucket: "<bucket-name>"To apply the changes, restart the docker services with sudo docker compose restart or sudo docker compose up -d.


Next steps
This setup provides a simple starting point for running Kestra in production on a single machine.
Reach out via Slack if you encounter any issues or if you have any questions regarding deploying Kestra to production.
Make sure to also check the CI/CD guide to automate your workflow deployments based on changes in Git.
Was this page helpful?