 Kestra CI/CD Pipelines – Validate and Deploy Flows
Automate the validation and deployment of your Kestra flows using CI/CD pipelines.
Automate validation and deployment with CI/CD
Continous integration and deliver (CI/CD) pipelines enable teams to deploy updates automatically and consistently as soon as they are reviewed and merged into a version control system (VCS) like Git. This section covers multiple approaches to building a CI/CD pipeline for Kestra — from using the CLI and GitHub Actions to integrating with Terraform.
When flows are deployed through CI/CD, add the system.readOnly label set to "true" so the UI editor is disabled and production configurations stay immutable. This is especially recommended for critical production flows:
labels: system.readOnly: trueWhy use a CI/CD pipeline?
A CI/CD process ensures fast, reliable, and repeatable deployments. It removes manual steps, reduces human error, and accelerates delivery from development to production environments.
CI/CD for Kestra flows
Kestra supports several approaches for automating flow validation and deployment. Choose the one that best fits your environment and tooling preferences.
Kestra CLI
The Kestra CLI includes built-in commands for validating and deploying your flows.
Validate and deploy a single flow
## Validate a single flow./kestra flow validate flow_directory/myflow.yml --server http://localhost:8080 --api-token <your-api-token>
## Deploy a single flow to a namespace (without deleting existing flows)./kestra flow namespace update namespace_name flow_directory/myflow.yml --no-delete --server http://localhost:8080 --api-token <your-api-token>
The --api-token flag is available in the Enterprise Edition.
In the open-source edition, use basic authentication with the --user flag:
./kestra flow namespace update namespace_name flow_directory/myflow.yml --no-delete --server http://localhost:8080 --user=USERNAME:PASSWORDRunning CLI commands in Docker
If Kestra runs inside a Docker container, you can access the CLI as follows:
docker exec -it kestra-container-name /bin/bash./kestra flow --helpValidate and deploy multiple flows
To process all flows in a directory:
./kestra flow validate flows/ --server http://localhost:8080 --api-token <your-api-token>./kestra flow namespace update namespace_name flows/ --no-delete --server http://localhost:8080 --api-token <your-api-token>Use --no-delete to preserve existing flows. Omit it if your Git repository or local directory should serve as the single source of truth — Kestra will then delete any previously stored flows not present in the directory.
CLI options
The CLI provides options to tailor the validation and deployment process:
--local: Validates flows locally using the client. By default, validation occurs server-side via the Kestra API.--server: Specifies the Kestra webserver/standalone server URL (default:http://localhost:8080).
For a full list of available options, use:
./kestra flow validate -h./kestra flow namespace update -hAutomate deployments within Kestra
You can run CLI commands directly from a Kestra flow to manage your CI/CD pipeline within Kestra itself.
id: ci-cdnamespace: company.team
tasks:  - id: github-ci-cd    type: io.kestra.plugin.core.flow.WorkingDirectory    tasks:      - id: clone-repository        type: io.kestra.plugin.git.Clone        url: https://github.com/anna-geller/kestra-ci-cd        branch: main
      - id: validate-flows        type: io.kestra.plugin.scripts.shell.Commands        description: "Validate flows from Git before deploying them."        taskRunner:          type: io.kestra.plugin.core.runner.Process        commands:          - /app/kestra flow validate flows/ --server http://localhost:8080 --api-token "{{ secret('KESTRA_API_TOKEN') }}"
      - id: deploy-flows        type: io.kestra.plugin.scripts.shell.Commands        description: "Deploy flows to production namespaces."        taskRunner:          type: io.kestra.plugin.core.runner.Process        commands:          - /app/kestra flow namespace update prod flows/prod/ --server http://localhost:8080 --api-token "{{ secret('KESTRA_API_TOKEN') }}"          - /app/kestra flow namespace update prod.marketing flows/prod.marketing/ --server http://localhost:8080 --api-token "{{ secret('KESTRA_API_TOKEN') }}"
triggers:  - id: github    type: io.kestra.plugin.core.trigger.Webhook    key: "yourSecretKey1234"
You can trigger this CI/CD flow manually via the UI or API — or automatically using a Git webhook.
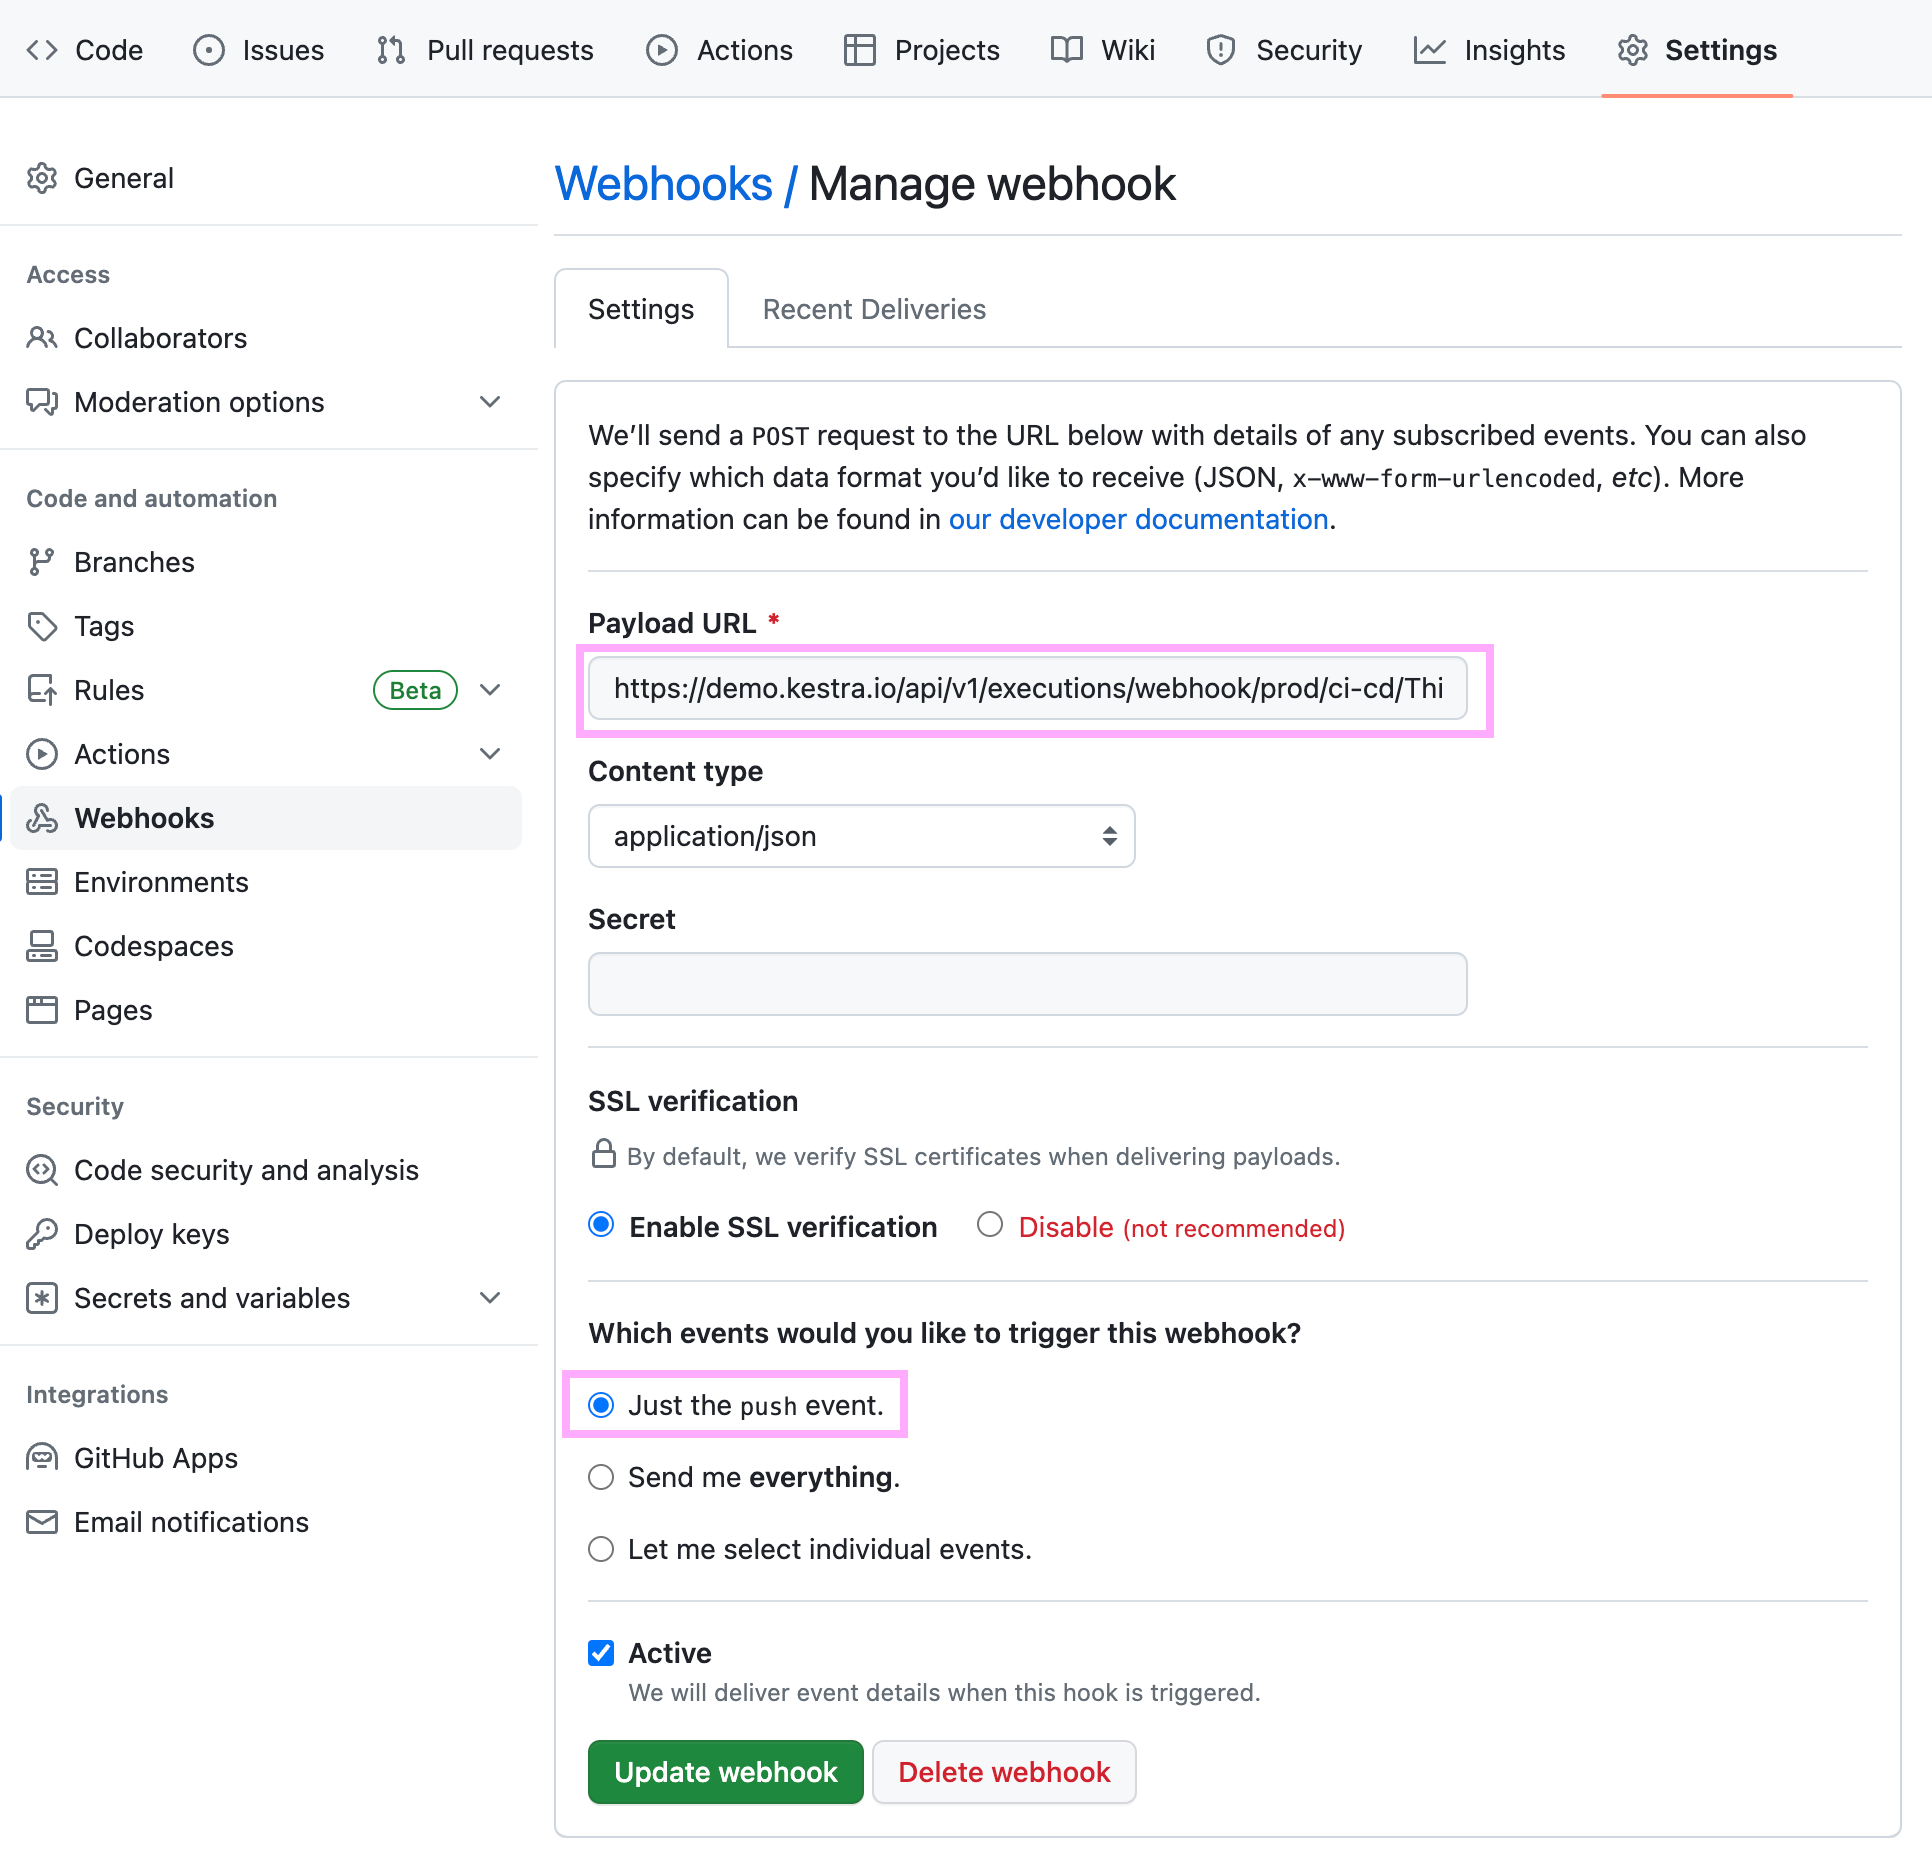
Configuring a GitHub webhook
To trigger your Kestra CI/CD flow on each Git push:
- Go to your GitHub repository → Settings → Webhooks
- Select Add webhook
- Set the Payload URL to your Kestra webhook endpoint:
https://kestra_host_url/api/v1/main/executions/webhook/namespace/flow_id/webhook_key- Choose the Push event to trigger your pipeline (or customize for pull requests, tags, etc.)

Deploy flows with GitHub Actions
Kestra provides official GitHub Actions to validate and deploy flows.
- Validate flows and templates — Validate Action
- Deploy flows and templates — Deploy Action
Example GitHub Actions workflow
name: Kestra CI/CDon: push: branches: - mainjobs: prod: runs-on: ubuntu-latest steps: - uses: actions/checkout@v3 - name: Validate flows uses: kestra-io/validate-action@master with: directory: ./flows/prod resource: flow server: ${{secrets.KESTRA_HOSTNAME}} user: ${{secrets.KESTRA_USER}} password: ${{secrets.KESTRA_PASSWORD}} - name: Deploy prod uses: kestra-io/deploy-action@develop with: namespace: prod directory: ./flows/prod resource: flow server: ${{secrets.KESTRA_HOSTNAME}} user: ${{secrets.KESTRA_USER}} password: ${{secrets.KESTRA_PASSWORD}} delete: false - name: Deploy prod-marketing uses: kestra-io/deploy-action@develop with: namespace: prod.marketing directory: ./flows/prod.marketing resource: flow server: ${{secrets.KESTRA_HOSTNAME}} user: ${{secrets.KESTRA_USER}} password: ${{secrets.KESTRA_PASSWORD}} delete: falseYou can also authenticate using an API token instead of username and password:
with: server: ${{secrets.KESTRA_HOSTNAME}} apiToken: ${{secrets.KESTRA_API_TOKEN}}Deploy flows with GitLab CI/CD
GitLab CI/CD uses a similar approach to GitHub Actions. See the GitLab guide for examples and configuration details.
Deploy flows with Terraform
Terraform provides the most flexible, Infrastructure-as-Code approach to managing Kestra deployments. It allows you to define, validate, and deploy flows alongside the rest of your cloud infrastructure.
Here’s an example Terraform configuration for deploying flows stored in a flows directory:
terraform {  required_providers {    kestra = {      source  = "kestra-io/kestra"      version = "~> 0.15.0"    }  }}
provider "kestra" {  url = "http://localhost:8080" # Kestra webserver/standalone server URL  api_token = "<your-api-token>" # Only available in the Enterprise Edition}
resource "kestra_flow" "flows" {  for_each  = fileset(path.module, "flows/*.yml")  flow_id   = yamldecode(templatefile(each.value, {}))["id"]  namespace = yamldecode(templatefile(each.value, {}))["namespace"]  content   = templatefile(each.value, {})  keep_original_source = true}
Then run the following commands:
terraform init # Download the Kestra providerterraform validate # Validate both the configuration and your flowsterraform apply -auto-approve # Deploy your flows automaticallyNext steps
Explore detailed documentation for each CI/CD option below to choose the best fit for your workflow and deployment process.
Was this page helpful?