GKE Deployment with CloudSQL and Google Cloud Storage
For the complete documentation index, see llms.txt. For a full content snapshot, see llms-full.txt. Append.mdto anykestra.io/docs/*URL for plain Markdown.
Deploy Kestra to GCP GKE with CloudSQL as the database backend and Google Cloud Storage as the internal storage backend.
Prerequisites
- Basic command-line interface (CLI) skills.
- Familiarity with GCP GKE, PostgreSQL, GCS, and Kubernetes.
Launch a GKE cluster
First, log in to GCP using gcloud init.
Run the following command to create a GKE cluster named my-kestra-cluster:
gcloud container clusters create my-kestra-cluster --region=europe-west3Confirm that the cluster is up by using the GCP console.
Before proceeding, check whether the gke-gcloud-auth-plugin plugin is already installed:
gke-gcloud-auth-plugin --versionIf the output displays version information, skip the next section.
You can install the authentication plugin using:
gcloud components install gke-gcloud-auth-pluginRun the following command to have your kubecontext point to the newly created cluster:
gcloud container clusters get-credentials my-kestra-cluster --region=europe-west3You can now confirm that your kubecontext points to the GKE cluster using:
kubectl get svcInstall Kestra on GCP GKE
Add the Kestra Helm chart repository and install Kestra:
helm repo add kestra https://helm.kestra.io/helm install my-kestra kestra/kestraWorkload Identity setup
If you are using Google Cloud Workload Identity, you can annotate your Kubernetes service account in the Helm chart configuration. This allows Kestra to automatically use the associated GCP service account for authentication.
To configure this, you can add the following to your “values.yaml” file:
serviceAccount: create: true name: <your-service-account-name> annotations: iam.gke.io/gcp-service-account: "<gcp-service-account>@<gcp-project-id>.iam.gserviceaccount.com"Alternatively, you can apply the annotation directly when you install Kestra using Helm:
helm install my-kestra kestra/kestra \ --set serviceAccount.annotations.iam.gke.io/gcp-service-account=<gcp-service-account>@<gcp-project-id>.iam.gserviceaccount.comThis configuration links your Kubernetes service account to the GCP service account, enabling Workload Identity for secure access to Google Cloud resources.
Launch CloudSQL
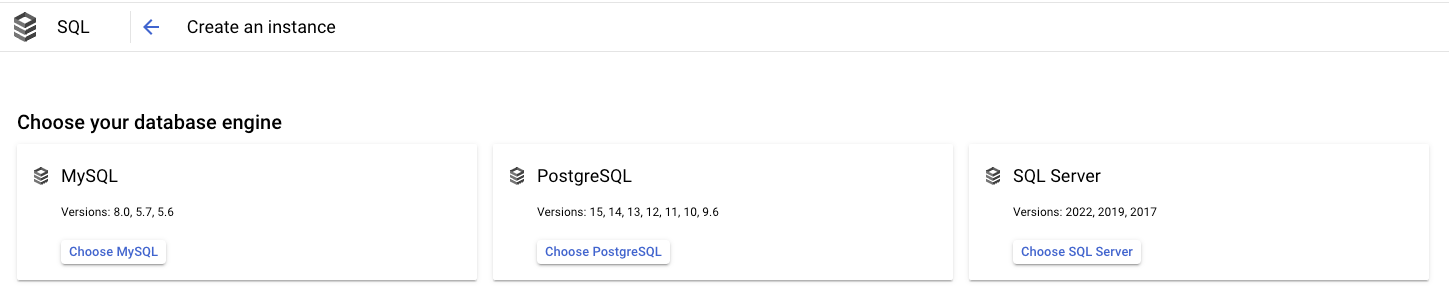
- Go to the Cloud SQL console.
- Click on Choose PostgreSQL (Kestra also supports MySQL, but PostgreSQL is recommended).
- Put an appropriate Instance ID and password for the admin user
postgres. - Select the latest PostgreSQL version from the dropdown.
- Choose Enterprise Plus or Enterprise edition based on your requirements.
- Choose an appropriate preset among Production, Development or Sandbox as per your requirement.
- Choose the appropriate region and zonal availability.
- Click create and wait for completion.

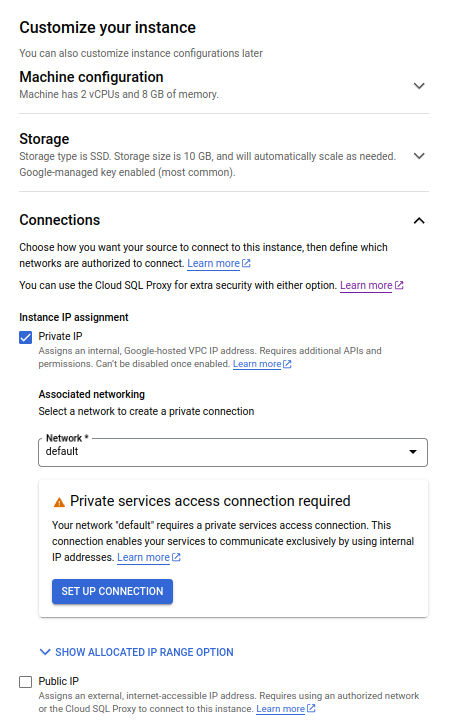
Enable VM connection to database
- Go to the database overview page and click on Connections from the left-side navigation menu.
- Go to the Networking tab and click on Add a Network.
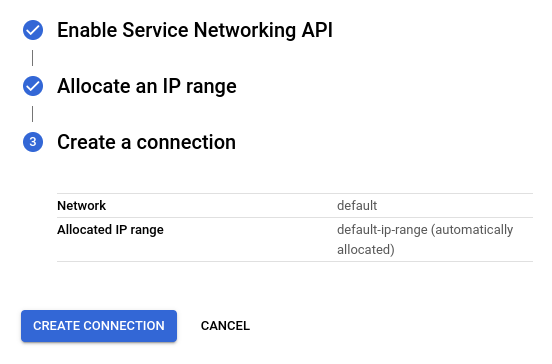
- In the New Network section, add an appropriate name like Kestra VM and enter your GKE pods’ IP address range in the network.
- Click on Done in the section.
- Click on Save on the page.
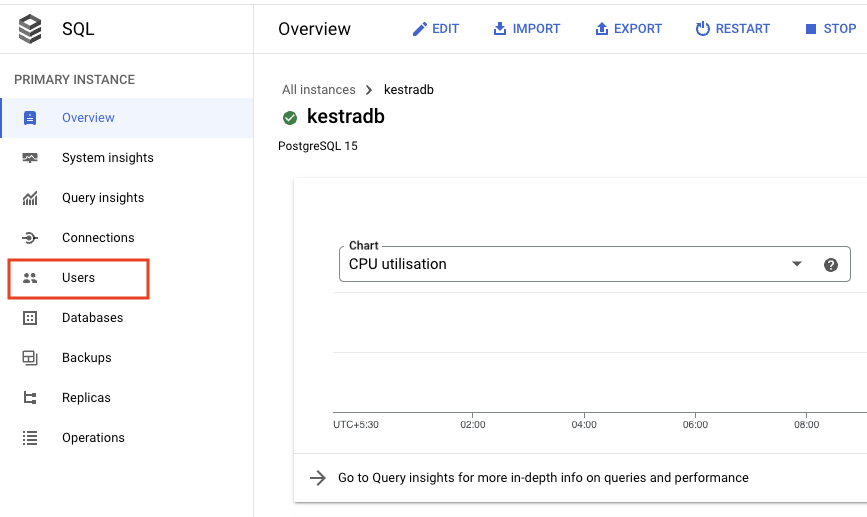
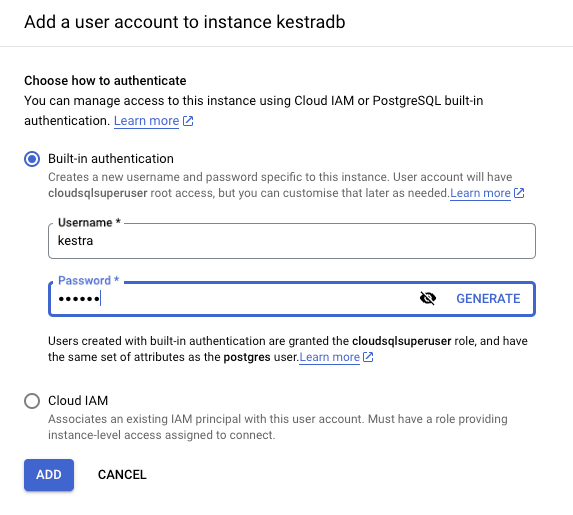
Create database user
- Go to the database overview page and click on Users from the left-side navigation menu.
- Click on Add User Account.
- Put an appropriate username and password and click on Add.
Create Kestra database
- Go to the database overview page and click on Databases from the left side navigation menu.
- Click on Create Database.
- Put an appropriate database name and click on Create.
Update Kestra configuration
Configure CloudSQL Database in the Helm chart’s values like in the following example:
configurations: application: kestra: queue: type: postgres repository: type: postgres datasources: postgres: url: jdbc:postgresql://<your-db-external-endpoint>:5432/<db_name> driver-class-name: org.postgresql.Driver username: <your-username> password: <your-password>To apply the changes, run:
helm upgrade my-kestra kestra/kestra -f values.yamlPrepare a GCS bucket
This section guides you on how to change the storage backend to Cloud Storage to ensure more reliable, durable, and scalable storage.
- Go to the Cloud Storage console and create a bucket.
- Go to IAM and select Service Accounts from the left-side navigation menu.
- On the Service Accounts page, click on Create Service Account at the top of the page.
- Put the appropriate Service account name and Service account description and grant the service account Storage Admin access. Click Done.
- On the Service Accounts page, click on the newly created service account.
- On the newly created service account page, go to the Keys tab at the top of the page and click on Add Key. From the dropdown, select Create New Key.
- Select the Key type as JSON and click on Create. The JSON key file for the service account will be downloaded.
- Use the stringified JSON for the configuration. You can use the bash command
cat <path_to_json_file> | jq '@json'to generate stringified JSON. - Edit Kestra storage configuration in the Helm chart’s values.
Note: If you want to use a Kubernetes service account configured with Workload Identity, you don’t need to provide anything for serviceAccount, as it will be autodetected for the pod configuration if it’s well configured.
configurations: application: kestra: storage: type: gcs gcs: bucket: "<your-cloud-storage-bucket-name>" project-id: "<your-gcp-project-name>" service-account: | "<stringified-json-file-contents>"To apply the changes, run:
helm upgrade my-kestra kestra/kestra -f values.yamlYou can validate the Google Cloud setup by executing the flow example below with a file and then checking it is correctly uploaded to Google Cloud Storage.
id: inputsnamespace: company.team
inputs:  - id: file    type: FILE
tasks:  - id: validator    type: io.kestra.plugin.core.log.Log    message: User {{ inputs.file }}
Commented-out examples in values.yaml
The values.yaml file includes commented-out examples for secrets, database, and other configuration options. Uncomment and adjust them as needed.
Example:
## Example configuration for secrets:## configurations:## application:## kestra:## queue:## type: h2## repository:## type: h2## storage:## type: local## local:## base-path: "/app/storage"## datasources:## h2:## url: jdbc:h2:mem:public;DB_CLOSE_DELAY=-1;DB_CLOSE_ON_EXIT=FALSE## username: kestra## password: ""## driver-class-name: org.h2.Driver## configmaps:## - name: kestra-others## key: others.yml## secrets:## - name: kestra-basic-auth## key: basic-auth.ymlThe example above demonstrates how to configure secrets, queue and repository types, and a PostgreSQL datasource. Uncomment and adjust the relevant sections for your setup.
Next steps
Reach out via Slack if you encounter any issues or have any questions regarding deploying Kestra to production.
Was this page helpful?