Integrate External Secret Managers: Vault, AWS, Azure, GCP, and more
For the complete documentation index, see llms.txt. For a full content snapshot, see llms-full.txt. Append.mdto anykestra.io/docs/*URL for plain Markdown.
Configure Kestra to store and retrieve secrets from an external backend such as AWS Secrets Manager, Azure Key Vault, Google Secret Manager, HashiCorp Vault, and others.
For short-lived OAuth-style access tokens, use a Credential that mints and refreshes tokens from secrets stored in your external manager, then reference it with credential() in flows.
Secrets manager modes
Kestra supports two modes when integrating an external secrets backend. They differ fundamentally in who is the source of truth for secret metadata.
| Managed mode (default) | Read-only mode | |
|---|---|---|
| Source of truth | Kestra | External system |
| Secret metadata | Kestra tags secrets automatically | Tags must be set manually in the external backend |
| Create / edit / delete | From Kestra UI or Terraform | Not possible from Kestra — external system only |
| Tag changes externally | Not reflected in Kestra | Reflected immediately |
| Value changes externally | Picked up at next read | Picked up at next read |
Managed mode (default)
Kestra is the source of truth. You create, edit, and delete secrets from the Kestra UI or via Terraform. When you create a secret, Kestra stores the encrypted value in the external backend and attaches metadata tags (namespace, tenant, key, prefix) automatically.
- Kestra reads the value from the external backend at runtime.
- Tag changes made directly in the external backend are not reflected in Kestra — Kestra ignores external metadata.
- The external backend is encrypted storage only; Kestra controls the index.
Secrets created directly in the external backend (without going through Kestra) will not appear in Kestra in managed mode. Kestra only discovers secrets it created itself. To make externally-managed secrets visible in Kestra, use read-only mode instead.
Read-only mode
The external system is the source of truth. You populate secrets and their metadata tags in the external backend yourself, and Kestra reads them. Kestra cannot create, edit, or delete secrets — the UI shows a lock icon and hides the Create New Secret button.
Read-only mode is supported for all external secrets backends. For backend-specific requirements such as secret format constraints, see the read-only subsection under the relevant backend below.
Enable globally — add read-only: true to your kestra.secret configuration:
kestra: secret: type: aws-secret-manager read-only: true aws-secret-manager: region: us-east-1Enable per tenant — toggle the setting in the Dedicated secrets manager configuration under the tenant settings:
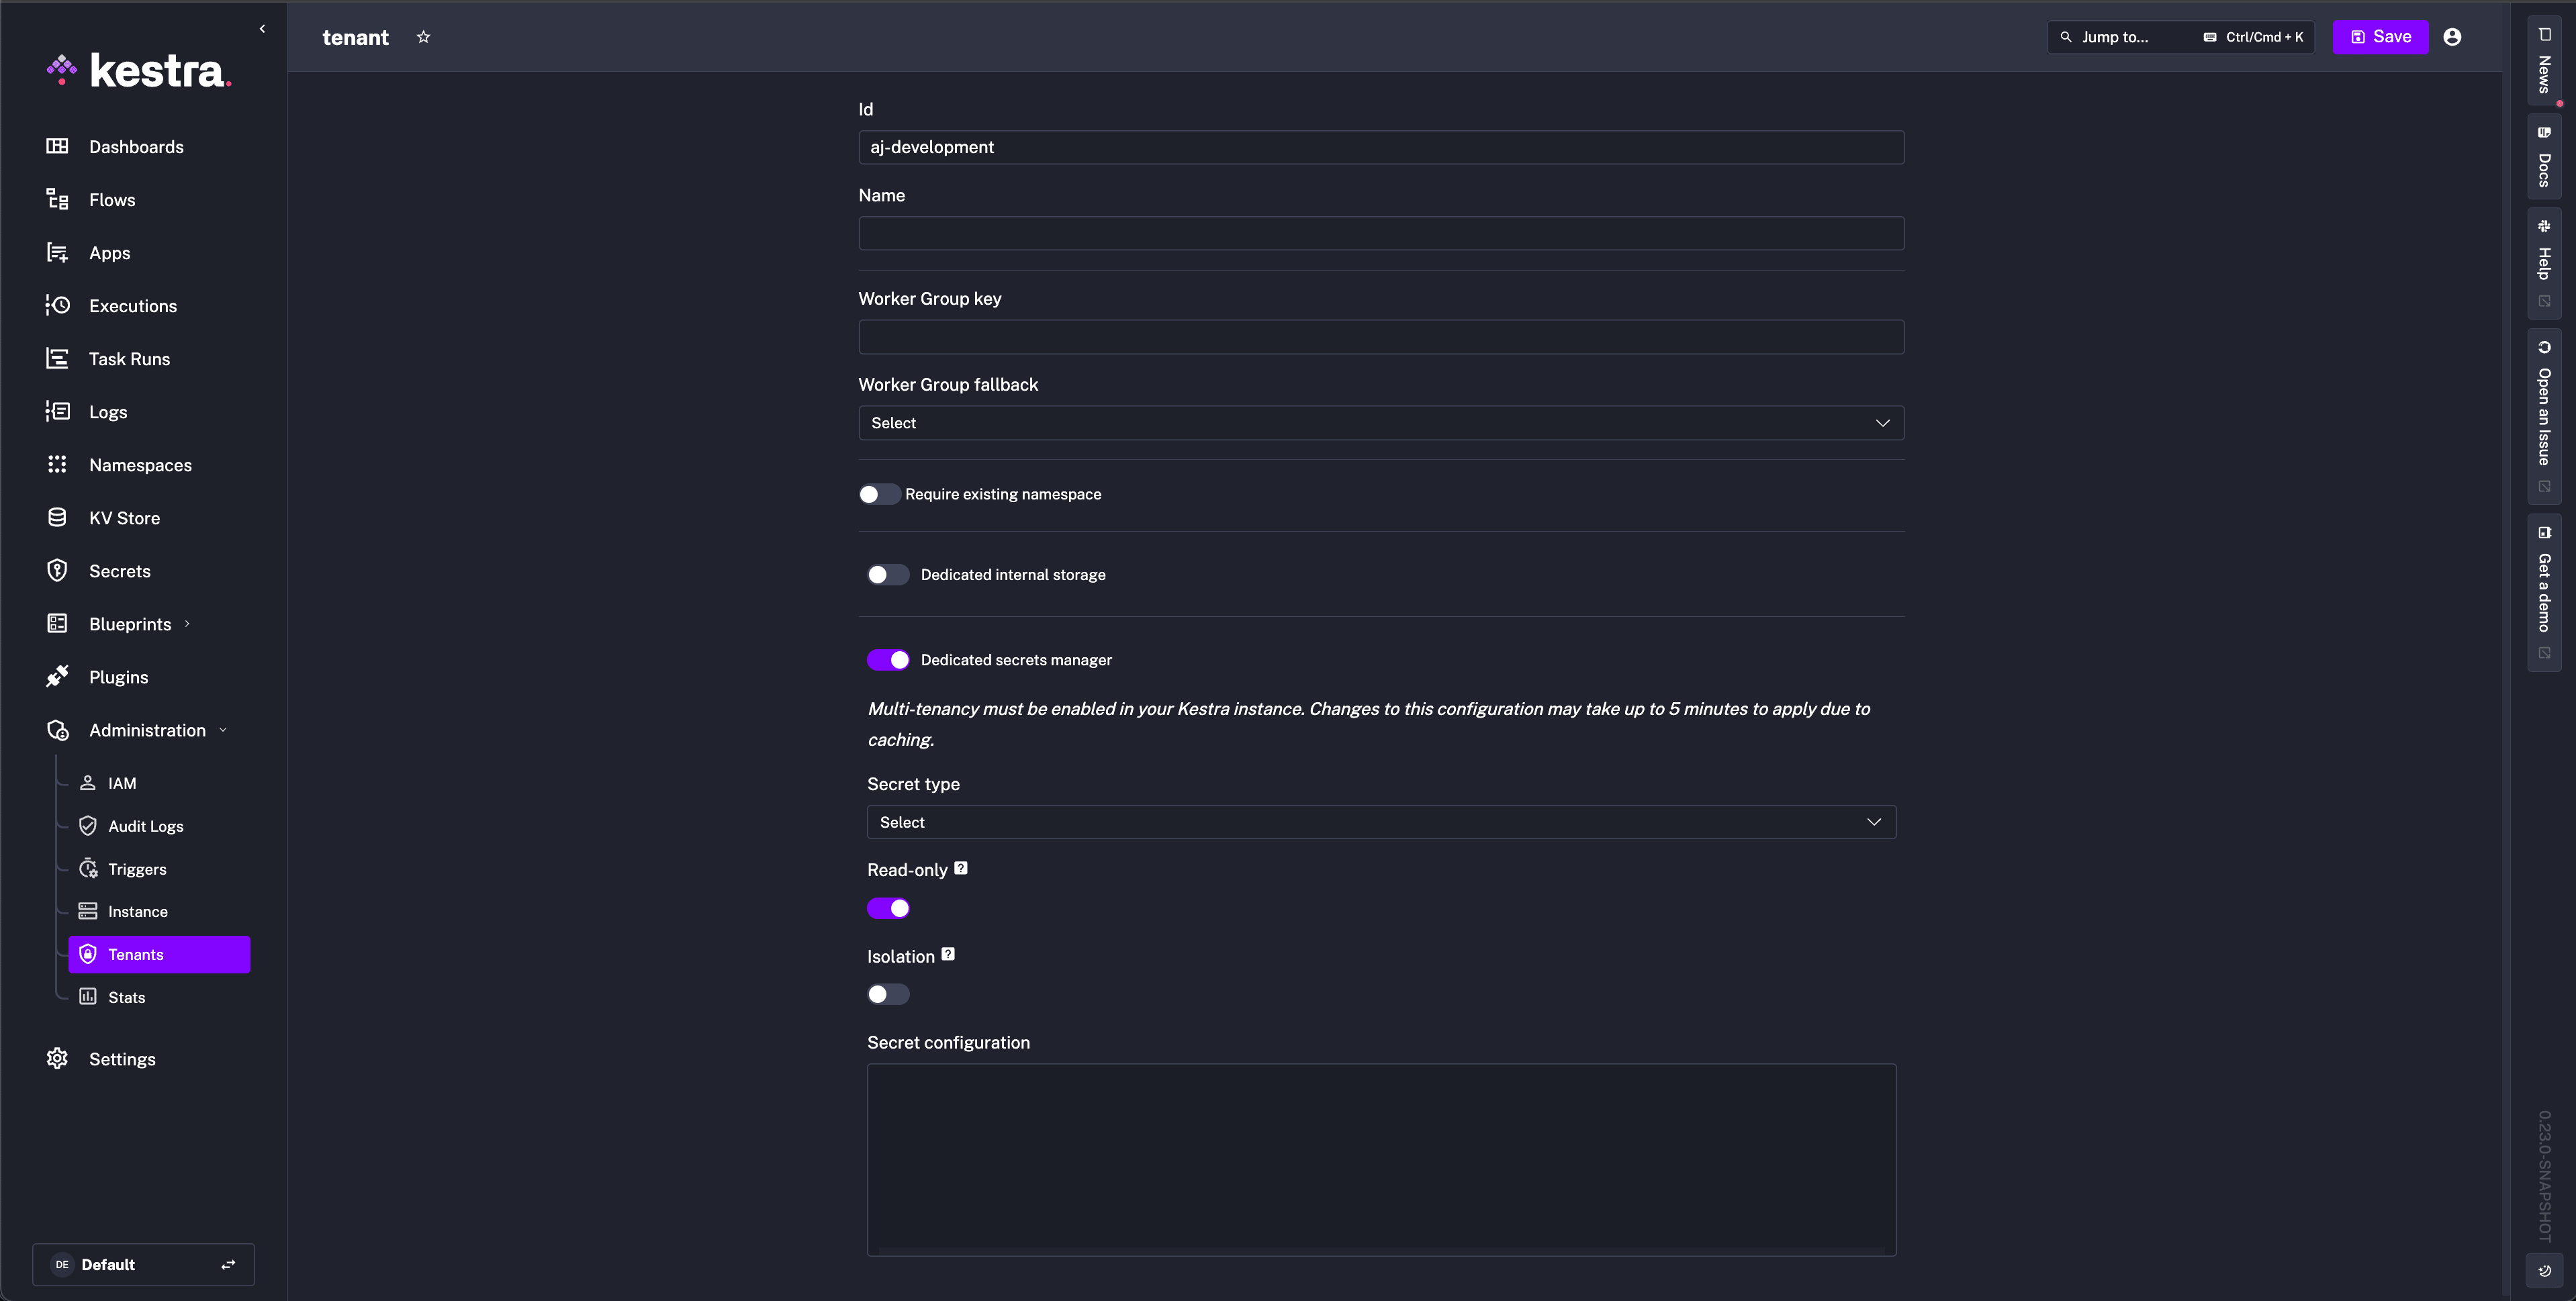
Enable per namespace — toggle the setting in the Dedicated secrets manager section of the namespace Edit tab:

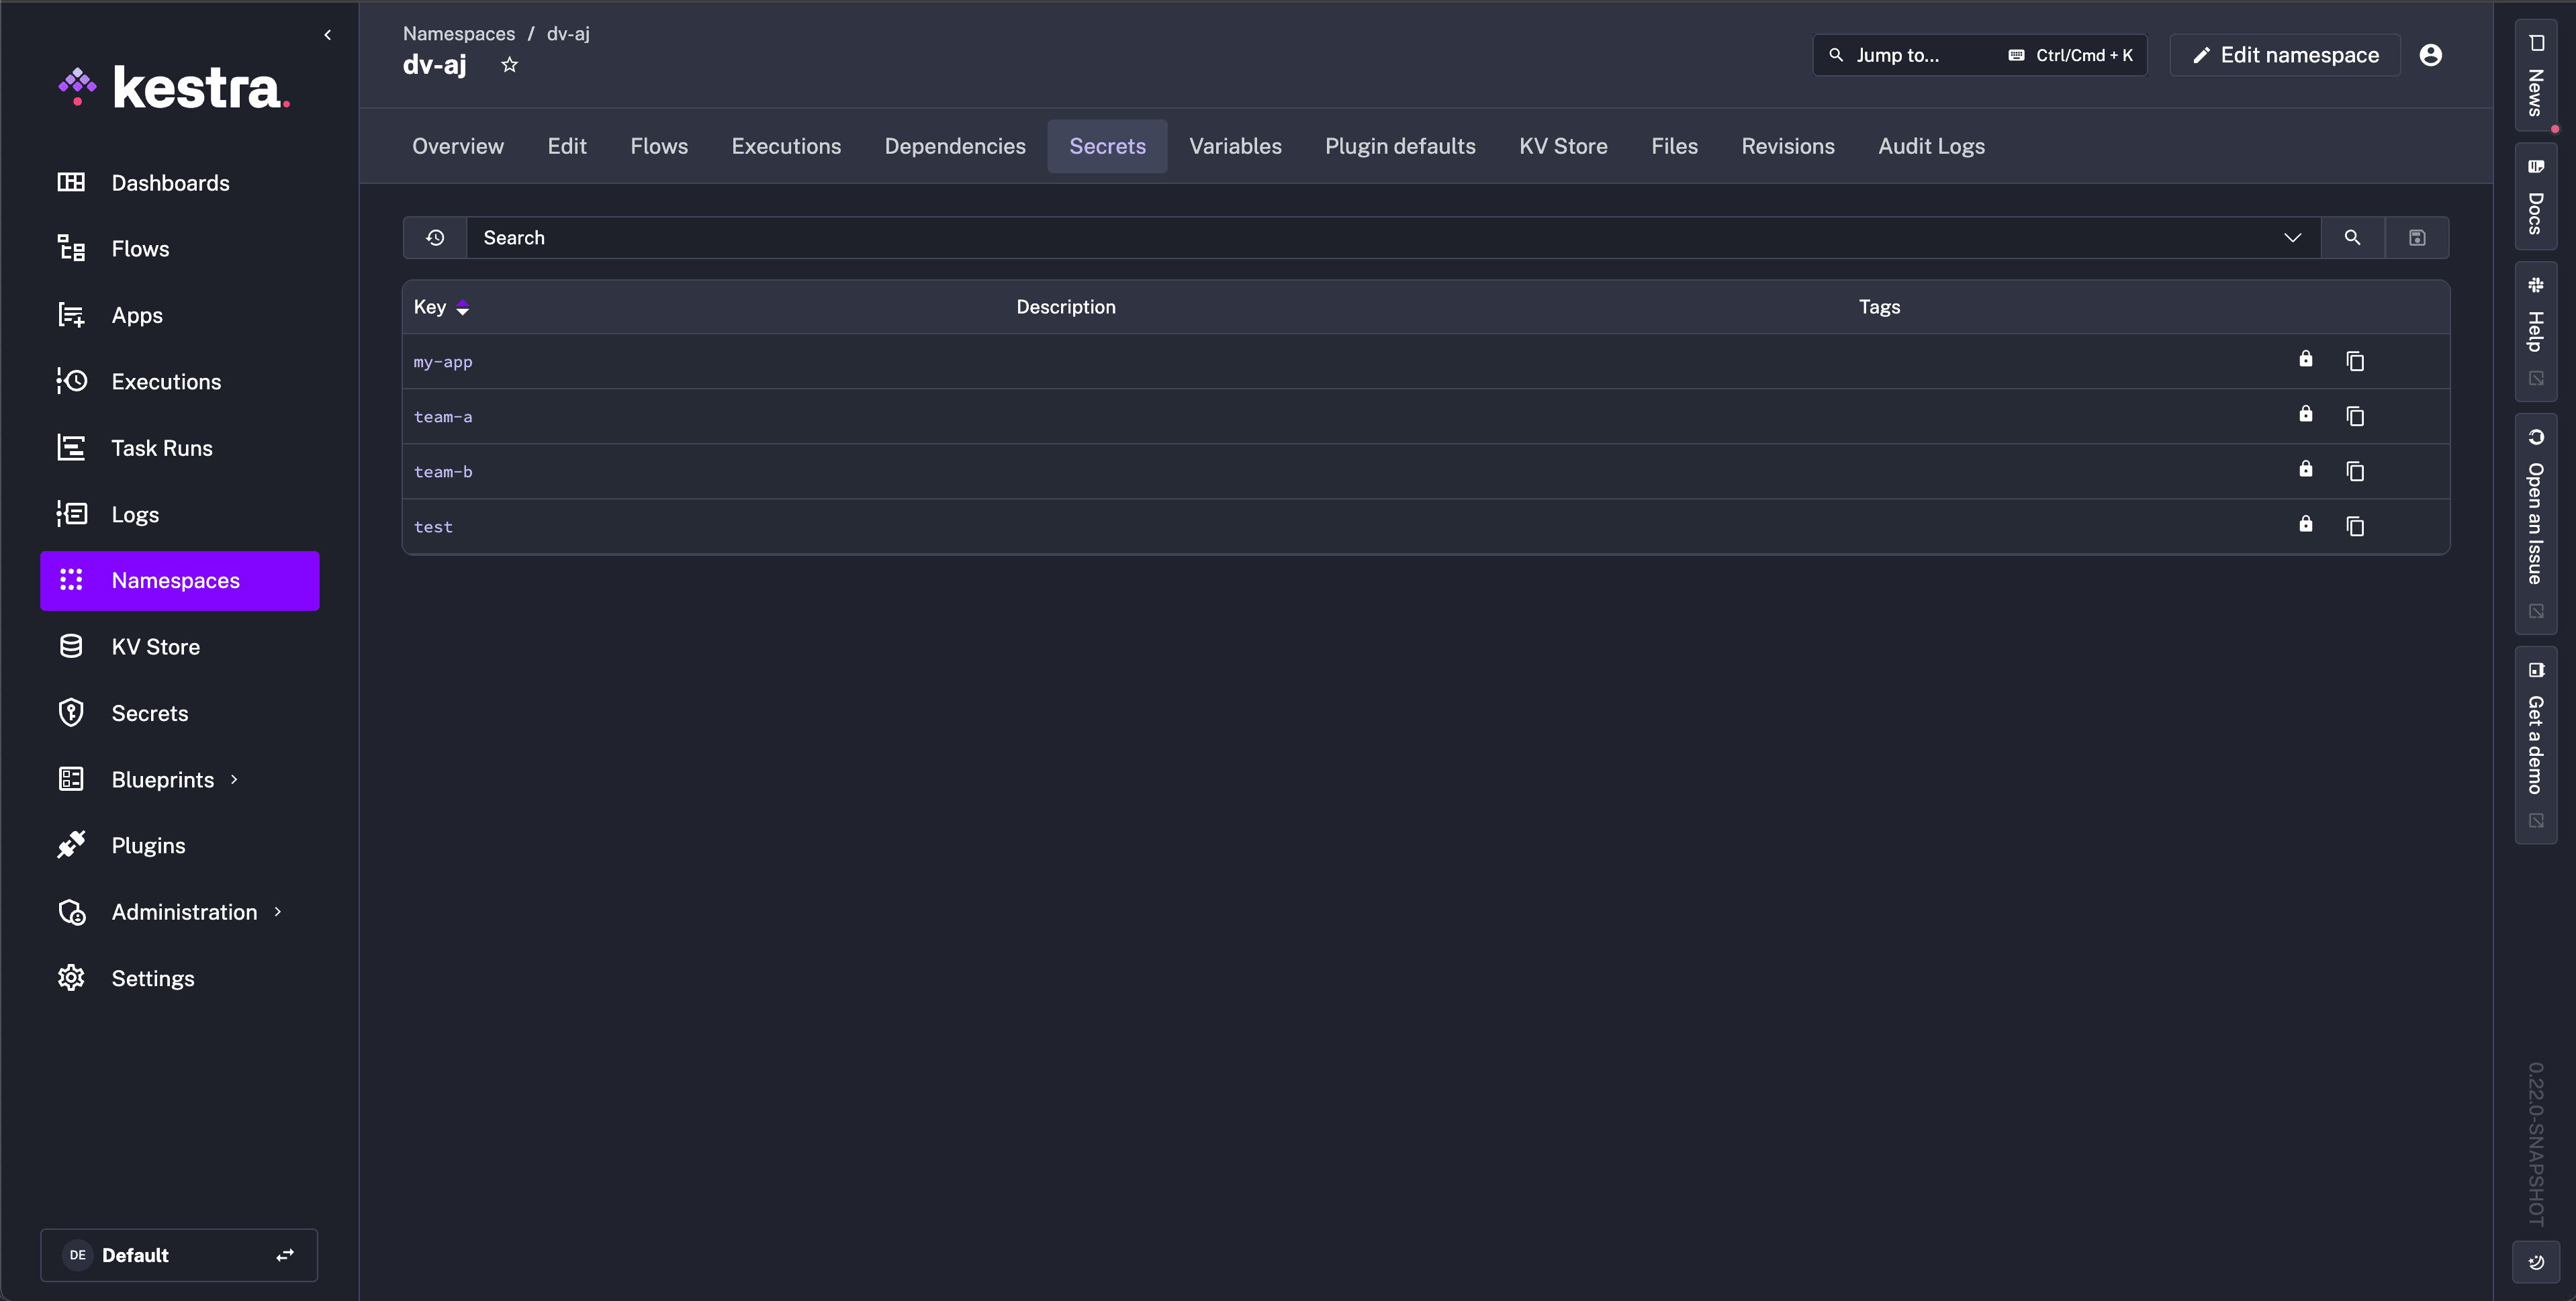
Once enabled, secrets display a lock icon and the Create New Secret button is hidden:
Required tags that must be set externally in read-only mode:
namespace— the namespace the secret belongs to.key— name used to reference the secret in flows viasecret('KEY').prefix— defaults tokestrawhen a secret is created inside Kestra; must be set manually in read-only mode.
Configure a secrets manager
Set the backend globally in your Kestra configuration file using kestra.secret.type, or scope it to a specific tenant or namespace via the Dedicated secrets manager setting in the UI. Each backend uses its own sub-key matching the type name.
Property naming differs between global config and the UI. In your kestra.yml configuration file, use kebab-case (e.g., safe-name, auth-method). When configuring a dedicated secrets manager for a namespace or tenant via the UI, use camelCase (e.g., safeName, authMethod).
Supported backends: AWS Secrets Manager · AWS SSM Parameter Store · Azure Key Vault · Google Secret Manager · HashiCorp Vault · CyberArk · Doppler · 1Password · BeyondTrust · Delinea Secret Server · Bitwarden · JDBC · Elasticsearch
AWS Secrets Manager
Permissions
Managed mode — the IAM identity needs: CreateSecret, DeleteSecret, DescribeSecret, GetSecretValue, ListSecrets, PutSecretValue, RestoreSecret, TagResource, UpdateSecret.
Read-only mode — only GetSecretValue, ListSecrets, and DescribeSecret are needed.
Minimum configuration
kestra: secret: type: aws-secret-manager aws-secret-manager: region: us-east-1With explicit credentials:
kestra: secret: type: aws-secret-manager aws-secret-manager: access-key-id: YOUR_ACCESS_KEY_ID secret-key-id: YOUR_SECRET_KEY_ID region: us-east-1Configuration reference
| Property | Type | Required | Default | Description |
|---|---|---|---|---|
access-key-id | string | No | — | AWS access key ID. |
secret-key-id | string | No | — | AWS secret access key. |
session-token | string | No | — | Temporary session token. |
region | string | No | — | AWS region (e.g. us-east-1). |
prefix | string | No | kestra | Prefix applied to all secret names. Use to share one backend across multiple Kestra instances. |
endpoint-override | string | No | — | Replace the default AWS endpoint with a compatible service (e.g. LocalStack). |
sts-role-arn | string | No | — | ARN of an IAM role to assume via STS before accessing secrets. |
sts-role-external-id | string | No | — | External ID passed with the STS AssumeRole call. |
sts-role-session-name | string | No | — | Session name for the STS assumed role. |
sts-role-session-duration | duration | No | PT15M | Duration of the assumed-role session. |
sts-endpoint-override | string | No | — | Override the STS endpoint URL. |
tags | map | No | — | Default tags added to every new or updated secret. |
filter-on-tags | map | No | — | Read-only mode: filter visible secrets by matching these tags. |
filter-on-prefix | object | No | — | Read-only mode: filter by secret name prefix. |
excluded-tags | map | No | — | Secrets with these tags are excluded from Kestra’s view. |
Credential resolution order
access-key-id/secret-key-id(+ optionalsession-token) in config.- STS role assumption using
sts-role-arn(chained on top of any resolved identity). AWS_ACCESS_KEY_ID/AWS_SECRET_ACCESS_KEY/AWS_DEFAULT_REGIONenvironment variables.- AWS CLI profile (
~/.aws/credentials). - EKS Pod Identity or IRSA (IAM Roles for Service Accounts).
- EC2/ECS instance metadata profile.
Read-only mode
Secrets must be stored as plain text in AWS Secrets Manager, not as key-value pairs.
kestra: secret: type: aws-secret-manager read-only: true aws-secret-manager: access-key-id: YOUR_ACCESS_KEY_ID secret-key-id: YOUR_SECRET_KEY_ID region: us-east-1Each secret must have the following tags set in AWS:
namespace— the Kestra namespace this secret belongs to.key— the name used insecret('KEY')expressions.prefix— typicallykestra.
The secret name in AWS will not display in Kestra. Use the key tag to control what name Kestra uses.
Filter by tags — limit visible secrets to those matching specific tags:
kestra: secret: type: aws-secret-manager read-only: true aws-secret-manager: filter-on-tags: tags: application: kestra-productionFilter by prefix — limit visible secrets to those whose names start with a given prefix:
kestra: secret: type: aws-secret-manager read-only: true aws-secret-manager: filter-on-prefix: prefix: prod_ keep-prefix: true # set false to strip the prefix from the Kestra key nameAWS SSM Parameter Store
Secrets are stored as SecureString parameters. The parameter name is <prefix>-<hash>; namespace, tenant, and key are stored as parameter tags. In read-only mode, Kestra reads existing parameters by their name, so a Parameter Store already populated outside Kestra can be used directly.
Permissions
Managed mode — the IAM identity needs: ssm:PutParameter, ssm:GetParameter, ssm:DeleteParameter, ssm:DescribeParameters, ssm:AddTagsToResource, ssm:RemoveTagsFromResource, ssm:ListTagsForResource, plus kms:Encrypt and kms:Decrypt on the KMS key used for SecureString encryption.
Read-only mode — only ssm:GetParameter, ssm:DescribeParameters, and ssm:ListTagsForResource are needed.
Minimum configuration
kestra: secret: type: aws-ssm-parameter-store aws-ssm-parameter-store: region: us-east-1Configuration reference
| Property | Type | Required | Default | Description |
|---|---|---|---|---|
access-key-id | string | No | — | AWS access key ID. |
secret-key-id | string | No | — | AWS secret access key. |
session-token | string | No | — | Temporary session token. |
region | string | No | — | AWS region. |
kms-key-id | string | No | — | Customer-managed KMS key ID for SecureString encryption. Defaults to alias/aws/ssm. |
prefix | string | No | kestra | Prefix applied to all parameter names. |
endpoint-override | string | No | — | Replace the default SSM endpoint. |
sts-role-arn | string | No | — | IAM role to assume via STS. |
sts-role-external-id | string | No | — | External ID for STS AssumeRole. |
sts-role-session-name | string | No | — | Session name for the assumed role. |
sts-role-session-duration | duration | No | PT15M | Duration of the assumed-role session. |
sts-endpoint-override | string | No | — | Override the STS endpoint URL. |
tags | map | No | — | Default tags added to every new or updated parameter. |
filter-on-tags | map | No | — | Read-only mode: filter visible parameters by matching tags. |
filter-on-prefix | object | No | — | Read-only mode: filter by parameter name prefix. |
excluded-tags | map | No | — | Parameters with these tags are excluded from Kestra’s view. |
Credential resolution order is identical to AWS Secrets Manager.
Read-only mode
kestra: secret: type: aws-ssm-parameter-store read-only: true aws-ssm-parameter-store: region: us-east-1Tag and prefix filtering work the same as for AWS Secrets Manager.
Azure Key Vault
Permissions
Managed mode — the service principal or managed identity needs: Get, List, Set, Delete, Recover, Backup, Restore, Purge.
Read-only mode — only Get and List are needed.
Minimum configuration
kestra: secret: type: azure-key-vault azure-key-vault: vault-name: my-vault-name client-secret: tenant-id: YOUR_TENANT_ID client-id: YOUR_CLIENT_ID client-secret: YOUR_CLIENT_SECRETConfiguration reference
Connection
| Property | Type | Required | Default | Description |
|---|---|---|---|---|
vault-name | string | No | — | Azure Key Vault name. Required unless key-vault-uri is set. |
key-vault-uri | string | No | — | Full vault URI (e.g. https://my-vault.vault.azure.net). Overrides vault-name. |
Service principal auth
| Property | Type | Required | Default | Description |
|---|---|---|---|---|
client-secret | object | No | — | Service principal credentials block. Sub-fields: tenant-id, client-id, client-secret. |
Managed identity auth
| Property | Type | Required | Default | Description |
|---|---|---|---|---|
managed-identity-client-id | string | No | — | Client ID of a user-assigned managed identity. Omit for system-assigned. |
managed-identity-resource-id | string | No | — | Resource ID of a user-assigned managed identity. Alternative to managed-identity-client-id. |
Workload identity auth
| Property | Type | Required | Default | Description |
|---|---|---|---|---|
workload-identity-client-id | string | No | — | Client ID for Azure Workload Identity (AKS federated credentials). |
All auth modes
| Property | Type | Required | Default | Description |
|---|---|---|---|---|
additionally-allowed-tenants | string[] | No | — | Additional tenant IDs the credential may acquire tokens for. Use "*" to allow any tenant. |
prefix | string | No | — | Prefix applied to all secret names. |
tags | map | No | — | Default tags added to every new or updated secret. |
filter-on-tags | map | No | — | Read-only mode: filter visible secrets by matching tags. |
filter-on-prefix | object | No | — | Read-only mode: filter by secret name prefix. Fields: prefix (string), keep-prefix (boolean). |
excluded-tags | map | No | — | Secrets with these tags are excluded from Kestra’s view. |
Credential resolution order
client-secretblock (service principal with client secret).managed-identity-client-idormanaged-identity-resource-id(managed identity).workload-identity-client-id(workload identity / federated credentials).- Azure default credential chain — environment variables (
AZURE_CLIENT_ID,AZURE_CLIENT_SECRET,AZURE_TENANT_ID), then Azure CLI, then managed identity.
Read-only mode
kestra: secret: type: azure-key-vault read-only: true azure-key-vault: client-secret: tenant-id: YOUR_TENANT_ID client-id: YOUR_CLIENT_ID client-secret: YOUR_CLIENT_SECRETFilter by tags:
kestra: secret: type: azure-key-vault read-only: true azure-key-vault: filter-on-tags: tags: application: kestra-productionFilter by prefix:
kestra: secret: type: azure-key-vault read-only: true azure-key-vault: filter-on-prefix: prefix: prod_ keep-prefix: true # set false to strip the prefix from the Kestra key nameGoogle Secret Manager
Permissions
Managed mode — the service account needs roles/secretmanager.admin.
Read-only mode — roles/secretmanager.secretAccessor is sufficient.
Minimum configuration
kestra: secret: type: google-secret-manager google-secret-manager: project: my-gcp-project-idWith an explicit service account key:
kestra: secret: type: google-secret-manager google-secret-manager: project: my-gcp-project-id service-account: | { "type": "service_account", "project_id": "my-gcp-project-id", "private_key_id": "...", "private_key": "...", ... }Configuration reference
| Property | Type | Required | Default | Description |
|---|---|---|---|---|
project | string | No | — | GCP project ID. |
service-account | string | No | — | Service account JSON key file contents. |
prefix | string | No | kestra | Prefix applied to all secret names. |
tags | map | No | — | Default labels added to every new or updated secret. |
filter-on-tags | map | No | — | Read-only mode: filter visible secrets by matching labels. |
filter-on-prefix | object | No | — | Read-only mode: filter by secret name prefix. |
excluded-tags | map | No | — | Secrets with these labels are excluded from Kestra’s view. |
Credential resolution order
service-accountJSON key in config.GOOGLE_APPLICATION_CREDENTIALSenvironment variable pointing to a key file.- Google default application credentials (Workload Identity, GCE metadata server, gcloud CLI).
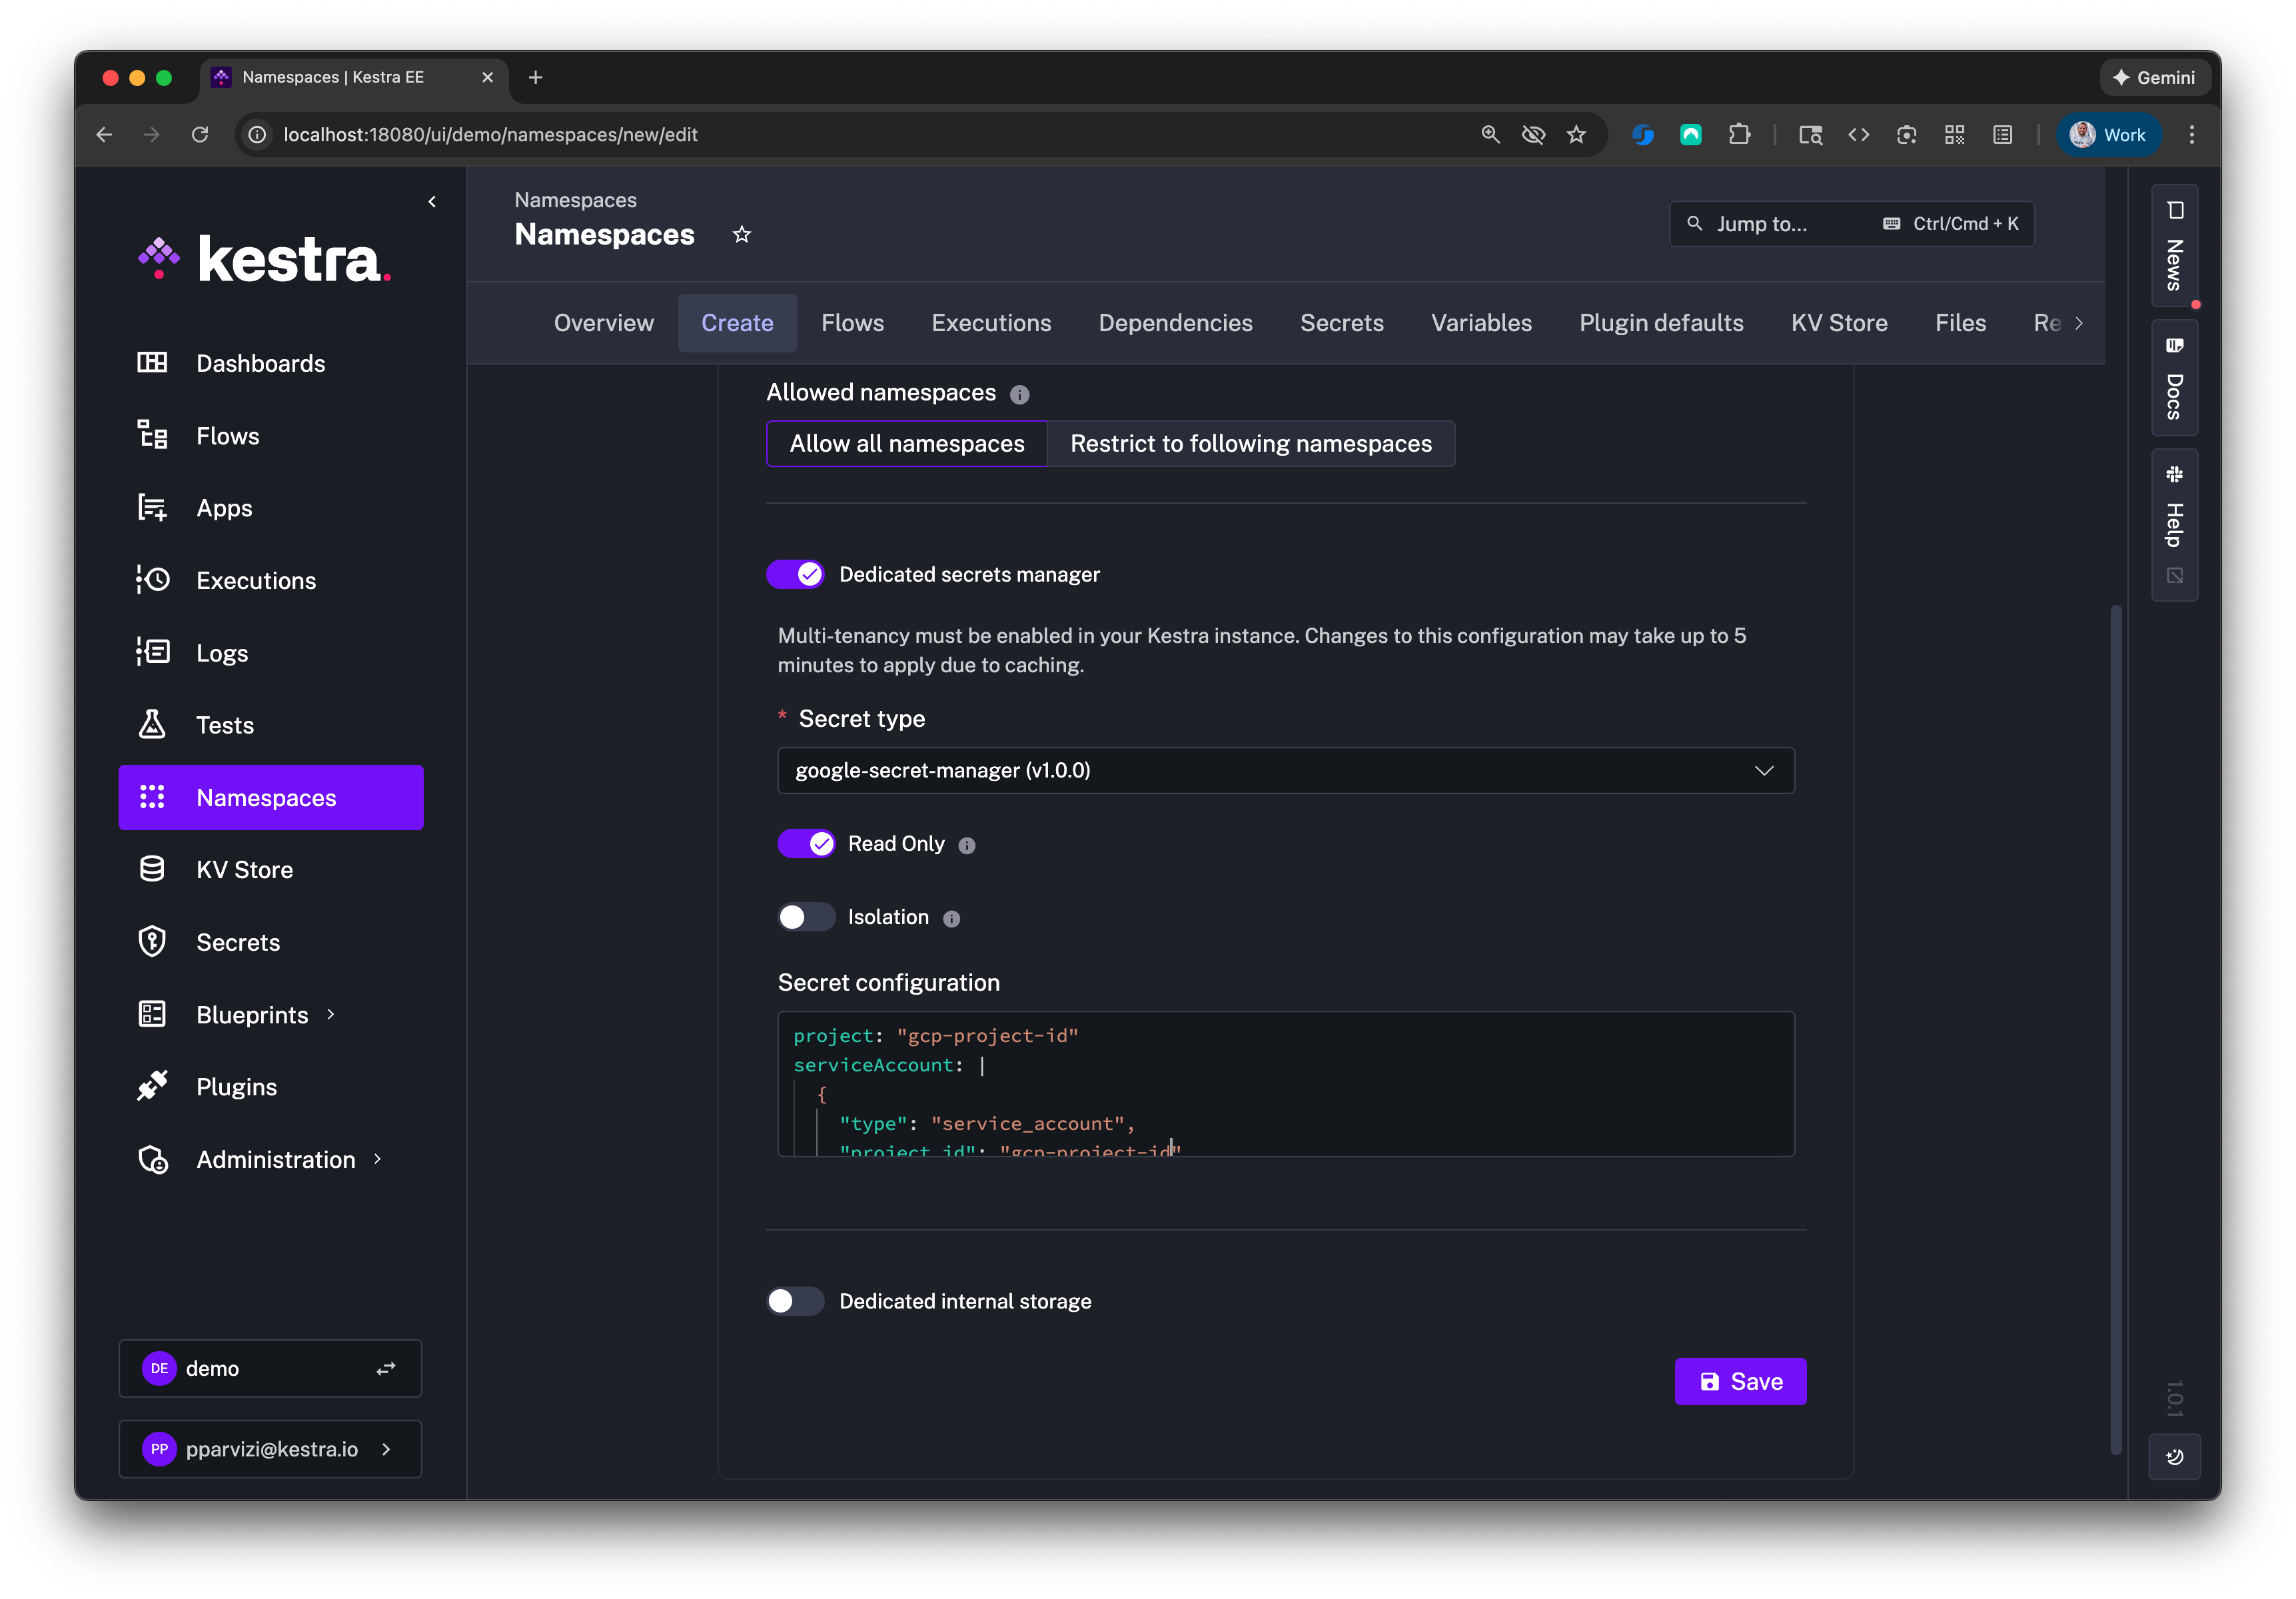
When configuring via the Kestra UI, only project and service-account fields appear:
Read-only mode
kestra: secret: type: google-secret-manager read-only: true google-secret-manager: project: my-gcp-project-id service-account: | Paste the contents of the service account JSON key file here.Filter by labels:
kestra: secret: type: google-secret-manager read-only: true google-secret-manager: filter-on-tags: tags: application: kestra-productionHashiCorp Vault
Kestra supports the KV Secrets Engine v2. Dynamic secrets engines and the Vault Secrets Operator on Kubernetes are not directly supported (the Vault Secrets Operator creates a Kubernetes Secret that Kestra can use with additional steps — contact us for guidance).
Permissions
The token or AppRole must have a Vault policy granting the following capabilities on your secrets engine path. Replace secret with your root-engine value if different.
Managed mode:
path "secret/data/*" { capabilities = ["create", "read", "update", "delete", "list"]}path "secret/metadata/*" { capabilities = ["create", "read", "update", "delete", "list"]}Read-only mode:
path "secret/data/*" { capabilities = ["read", "list"]}path "secret/metadata/*" { capabilities = ["read", "list"]}Auth methods
Choose one of the following auth methods:
Userpass
kestra: secret: type: vault vault: address: "http://localhost:8200" password: user: john password: fooToken
kestra: secret: type: vault vault: address: "http://localhost:8200" token: token: YOUR_VAULT_TOKENAppRole
kestra: secret: type: vault vault: address: "http://localhost:8200" app-role: path: approle role-id: YOUR_ROLE_ID secret-id: YOUR_SECRET_IDKubernetes
kestra: secret: type: vault vault: address: "http://localhost:8200" kubernetes: path: "kubernetes" role: "kestra"Configuration reference
| Property | Type | Required | Default | Description |
|---|---|---|---|---|
address | string | No | — | Fully qualified Vault address with scheme and port. |
password | object | No | — | Userpass auth. Sub-fields: user, password. |
token | object | No | — | Token auth. Sub-field: token. |
app-role | object | No | — | AppRole auth. Sub-fields: path, role-id, secret-id. |
kubernetes | object | No | — | Kubernetes auth. Sub-fields: path, role. |
namespace | string | No | — | Vault Enterprise namespace. |
engine-version | integer | No | 2 | KV secrets engine version. |
root-engine | string | No | secret | KV secrets engine path in Vault. |
prefix | string | No | "" | Prefix applied to all secret paths. |
secret-path-prefix | string | No | "" | Path prefix within the engine to scope Kestra’s access. |
role | string | No | — | Vault role name (used with some auth methods). |
read-only | boolean | No | false | Enable read-only mode for this backend. |
connect-timeout | duration | No | PT15S | Vault API connection timeout. |
read-timeout | duration | No | PT1M | Vault API read timeout. |
tags | map | No | — | Default tags added to every new or updated secret. |
filter-on-tags | map | No | — | Read-only mode: filter visible secrets by matching tags. |
excluded-tags | map | No | — | Secrets with these tags are excluded from Kestra’s view. |
In Vault, secrets created through Kestra are stored under TENANT_ID/NAMESPACE_PARENT/.../NAMESPACE_CHILD/SECRET_NAME. For a tenant internal and namespace company.team:
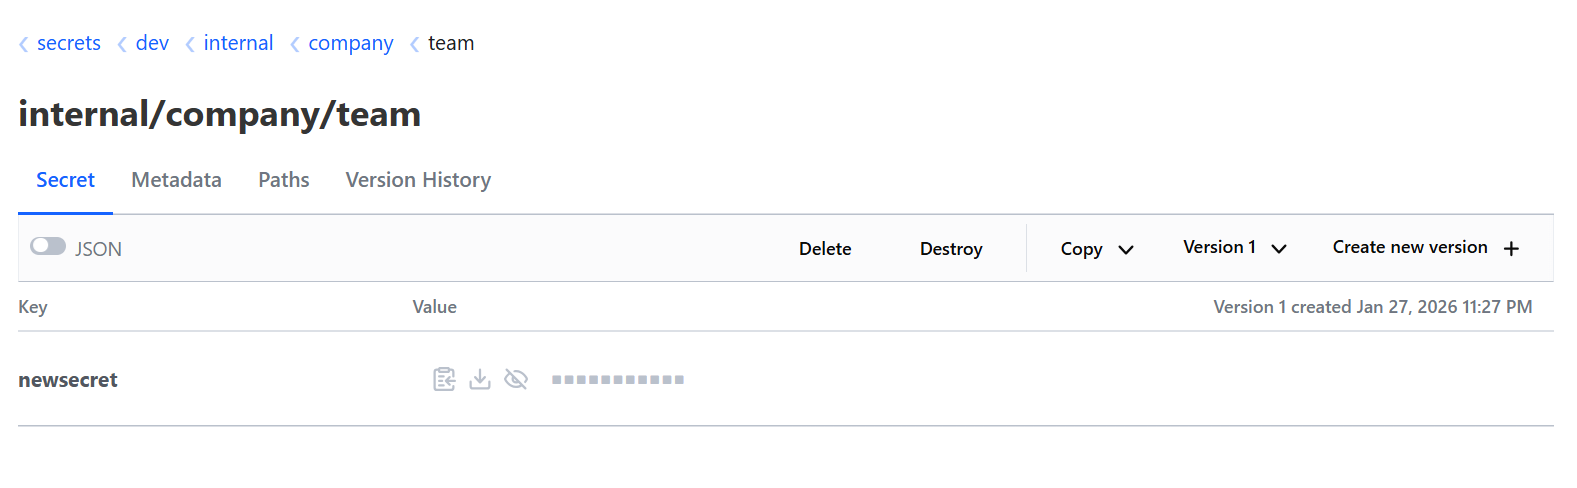
When using root-engine: dev, the engine path appears in Vault as:
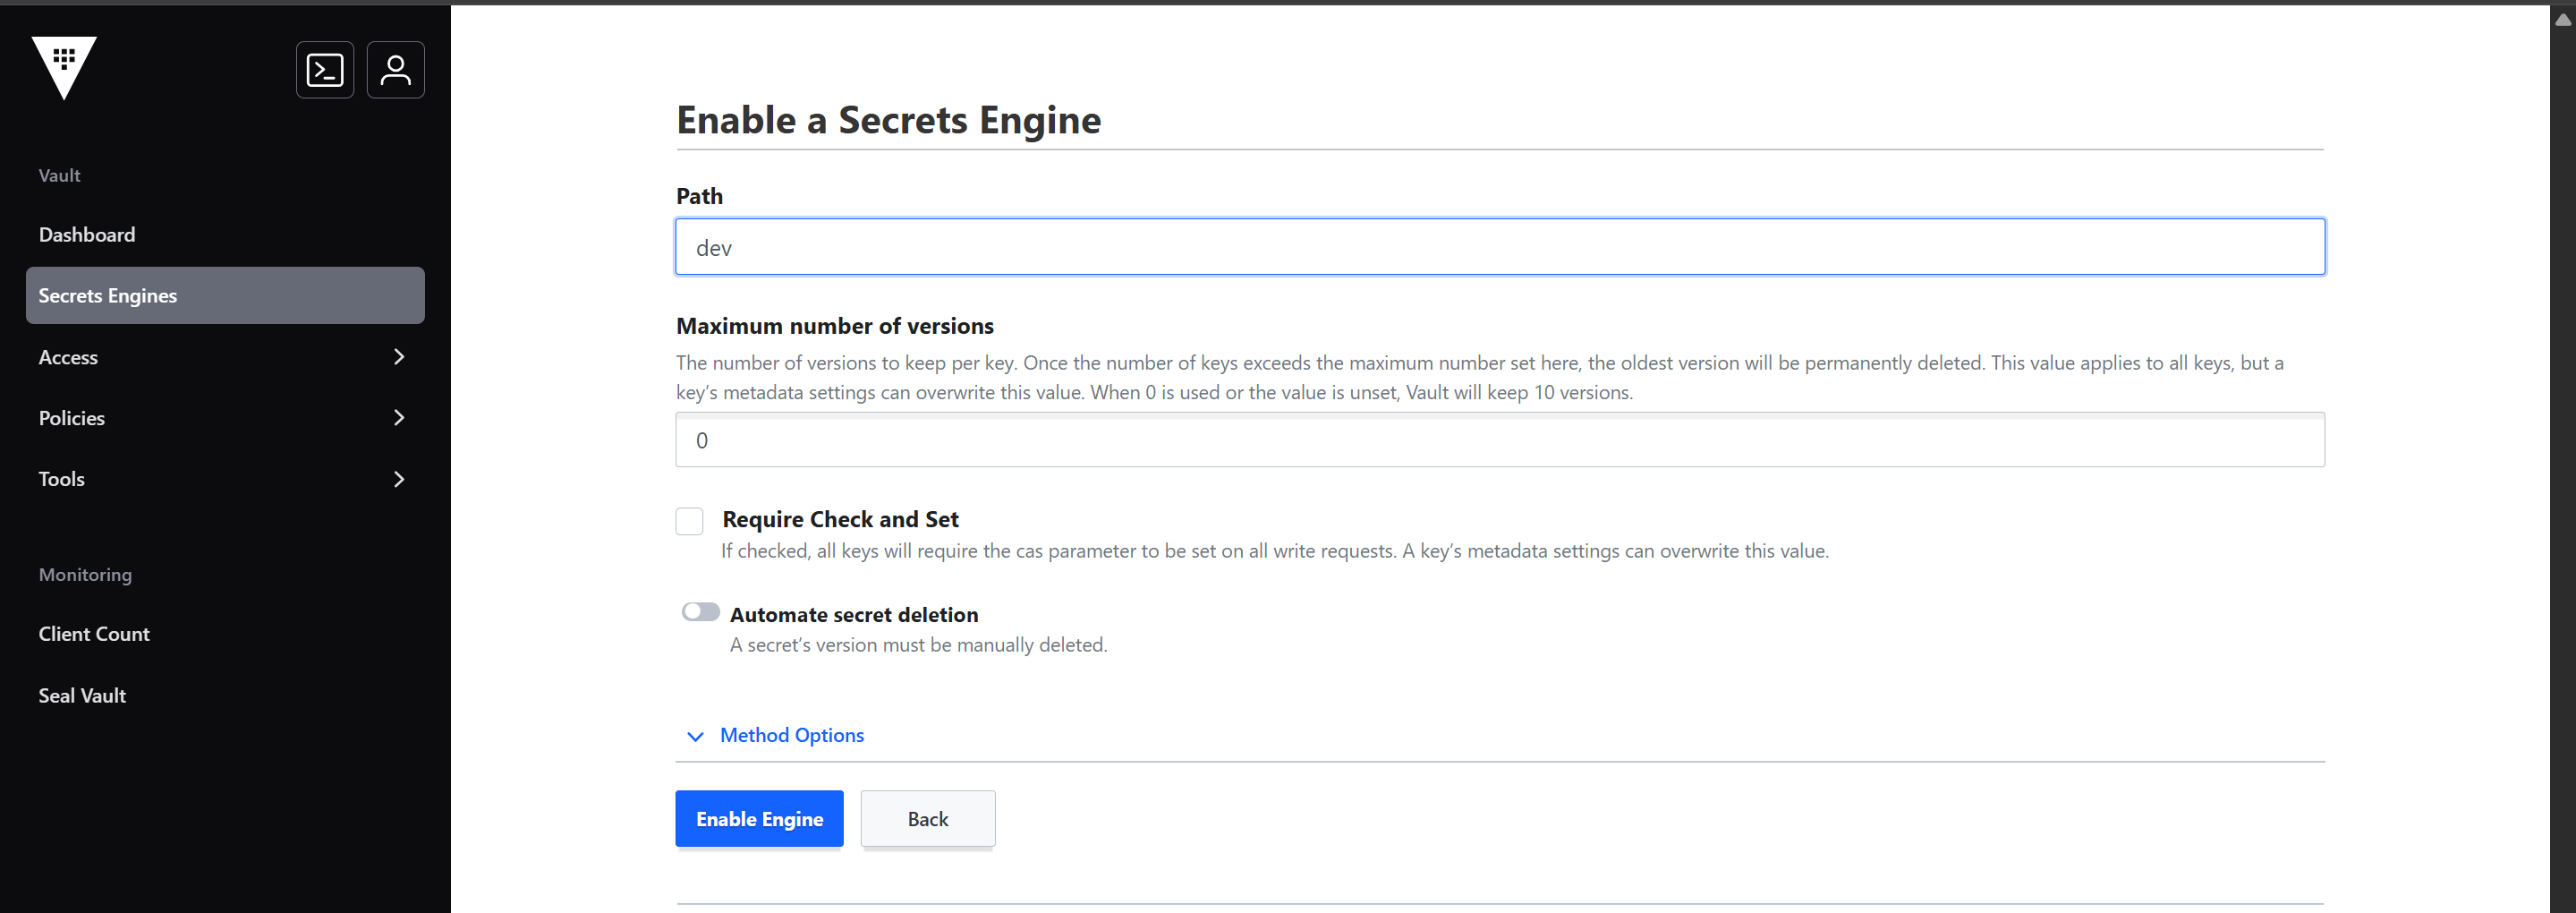
Read-only mode
Set read-only: true inside the vault config block (unlike other backends which use kestra.secret.read-only):
kestra: secret: type: vault vault: address: https://my-vault:8200/ root-engine: secret secret-path-prefix: app1 token: token: my-vault-access-token read-only: trueUse secret-path-prefix to scope Kestra’s view to a specific path within the engine. In the example above, only secrets under the app1 path are visible. Reference a subkey in a flow with:
{{ secret('my-app', subkey='MY_SUBKEY') }}For a full end-to-end walkthrough with screenshots, see Use HashiCorp Vault as a Read-Only Secrets Backend.
CyberArk
Kestra integrates with CyberArk Privilege Cloud as a secrets backend using one of two authentication methods:
- PVWA (default) — username and password logon via the CyberArk REST API. Supports read and write.
- CCP — Central Credential Provider (AIM web service), authenticated by IP allowlisting and an Application ID. Read-only. No credentials stored in Kestra configuration.
Permissions
PVWA
Managed mode — the account needs: GetAccounts, AddAccounts, UpdateAccountContent, UpdateAccountProperties, DeleteAccounts, RetrieveAccounts on the target Safe.
Read-only mode — only GetAccounts and RetrieveAccounts are needed.
CCP
CCP uses IP-based authentication — the Kestra server’s IP must be registered in the CyberArk Application ID’s allowed machines list. No CyberArk user account or password is required.
Minimum configuration
PVWA
kestra: secret: type: cyberark cyberark: address: https://your-cyberark-host username: YOUR_USERNAME password: YOUR_PASSWORD platform-id: YOUR_PLATFORM_ID safe-name: YOUR_SAFE_NAMECCP
kestra: secret: type: cyberark read-only: true cyberark: auth-method: CCP address: https://your-cyberark-host application-id: YOUR_APP_ID safe-name: YOUR_SAFE_NAMEConfiguration reference
| Property | Type | Required | Default | Description |
|---|---|---|---|---|
address | string | Yes | — | CyberArk API base URL. |
auth-method | enum | No | PVWA | Authentication method: PVWA or CCP. |
username | string | PVWA only | — | Username for PVWA authentication. |
password | string | PVWA only | — | Password for PVWA authentication. |
application-id | string | CCP only | — | Application ID registered in CyberArk for CCP authentication. |
safe-name | string | Yes | — | Name of the CyberArk Safe where secrets are stored. |
platform-id | string | PVWA managed | — | CyberArk platform ID used when creating secrets. Not required in read-only mode or for CCP. |
web-service-id | string | No | AIMWebService | CCP web service name. Only used when auth-method is CCP. |
client-certificate | string | No | — | PEM-encoded client certificate for mutual TLS. Applies to both auth methods. |
client-certificate-key | string | No | — | PEM-encoded PKCS#8 private key for the client certificate. Required if client-certificate is set. |
reason | string | No | — | Reason recorded in the CyberArk audit log on CCP credential retrieval. |
query-format | enum | No | Exact | CCP object query matching: Exact or Regexp. Only used when auth-method is CCP. |
object-property | string | No | — | Account property to return as the secret value. Defaults to the password field. Only used when auth-method is CCP. |
use-proxy | boolean | No | — | Route API calls through the configured system proxy. |
validate-certs | boolean | No | true | Validate TLS certificates on the CyberArk endpoint. |
secret-path-prefix | string | No | "" | Path prefix within the Safe. |
tags | map | No | — | Default tags added to every new or updated secret. |
filter-on-tags | map | No | — | Filter visible secrets by matching tags. |
excluded-tags | map | No | — | Secrets with these tags are excluded from Kestra’s view. |
Read-only mode
Set read-only: true to prevent Kestra from creating or modifying secrets.
PVWA read-only — platform-id is not required in this mode.
kestra: secret: type: cyberark read-only: true cyberark: address: https://your-cyberark-host username: YOUR_USERNAME password: YOUR_PASSWORD safe-name: YOUR_SAFE_NAMECCP is always read-only and does not support write operations.
Doppler
Kestra integrates with Doppler as a secrets backend. Secrets are accessed at runtime via the Doppler API and kept only in memory.
Minimum configuration
kestra: secret: type: doppler doppler: token: YOUR_SERVICE_TOKEN project: my-project config: productionConfiguration reference
| Property | Type | Required | Default | Description |
|---|---|---|---|---|
token | string | No | — | Doppler service token with access to the target project and config. |
project | string | No | — | Doppler project containing the secrets. |
config | string | No | — | Doppler config (environment) to read from. |
secret-name-prefix | string | No | — | Prefix added to secret keys to avoid collisions when sharing a backend. |
connect-timeout | duration | No | PT15S | HTTP connection timeout for Doppler API calls. |
read-timeout | duration | No | PT60S | HTTP read timeout for Doppler API calls. |
tags | map | No | — | Default tags for new or updated secrets. |
filter-on-tags | map | No | — | Filter visible secrets by tags. |
excluded-tags | map | No | — | Secrets with these tags are excluded. |
Read-only mode
Use a service token with read access only. The project and config values scope Kestra’s view to a single Doppler environment.
kestra: secret: type: doppler read-only: true doppler: token: YOUR_SERVICE_TOKEN project: my-project config: production1Password
Kestra integrates with 1Password via the 1Password Connect API. A running 1Password Connect server is required.
Minimum configuration
kestra: secret: type: 1password 1password: address: http://localhost:18080 token: YOUR_CONNECT_TOKEN vault-id: YOUR_VAULT_IDConfiguration reference
| Property | Type | Required | Default | Description |
|---|---|---|---|---|
address | string | Yes | — | Base URL of the 1Password Connect server. |
token | string | Yes | — | 1Password Connect API token. |
vault-id | string | Yes | — | ID of the vault containing the secrets. |
validate-certs | boolean | No | — | Validate TLS certificates on the Connect server. |
secret-path-prefix | string | No | "" | Path prefix for secrets in the vault. |
tags | map | No | — | Default tags for new or updated secrets. |
filter-on-tags | map | No | — | Filter visible secrets by tags. |
excluded-tags | map | No | — | Secrets with these tags are excluded. |
Read-only mode
The Connect API token needs only read access to the target vault (item:read scope). No special format requirements apply to secrets.
kestra: secret: type: 1password read-only: true 1password: address: http://localhost:18080 token: YOUR_CONNECT_TOKEN vault-id: YOUR_VAULT_IDBeyondTrust
Kestra integrates with BeyondTrust Password Safe (Secrets Safe) via the Secret Safe API.
Permissions
Managed mode — the API key must have Secrets Safe permissions to retrieve, create, update, and delete secrets in the target folder.
Read-only mode — only Retrieve permissions are needed.
Minimum configuration
kestra: secret: type: beyondtrust beyondtrust: address: https://beyondtrust.example.com api-key: YOUR_API_KEY run-as: domain\\service-accountConfiguration reference
| Property | Type | Required | Default | Description |
|---|---|---|---|---|
address | string | Yes | — | Base URL of the BeyondTrust Password Safe instance. |
api-key | string | Yes | — | API key for authentication. |
run-as | string | Yes | — | User context for API calls (e.g. domain\\username). |
folder-id | string | No | — | Secrets Safe folder ID where Kestra secrets are stored. |
owner-id | integer | No | — | Owner ID for new secrets. |
owner-type | string | No | User | Owner type: User or Group. |
api-version | string | No | V3_0 | API version to use: V3_0 or V3_1. |
connect-timeout | duration | No | PT15S | HTTP connection timeout. |
read-timeout | duration | No | PT1M | HTTP read timeout. |
secret-path-prefix | string | No | "" | Path prefix for secrets. |
tags | map | No | — | Default tags for new or updated secrets. |
filter-on-tags | map | No | — | Filter visible secrets by tags. |
excluded-tags | map | No | — | Secrets with these tags are excluded. |
Read-only mode
In read-only mode, folder-id, owner-id, and owner-type are not needed — they apply only when Kestra creates new secrets. The API key needs only Retrieve (read) permissions on the target Secrets Safe.
kestra: secret: type: beyondtrust read-only: true beyondtrust: address: https://beyondtrust.example.com api-key: YOUR_API_KEY run-as: domain\\service-accountDelinea Secret Server
Kestra integrates with Delinea Secret Server as a secrets backend.
Minimum configuration
kestra: secret: type: delinea delinea: address: https://your-delinea-instance.secretservercloud.com username: YOUR_USERNAME password: YOUR_PASSWORDConfiguration reference
| Property | Type | Required | Default | Description |
|---|---|---|---|---|
address | string | Yes | — | Base URL of the Delinea Secret Server instance. |
username | string | Yes | — | Username for authentication. |
password | string | Yes | — | Password for authentication. |
domain | string | No | — | Active Directory domain for on-premise deployments using domain accounts. |
folder-id | integer | No | — | Folder ID in Delinea where Kestra secrets are stored. Required for write operations. |
secret-template-id | integer | No | — | Secret template ID for creating new secrets. Required for write operations. |
site-id | integer | No | — | Site ID for distributed engine deployments. |
connect-timeout | duration | No | PT15S | HTTP connection timeout. |
read-timeout | duration | No | PT1M | HTTP read timeout. |
secret-path-prefix | string | No | "" | Path prefix for secrets. |
tags | map | No | — | Default tags for new or updated secrets. |
filter-on-tags | map | No | — | Filter visible secrets by tags. |
excluded-tags | map | No | — | Secrets with these tags are excluded. |
Reading multi-field Delinea secrets
Delinea secrets contain structured credentials — for example, an Active Directory template has a password, username, and domain as separate fields.
By default, secret() returns the password field:
{{ secret('AD_CREDS') }}Pass full=true to retrieve all fields. The value key holds the password; metadata holds all other non-password, non-notes template fields keyed by their Delinea item slug:
{% set creds = secret('AD_CREDS', full=true) %}{{ creds.value }} {# password #}{{ creds.metadata.username }}{{ creds.metadata.domain }}The keys available under creds.metadata depend on the fields defined in your Delinea secret template. The notes field is always excluded.
Read-only mode
In read-only mode, folder-id and secret-template-id are not required — they are only used when Kestra creates new secrets. The Delinea account needs only view access to the target secrets.
kestra: secret: type: delinea read-only: true delinea: address: https://your-delinea-instance.secretservercloud.com username: YOUR_USERNAME password: YOUR_PASSWORDBitwarden
Kestra integrates with Bitwarden Secrets Manager. Secrets are decrypted client-side by Kestra workers at runtime and kept only in memory. No Bitwarden CLI or native SDK is required.
Minimum configuration
kestra: secret: type: bitwarden bitwarden: access-token: YOUR_ACCESS_TOKEN organization-id: YOUR_ORGANIZATION_IDConfiguration reference
| Property | Type | Required | Default | Description |
|---|---|---|---|---|
access-token | string | No | — | Machine account access token for authentication and client-side decryption. |
organization-id | string | No | — | Bitwarden organization the machine account belongs to. |
api-url | string | No | https://api.bitwarden.com | Bitwarden API URL. Use https://api.bitwarden.eu for EU cloud or your instance URL for self-hosted. |
identity-url | string | No | https://identity.bitwarden.com | Bitwarden identity URL. Use https://identity.bitwarden.eu for EU cloud. |
project-id | string | No | — | Restrict resolution to a single Bitwarden project. |
secret-name-prefix | string | No | "" | Prefix applied to all secret names. |
connect-timeout | duration | No | PT15S | HTTP connection timeout. |
read-timeout | duration | No | PT1M | HTTP read timeout. |
tags | map | No | — | Default tags for new or updated secrets. |
filter-on-tags | map | No | — | Filter visible secrets by tags. |
excluded-tags | map | No | — | Secrets with these tags are excluded. |
Read-only mode
The machine account access token must have read access to the Bitwarden project containing the secrets. Read-only mode prevents Kestra from creating or modifying secrets.
kestra: secret: type: bitwarden read-only: true bitwarden: access-token: YOUR_ACCESS_TOKEN organization-id: YOUR_ORGANIZATION_IDJDBC (PostgreSQL, H2, MySQL)
The JDBC backend stores encrypted secrets in Kestra’s own database. This is the default for open-source deployments.
kestra: secret: type: jdbc jdbc: secret: YOUR_ENCRYPTION_KEYThe encryption key must be at least 32 characters. See the Security and Secrets configuration guide for key generation details.
Elasticsearch
The Elasticsearch backend stores secrets with AES encryption in the same Elasticsearch cluster used by Kestra (Kafka/Elastic backend deployments).
kestra: secret: type: elasticsearch elasticsearch: secret: "a-secure-32-character-minimum-key"See the Security and Secrets configuration guide for key generation details.
Shared configuration
Default tags
Each secret backend accepts a tags map. Tags are added to every secret created or updated through Kestra and can be used as read-only mode filters.
kestra: secret: aws-secret-manager: tags: application: kestra-production environment: prodSecret caching
For cloud-backed secrets managers, enable caching to reduce the number of API calls per execution.
kestra: secret: cache: enabled: true maximum-size: 1000 expire-after-write: 60s| Property | Description |
|---|---|
cache.enabled | Enable caching (default false). |
cache.maximum-size | Maximum number of cached secret entries. |
cache.expire-after-write | TTL for each cache entry after creation. |
Secret isolation
Restrict which Kestra services are permitted to resolve secrets. Use this to prevent components such as the Executor from accessing secret values directly, limiting resolution to Workers only.
kestra: secret: isolation: enabled: true denied-services: - EXECUTOR| Property | Description |
|---|---|
isolation.enabled | Enable service isolation (default false). |
isolation.denied-services | List of Kestra service names that must not resolve secrets (e.g. EXECUTOR, INDEXER, SCHEDULER). |
Known limitations
Pre-existing secrets are not migrated when switching backends
When a namespace or tenant switches from Kestra’s internal secret backend (JDBC or Elasticsearch) to an external secrets manager, existing secrets stored in the internal backend are not automatically migrated.
Kestra will attempt to resolve those secret keys against the new external backend. Because the external backend does not hold them, resolution fails silently — the Kestra UI shows no error, but the secret() function fails at runtime when a flow uses one of those keys.
Before switching backends:
- Export all existing secrets from the current backend.
- Re-create them in the new external backend with the correct tags (
namespace,key,prefix). - Switch the backend configuration in Kestra.
This also applies when adding a dedicated external backend to a namespace that previously used the instance-level JDBC or Elasticsearch backend.
Was this page helpful?