 Set Up for Kestra Plugin Development
Set up your environment for Plugin Development.
Prepare your environment for plugin development
This quick setup guide gets you ready to build and publish Kestra plugins.
Plugin Template
To get started with building a new plugin, make sure to use the plugin-template, as it comes prepackaged with the standardized repository structure and deployment workflows.
That template will create a project hosting a group of plugins — we usually create multiple subplugins for a given service. For example, there’s only one plugin for AWS, but it includes many subplugins for specific AWS services.
Note that the Kestra plugin library version must align with your Kestra instance. You may encounter validation issues during flow creation (e.g., Invalid bean response with status 422) when some plugins are on an older version of the Kestra plugin library. In that case, you may want to update the file plugin-yourplugin/gradle.properties and set the version property to the correct Kestra version like below:
version=0.20.0-SNAPSHOTkestraVersion=[0.20,)It’s not mandatory that your plugin version matches the Kestra version, Kestra’s official plugins version will always match the minor version of Kestra, but it is best practice.
Then rebuild and publish the plugin.
Requirements
Kestra plugins development requirements are:
- Java 21 or later.
- IntelliJ IDEA (or any other Java IDE, we provide only help for IntelliJ IDEA).
- Gradle (included most of the time with the IDE).
Create a new plugin
Here are the steps:
- Go to the plugin-template repository.
- Click on Use this template.
- Choose the GitHub account you want to link and the repository name for the new plugin.
- Clone the new repository:
git clone git@github.com:{{user}}/{{name}}.git. - Open the cloned directory in IntelliJ IDEA.
- Enable annotations processors.
- If you are using IntelliJ IDEA < 2020.03, install the lombok plugins (if not, it’s included by default).
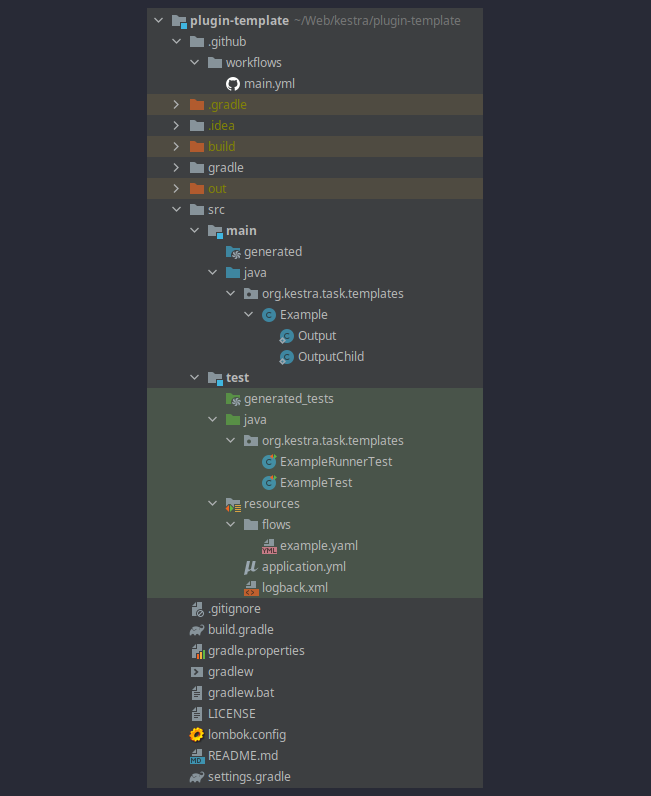
Once you completed the steps above, you should see a similar directory structure:

As you can see, there is one generated plugin: the Example class representing the Example plugin (a task).
A project typically hosts multiple plugins. We call a project a group of plugins, and you can have multiple sub-groups inside a project by splitting plugins into different packages. Each package that has a plugin class is a sub-group of plugins.
Plugin icons
Plugin icons need to be added in the SVG format — see an example here in the JIRA plugin.
Where can you find icons?
- For proprietary systems, Wikipedia is a good source of SVG icons.
- For AWS services, the AWS icons is a great resource.
- Google Fonts Icons
- Feather Icons.
Was this page helpful?