Integrate Keycloak as Your OIDC Identity Provider
For the complete documentation index, see llms.txt. For a full content snapshot, see llms-full.txt. Append.mdto anykestra.io/docs/*URL for plain Markdown.
Set up Keycloak SSO to manage authentication for users.
Configure Keycloak SSO
In conjunction with SSO, check out the Keycloak SCIM provisioning guide.
Start a Keycloak service
If you don’t have a Keycloak server already running, you can use a managed service like Cloud IAM.
You can follow the steps described in the Keycloak tutorial documentation to deploy a managed Keycloak cluster for free.
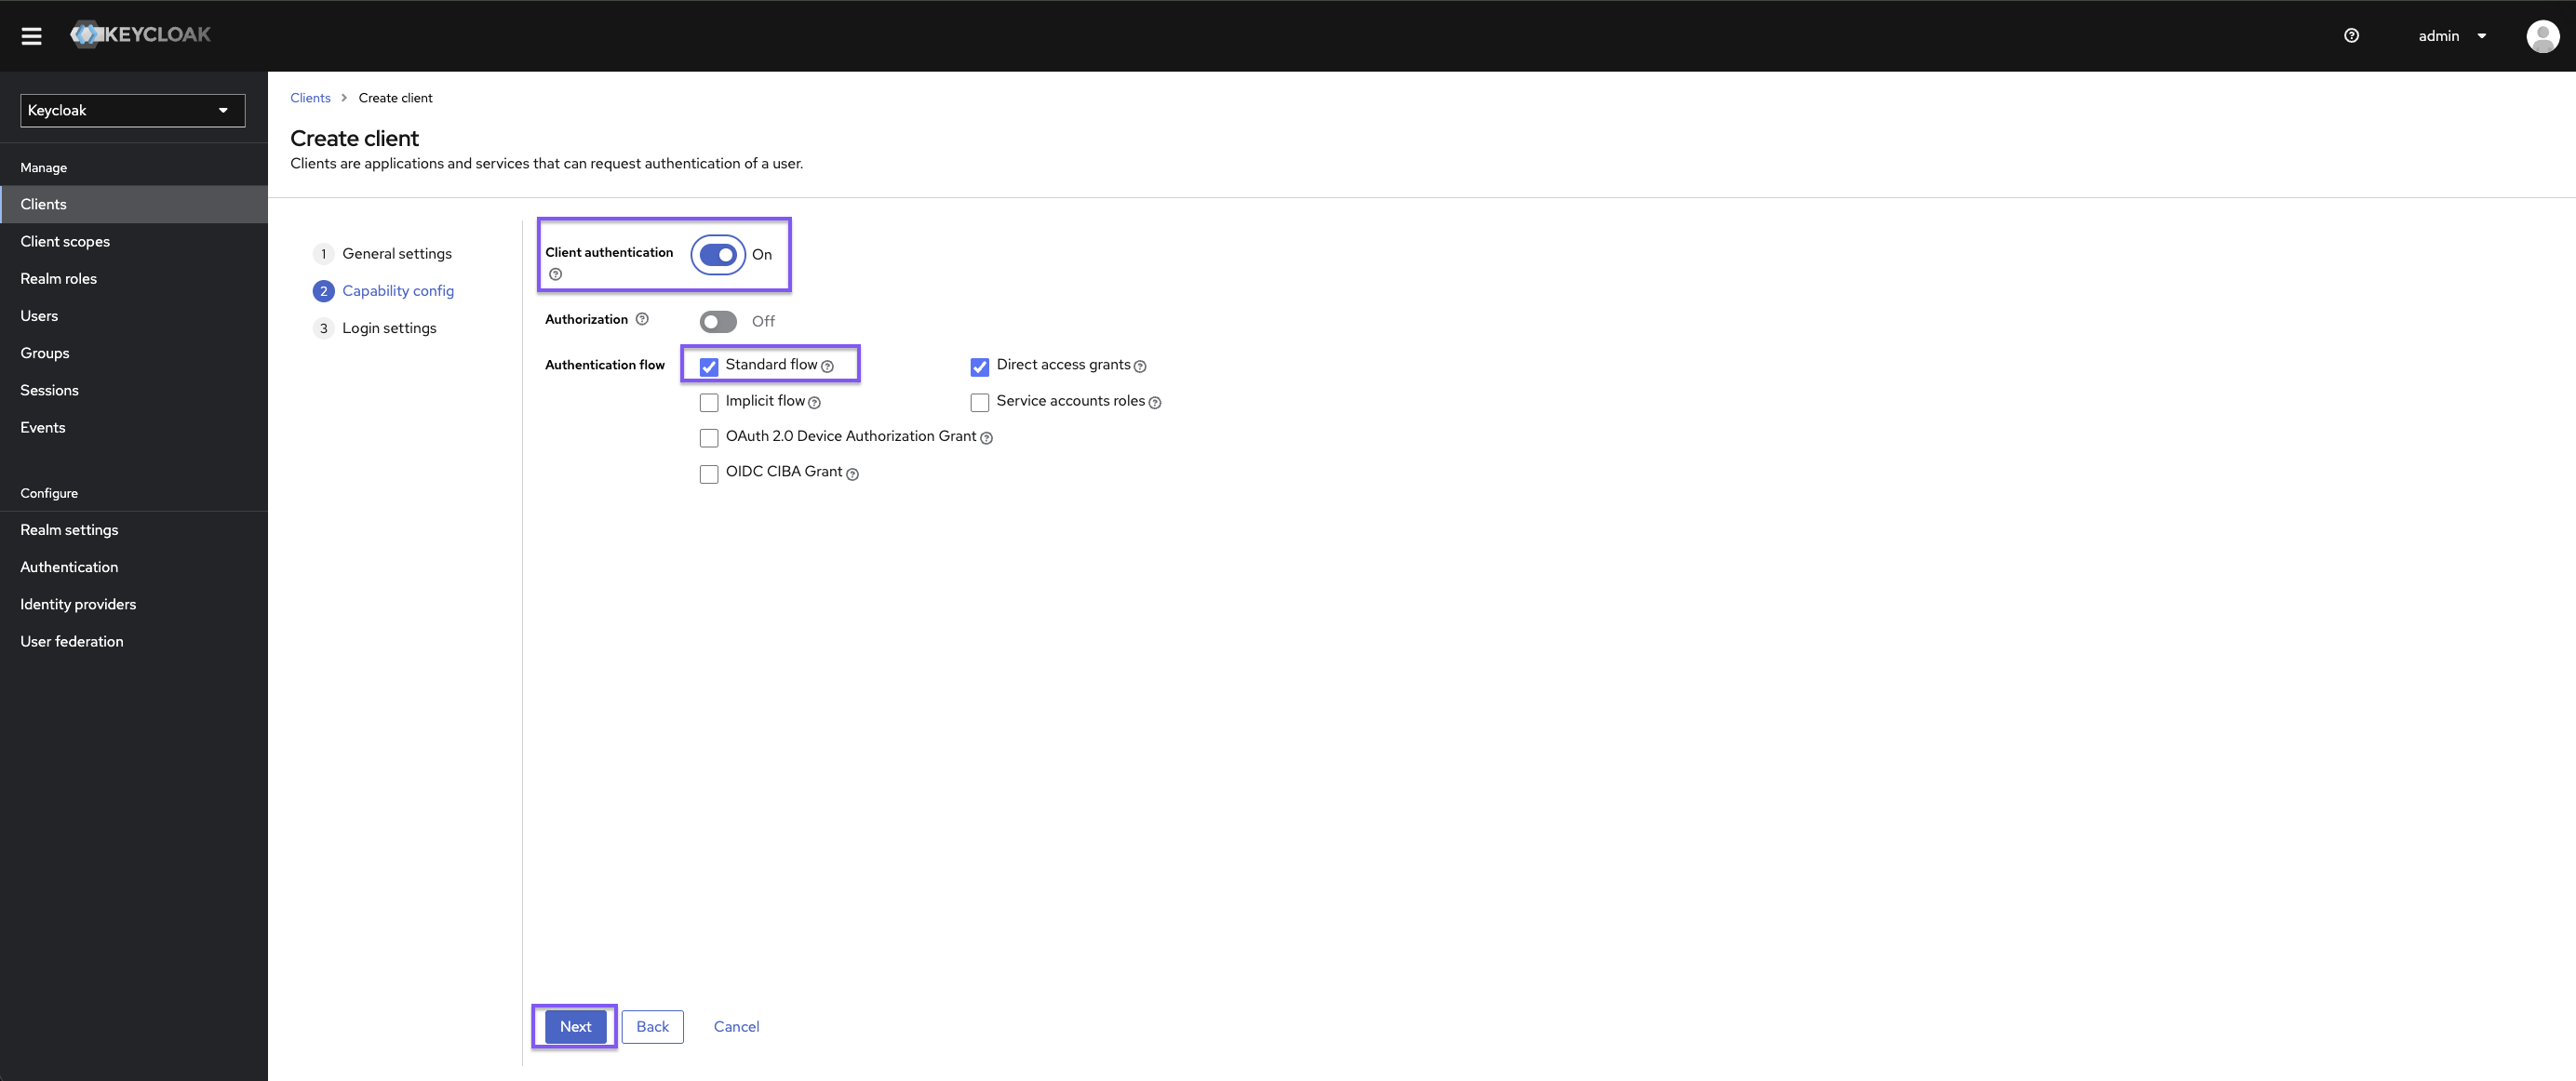
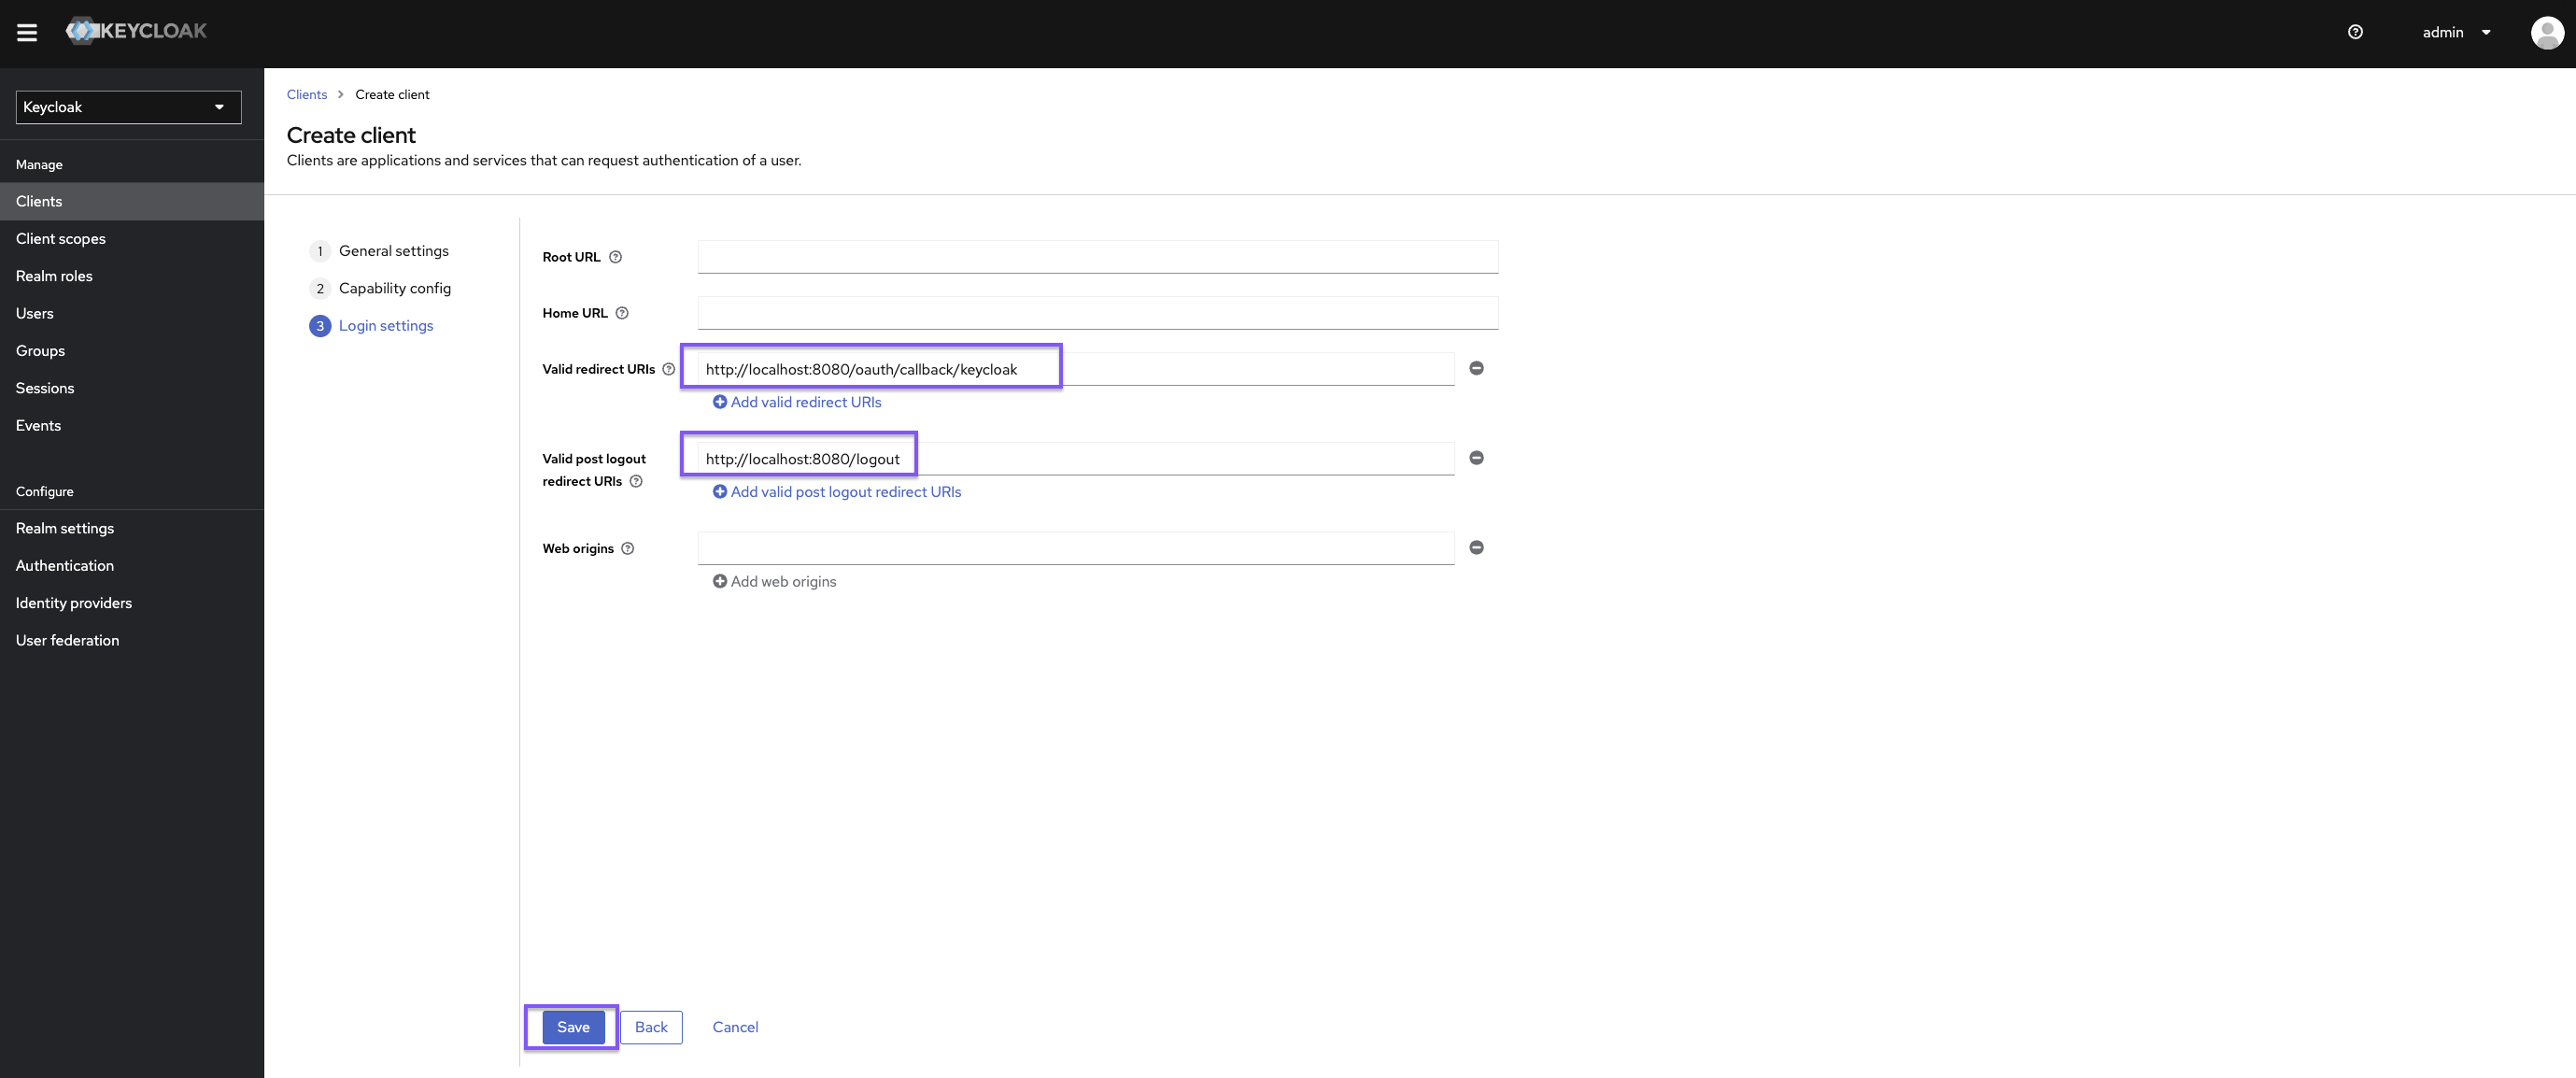
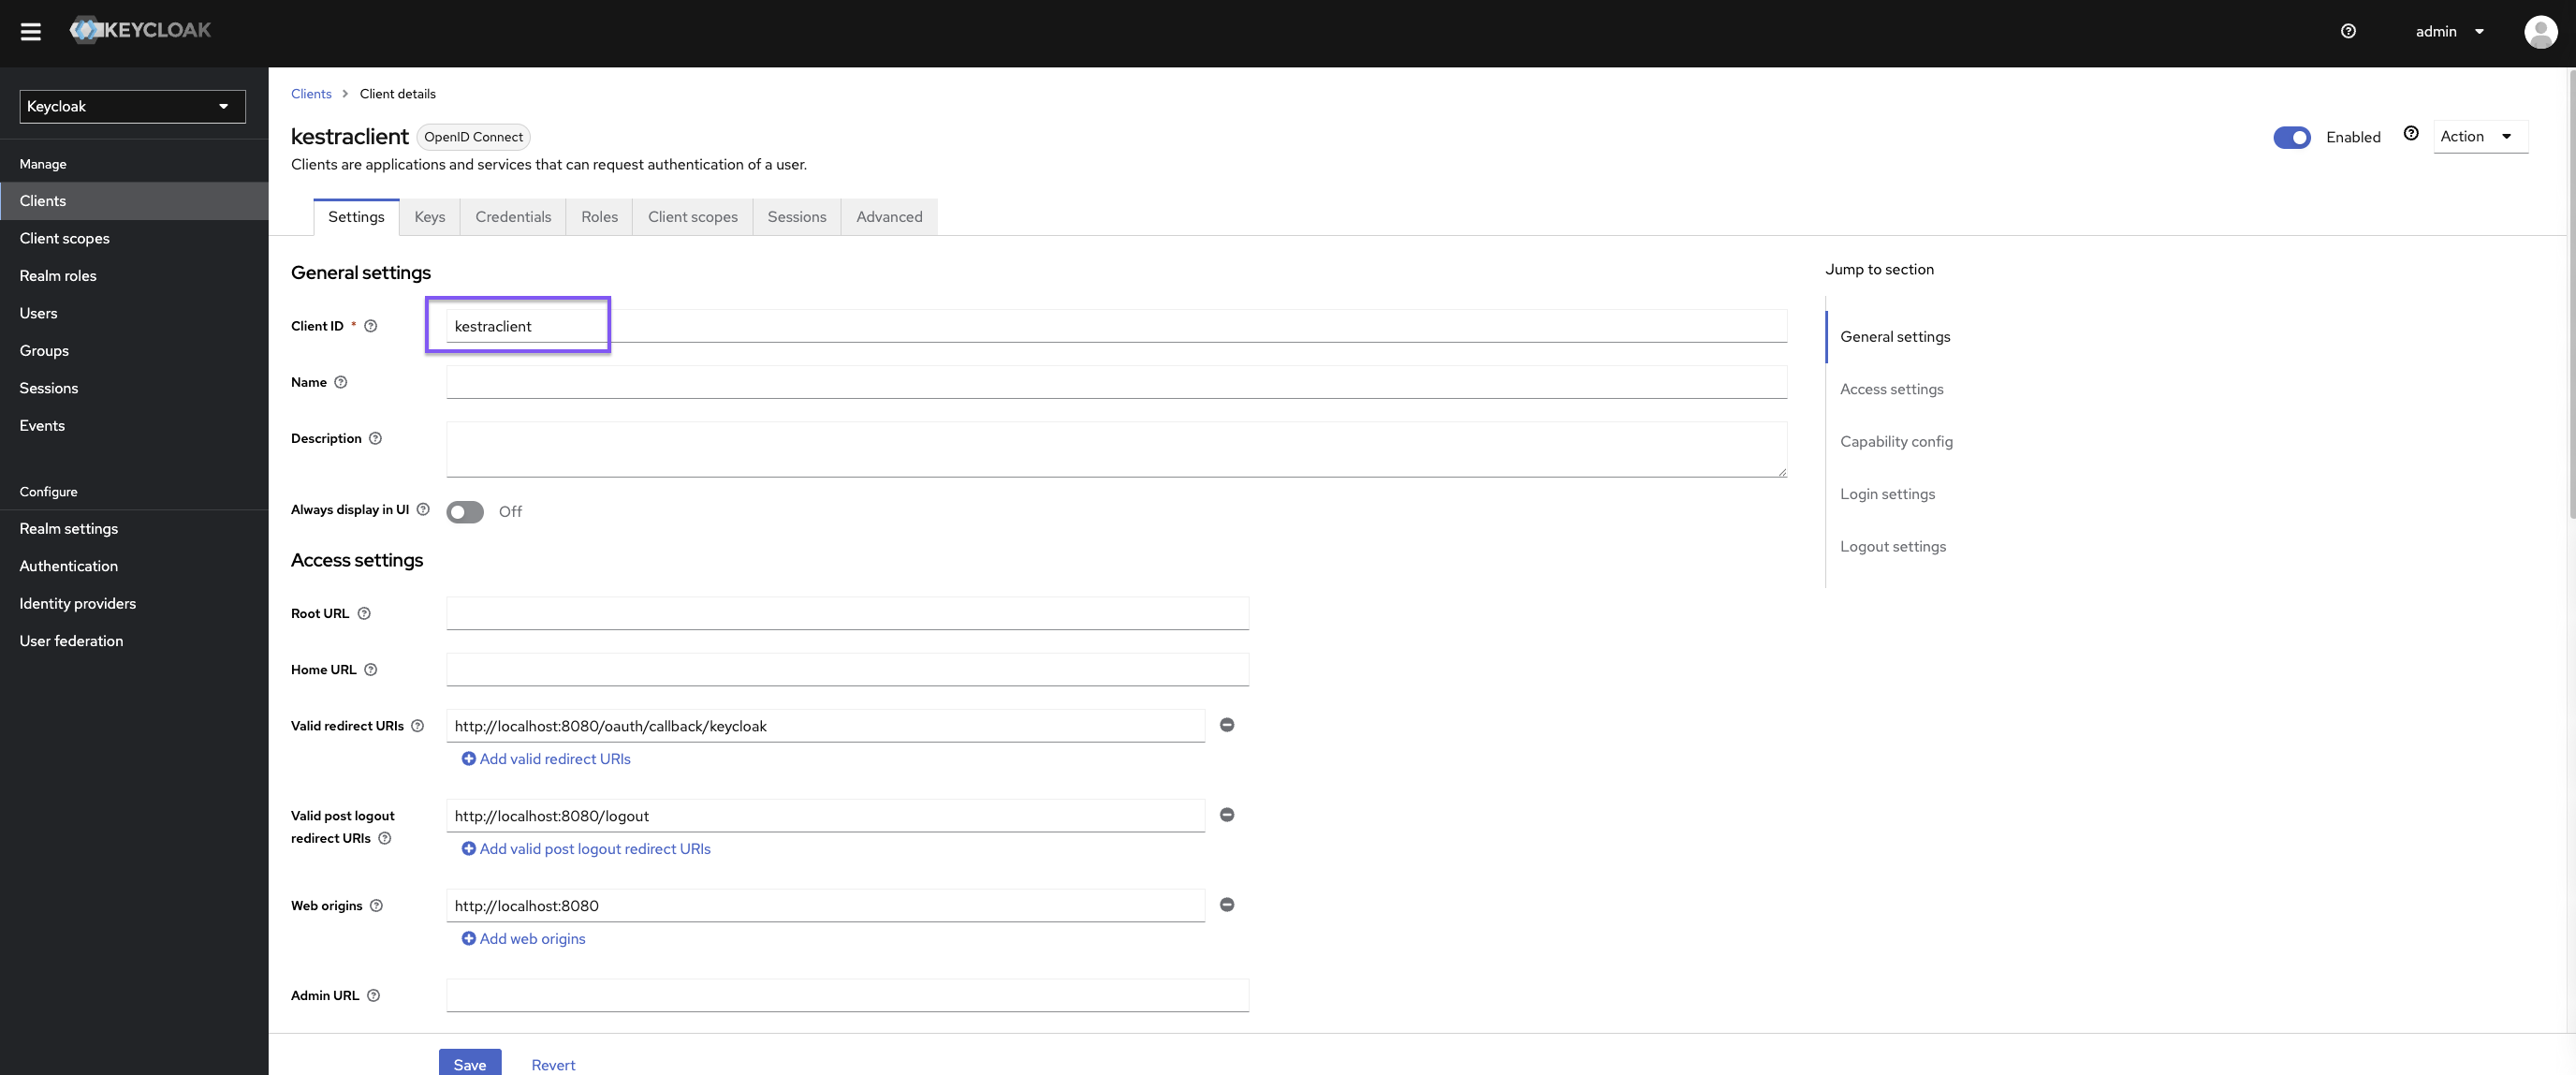
Configure Keycloak client
Once in Keycloak, create a new client:

Set https://{{ yourKestraInstanceURL }}/oauth/callback/keycloak as the valid redirect URI and https://{{ yourKestraInstanceURL }}/logout as the valid post-logout redirect URI.
Kestra Configuration
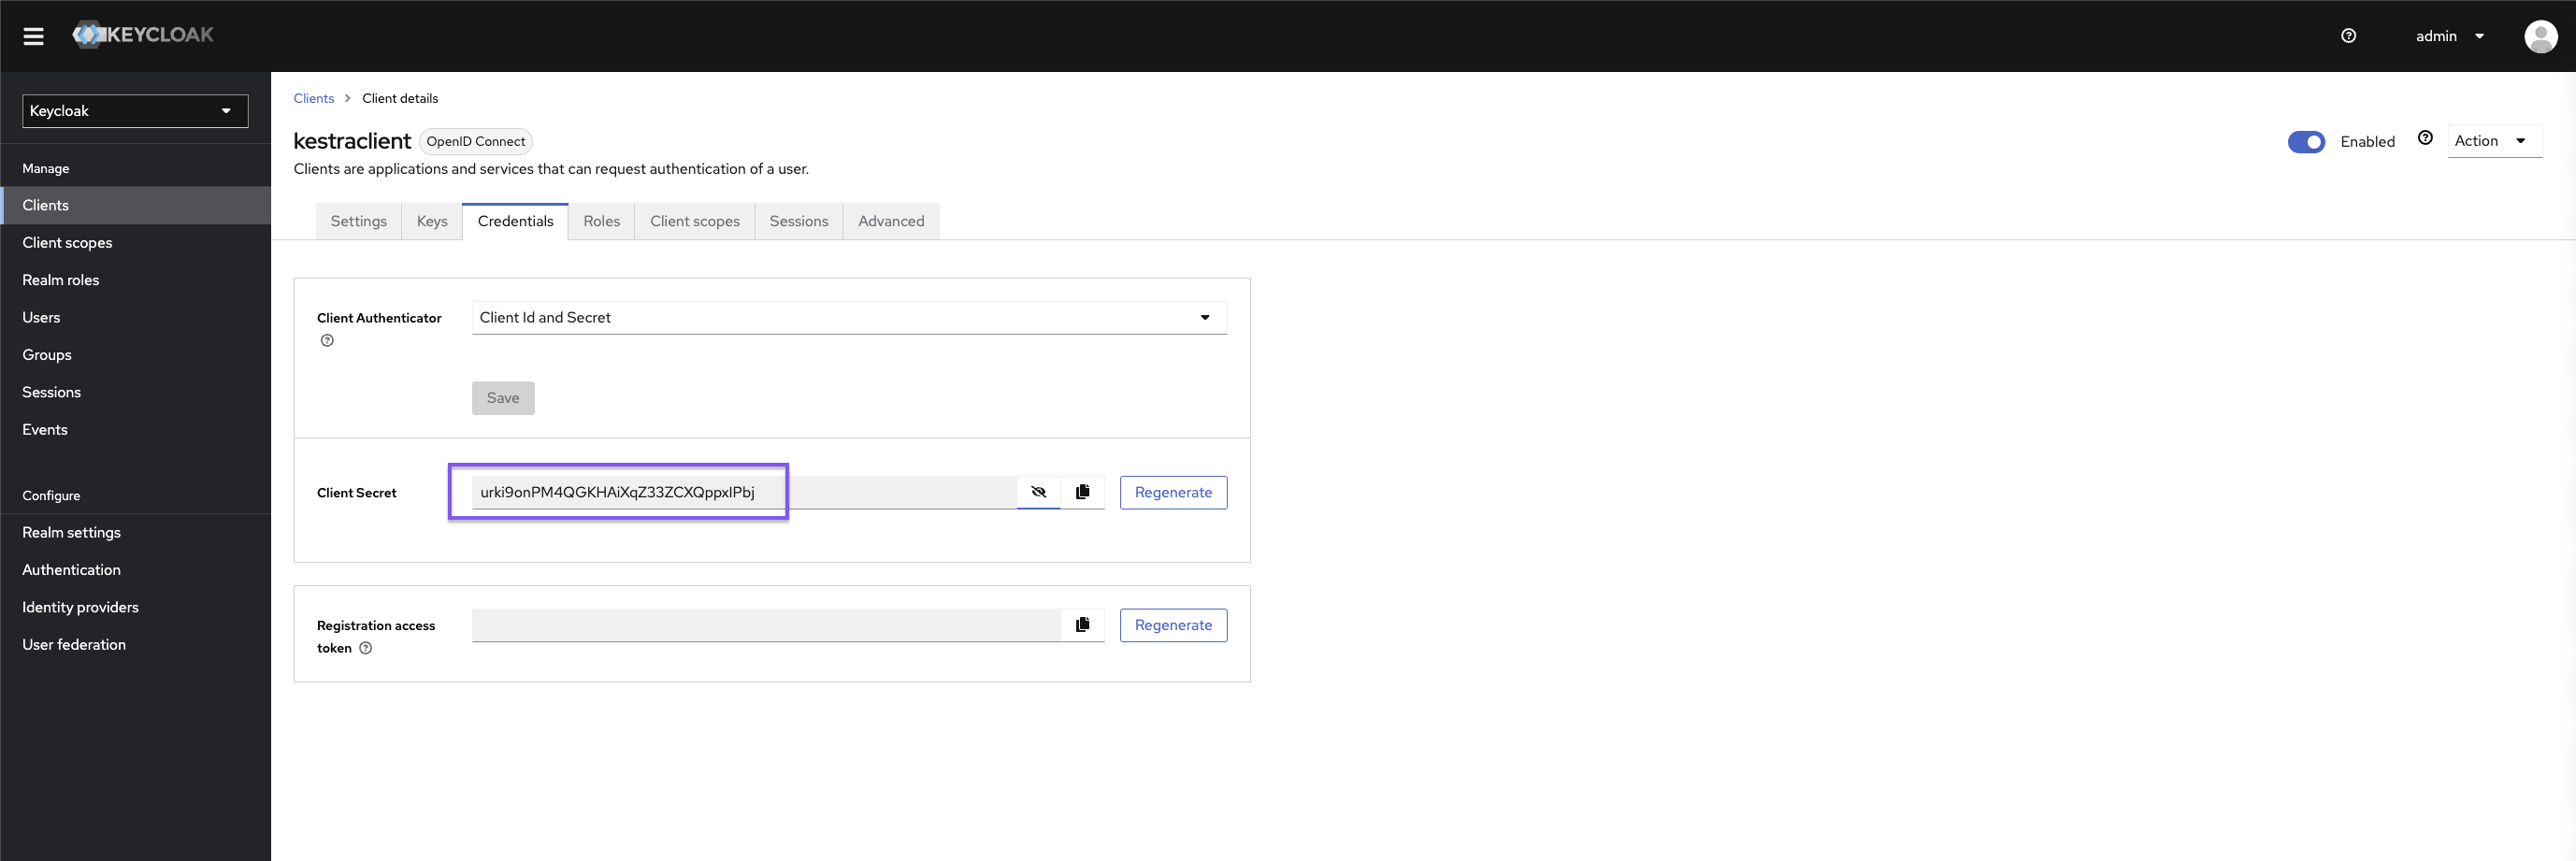
micronaut: security: oauth2: enabled: true clients: keycloak: client-id: "{{clientId}}" client-secret: "{{clientSecret}}" openid: issuer: "https://{{keyCloakServer}}/realms/{{yourRealm}}" endpoints: logout: get-allowed: trueYou can retrieve the clientId and clientSecret via Keycloak user interface
Don’t forget to set a default role in your Kestra Security and Secrets configuration to streamline the process of onboarding new users.
kestra: security: defaultRole: name: Editor description: Default Editor role permissions: FLOW: ["CREATE", "READ", "UPDATE", "DELETE"] EXECUTION: - CREATE - READ - UPDATE - DELETENote: depending on the Keycloak configuration, you might want to tune the issuer URL.
For more configuration details, refer to the Keycloak OIDC configuration guide.
Logout and session termination
By default, clicking logout in Kestra clears the Kestra session but does not terminate the underlying Keycloak SSO session. The next login will skip the username and password prompt and automatically re-authenticate the user via the still-active Keycloak session.
To fully terminate the Keycloak session on logout, add end-session to your configuration:
micronaut: security: oauth2: enabled: true clients: keycloak: client-id: "{{clientId}}" client-secret: "{{clientSecret}}" openid: issuer: "https://{{keyCloakServer}}/realms/{{yourRealm}}" end-session: enabled: true url: "https://{{keyCloakServer}}/realms/{{yourRealm}}/protocol/openid-connect/logout" endpoints: logout: get-allowed: trueIf you also want to force users to re-enter their credentials on every Kestra login — even when an active Keycloak SSO session exists — add ?prompt=login to the authorization URL:
micronaut: security: oauth2: clients: keycloak: openid: authorization: url: "https://{{keyCloakServer}}/realms/{{yourRealm}}/protocol/openid-connect/auth?prompt=login"These two settings are independent: end-session controls what happens on logout, while prompt=login controls what happens on the next login attempt.
Manage Groups via OIDC Claims
If you are unable to use SCIM with Keycloak, you can configure Kestra to source user groups from OIDC claims. In this setup, Keycloak acts as the single source of truth for user group membership. This method requires creating a groups client scope that exposes group membership via a claim in the ID Token.
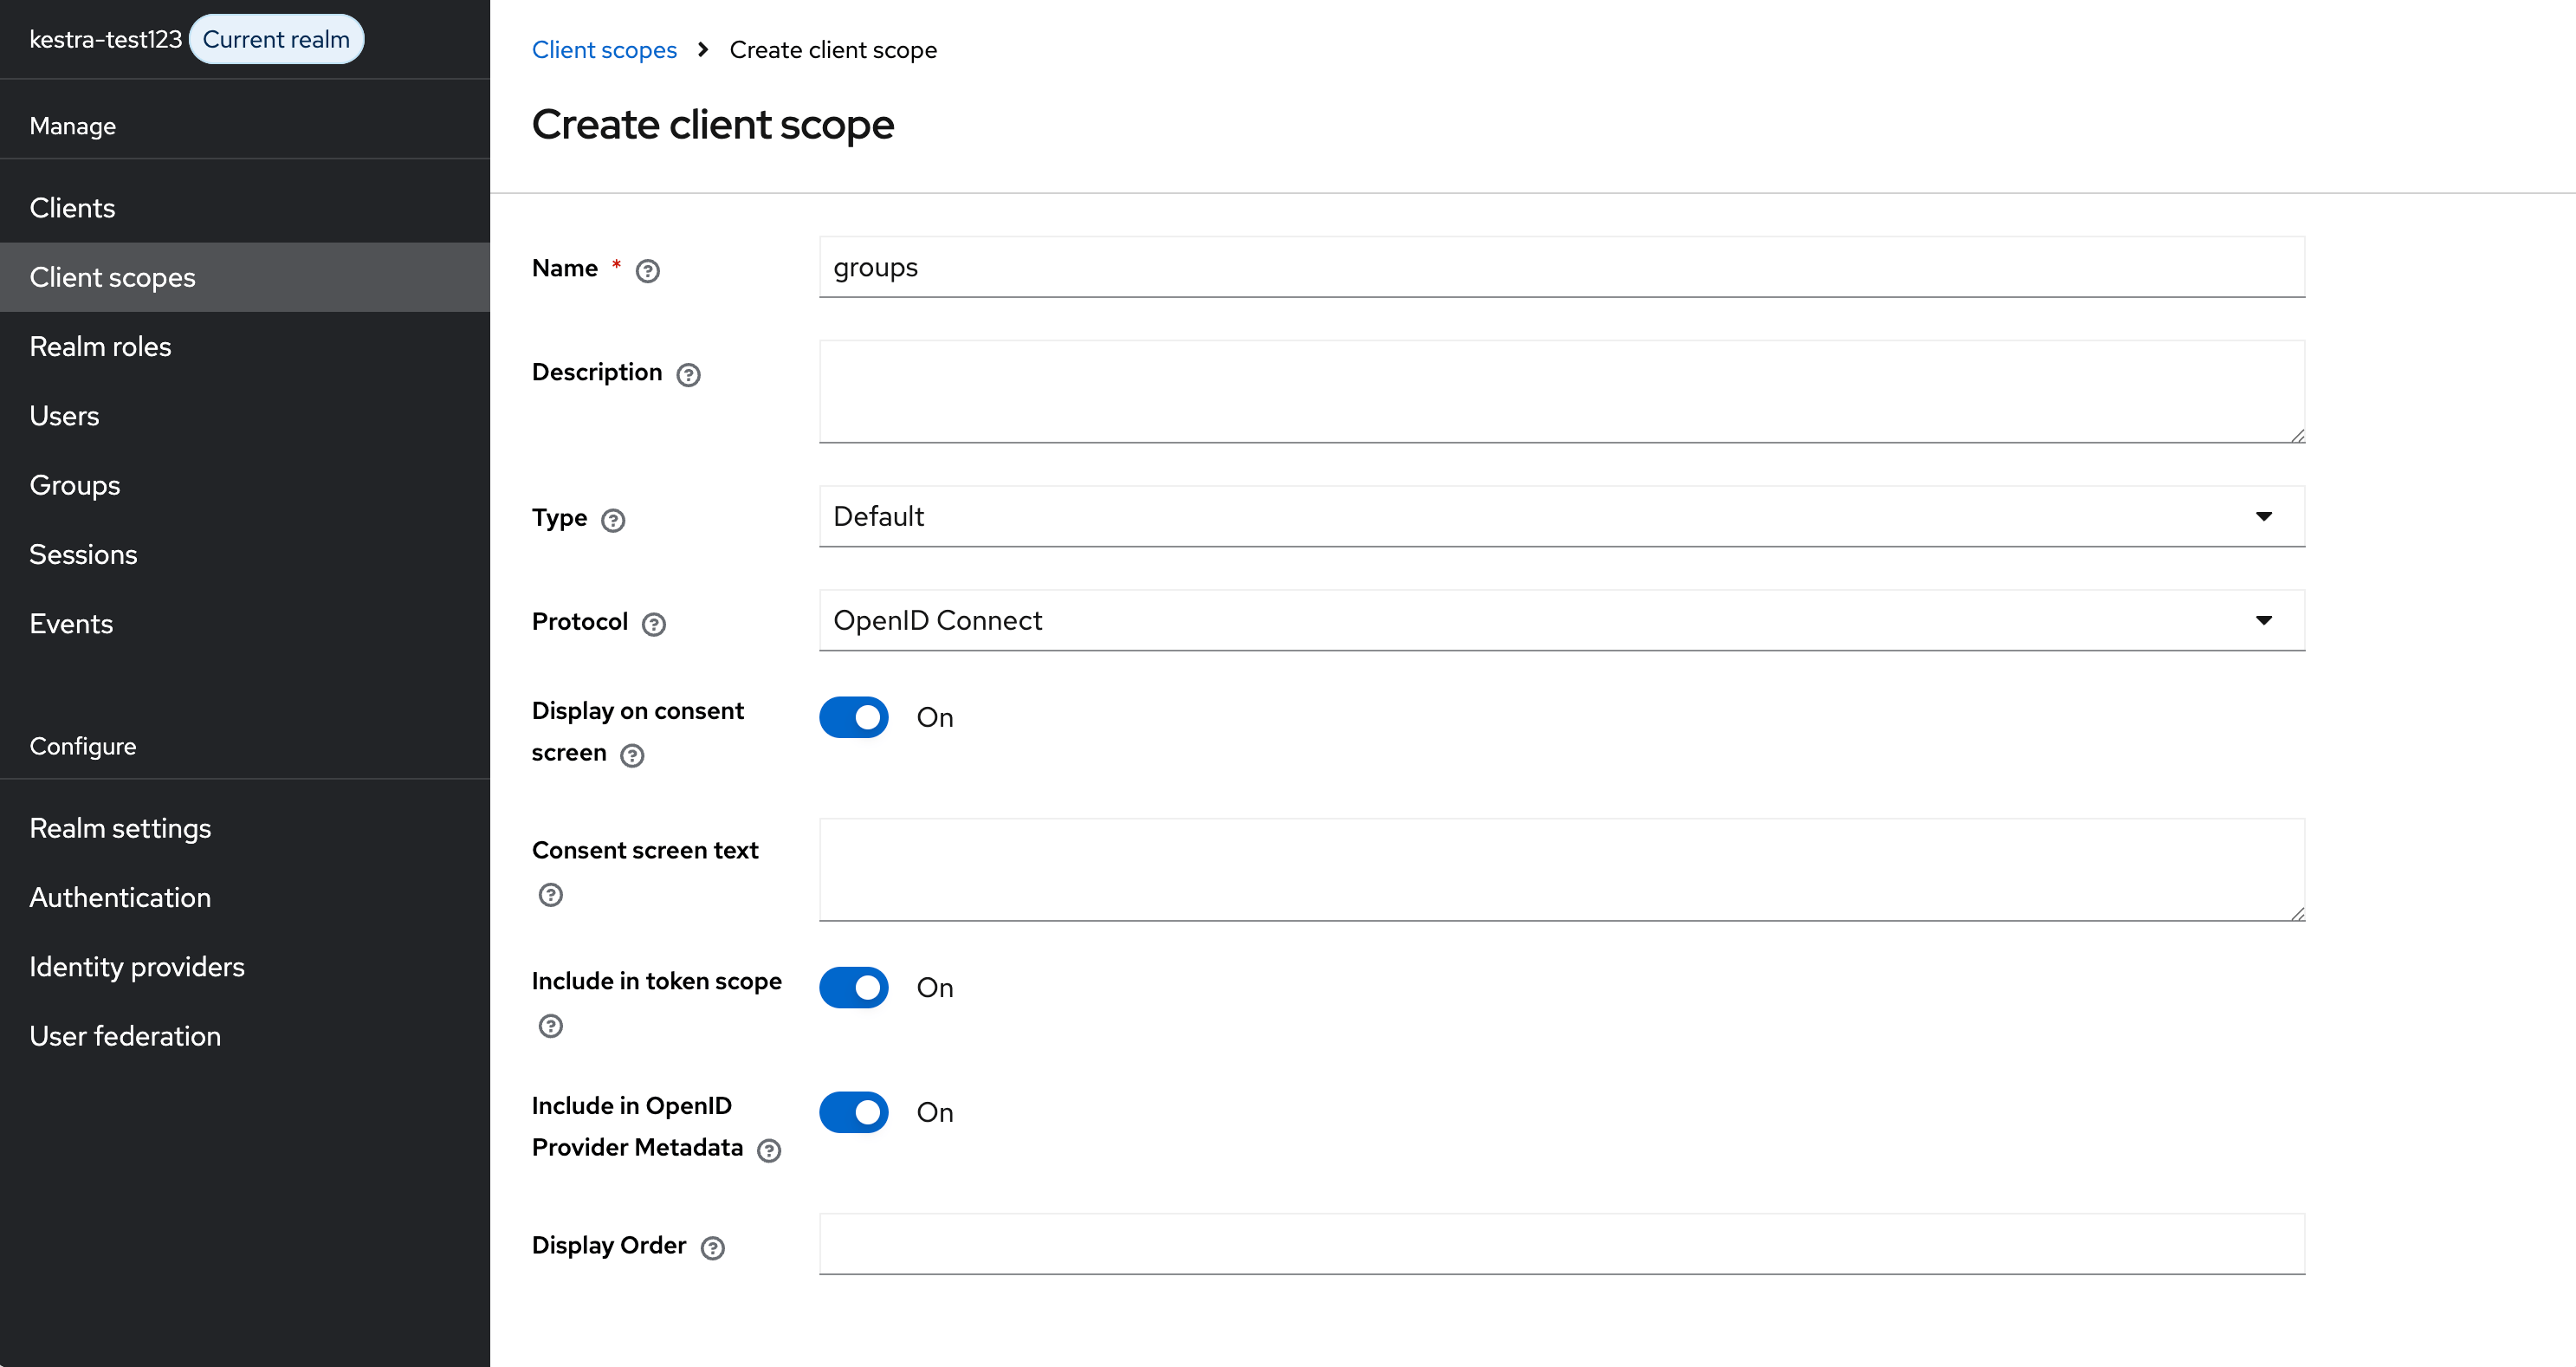
Create a Groups Client Scope
In Keycloak, go to Client Scopes and click Create Client Scope. Name it groups, set Type to Default, and keep Protocol as OpenID Connect.
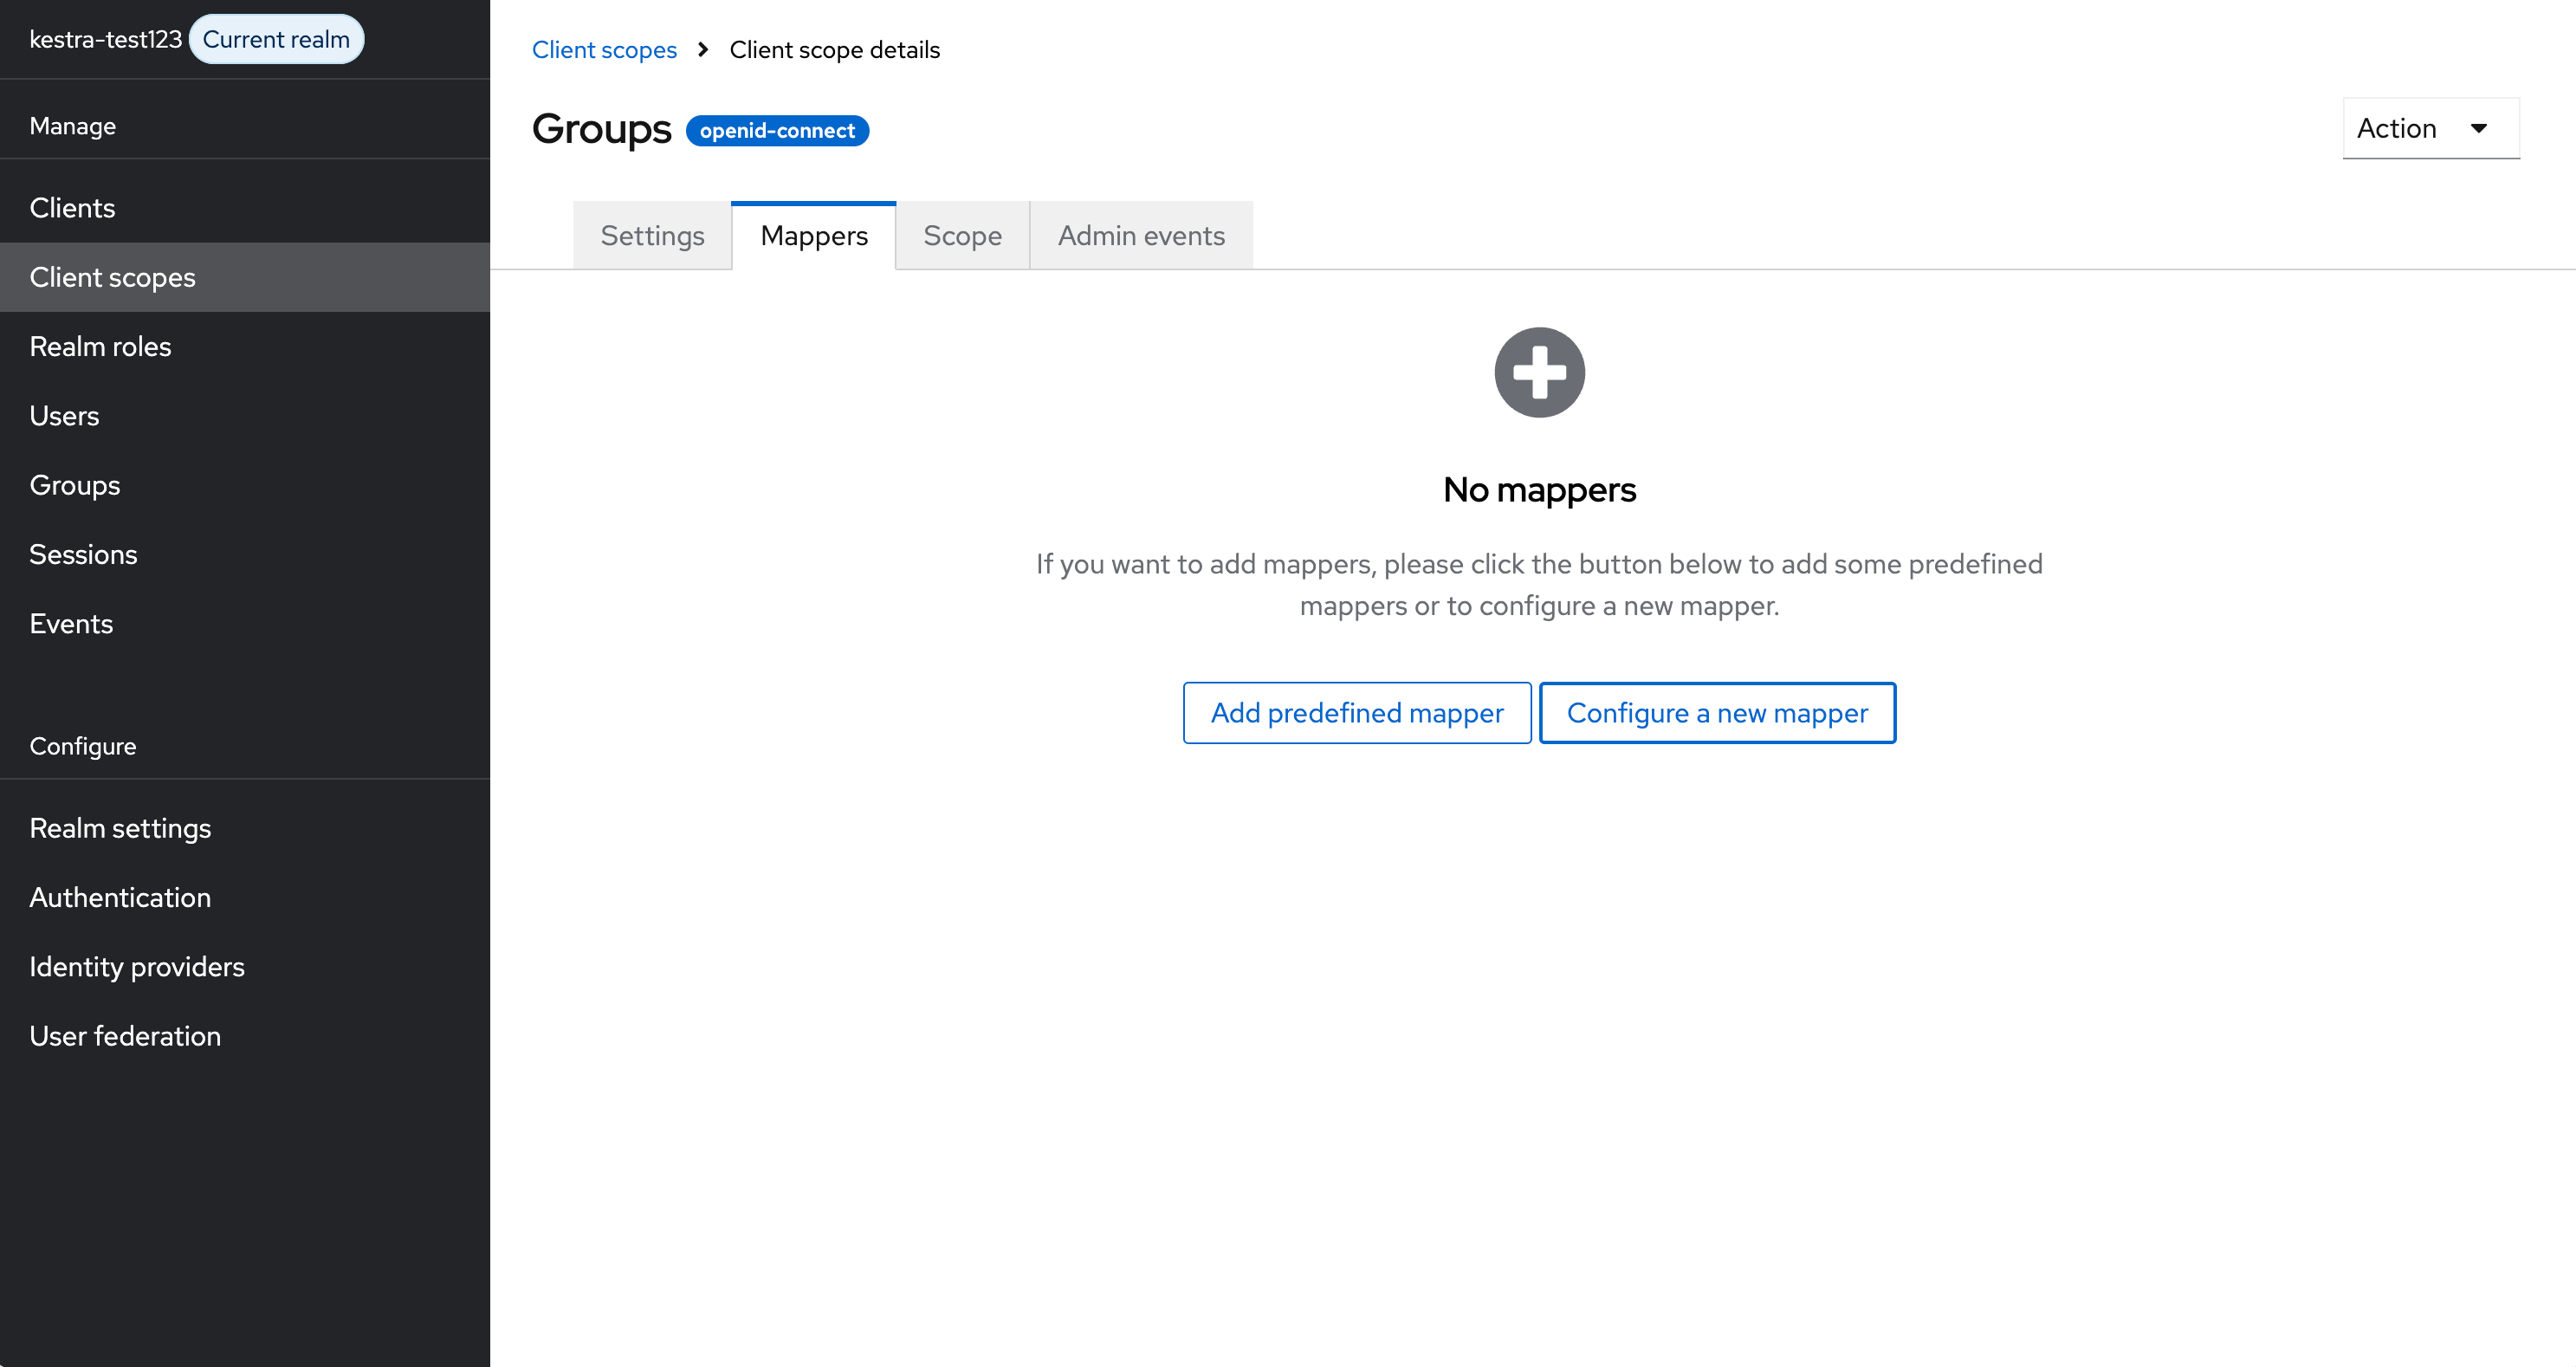
Add a Group Membership Mapper
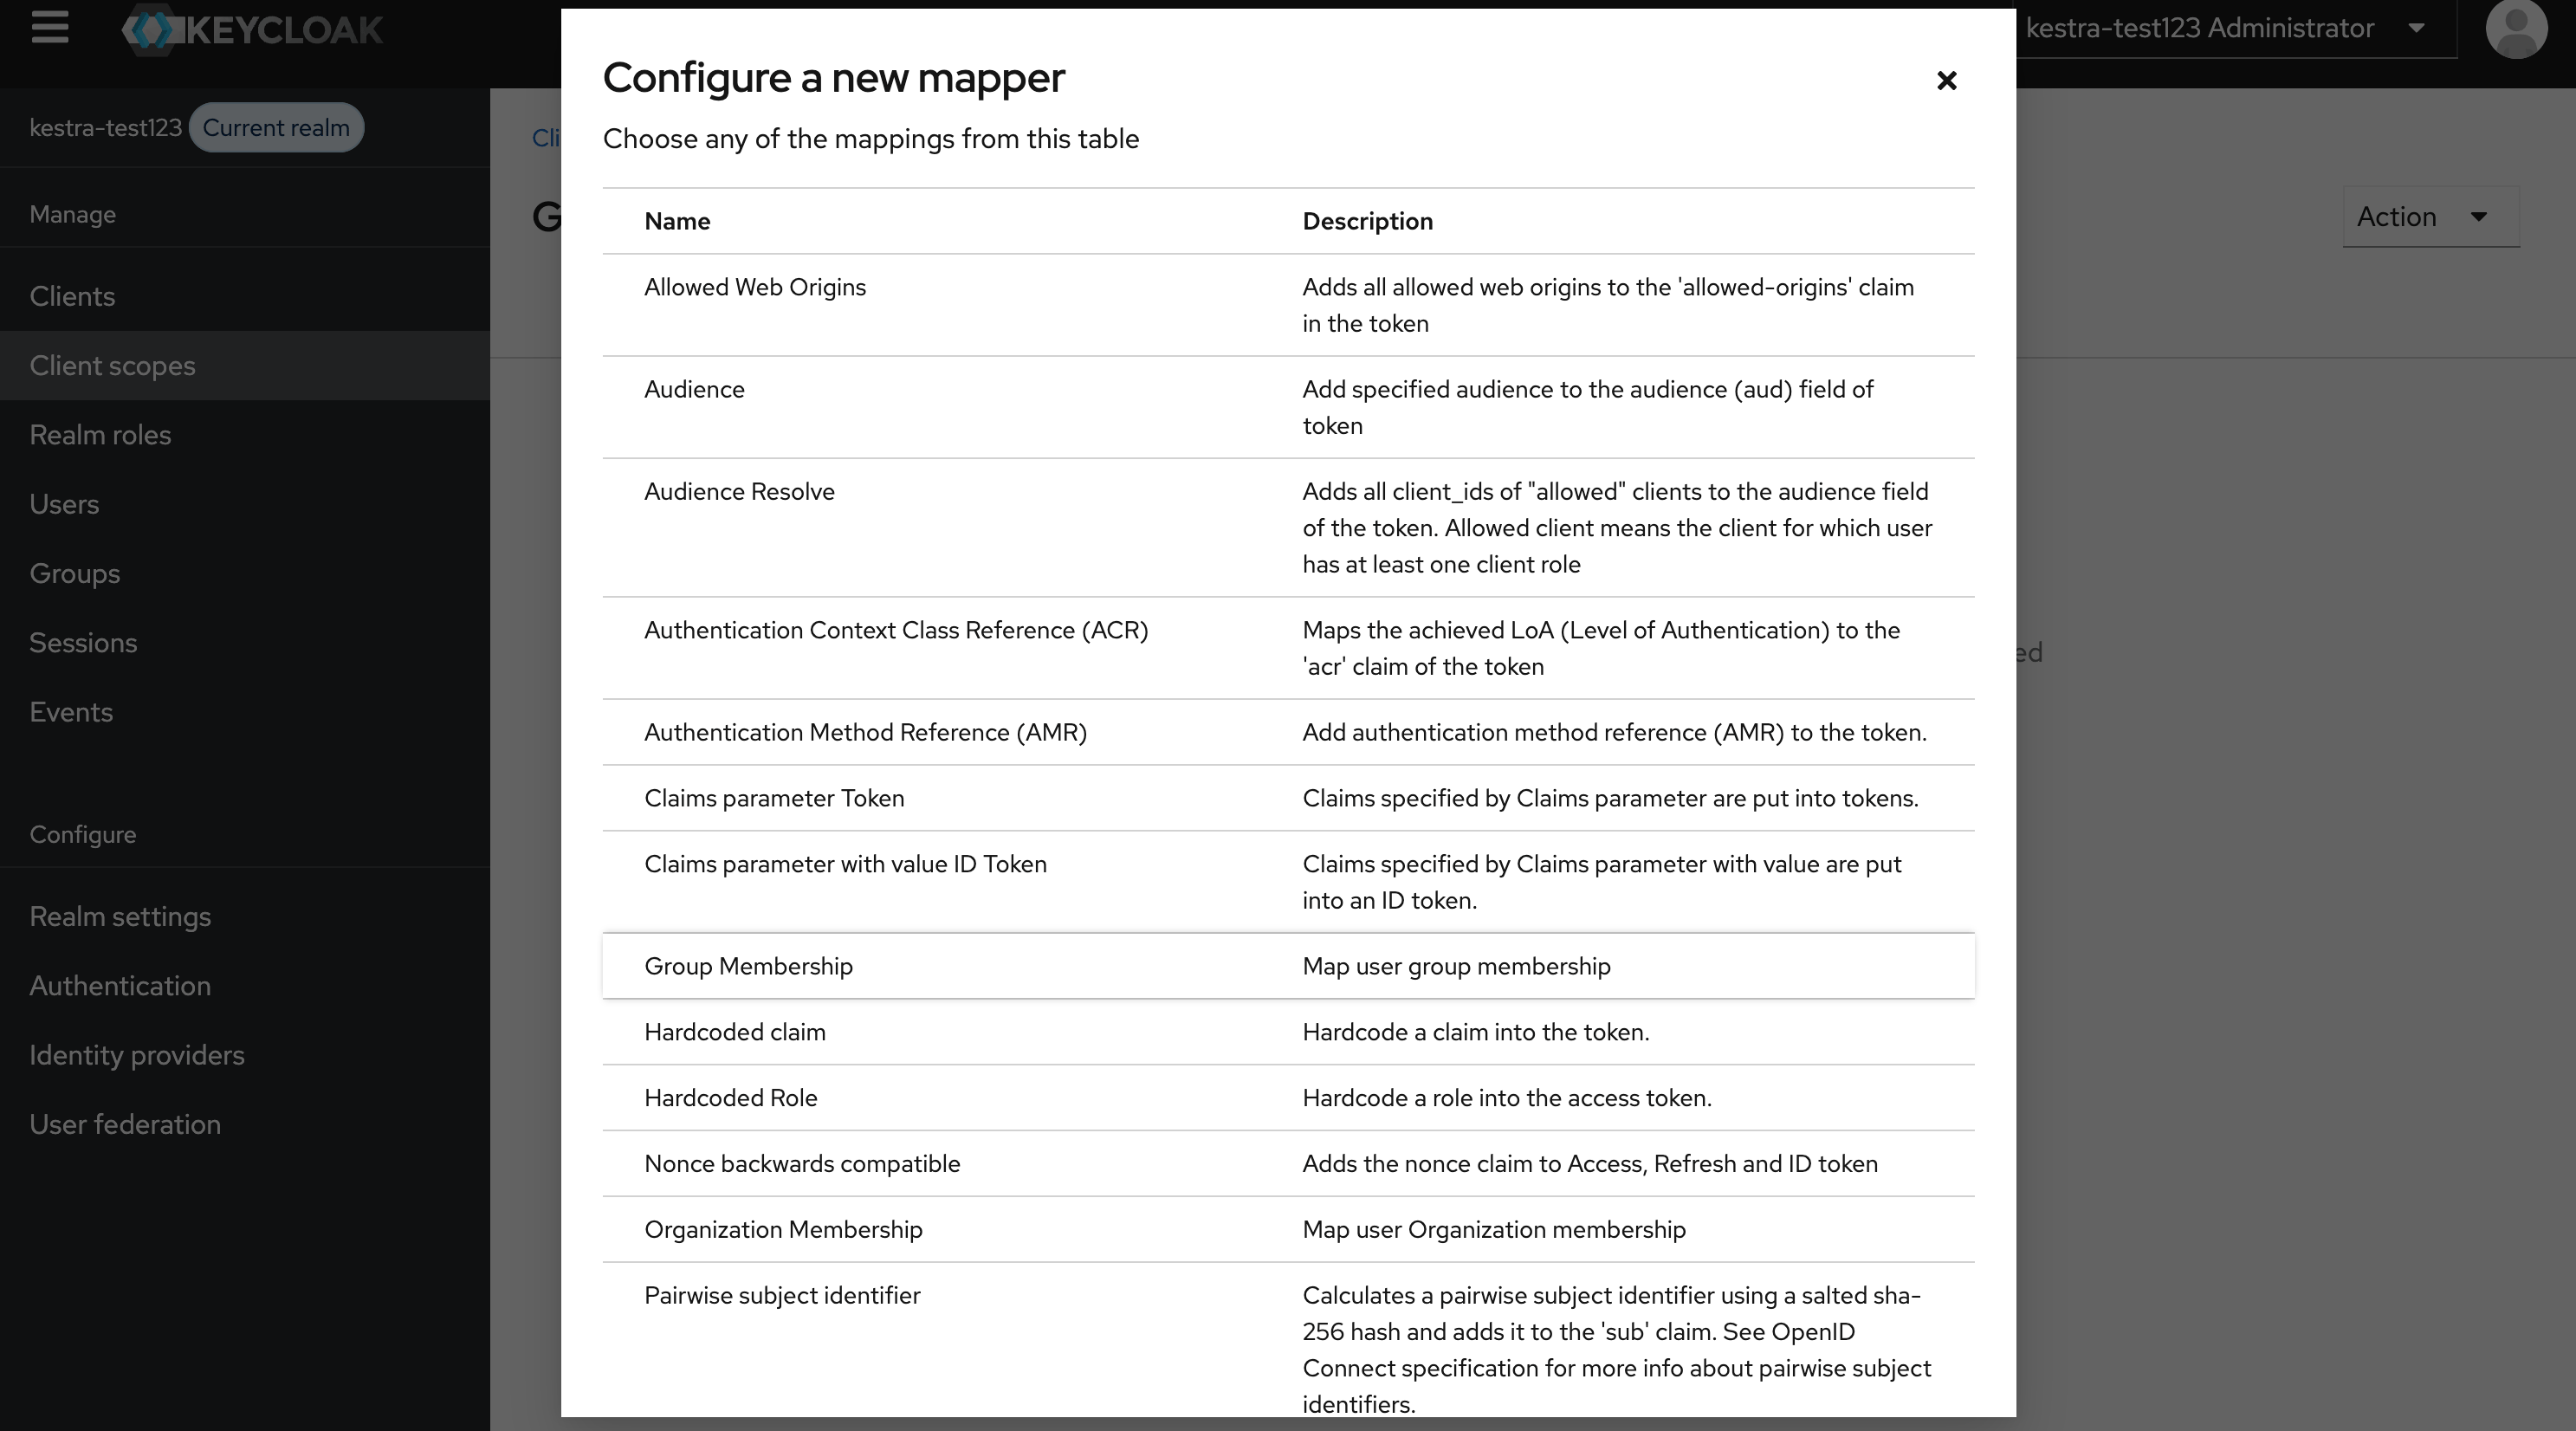
In the newly created groups scope, go to the Mappers tab and click Configure a new mapper.
Select Group Membership from the list of available mapper types.
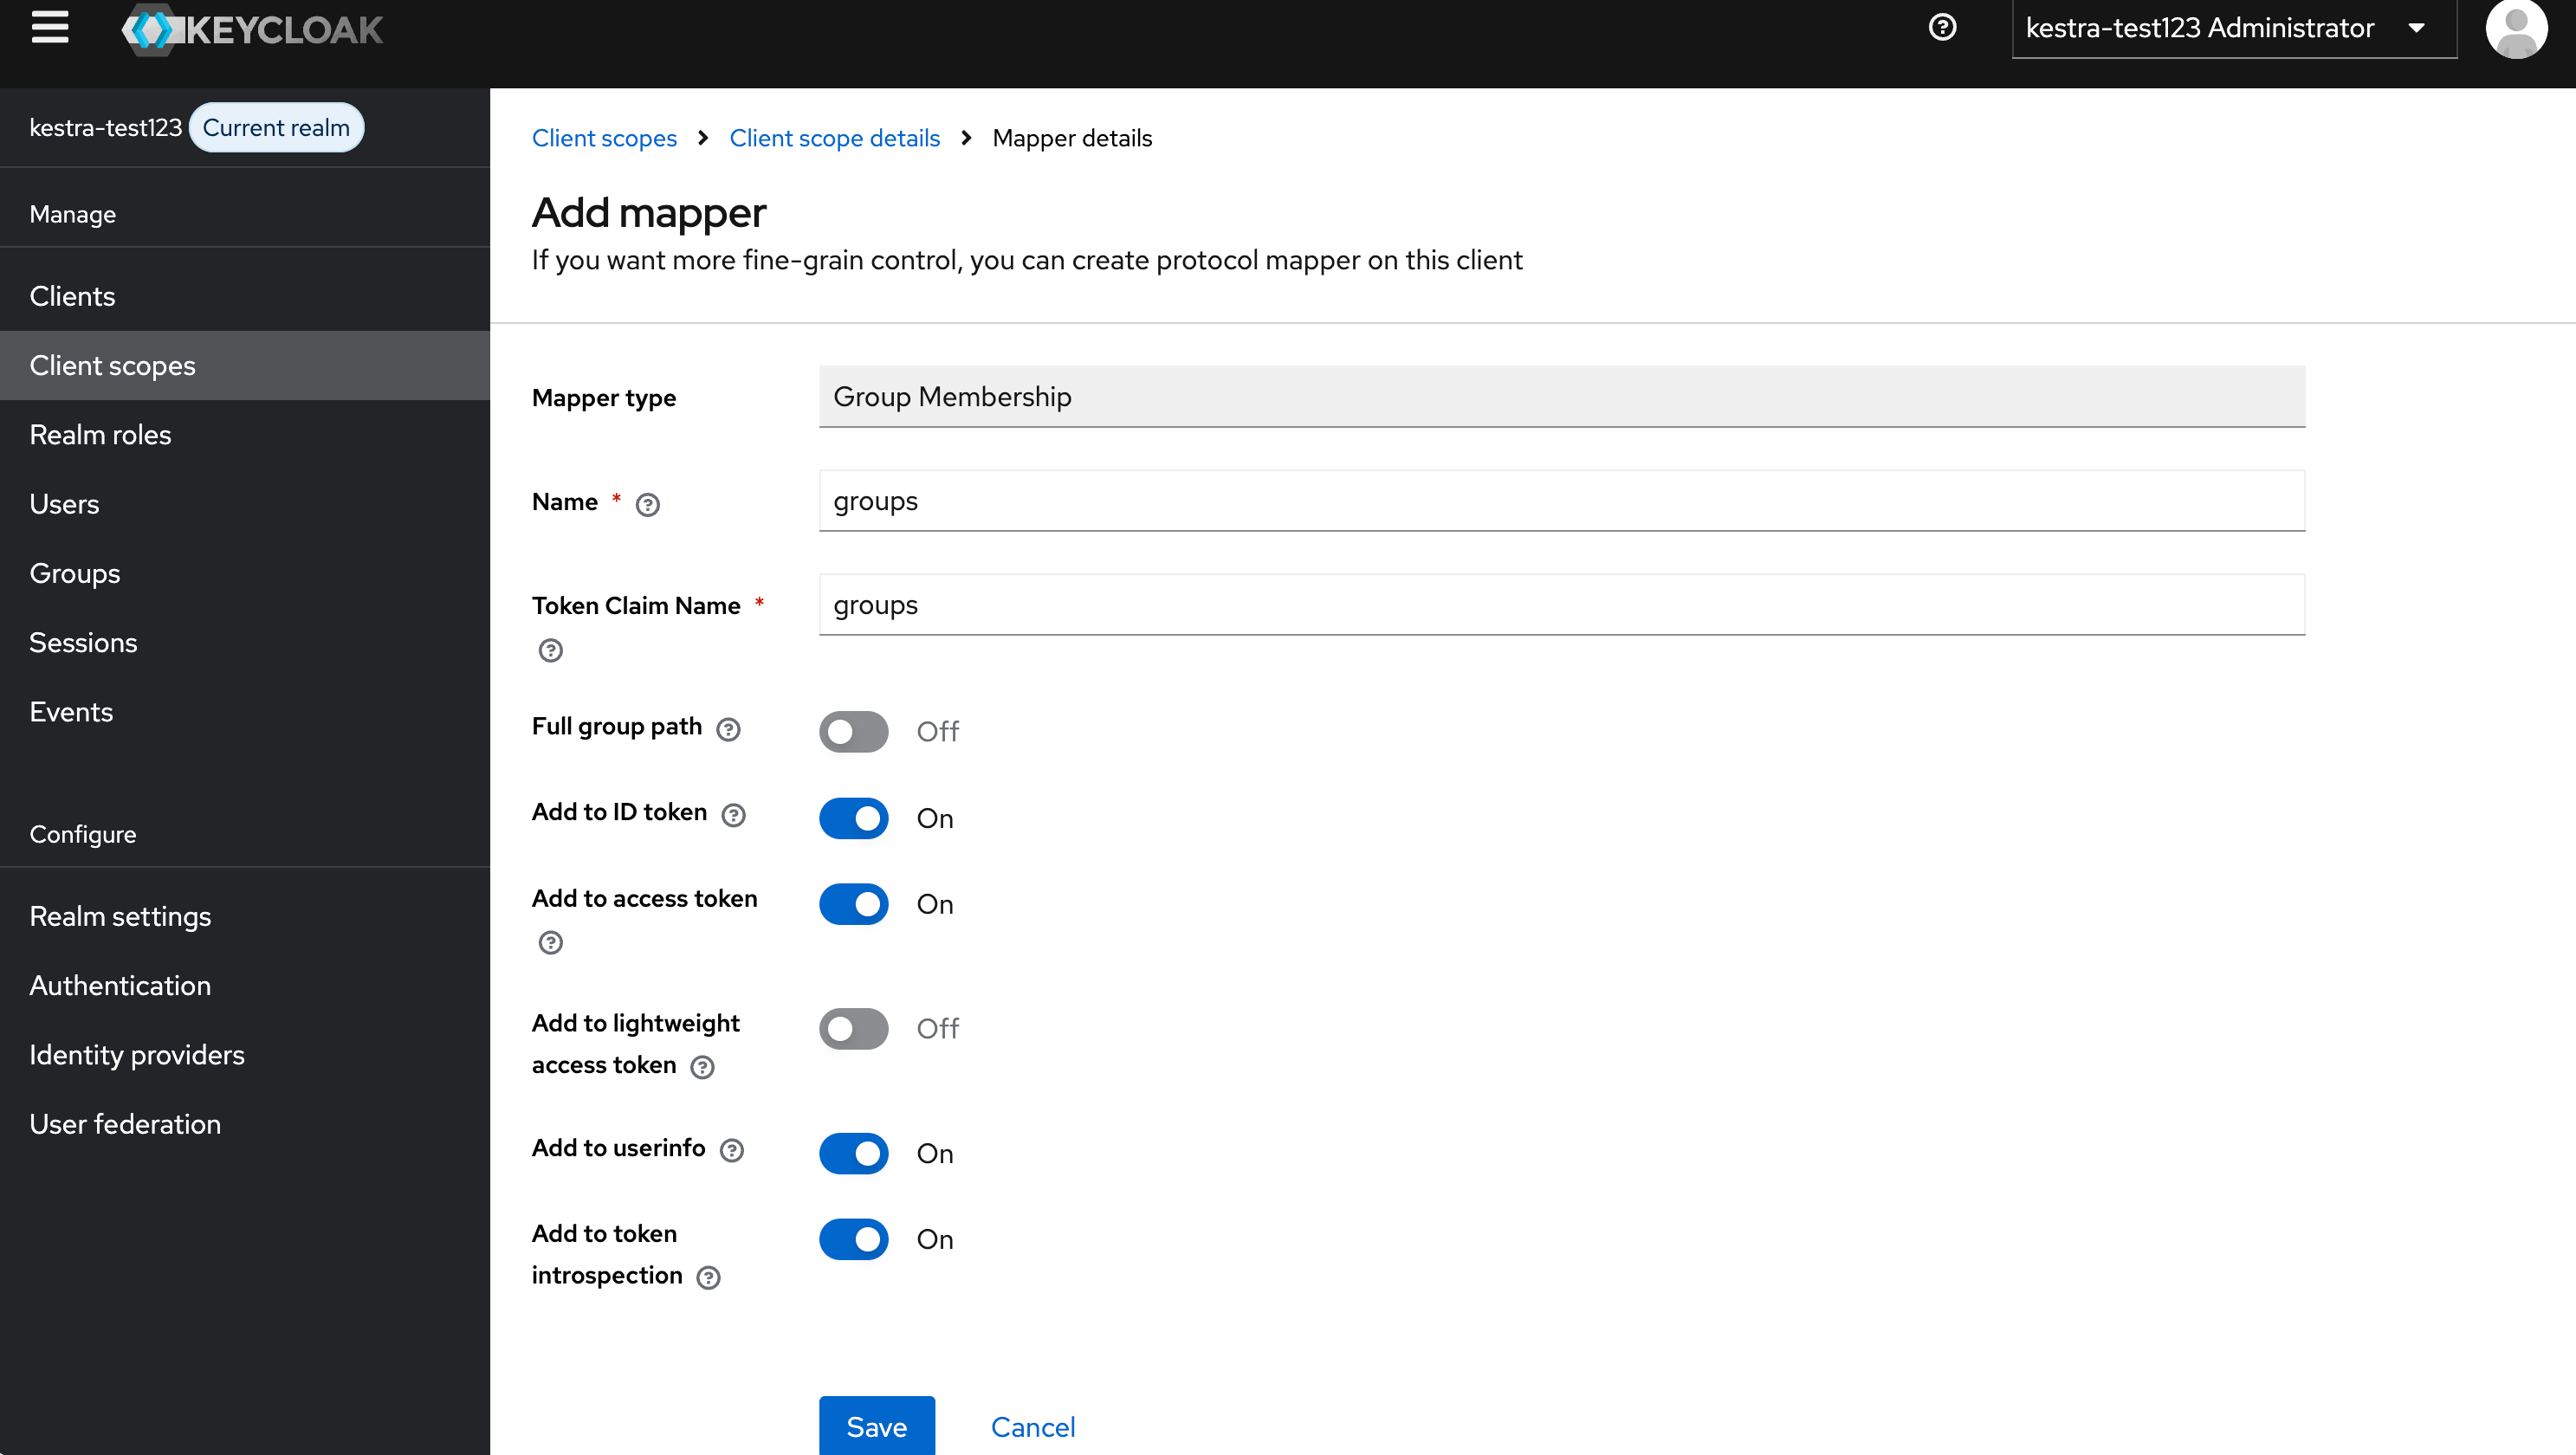
Configure the mapper with the following settings:
- Name:
groups - Token Claim Name:
groups - Full group path: Off
- Add to ID token: On
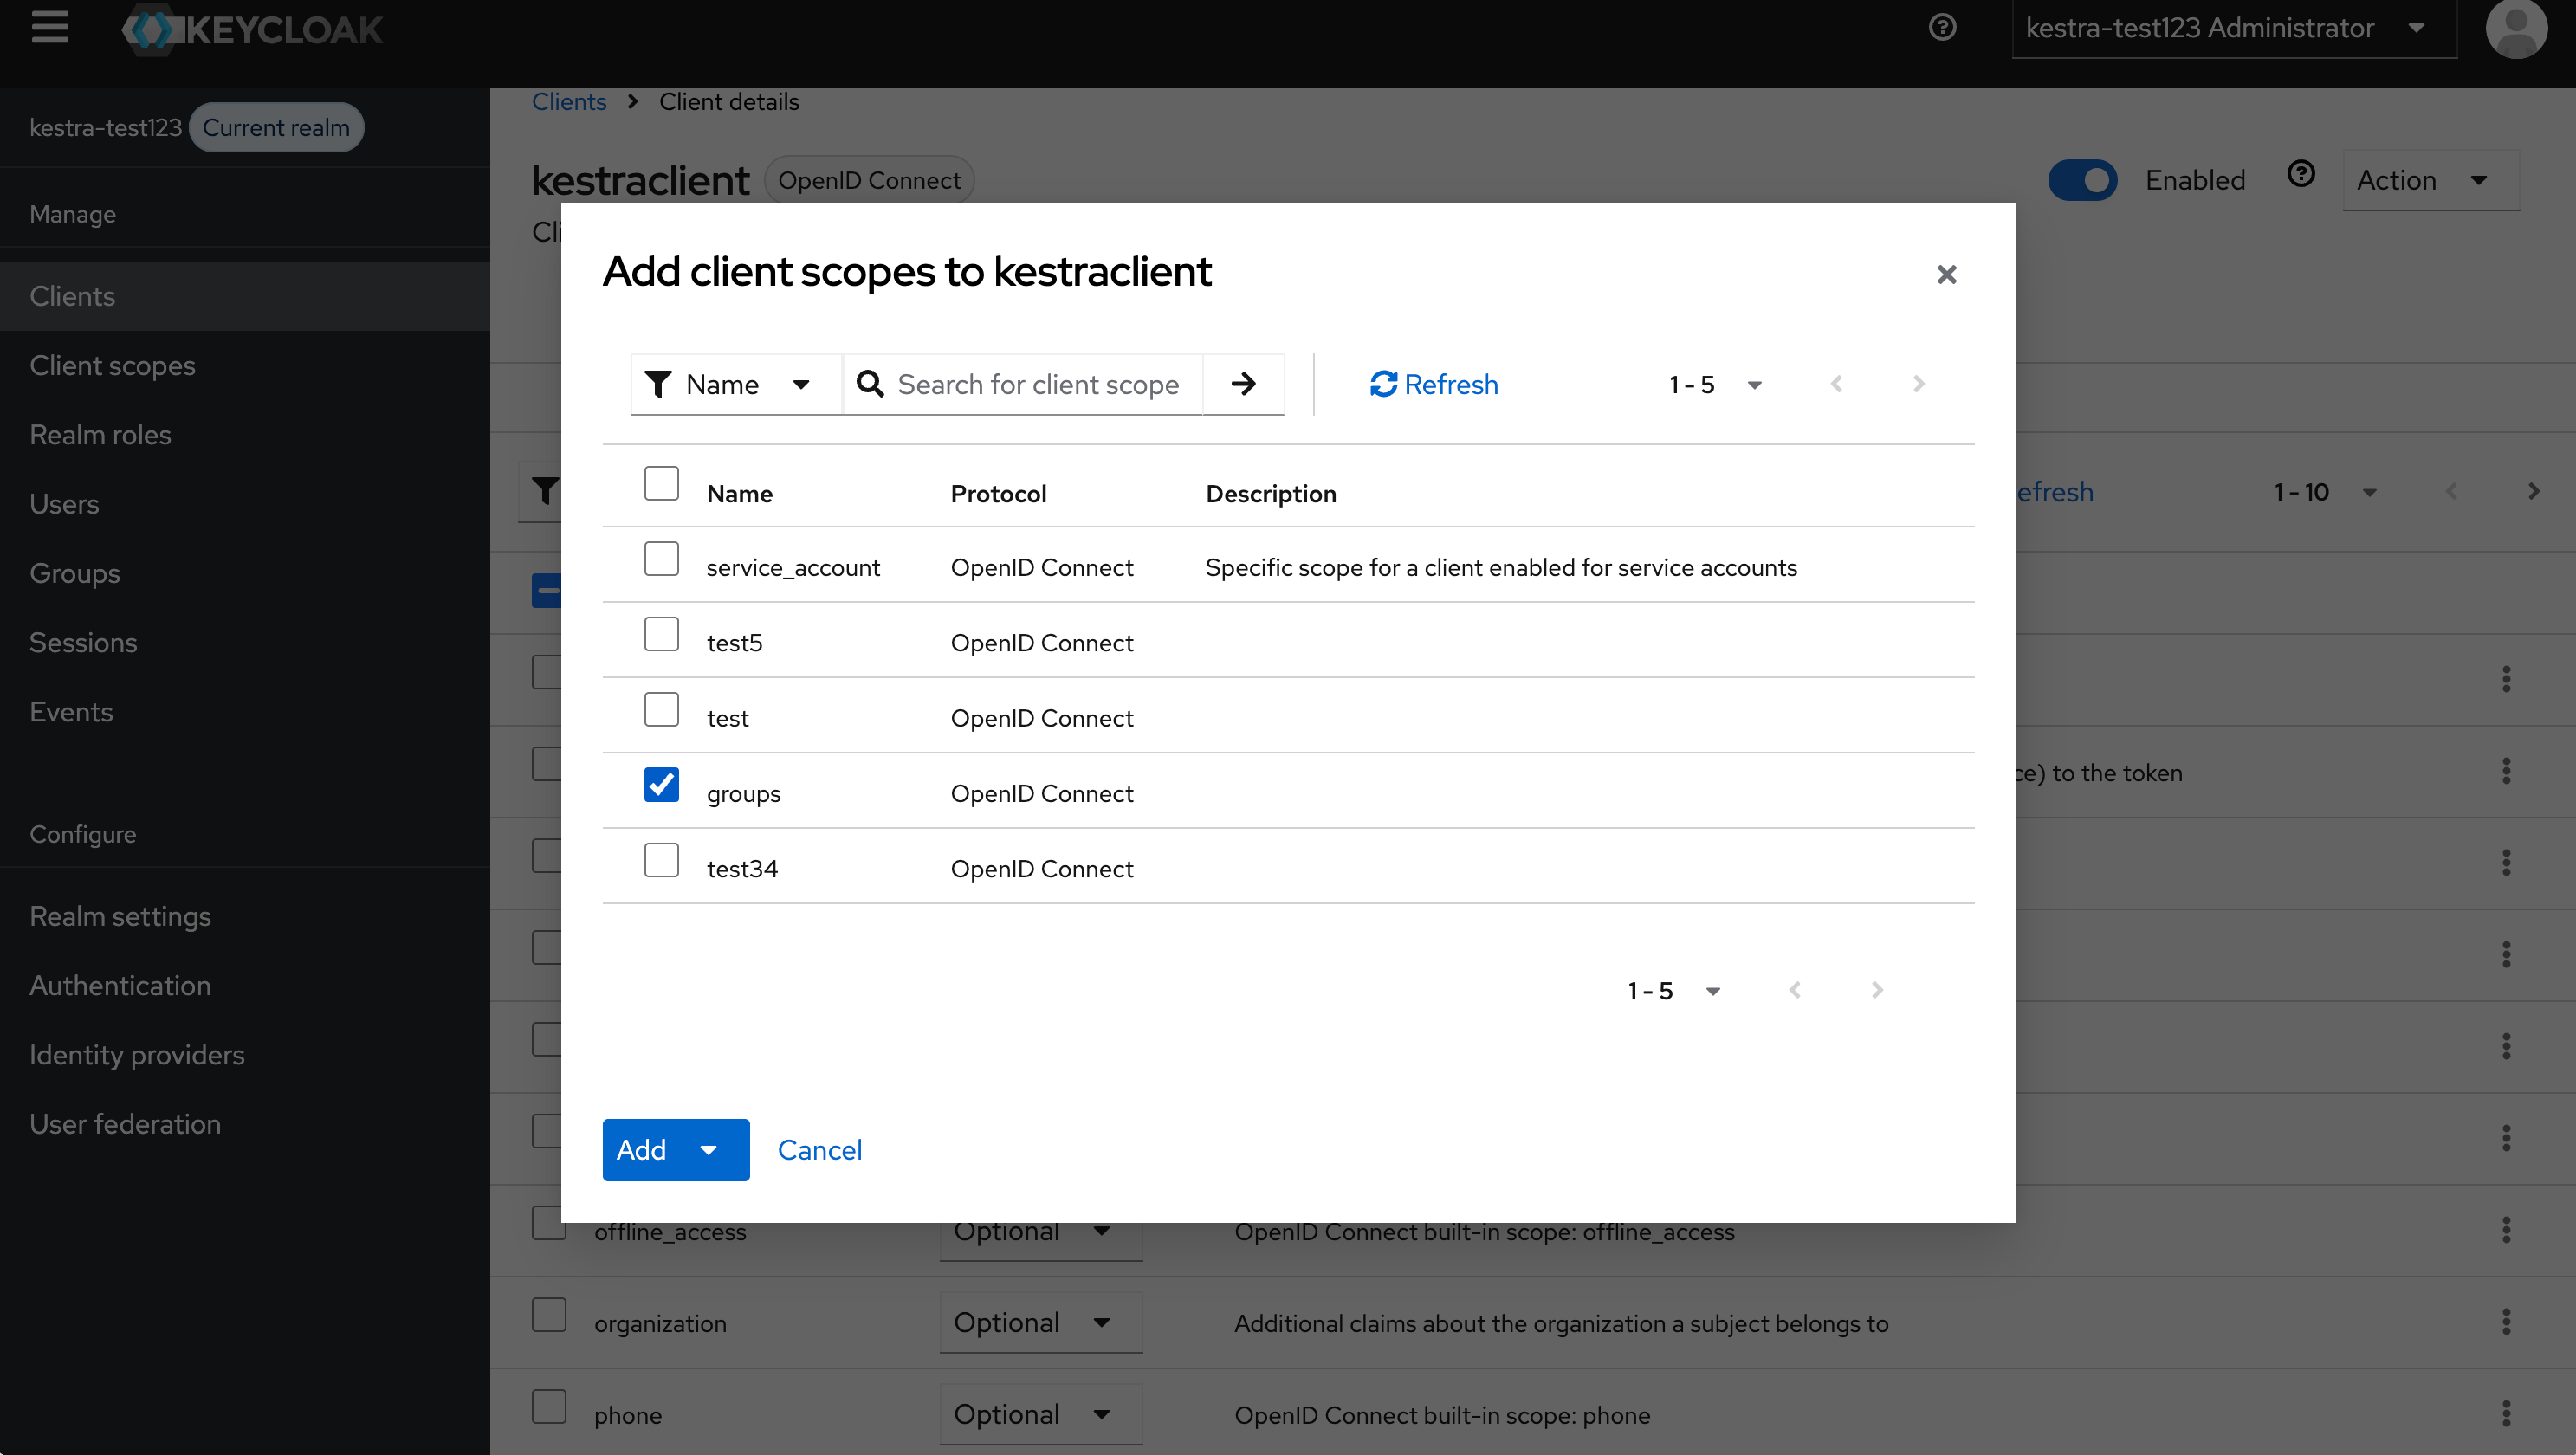
Add the Client Scope to Your Client
Go to Clients, select your Kestra client, and add the groups client scope.
Configure Kestra
Update your Micronaut configuration to include groups in the scopes:
micronaut: security: oauth2: enabled: true clients: keycloak: client-id: "{{clientId}}" client-secret: "{{clientSecret}}" openid: issuer: "https://{{keyCloakServer}}/realms/{{yourRealm}}" scopes: ["openid", "profile", "email", "groups"] endpoints: logout: get-allowed: trueThen configure Kestra to synchronize groups from the groups claim:
kestra: security: oidc: groups-claim-path: "groups"Once configured, Kestra will source user groups from the groups claim in the ID Token, with Keycloak as the single source of truth.
Was this page helpful?