Authenticate Users with Google OIDC
For the complete documentation index, see llms.txt. For a full content snapshot, see llms-full.txt. Append.mdto anykestra.io/docs/*URL for plain Markdown.
Available on:Enterprise EditionCloud
Authenticate Kestra users with their Google accounts using Google Identity Platform and OIDC.
Prerequisites
- A Google Cloud project with billing enabled.
- Sufficient permissions to configure Identity Platform and manage identity providers.
See the Google OIDC setup documentation for reference.
Step 1: Enable Identity Platform in Google Cloud
- Go to the Identity Platform page in the Google Cloud Console.
- Confirm the correct project is selected.
Step 2: Add an OIDC Provider in Google Cloud
- In the Identity Platform menu, select Providers.
- Click Add a Provider and choose OpenID Connect.
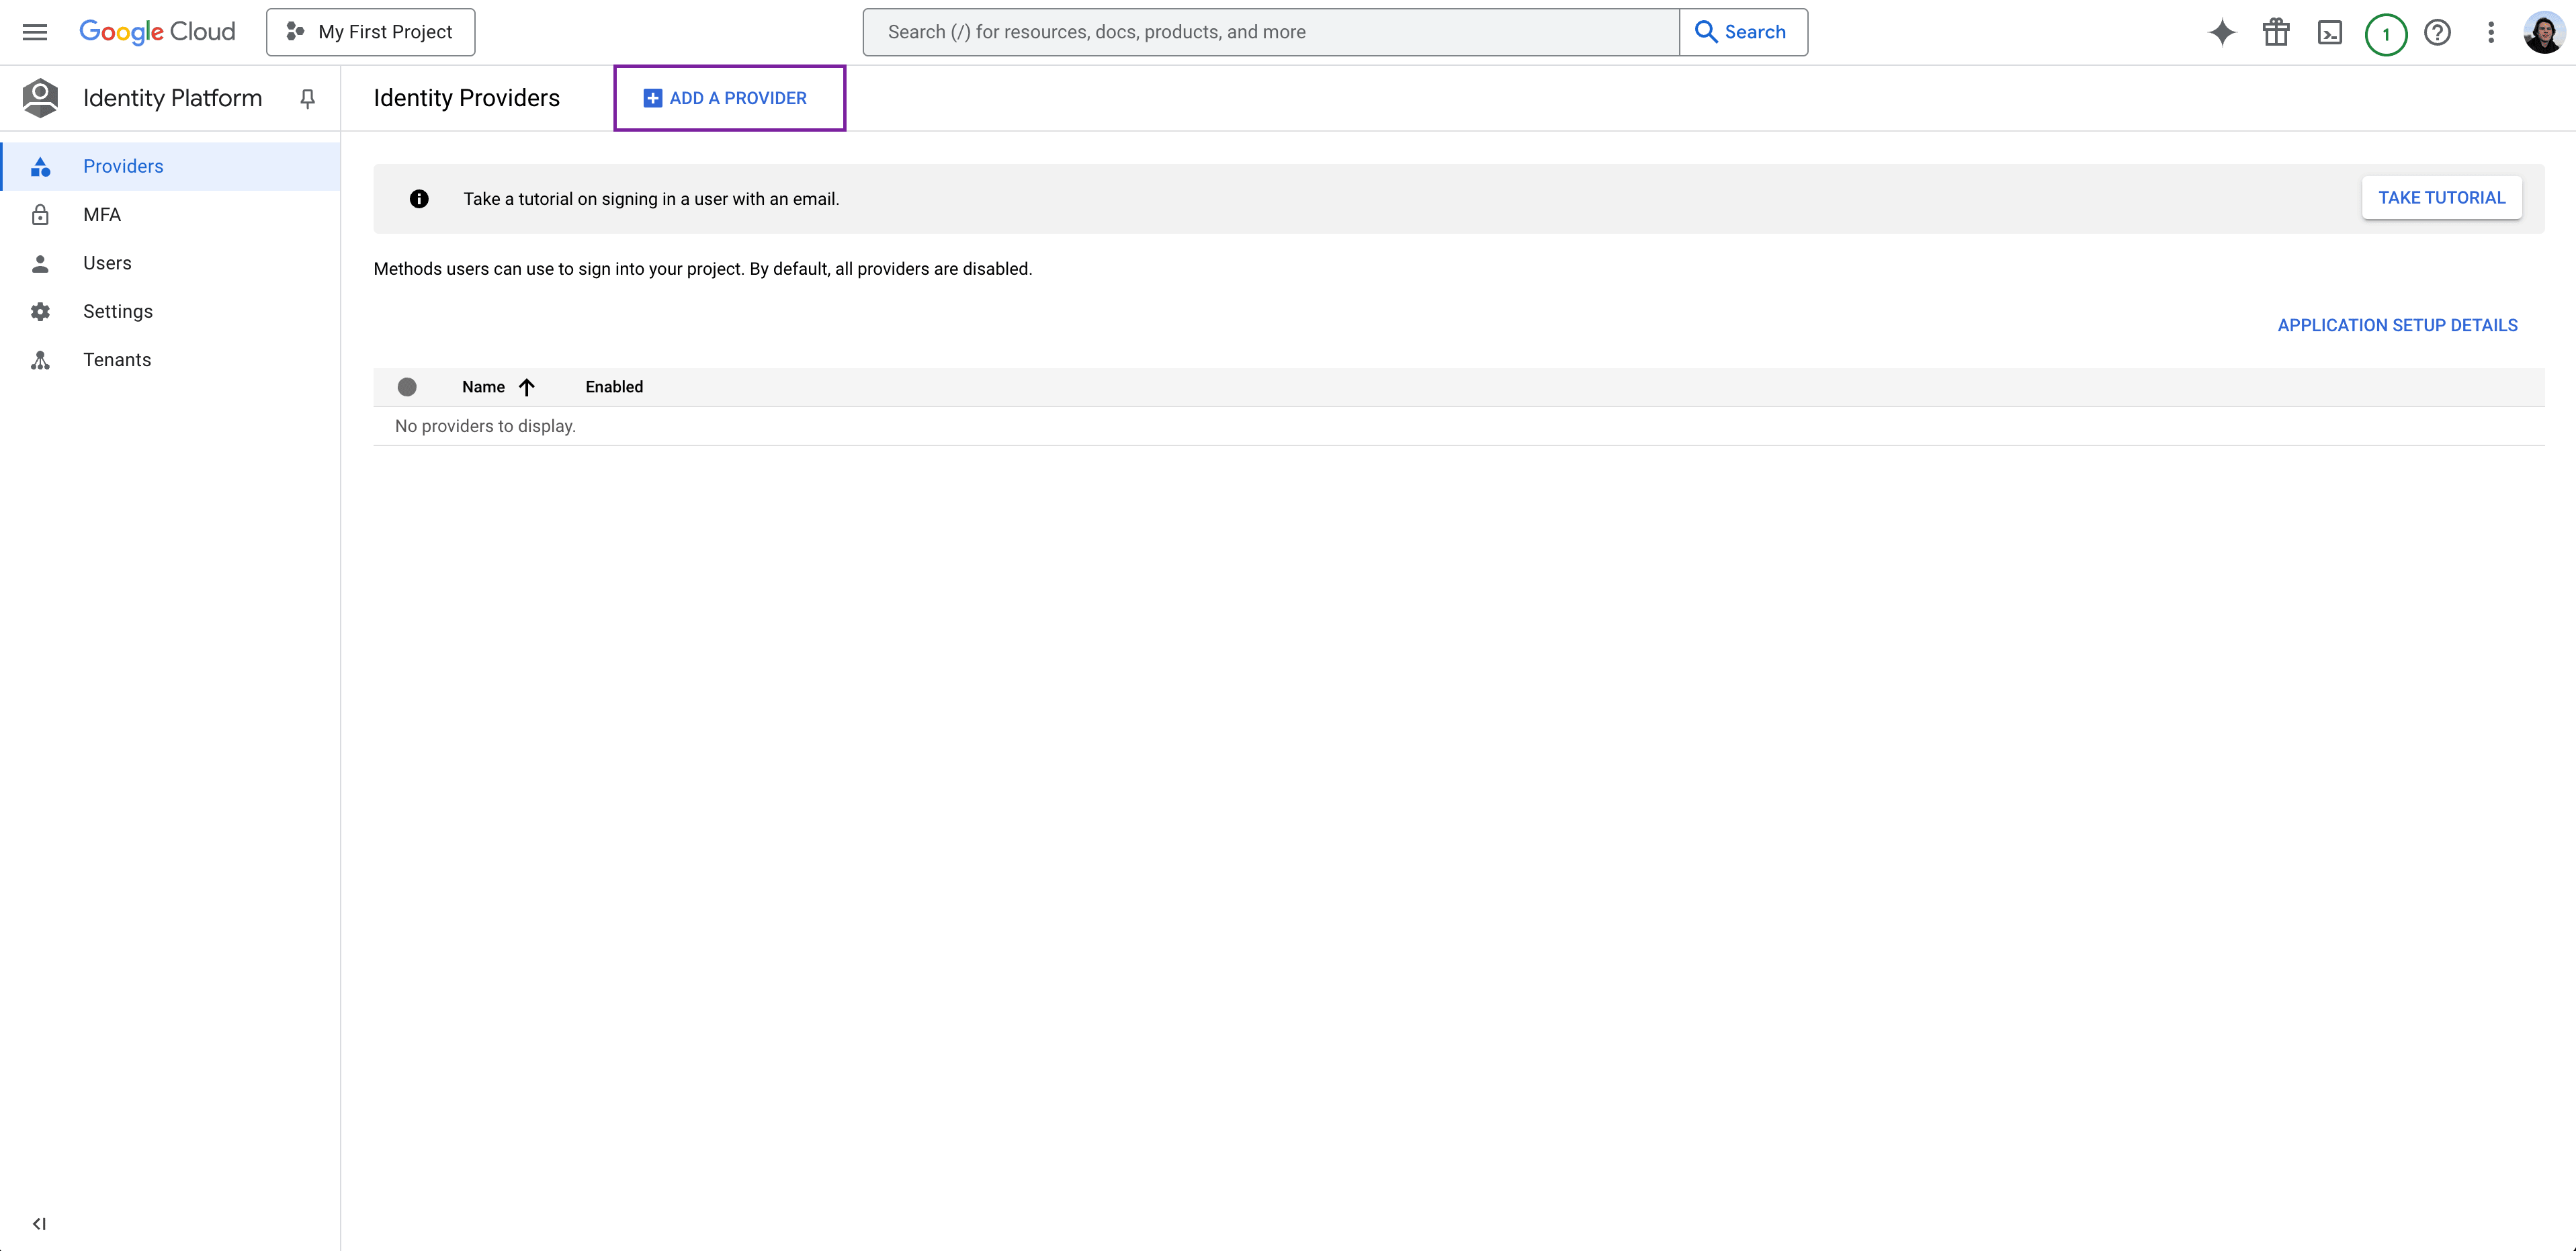
- Configure the OIDC Provider:
- Grant type: Select the Code Flow grant type.
- Provider Name: Enter a display name for the OIDC provider.
- Client ID: Enter the Client ID obtained from Google.
- Client Secret: Enter the Client Secret associated with the Client ID.
- Issuer URL: Provide the Issuer URL (e.g.,
https://accounts.google.com). - Scopes: Specify any additional scopes required by your application.
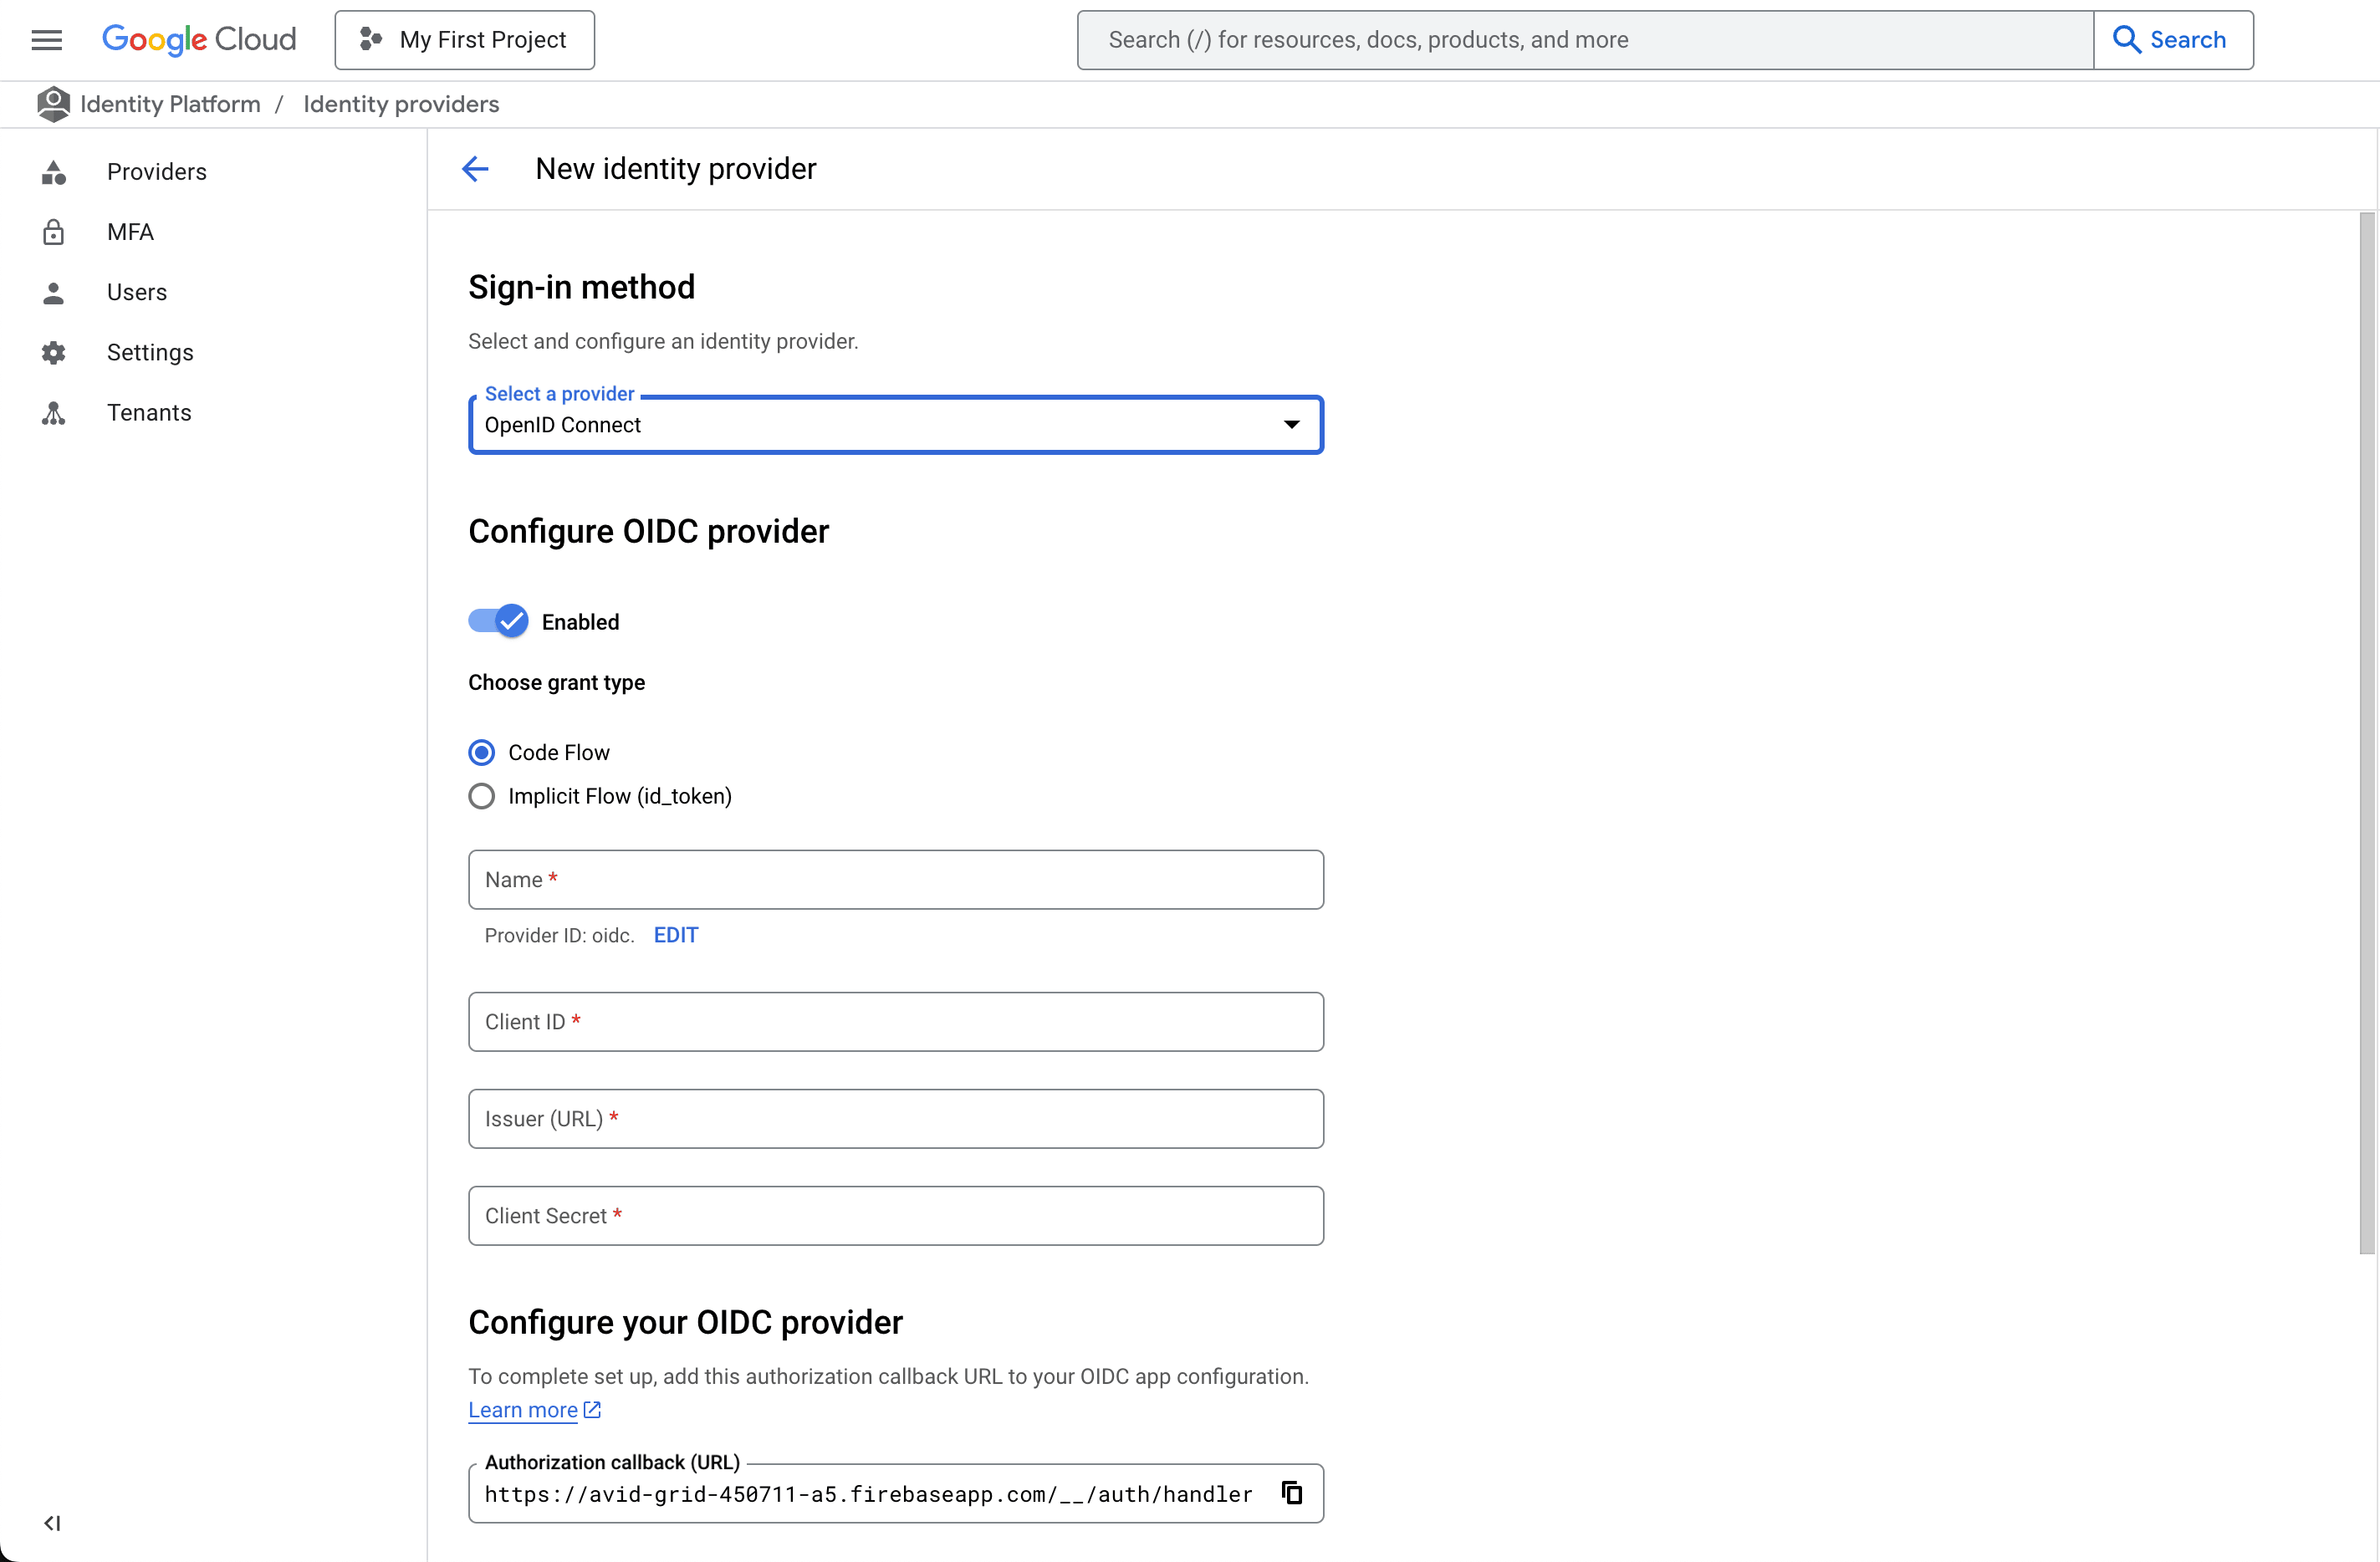
- Click Save to add the provider.
Step 3: Configure Kestra
Add the following to your Kestra Security and Secrets configuration:
micronaut: security: oauth2: enabled: true clients: google: client-id: "{{ clientId }}" client-secret: "{{ clientSecret }}" openid: issuer: 'https://accounts.google.com'Replace clientId and clientSecret with the values from the Google Identity Platform, then restart Kestra.
Configure a default role for SSO users
SSO users need a default role for initial access in Kestra. Add the following to kestra.security:
kestra: security: defaultRole: name: default_admin_role description: "Default Admin Role" permissions: FLOW: - VIEW - LIST - CREATE - UPDATE - DELETE - EXECUTE - DISABLE - ENABLE - VALIDATE - EXPORT - IMPORT EXECUTION: - VIEW - LIST - UPDATE - DELETE - RESTART - KILL - REPLAY - PAUSE - RESUME - CHANGE_LABELS - ACCESS_LOGS - ACCESS_OUTPUTS - ACCESS_FILES - EXPORT - UNQUEUE - FORCE_RUN - FOLLOW NAMESPACE: - VIEW - LIST - CREATE - UPDATE - DELETE - MANAGE_FILES SECRET: ["VIEW", "LIST", "UPDATE", "DELETE"] KVSTORE: ["VIEW", "LIST", "CREATE", "UPDATE", "DELETE"] BLUEPRINT: ["VIEW", "LIST", "CREATE", "UPDATE", "DELETE"] ROLE: ["VIEW", "LIST", "CREATE", "UPDATE", "DELETE"] GROUP: ["VIEW", "LIST", "CREATE", "UPDATE", "DELETE", "MANAGE_MEMBERS"] USER: ["VIEW", "LIST", "CREATE", "UPDATE", "DELETE", "MANAGE_GROUP_MEMBERSHIP"] BINDING: ["VIEW", "LIST", "CREATE", "DELETE"] AUDITLOG: ["VIEW", "LIST", "EXPORT"] ee: tenants: enabled: true defaultTenant: falsePlace defaultRole under kestra.security, not under micronaut.security. The example above grants broad access — adjust the action lists to match the permissions your users actually need in production.
Additional resources
Was this page helpful?