Manage Namespace Files and Use Them in Your Flows
For the complete documentation index, see llms.txt. For a full content snapshot, see llms-full.txt. Append.mdto anykestra.io/docs/*URL for plain Markdown.
Manage Namespace Files and how to use them in your flows.
Namespace Files are files tied to a given namespace. You can think of Namespace Files as the equivalent of a project in your local IDE or a copy of your Git repository.
Namespace Files can hold Python files, R or Node.js scripts, SQL queries, dbt or Terraform projects, and much more.
You can synchronize your Git repository with a specific namespace to orchestrate dbt, Terraform or Ansible, or any other project that contains code and configuration files.
Once you add any file to a namespace, you can reference it inside your flows using the read() function in EVERY task or trigger from the same namespace.
For instance, if you add a SQL query called my_query.sql to the queries directory in the company.team namespace, you can reference it in any Query task or any JDBC Trigger like so: {{ read('queries/my_query.sql') }}.
Here is an example showing how you can use the read() function in a ClickHouse Trigger to read a SQL query stored as a Namespace File:
id: jdbc_triggernamespace: company.team
tasks:  - id: for_each_row    type: io.kestra.plugin.core.flow.ForEach    values: "{{ trigger.rows }}"    tasks:      - id: return        type: io.kestra.plugin.core.debug.Return        format: "{{ json(taskrun.value) }}"
triggers:  - id: query_trigger    type: io.kestra.plugin.jdbc.clickhouse.Trigger    interval: "PT5M"    url: jdbc:clickhouse://127.0.0.1:56982/    username: "{{ secret('CLICKHOUSE_USERNAME') }}"    password: "{{ secret('CLICKHOUSE_PASSWORD') }}"    sql: "{{ read('queries/my_query.sql') }}" # 🚀 The read() function reads the content of the file as a string!    fetchType: FETCH
The namespaceFiles.enabled: true property is not required here — it is only needed to inject an entire directory of namespace files into the working directory of a script task. If you only need to read a file’s contents, use read() without mounting; mounting is for when the task needs files on disk.
Why use Namespace Files
Namespace Files offer a simple way to organize your code and configuration files. Before Namespace Files, you had to store your code and configuration files in a Git repository and then clone that repository at runtime using the git.Clone task. With Namespace Files, you can store your code and configuration files directly in the Kestra’s internal storage backend. That storage backend can be your local directory or an S3 bucket to ensure maximum security and privacy.
Namespace Files make it easy to:
- orchestrate Python, R, Node.js, SQL, and more without having to worry about code dependencies, packaging, and deployments — simply add your code in the embedded Code Editor or sync your Git repository with a given namespace
- manage your code for a given project or team in one place, even if those files are stored in different Git repositories or even different Git providers
- share your code and configuration files between workflows and team members in your organization
- orchestrate complex projects that require the code to be separated into multiple scripts, queries, or modules.
How to add Namespace Files
Embedded code editor
While creating or editing a Flow, you can access Namespace Files from the Namespace Files tab. You can easily write, import, or paste custom scripts, queries, and configuration files.
To start, add a new file (e.g., a Python script). Add a folder named scripts and a file called hello.py with the following content:
print("Hello from the Editor!")Once you added a file, you can use it in your flow:
id: editornamespace: company.team
tasks:  - id: hello    type: io.kestra.plugin.scripts.python.Commands    namespaceFiles:      enabled: true    commands:      - python scripts/hello.py
The Execute button allows you to run your flow directly from the Code Editor. Click on the Execute button to run your flow. You then see the Execution running, and once you navigate to the Logs tab, you should see a friendly message Hello from the Editor! in the logs.
Namespace Files Revision History
Namespace Files include revision history just like flows, so you can inspect or roll back earlier uploads without leaving the Editor.
- First upload of a path is stored as
queries/my_query.sqland treated as version 0 for backward compatibility. - Each subsequent upload keeps
queries/my_query.sqlas the latest version while adding suffixed revisions such asqueries/my_query.sql.v1,queries/my_query.sql.v2, and so on. - Older revisions remain available under their suffixed filenames, letting you compare and restore as needed.
To access a file’s revision history, right-click on the file.
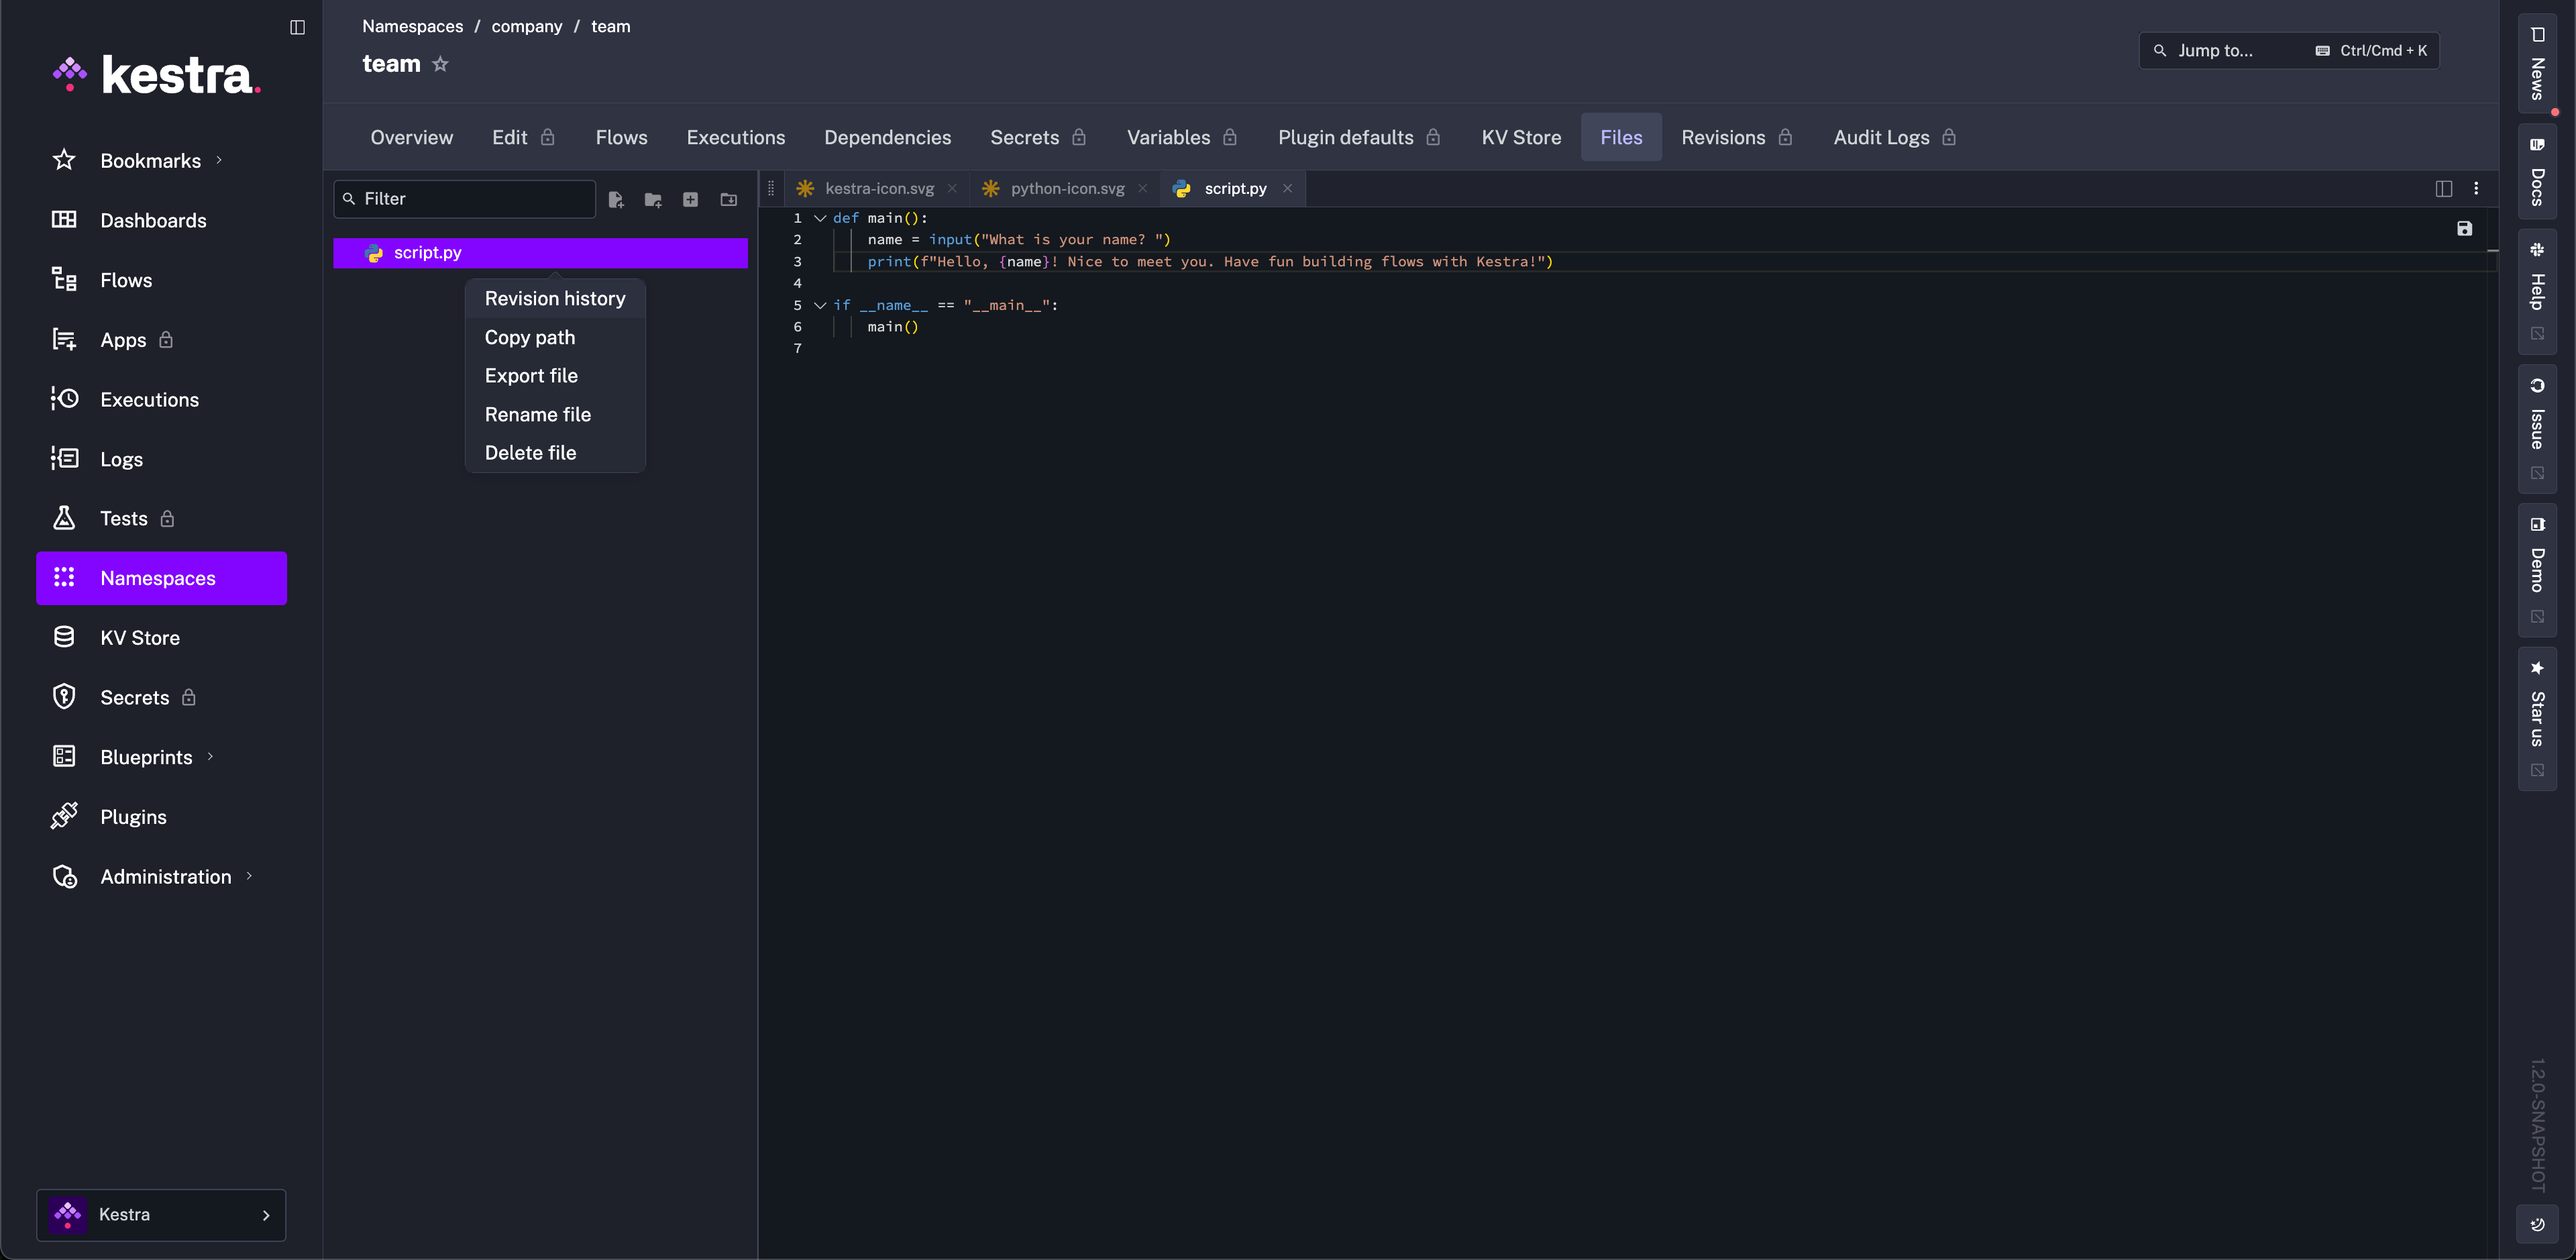
From the history, view, compare, and restore prior versions.
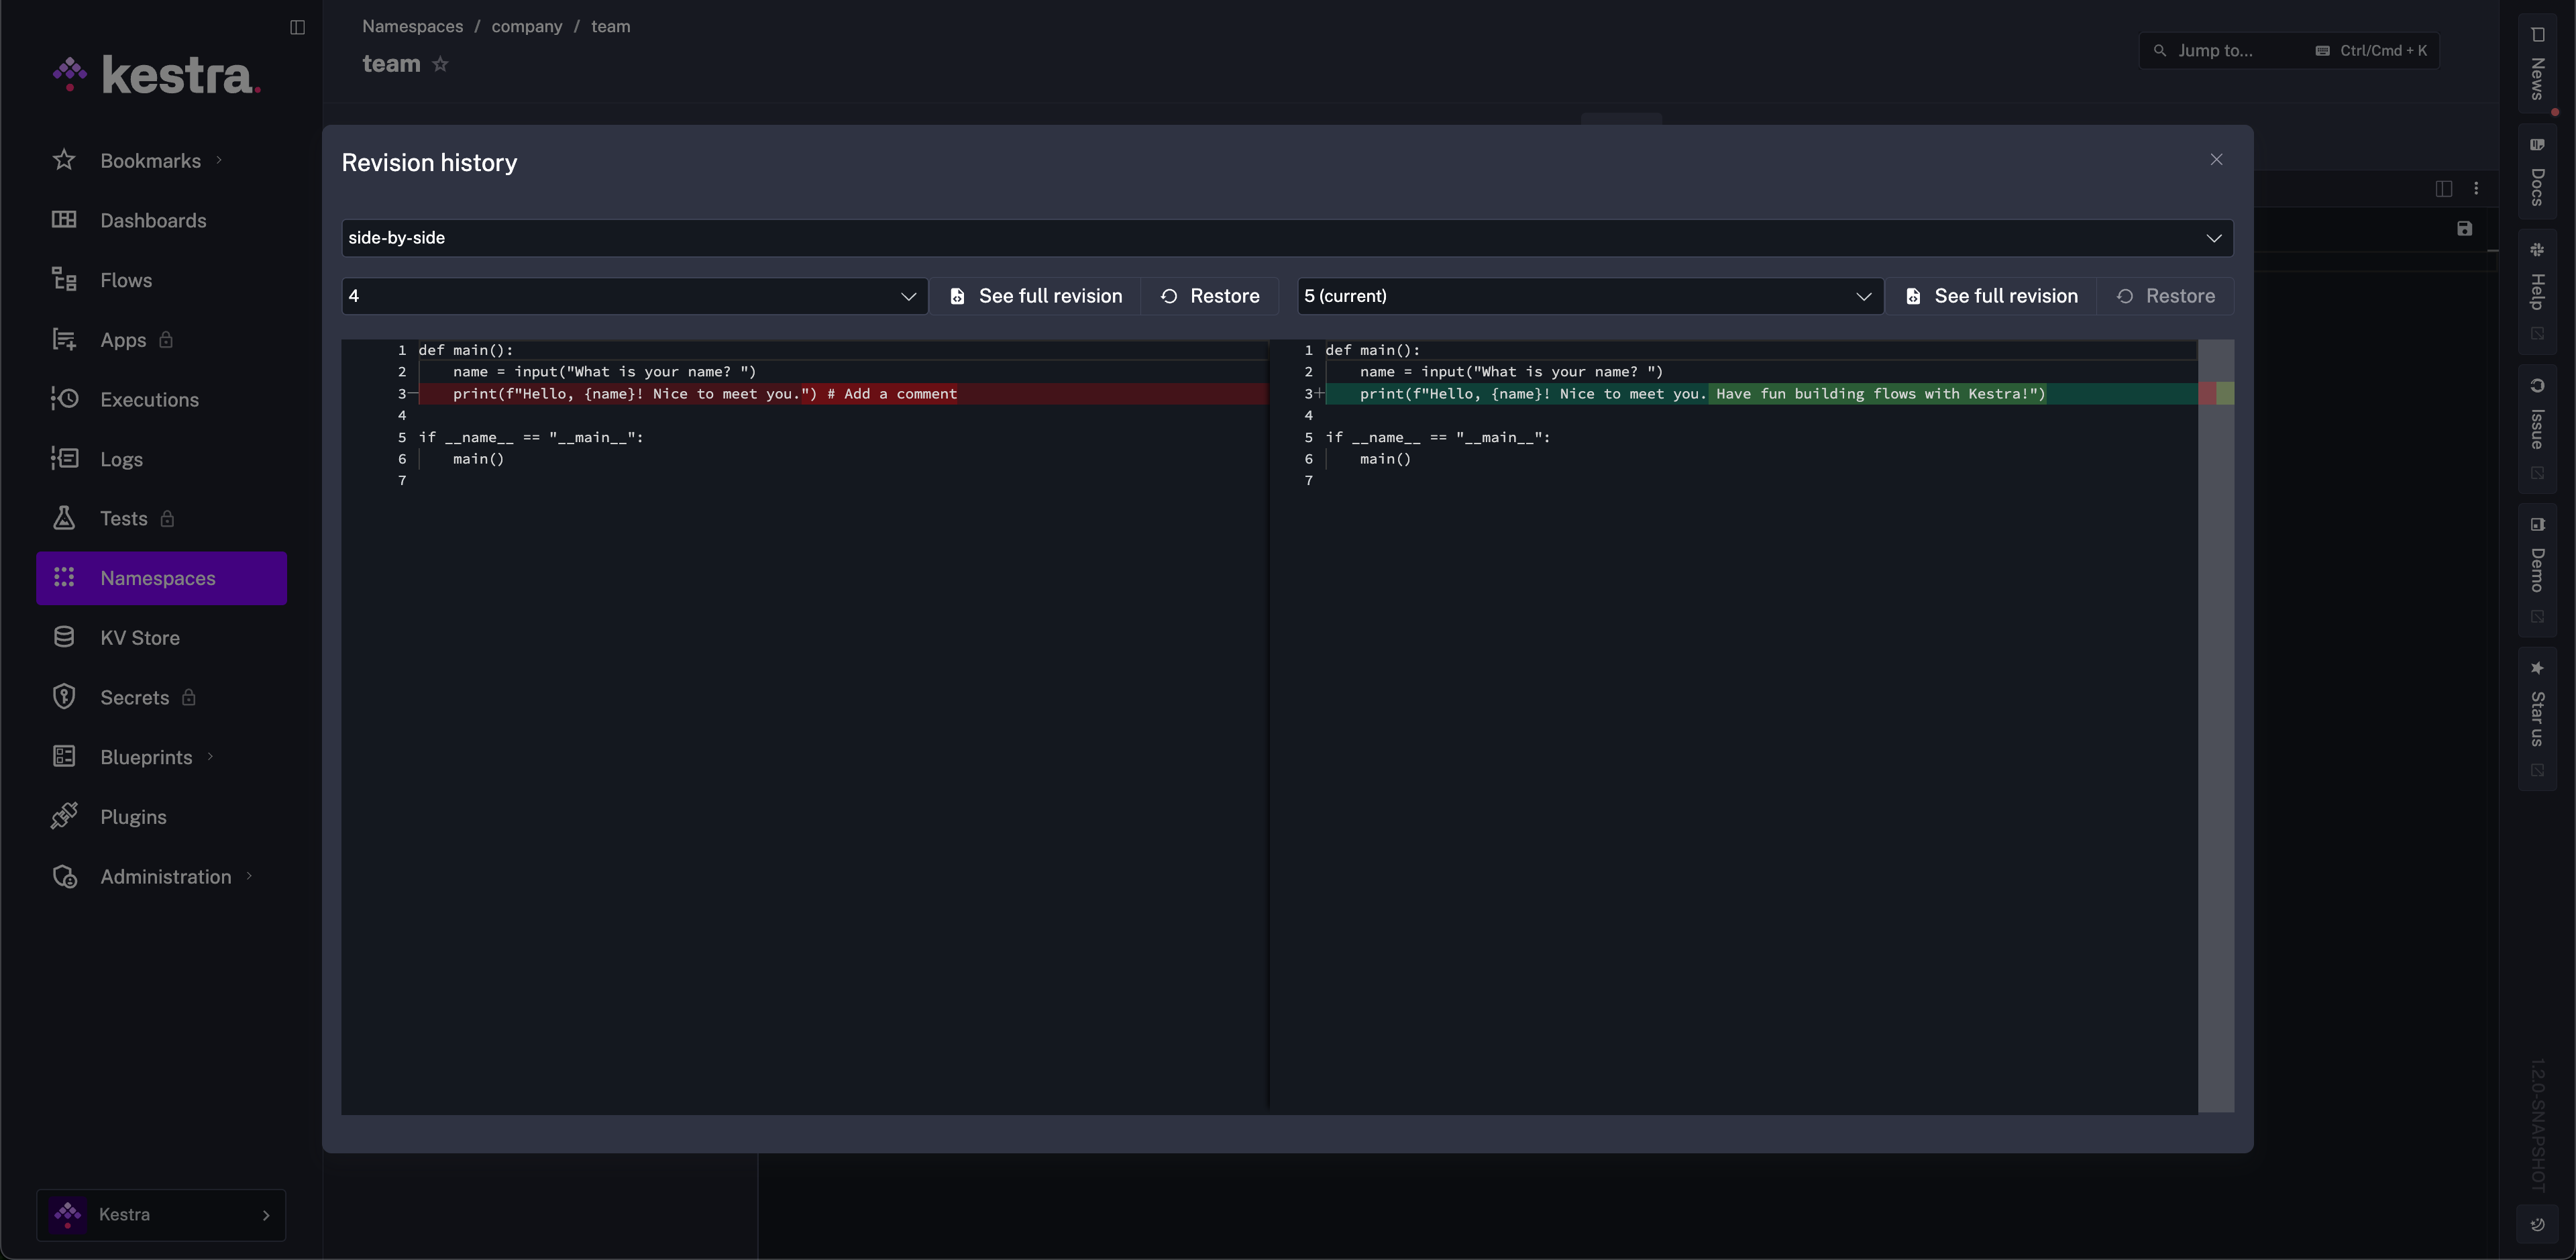
From the Revisions list, you can delete a given revision or all revisions older than the selected one. You will be prompted to confirm this choice, as there is no possible way to restore a revision once is has been deleted.
To keep your version history clean, you can purge “N” number of Namespace File revisions or revisions older than a certain date. Refer to the Purge documentation.
PushNamespaceFiles and SyncNamespaceFiles tasks
There are two tasks to help you automatically manage your namespace files with Git. This allows you to sync the latest changes from a Git repository.
This example pushes Namespace Files you already have in Kestra to a Git repository for you:
id: push_to_gitnamespace: system
tasks:  - id: commit_and_push    type: io.kestra.plugin.git.PushNamespaceFiles    username: git_username    password: "{{ secret('GITHUB_ACCESS_TOKEN') }}"    url: https://github.com/git_username/scripts    branch: dev    namespace: company.team    files:      - "example.py"    gitDirectory: _files    commitMessage: "add namespace files"    dryRun: true
This example syncs Namespace Files inside of a Git repository to your Kestra instance:
id: sync_files_from_gitnamespace: system
tasks:  - id: sync_files    type: io.kestra.plugin.git.SyncNamespaceFiles    username: git_username    password: "{{ secret('GITHUB_ACCESS_TOKEN') }}"    url: https://github.com/git_username/scripts    branch: main    namespace: git    gitDirectory: _files    dryRun: true
Check out the dedicated guides for more information:
GitHub Actions CI/CD
Use the official Kestra GitHub Actions to upload namespace files directly from your repository. This is ideal for promoting configuration, scripts, or other assets that live alongside your code.
Example workflow deploying the scripts/ folder to the prod namespace using the deploy-namespace-files action:
name: Kestra Namespace Fileson: [push]
jobs: upload-namespace-files: runs-on: ubuntu-latest steps: - uses: actions/checkout@v5 - name: Upload scripts folder to prod uses: kestra-io/github-actions/deploy-namespace-files@main with: localPath: ./scripts # folder in the repo namespacePath: scripts # destination path in the namespace namespace: prod server: ${{ secrets.KESTRA_HOSTNAME }} # Choose one auth method: # apiToken: ${{ secrets.KESTRA_API_TOKEN }} # Enterprise Edition user: ${{ secrets.KESTRA_USERNAME }} # Basic auth password: ${{ secrets.KESTRA_PASSWORD }}- Store credentials as GitHub Secrets. Provide
tenantwhen targeting multi-tenant Enterprise environments. - Ensure the service account role grants namespace file permissions (and
FLOWSwhen deploying flows) to your target namespace.
Terraform provider
You can use the kestra_namespace_file resource from the official Kestra Terraform Provider to deploy all your custom script files from a specific directory to a given Kestra namespace.
Below is a simple example showing how you can synchronize an entire directory of scripts from the directory src with the company.team namespace using Terraform:
resource "kestra_namespace_file" "prod_scripts" { for_each = fileset(path.module, "src/**") namespace = "company.team" filename = each.value # or "/${each.value}" content = file(each.value)}Deploy namespace files via kestractl
You can upload namespace files from the command line using kestractl. The following example synchronizes an entire local directory with the prod namespace:
kestractl nsfiles upload prod ./scripts --overrideTo upload to a specific path within the namespace rather than the root:
kestractl nsfiles upload prod ./assets --path resources --override --fail-fastThe --override flag replaces existing files; --fail-fast stops on the first error rather than continuing.
kestractl nsfiles also supports list, get, and delete for inspecting and removing individual files. Run kestractl nsfiles --help for the full reference.
How to use Namespace Files in your flows
There are multiple ways to use Namespace Files in your flows. You can use the read() function to read the content of a file as a string, point to the file path in the supported tasks, or use a dedicated task to retrieve it as an output.
Kestra 0.24 introduced a universal file protocol that simplifies accessing files — local or namespace — in your flow. For more details, refer to the File Access documentation page.
Usually, pointing to a file location, rather than reading the file’s content, is required when you want to use a file as an input to a CLI command (e.g., in a Commands task such as io.kestra.plugin.scripts.python.Commands or io.kestra.plugin.scripts.node.Commands). In all other cases, the read() function can be used to read the content of a file as a string (e.g., in Query or Script tasks).
You can also use the io.kestra.plugin.core.flow.WorkingDirectory task to read namespace files and then use them in child tasks that require a file path in CLI commands, for example: python scripts/hello.py.
The read() function
The script in the first section used the read() function to read the content of the scripts/hello.py file as a string using the expression "{{ read('scripts/hello.py') }}". It’s important to remember that this function reads the content of the file as a string. Therefore, you should use that function only in tasks that expect a string as an input like io.kestra.plugin.scripts.python.Script or io.kestra.plugin.scripts.node.Script, rather than io.kestra.plugin.scripts.python.Commands or io.kestra.plugin.scripts.node.Commands.
The read() function allows you to read the content of a Namespace File stored in the Kestra’s internal storage backend. The read() function takes a single argument, which is the absolute path to the file you want to read. The path must point to a file stored in the same namespace as the flow you are executing.
In this example, we have a namespace file called example.txt that contains the text Hello, World!. We can print the content to the logs by using {{ read('example.txt') }}:
id: filesnamespace: company.team
tasks:  - id: log    type: io.kestra.plugin.core.log.Log    message: "{{ read('example.txt') }}"
namespaceFiles.enabled on supported tasks
With supported tasks, such as the io.kestra.plugin.scripts group, we can access files using their path and enabling the task to read namespace files.
Below is a simple weather.py script that reads a secret to talk to a Weather Data API:
import requestsapi_key = '{{ secret("WEATHER_DATA_API_KEY") }}'url = f"https://api.openweathermap.org/data/2.5/weather?q=Paris&APPID={api_key}"weather_data = requests.get(url)print(weather_data.json())Next, is a flow that uses the script:
id: weather_datanamespace: company.team
tasks:  - id: get_weather    type: io.kestra.plugin.scripts.python.Commands    namespaceFiles:      enabled: true      include:        - scripts/weather.py    taskRunner:      type: io.kestra.plugin.scripts.runner.docker.Docker    containerImage: ghcr.io/kestra-io/pydata:latest    commands:      - python scripts/weather.py
namespaceFiles property
The example above uses the include field to only allow the scripts/weather.py file to be accessible by the task.
We can control what namespace files are available to our flow with the namespaceFiles property.
namespaceFiles has several configurable attributes:
enabled: when set to true enables all files in that namespace to be visible to the taskinclude: specifies files you want to be accessible by the taskexclude: specifies files you don’t want to be accessible by the tasknamespaces: specifies a list of namespaces to search for files.ifExists: specifies what to do in the instance a Namespace file already exists in the working directoryfolderPerNamespace: a boolean property that mounts namespace files in separate directories (set tofalseby default) rather than all files to the root of the working directory
The namespaces attribute can be used like in the following example:
id: namespace_files_examplenamespace: dev.test
tasks:
  - id: namespace    type: io.kestra.plugin.scripts.python.Commands    namespaceFiles:      enabled: true      namespaces:        - "dev.test"        - "company"    commands:      - python test.py

  - id: namespace2    type: io.kestra.plugin.scripts.python.Script    namespaceFiles:      enabled: true    script: "{{ read('test.py') }}"
The files are loaded in the namespace order, and only the latest version of a file is kept. Meaning if a file is present in the first and second namespace, only the file present on the second namespace will be loaded. In the first task, the test.py file from the company namespace will be used because priority is given from top to bottom of the list of namespaces. In the case of multiple files of the same name, the last listed namespace holds priority.
For the second task, the test.py file in the dev.test namespace will be used because no namespace has been defined in the read() function. If you want to fetch the test.py script from a different namespace, you need to explicitly define it as follows: "{{ read('test.py', namespace='company.team') }}".
The ifExists attribute has four possible options for behavior when tasks invoke a Namespace file that already exists in the working directory:
OVERWRITE: set by default, adds a debug log that the file was overwrittenFAIL: logs and ERROR and fails the taskWARN: logs a WARNING but continues running the executionIGNORE: doesn’t overwrite the file or log any warnings
For example, in the following task the second instance of sample_python.py will overwrite the first:
id: test_workdir_issuenamespace: prod
tasks:  - id: git_wdir    type: io.kestra.plugin.core.flow.WorkingDirectory    tasks:      - id: clone        type: io.kestra.plugin.git.Clone        branch: main        url: https://github.com/kestra-io/examples
      - id: python_command_1        type: io.kestra.plugin.scripts.python.Commands        namespaceFiles:          enabled: true        commands:          - python scripts/sample_python.py
- id: python_command_2 type: io.kestra.plugin.scripts.python.Commands namespaceFiles: enabled: true ifExists: OVERWRITE commands: - python scripts/sample_python.pyNamespace tasks
You can use the Namespace Tasks to upload, download, and delete tasks in Kestra.
In the example below, we have a namespace file called example.ion that we want to convert to a .csv file. We can use the DownloadFiles task to generate an output that contains the file so we can easily pass it dynamically to the IonToCsv task.
id: filesnamespace: company.teamtasks:  - id: namespace    type: io.kestra.plugin.core.namespace.DownloadFiles    namespace: company.team    files:      - example.ion
  - id: ion_to_csv    type: io.kestra.plugin.serdes.csv.IonToCsv    from: "{{ outputs.namespace.files['/example.ion'] }}"
Read more about the tasks below:
Include / exclude namespace files
You can selectively include or exclude namespace files.
Let’s say that you have multiple namespace files present: file1.txt, file2.txt, file3.json, file4.yml. You can selectively include multiple files using the include attribute under namespaceFiles as shown below:
id: include_namespace_filesnamespace: company.team
tasks:  - id: include_files    type: io.kestra.plugin.scripts.shell.Commands    namespaceFiles:      enabled: true      include:        - file1.txt        - file3.json    commands:      - ls
The include_files task lists all the included files. In the example above, these are file1.txt and file3.json as only those were included from the namespace through include.
The exclude attribute, alternatively, includes all the namespace files except those specified under exclude.
id: exclude_namespace_filesnamespace: company.team
tasks:  - id: exclude_files    type: io.kestra.plugin.scripts.shell.Commands    namespaceFiles:      enabled: true      exclude:        - file1.txt        - file3.json    commands:      - ls
The exclude_files task from the above flow lists file2.txt and file4.yml, all the namespace files except those that were excluded using exclude.
Pattern matching rules for include / exclude
- Patterns that do not start with
/are automatically prefixed with**/, so they match recursively (e.g.,file1.txtbecomes**/file1.txt). - Patterns that start with
/match from the namespace root only (e.g.,/config/settings.json). - You can force explicit types with
glob:orregex::glob:/src/**/*.pyregex:^src/.*\\.py$
Examples:
namespaceFiles:  enabled: true  include:    # Root-only matches    - /file1.txt    - /config/settings.json
    # Recursive matches (auto **/ prefix)    - file1.txt          # becomes **/file1.txt    - src/**             # becomes **/src/**
    # Explicit glob    - glob:/src/**/*.py    - glob:config/*.json
    # Regex    - regex:^src/.*\.py$    - regex:.*test.*\.json
Patterns without a leading / are automatically prefixed with **/. Use /… or explicit glob:/regex: patterns if you want root-only matching. Patterns that already contain ** (for example sg_base_etl/**) may be unintentionally transformed; use /sg_base_etl/** or glob:/sg_base_etl/** as a workaround.
Was this page helpful?