Send HTTP Requests to External APIs from Kestra Workflows
For the complete documentation index, see llms.txt. For a full content snapshot, see llms-full.txt. Append.mdto anykestra.io/docs/*URL for plain Markdown.
Make HTTP requests to fetch data and generate outputs.
You can make HTTP requests directly inside a flow and use the responses as outputs in downstream tasks. This guide covers what HTTP requests are and how to use the most common request methods in Kestra.
What is an HTTP request?
Hypertext Transfer Protocol (better known as HTTP) requests are messages sent between a client and server to request something.
Requests can send or request data, with common methods known as GET, POST, PUT and DELETE requests. You can use these directly in Kestra to interact with third-party systems.
| Request Method | Description |
|---|---|
| GET | Used to retrieve data from a server |
| POST | Used to create new data on a server |
| PUT | Used to replace data on a server |
| DELETE | Used to delete data on a server |
There are many other request methods too, which you can read more about on the MDN docs.
When you make a request, you will receive a response from the server with the answer. This answer can drive Kestra automations. First, here is what makes up a request.
Status code
When you make a request, you’ll receive a response with a status code that indicates whether the request succeeded. The format follows:
| Status Codes | Description |
|---|---|
| 100 - 199 | Informational |
| 200 - 299 | Successful |
| 300 - 399 | Redirection |
| 400 - 499 | Client error |
| 500 - 599 | Server error |
A few common ones you might have seen include:
- 200: OK - Request was successful.
- 404: Not Found - Request reached the server but the resource wasn’t found. A common one you see when you go to a page on a website that doesn’t exist.
- 500: Internal Server Error - Request reached the server but the server was unable to process it. Usually means the server has thrown an error.
You can read the full list of status codes on the MDN docs.
Headers
Each request also has a set of request headers that provide additional information, such as the client type and the content type being sent. You can read more about HTTP headers on the MDN docs. Responses include headers in the same structure.
Body
Requests can also have a request body that contains data to send. For example, if you want to add a user to a system, you would include their name and email in the body. Request bodies are fundamental for POST and PUT requests, but methods like GET don’t have them. You can read more about the request body on the MDN docs.
When you receive a response, it may also have a body — for example, a GET request might return JSON data that you can pass to downstream tasks in your workflow.
How can I make HTTP requests?
You can make requests by putting a URL directly into your browser, especially for GET requests, but it can be challenging to specify the body and headers for other methods, such as POST and PUT requests. There’s a variety of tools that can make this easier such as Postman and cURL.
The example below uses Postman to make a POST request to dummyjson.com. Use the /products/add route to add a new product by providing a body like this:
{ "title": "Kestra Pen"}In Postman, add the URL https://dummyjson.com/products/add, set the request type to POST, add the body above as a raw option, and change the type to JSON. Then press send:
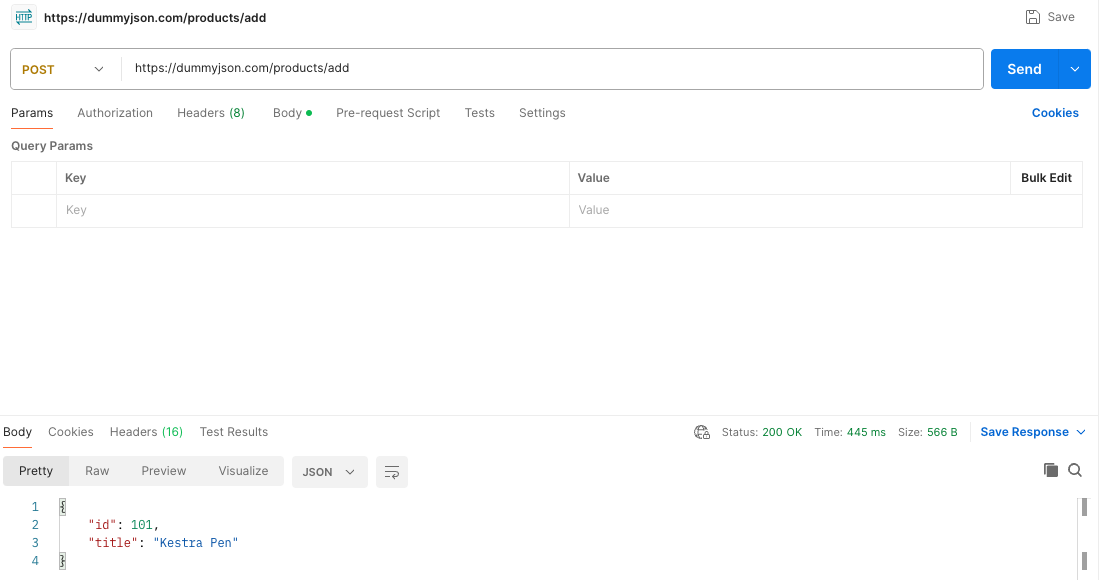
You can do the same with cURL:
curl -X POST https://dummyjson.com/products/add \ -H 'Content-Type: application/json' \ -d '{ "title": "Kestra Pen" }'The arguments used are:
-X {method} {url}— specifies the HTTP method and URL-H {header-type}— sets request headers-d {body}— provides the request body
The response is the same as in Postman:
{ "id": 101, "title": "Kestra Pen"}These tools work well for one-off API testing but require extra effort to automate or integrate with other systems.
Making HTTP requests in Kestra
Kestra’s HTTP task lets you automate requests alongside other tasks. Below, you’ll find examples for GET, POST, PUT, and DELETE requests in your flow.
To make a request, use the task type io.kestra.plugin.core.http.Request. For more information on the task type, see the dedicated documentation.
GET request
Use a GET request to fetch data from a server and pass it to downstream tasks.
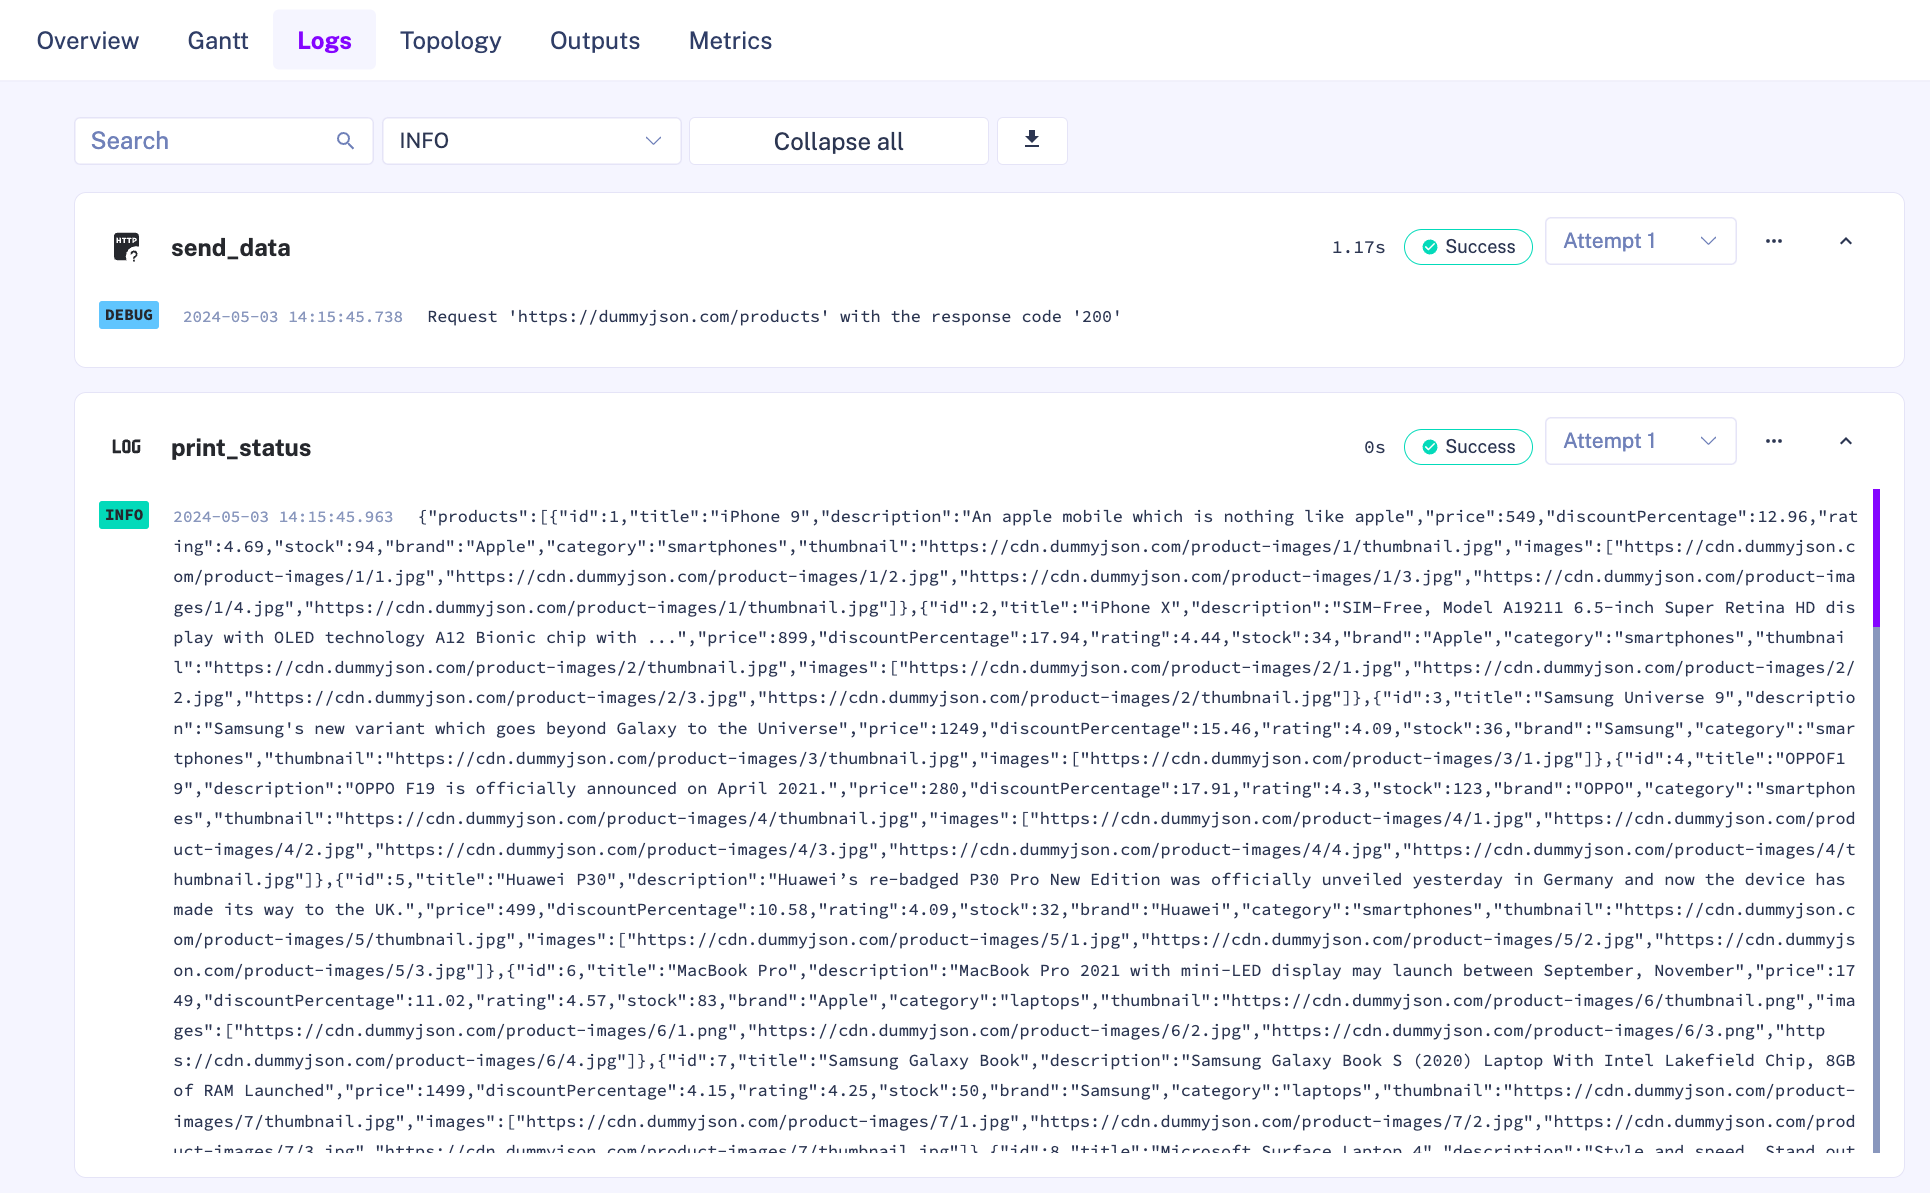
This flow sends a GET request to collect a list of products and print the output to the logs:
id: http_get_request_examplenamespace: company.teamdescription: Make a HTTP Request and Handle the Output
tasks:  - id: send_data    type: io.kestra.plugin.core.http.Request    uri: https://dummyjson.com/products    method: GET    contentType: application/json
  - id: print_status    type: io.kestra.plugin.core.log.Log    message: "{{ outputs.send_data.body }}"
The Logs page shows the response:
To view task outputs without Log tasks, use the Outputs page in the UI:
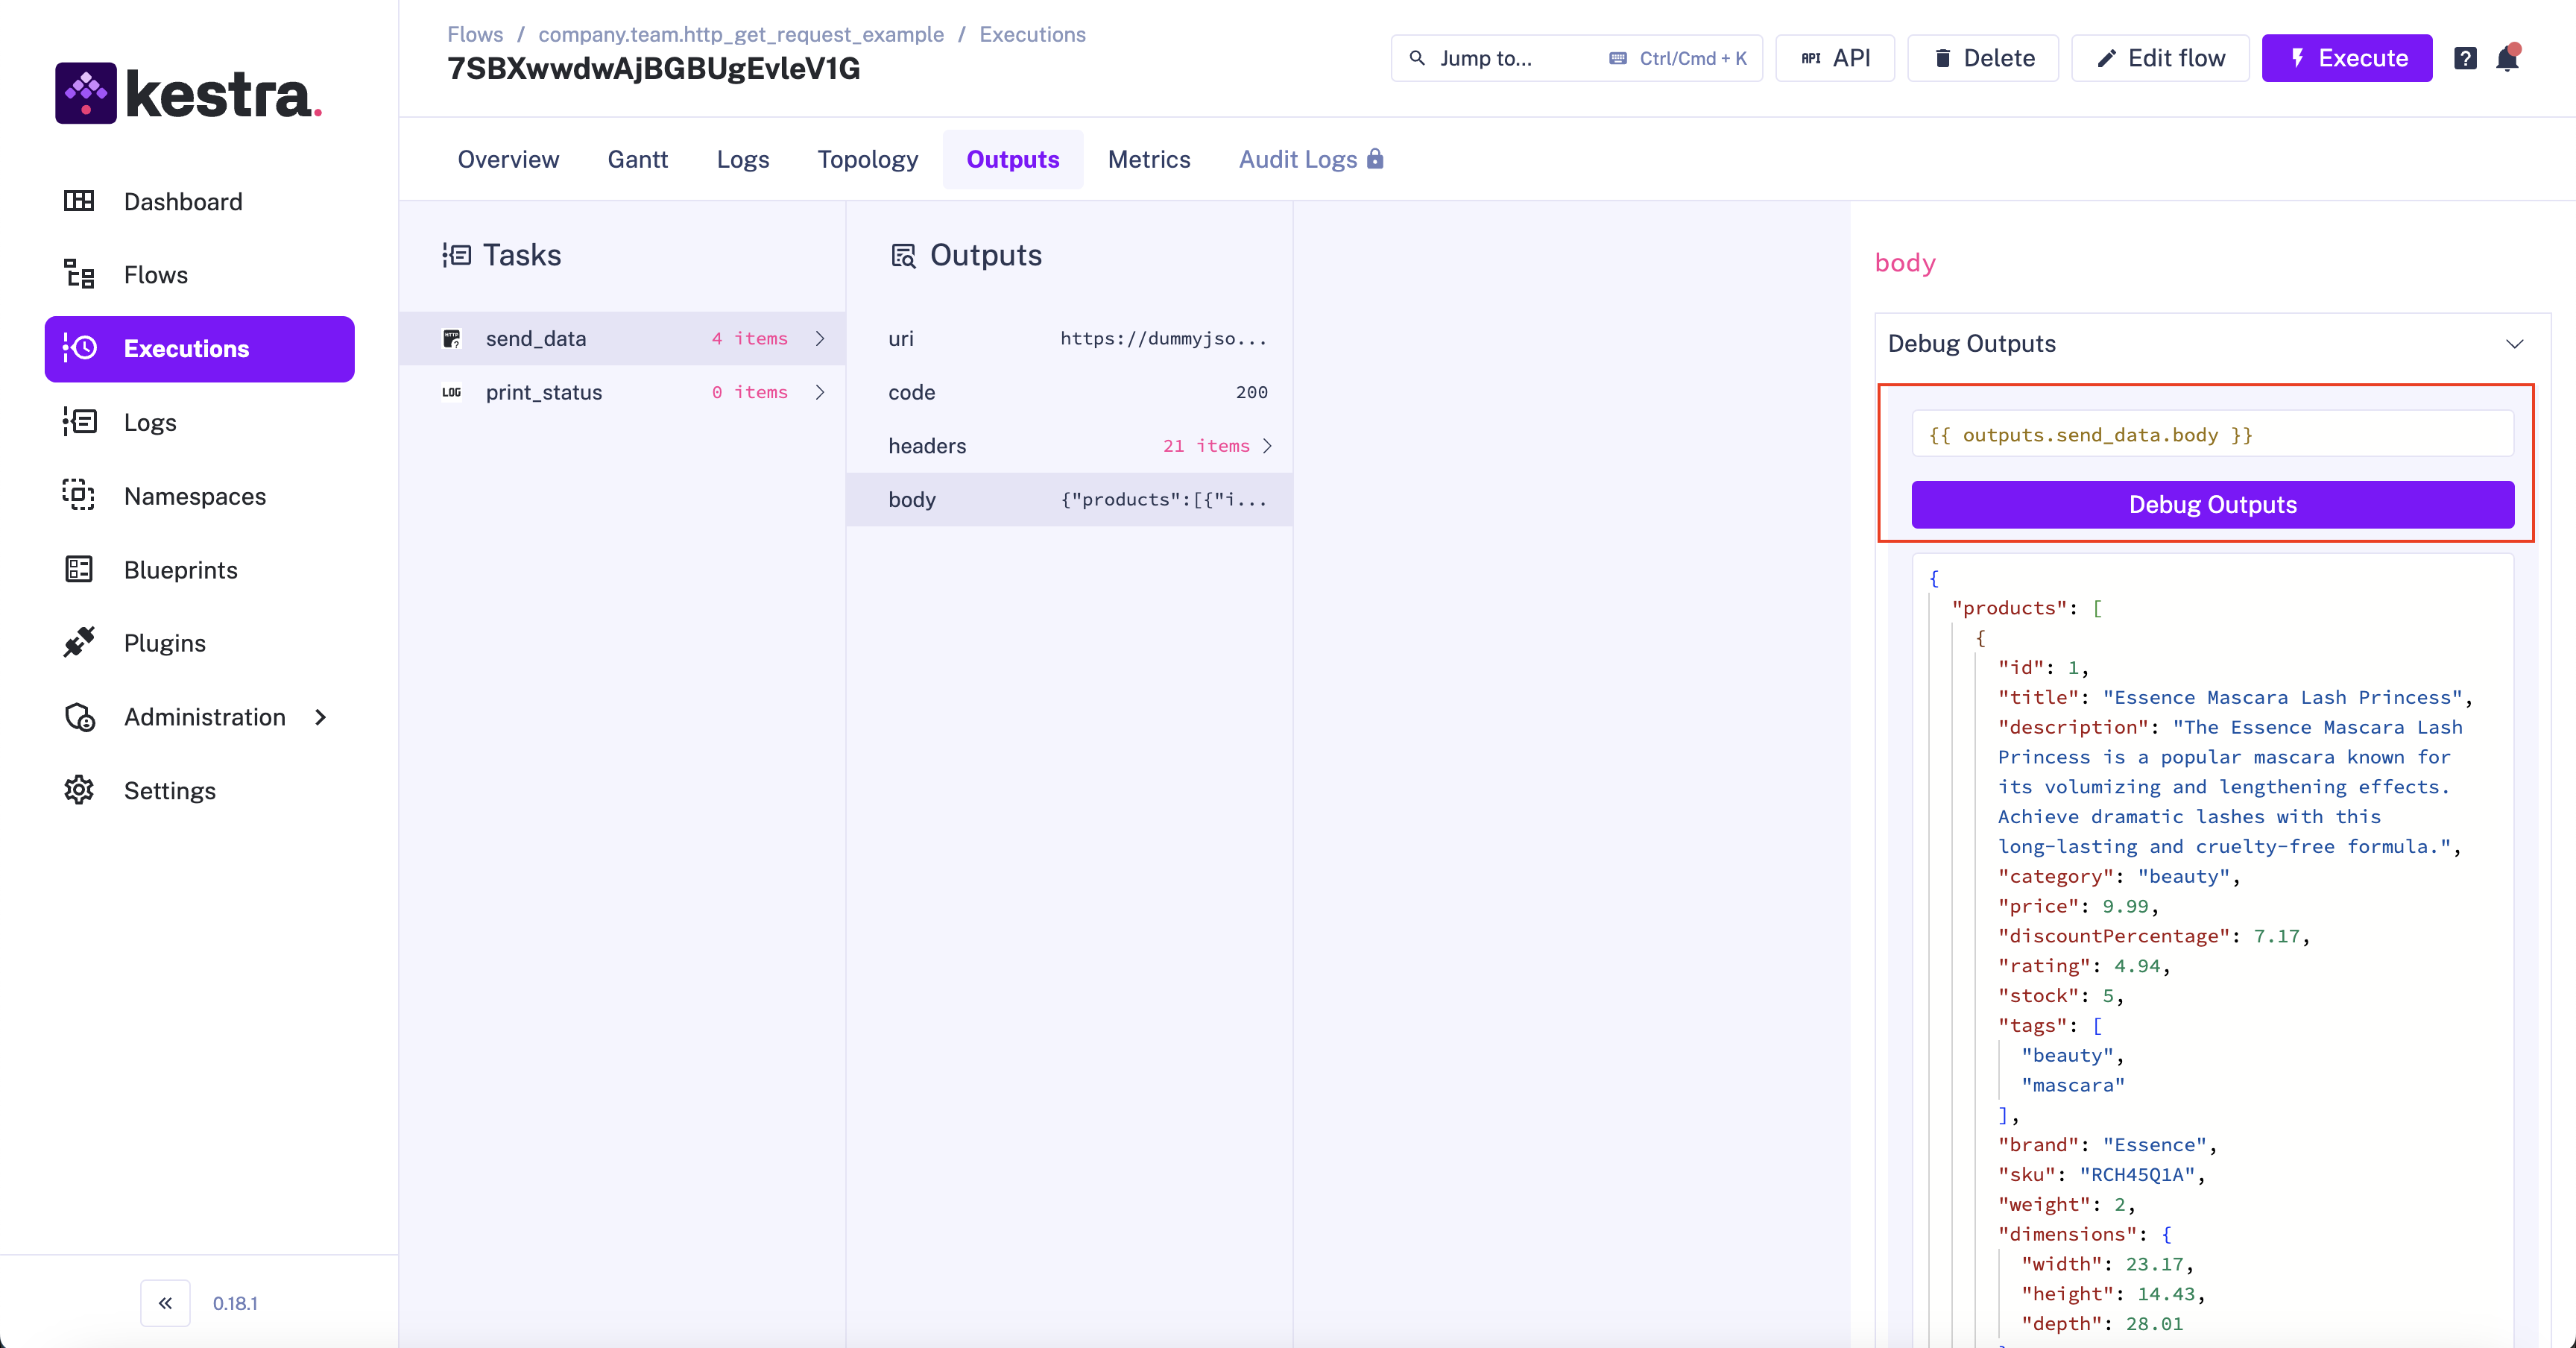
The Debug Expression option lets you inspect specific outputs using an expression after the flow executes — useful when debugging tasks to see what was generated.
POST request
Build on the GET request example above by changing these properties:
uri→https://dummyjson.com/products/addmethod→POSTbody→ add the data to send to the server
id: http_post_request_examplenamespace: company.teamdescription: Make a HTTP Request and Handle the Output
inputs:  - id: payload    type: JSON    defaults: |      { "title": "Kestra Pen" }
tasks:  - id: send_data    type: io.kestra.plugin.core.http.Request    uri: https://dummyjson.com/products/add    method: POST    contentType: application/json    body: "{{ inputs.payload }}"
  - id: print_status    type: io.kestra.plugin.core.log.Log    message: "{{ outputs.send_data.body }}"
Defining the request body as an input makes it easy to change at execution time or reuse across multiple requests.
If your body message input is multiple lines, the best practice is to use a pebble expression to convert it to JSON and avoid escape function issues. For more details, check out this multiline JSON example with pebble.
Executing this as a POST request returns the following response, visible in the Outputs page via the Debug Expression option:
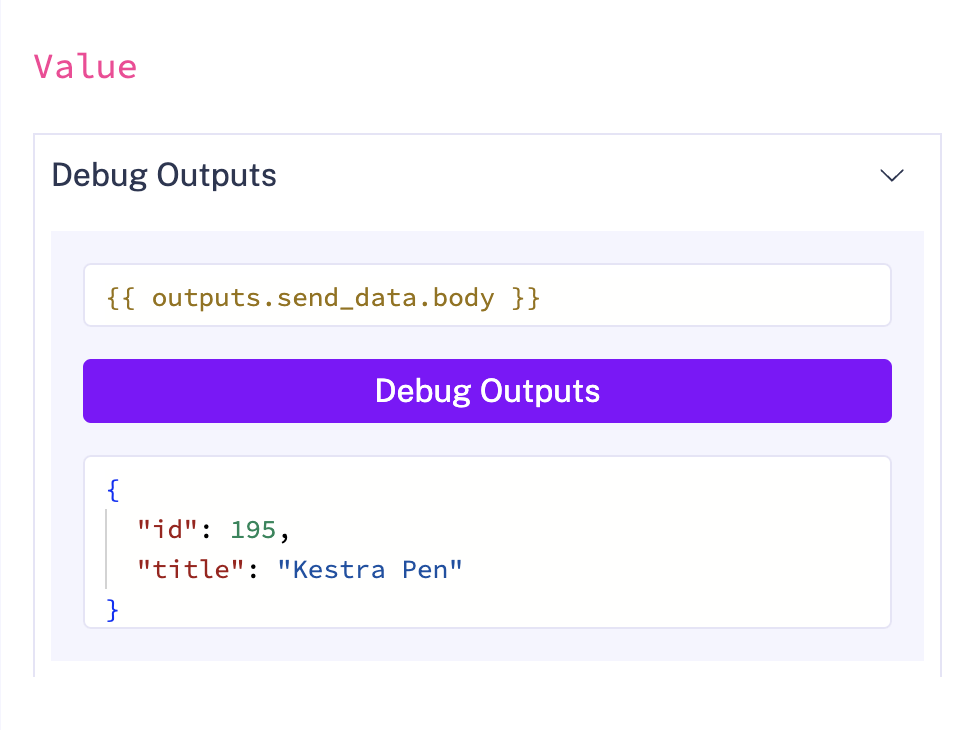
This produces the same output as the earlier example, with the added ability to pass the response to downstream tasks.
PUT request
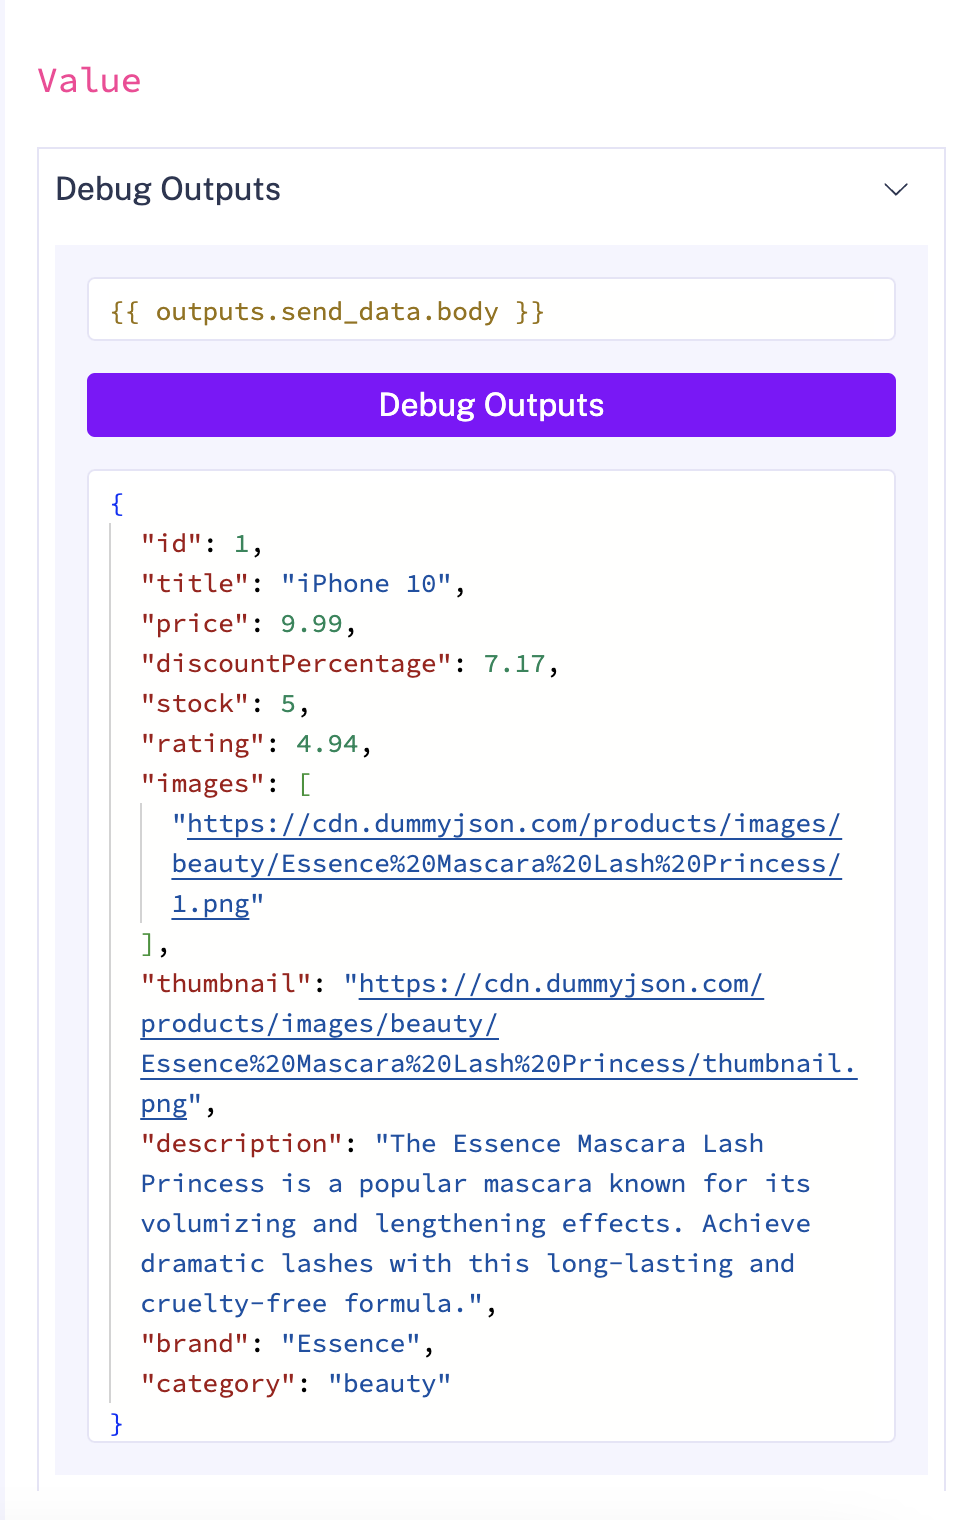
Similar to the POST request, change the method property to PUT. Since the PUT request replaces content, adjust the body with the data to update. From the GET request, id 1 is an iPhone 9 — change it to an iPhone 10:
id: http_put_request_examplenamespace: company.teamdescription: Make a HTTP Request and Handle the Output
inputs:  - id: payload    type: JSON    defaults: |      {"title": "iPhone 10"}
tasks:  - id: send_data    type: io.kestra.plugin.core.http.Request    uri: https://dummyjson.com/products/1    method: PUT    contentType: application/json    body: "{{ inputs.payload }}"
  - id: print_status    type: io.kestra.plugin.core.log.Log    message: "{{ outputs.send_data.body }}"
The response body confirms the updated title field.
DELETE request
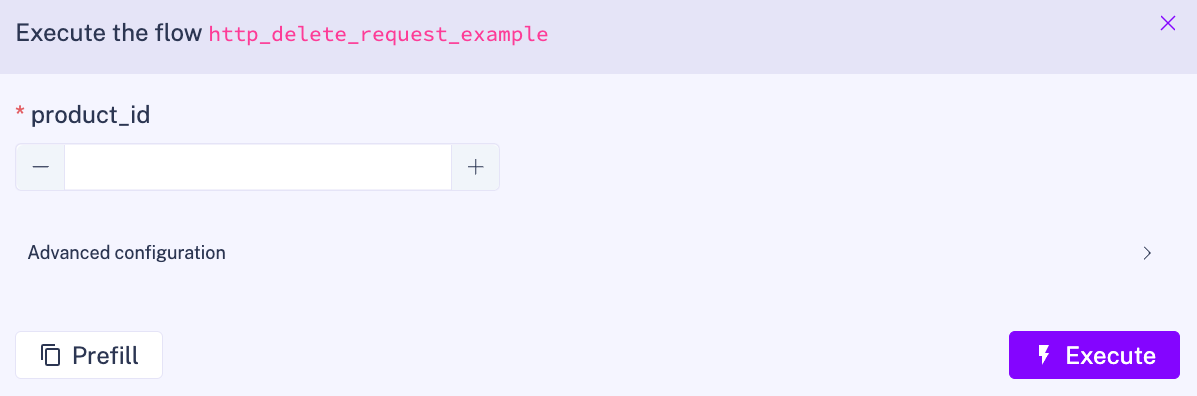
Use a DELETE request to remove a resource. Unlike POST and PUT, you don’t need to provide a body — just specify the resource ID as an input.
id: http_delete_request_examplenamespace: company.teamdescription: Make a HTTP Request and Handle the Output
inputs:  - id: product_id    type: INT
tasks:  - id: send_data    type: io.kestra.plugin.core.http.Request    uri: "https://dummyjson.com/products/{{ inputs.product_id }}"    method: DELETE    contentType: application/json
  - id: print_status    type: io.kestra.plugin.core.log.Log    message: "{{ outputs.send_data.body }}"
Adding an input lets you specify which product to remove by providing the id at execution.
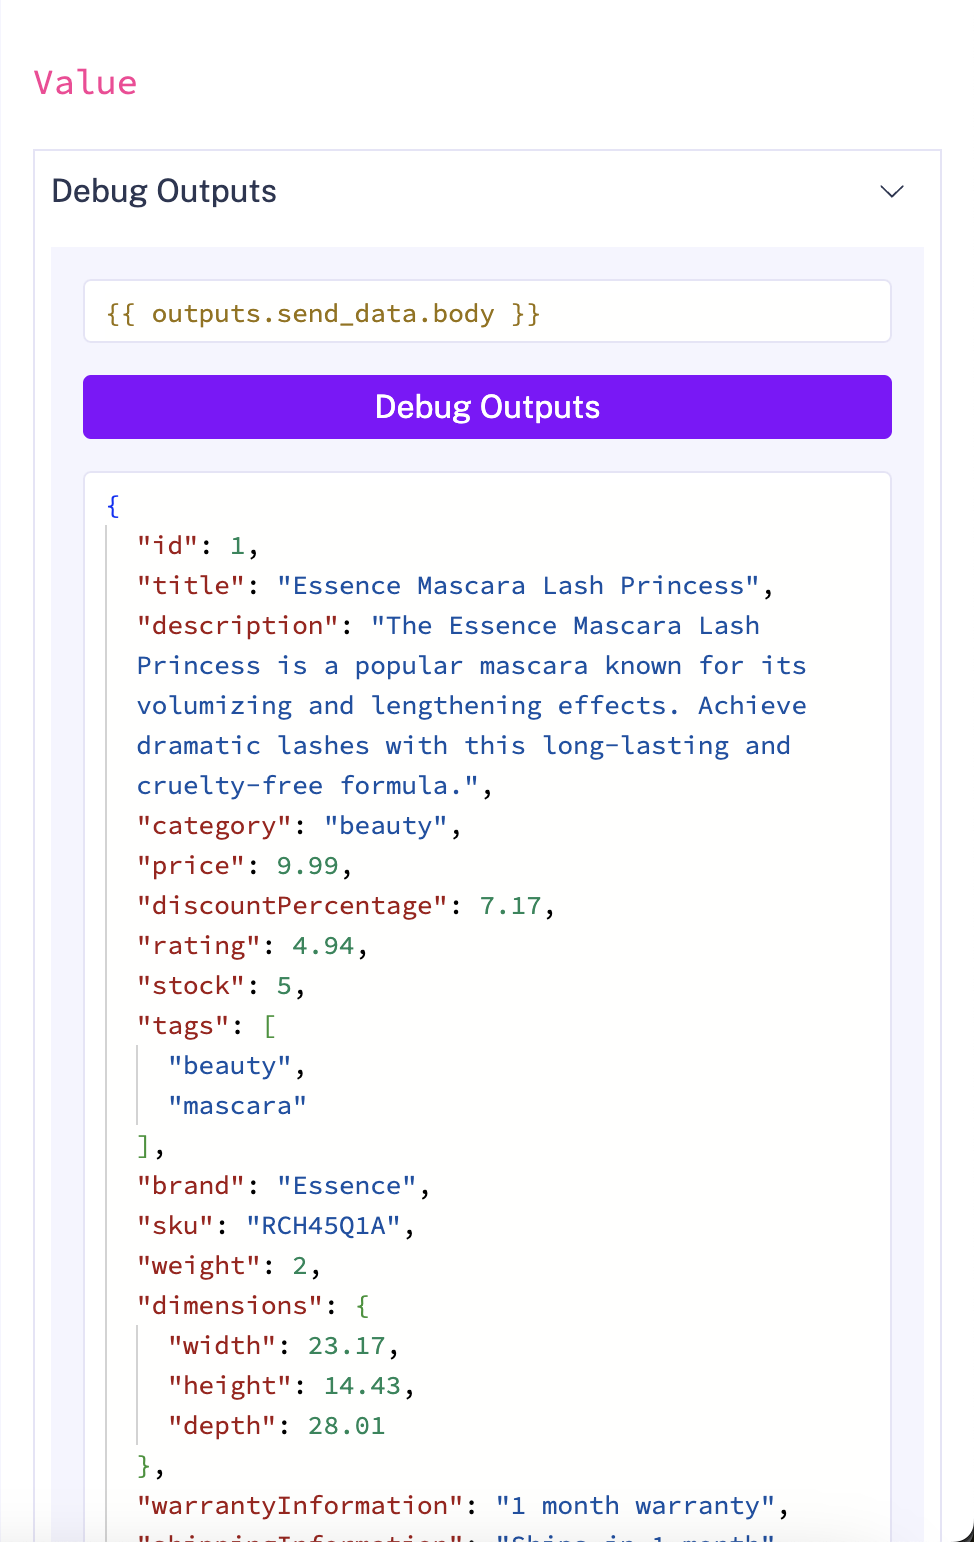
The response confirms the deletion:
SSL and self-signed certificates
If the endpoint you are calling uses a self-signed or internally issued certificate, the task fails with an SSL verification error.
Development and testing
For non-production environments, you can disable certificate verification with options.ssl.insecureTrustAllCertificates:
id: http_insecure_ssl_examplenamespace: company.team
tasks:  - id: send_data    type: io.kestra.plugin.core.http.Request    uri: https://internal-service.example.com/api    method: GET    options:      ssl:        insecureTrustAllCertificates: true
insecureTrustAllCertificates: true disables all certificate verification. Never use this in production — it exposes connections to man-in-the-middle attacks.
Production
For production, import the CA certificate into the JVM trust store on the Kestra worker. Once imported, the worker trusts any endpoint signed by that CA and tasks connect without disabling verification.
- Kubernetes: see Trusting a custom CA for outbound connections on Kubernetes for keytool steps and Helm configuration.
- Standalone or Docker: set
JAVA_OPTSin your Kestra environment:
JAVA_OPTS="-Djavax.net.ssl.trustStore=/path/to/truststore.p12 \ -Djavax.net.ssl.trustStorePassword=changeit \ -Djavax.net.ssl.trustStoreType=PKCS12"Was this page helpful?