 Restack
Launch a Kestra instance on Restack.
Restack makes deploying Kestra to your AWS, GCP, or Azure Cloud infrastructure easy without requiring DevOps resources. This section provides a step-by-step guide to walk you through the deployment process.
Getting Started
To deploy Kestra with Restack:
- Sign up for a Restack account
- Connect your AWS account
- Connect your GCP account
- Connect your Azure account
- One-click cluster creation with Restack
- Deploy Kestra on Restack
- Start using Kestra
- Deploy your own Kestra image
- Manage secrets and environment variables.
Sign up for a Restack account
To create a Restack account, visit www.restack.io/signup. You can sign up for free (no credit card required) using your company's email address or your GitHub account.
If you already have an account, login to Restack at www.restack.io/login.
Connect your AWS account
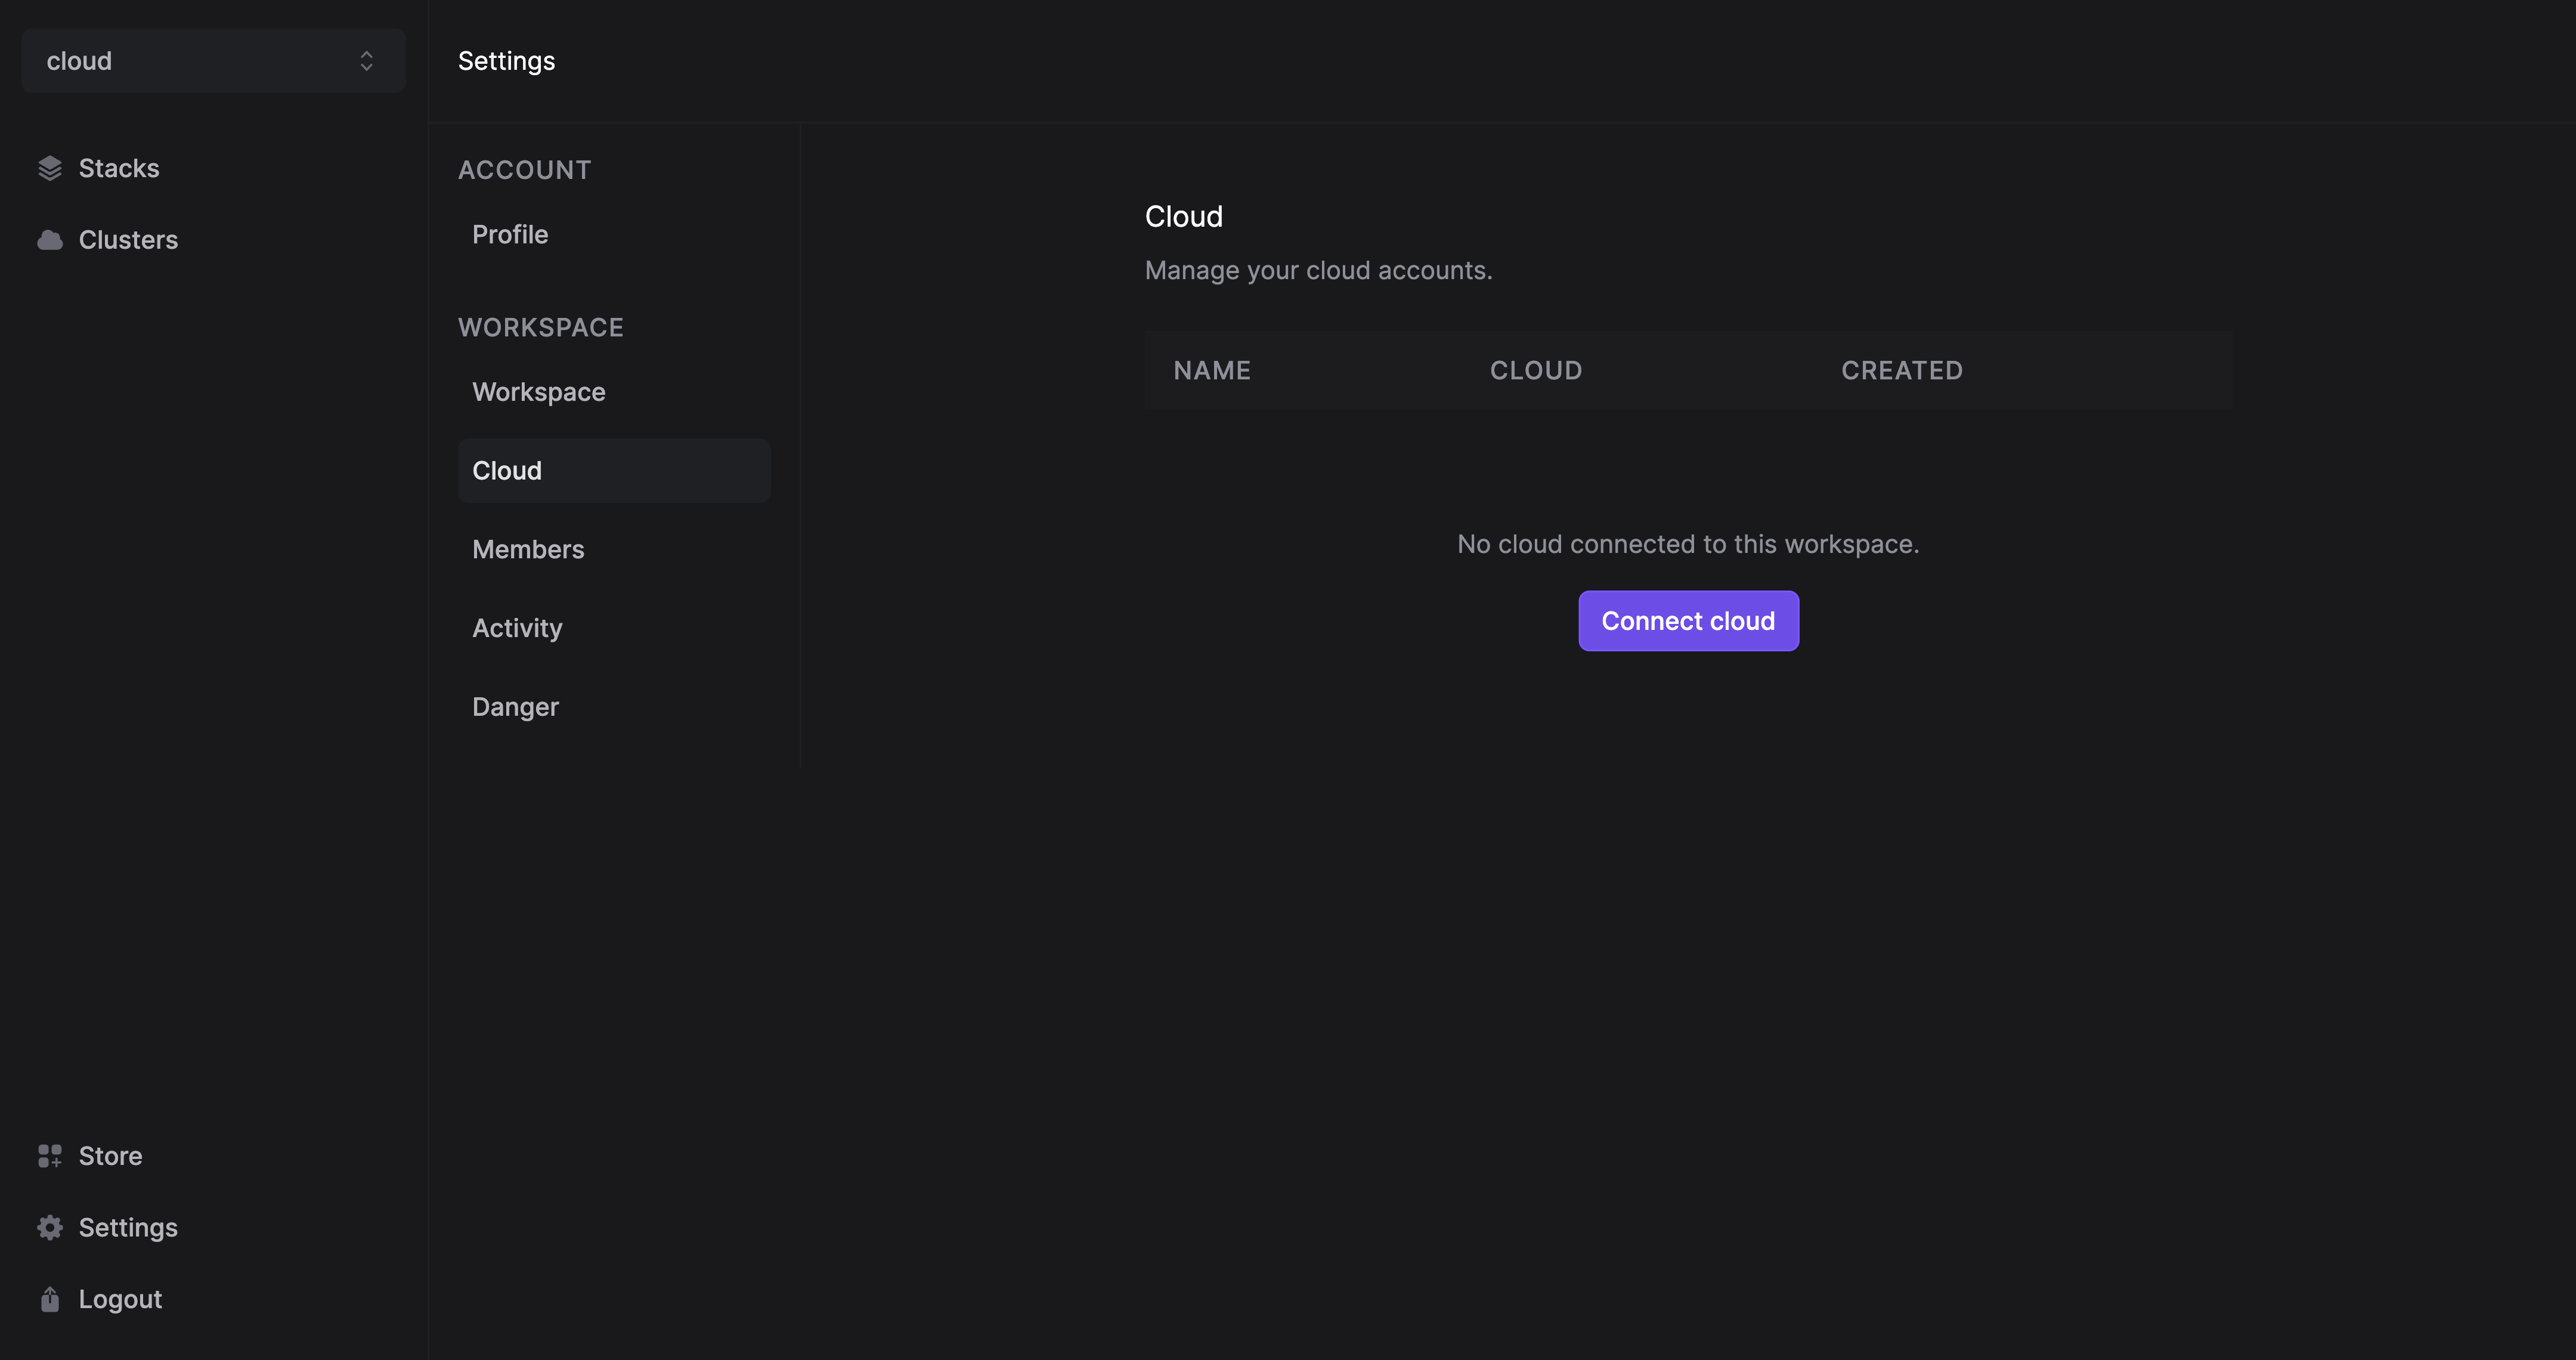
Log into Restack Console and navigate to Settings > Cloud > Connect Cloud:
Then, create an IAM Role by following the steps below:
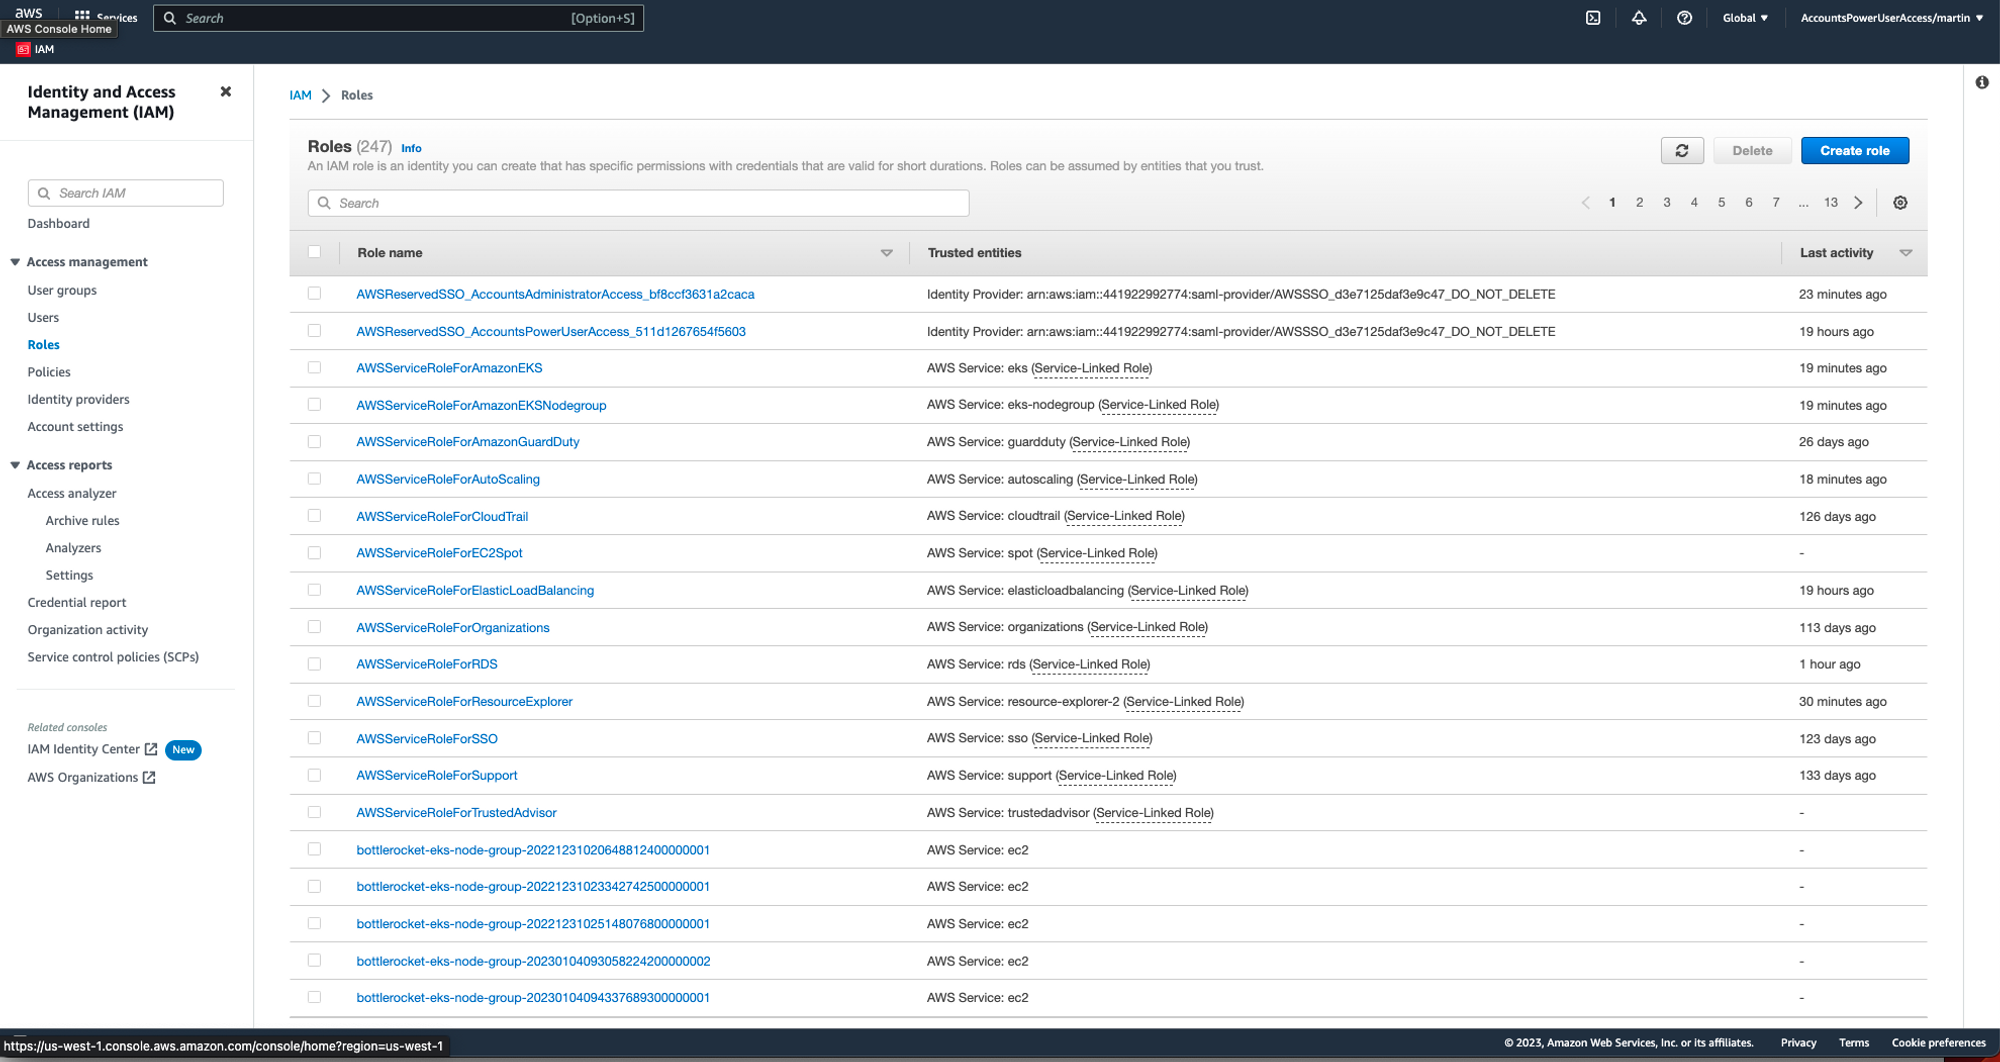
- Log into your AWS Management Console as a user with administrator privileges and go to the IAM section.
- Click the Roles tab and click on Create Role in the IAM sidebar.
- In the "Select type of trusted entity" section, select the "Custom trust policy" option
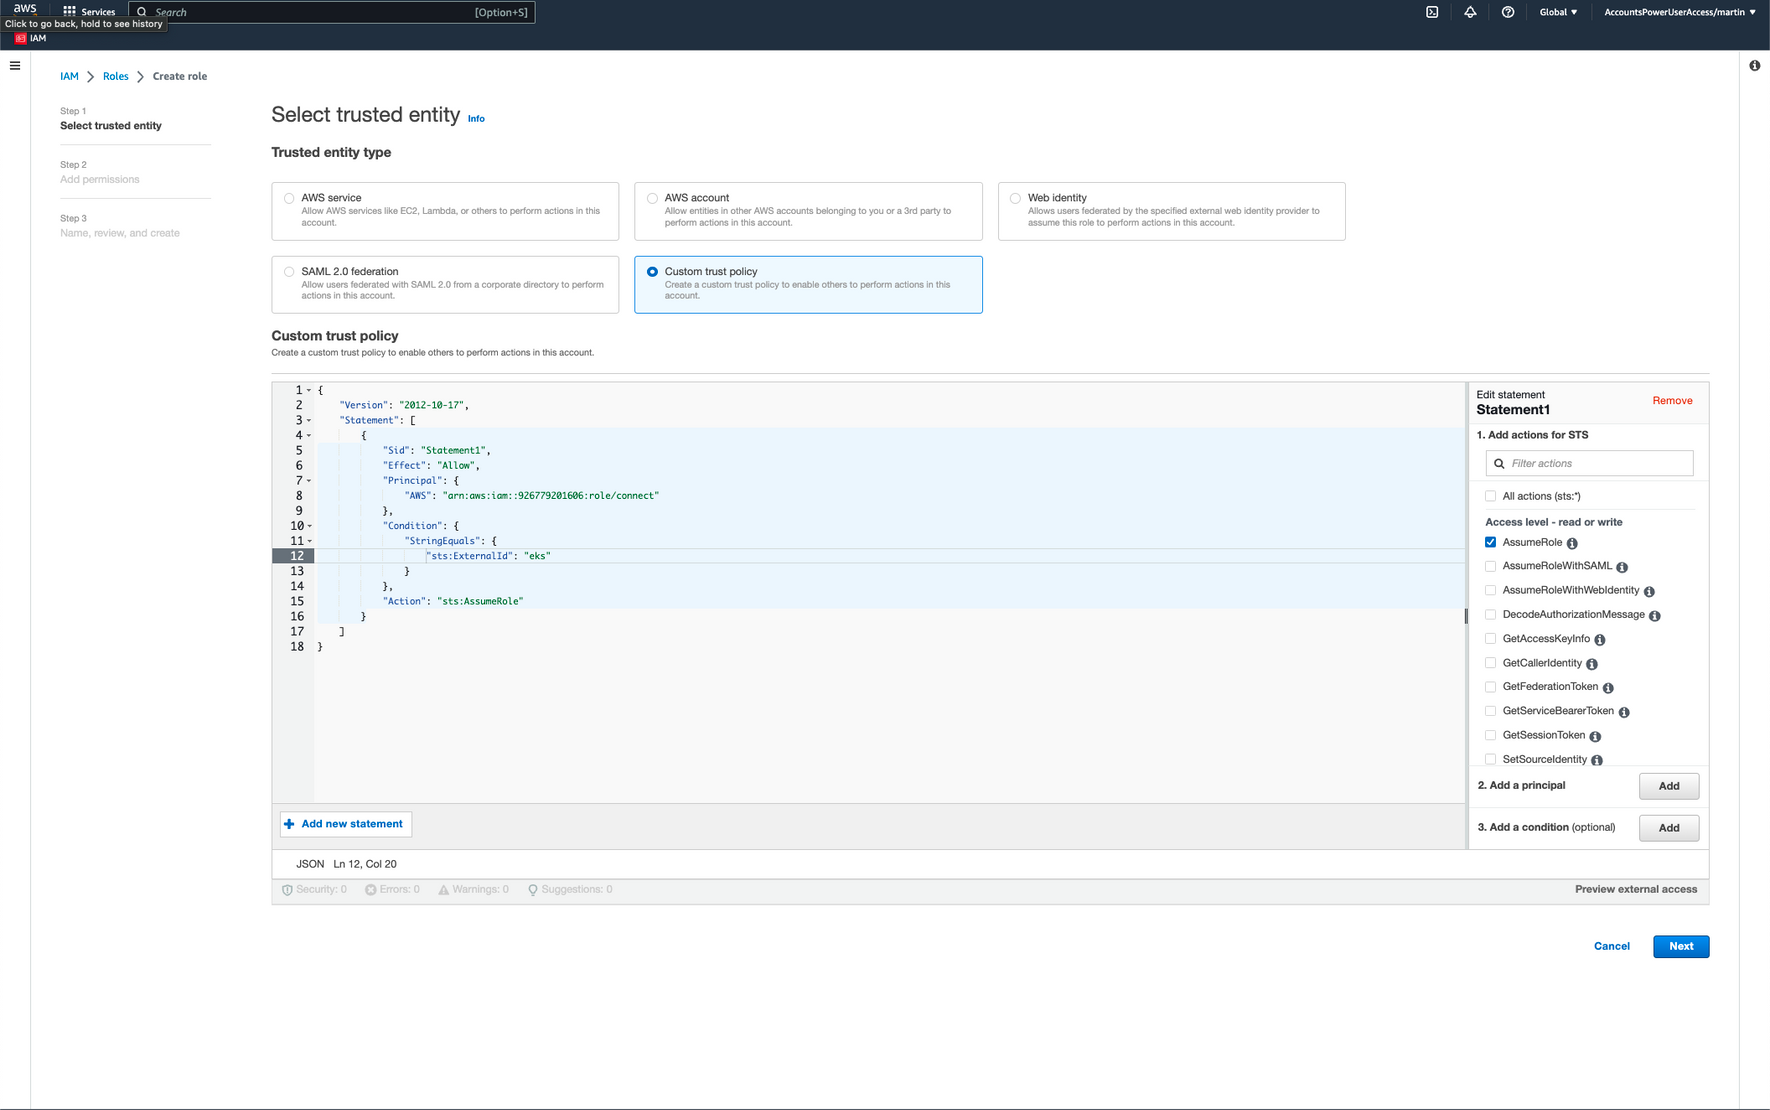
- Copy and paste the following JSON policy into the custom policy field (you also can copy the same policy from the Restack UI):
{
    "Version": "2012-10-17",
    "Statement": [
        {
            "Effect": "Allow",
            "Principal": {
                "AWS": [
                    "arn:aws:iam::223746943638:user/connect",
                    "arn:aws:iam::223746943638:role/connect"
                ]
            },
            "Action": "sts:AssumeRole",
            "Condition": {
                "StringEquals": {
                    "sts:ExternalId": "restack"
                }
            }
        }
    ]
  }
- Click the "Next" button and under the "Add permissions" section, add the
AdministratorAccesspolicy.
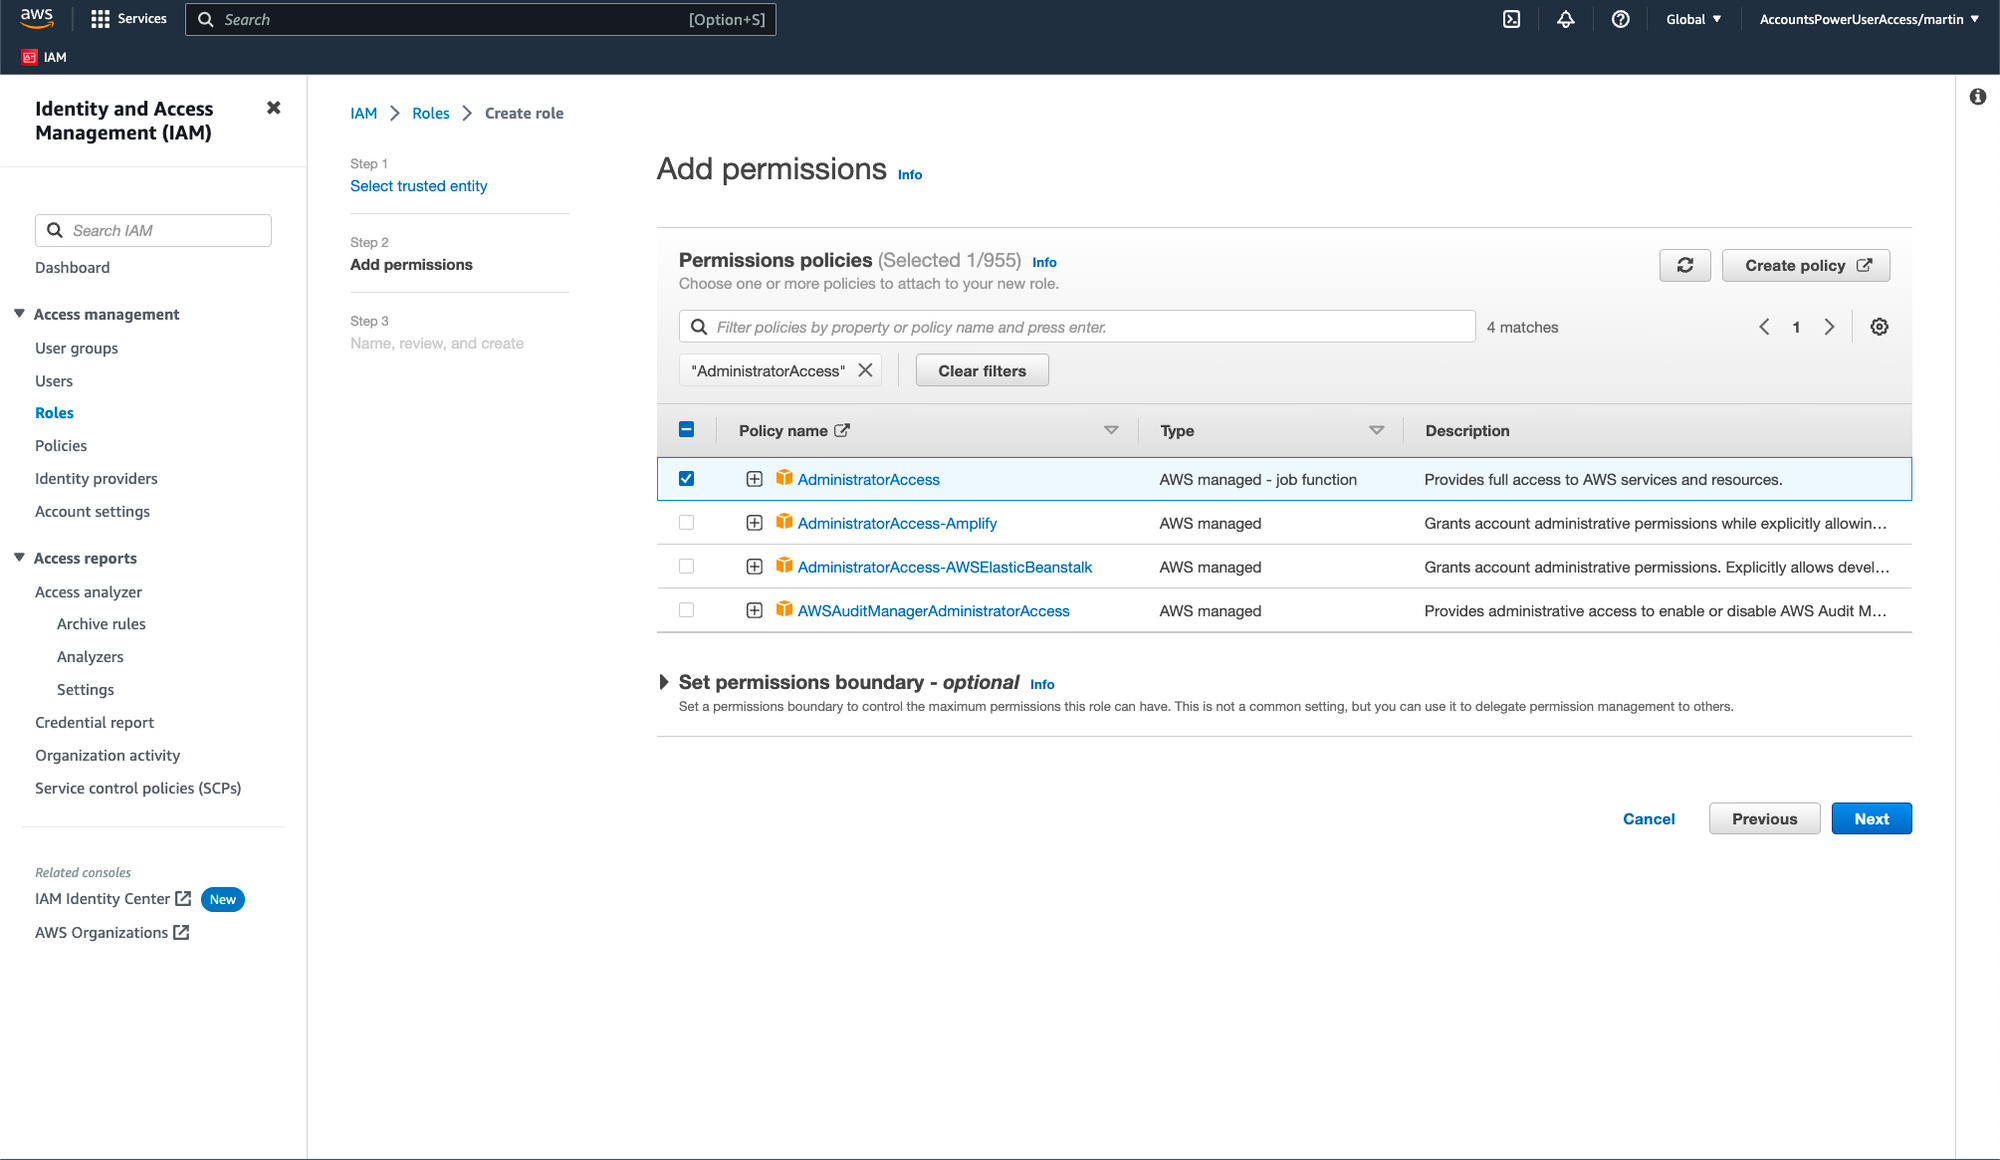
- Click the "Next" button and type
restackin the "Role name" field. Then, review the IAM role and click on the "Create role" button.
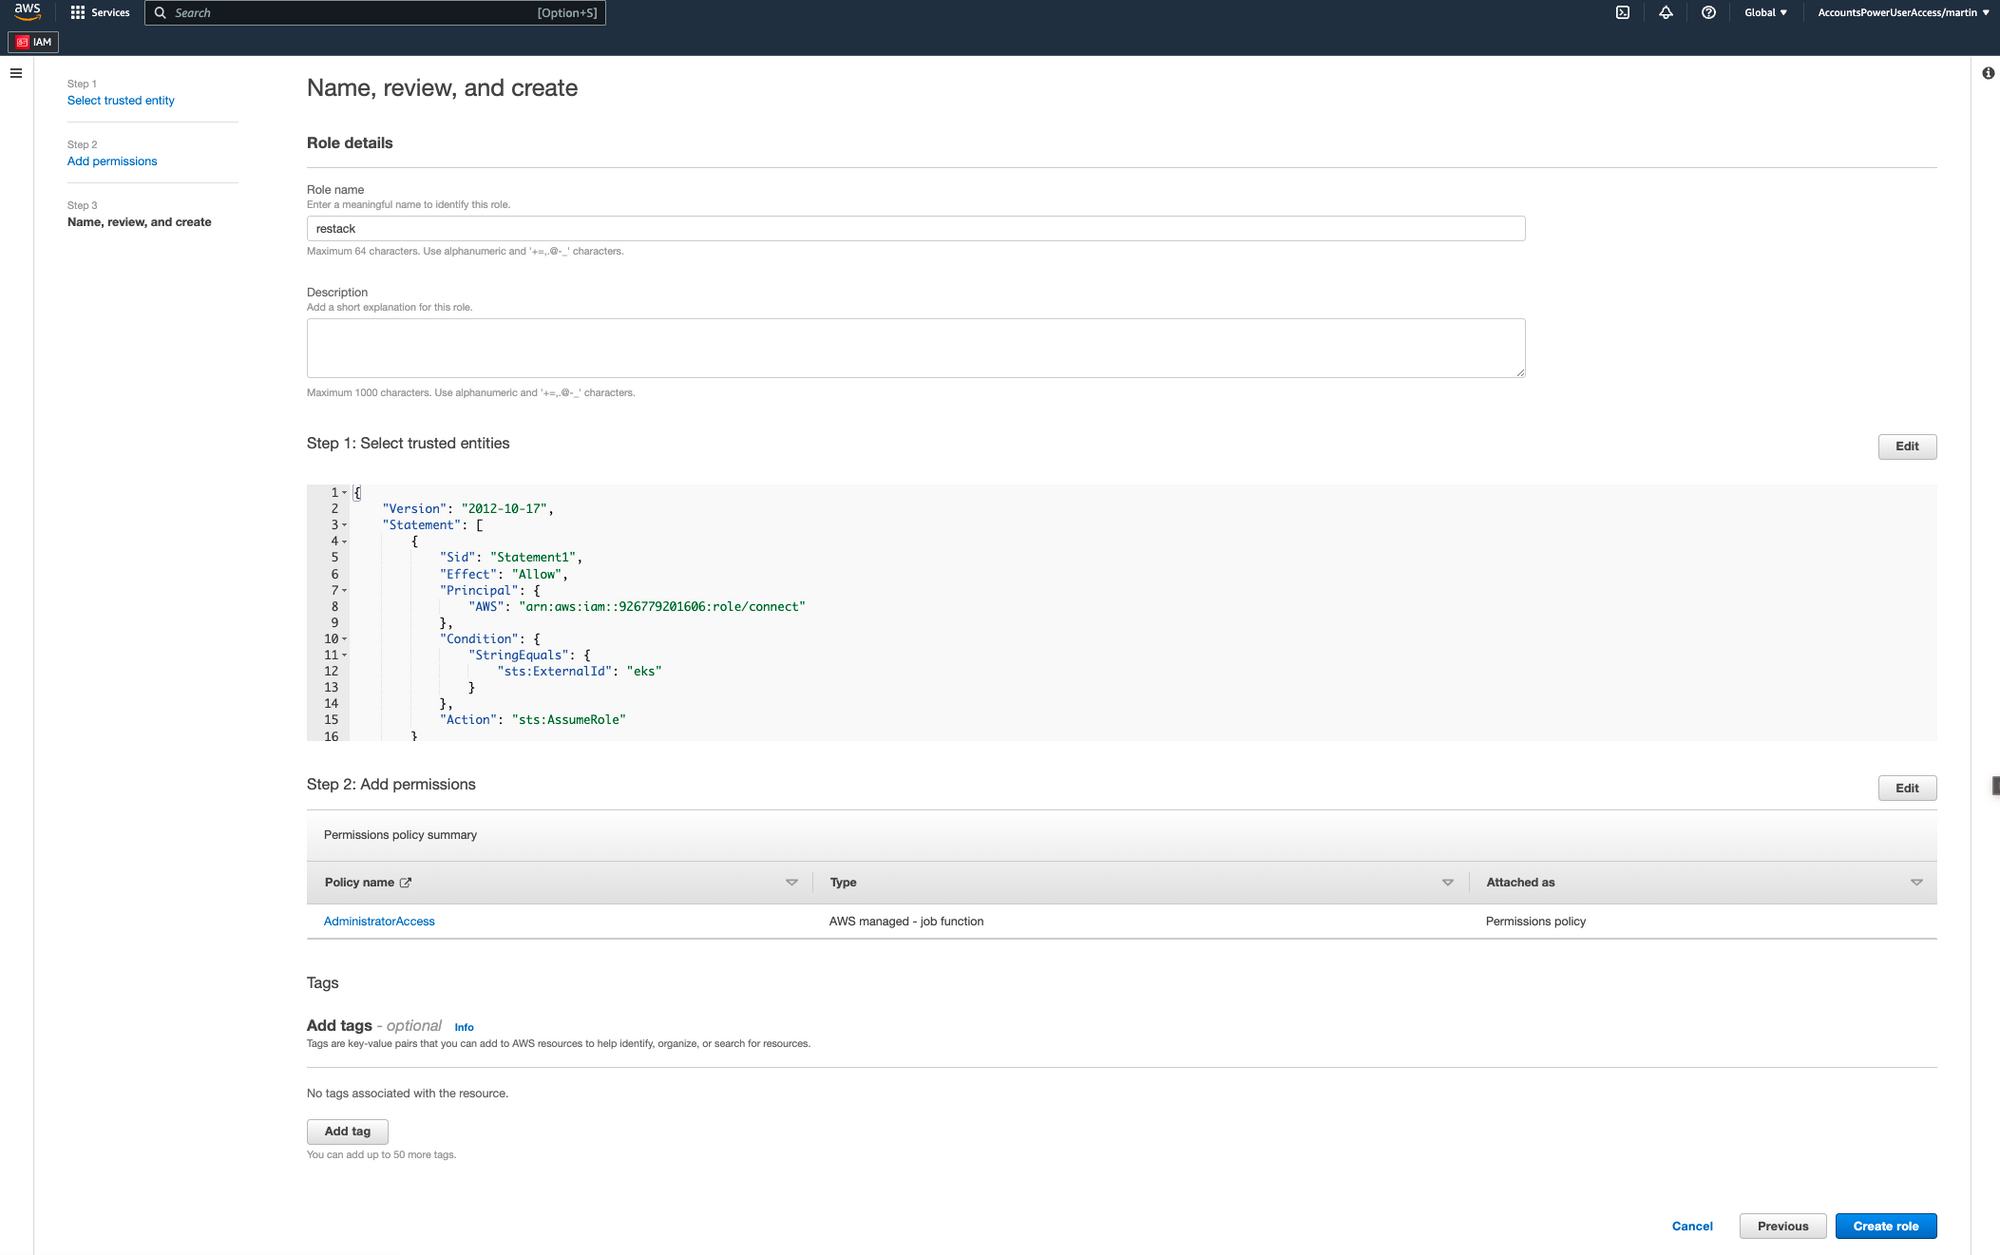
- From the IAM > Roles overview, navigate to the role you've just created and copy its ARN.
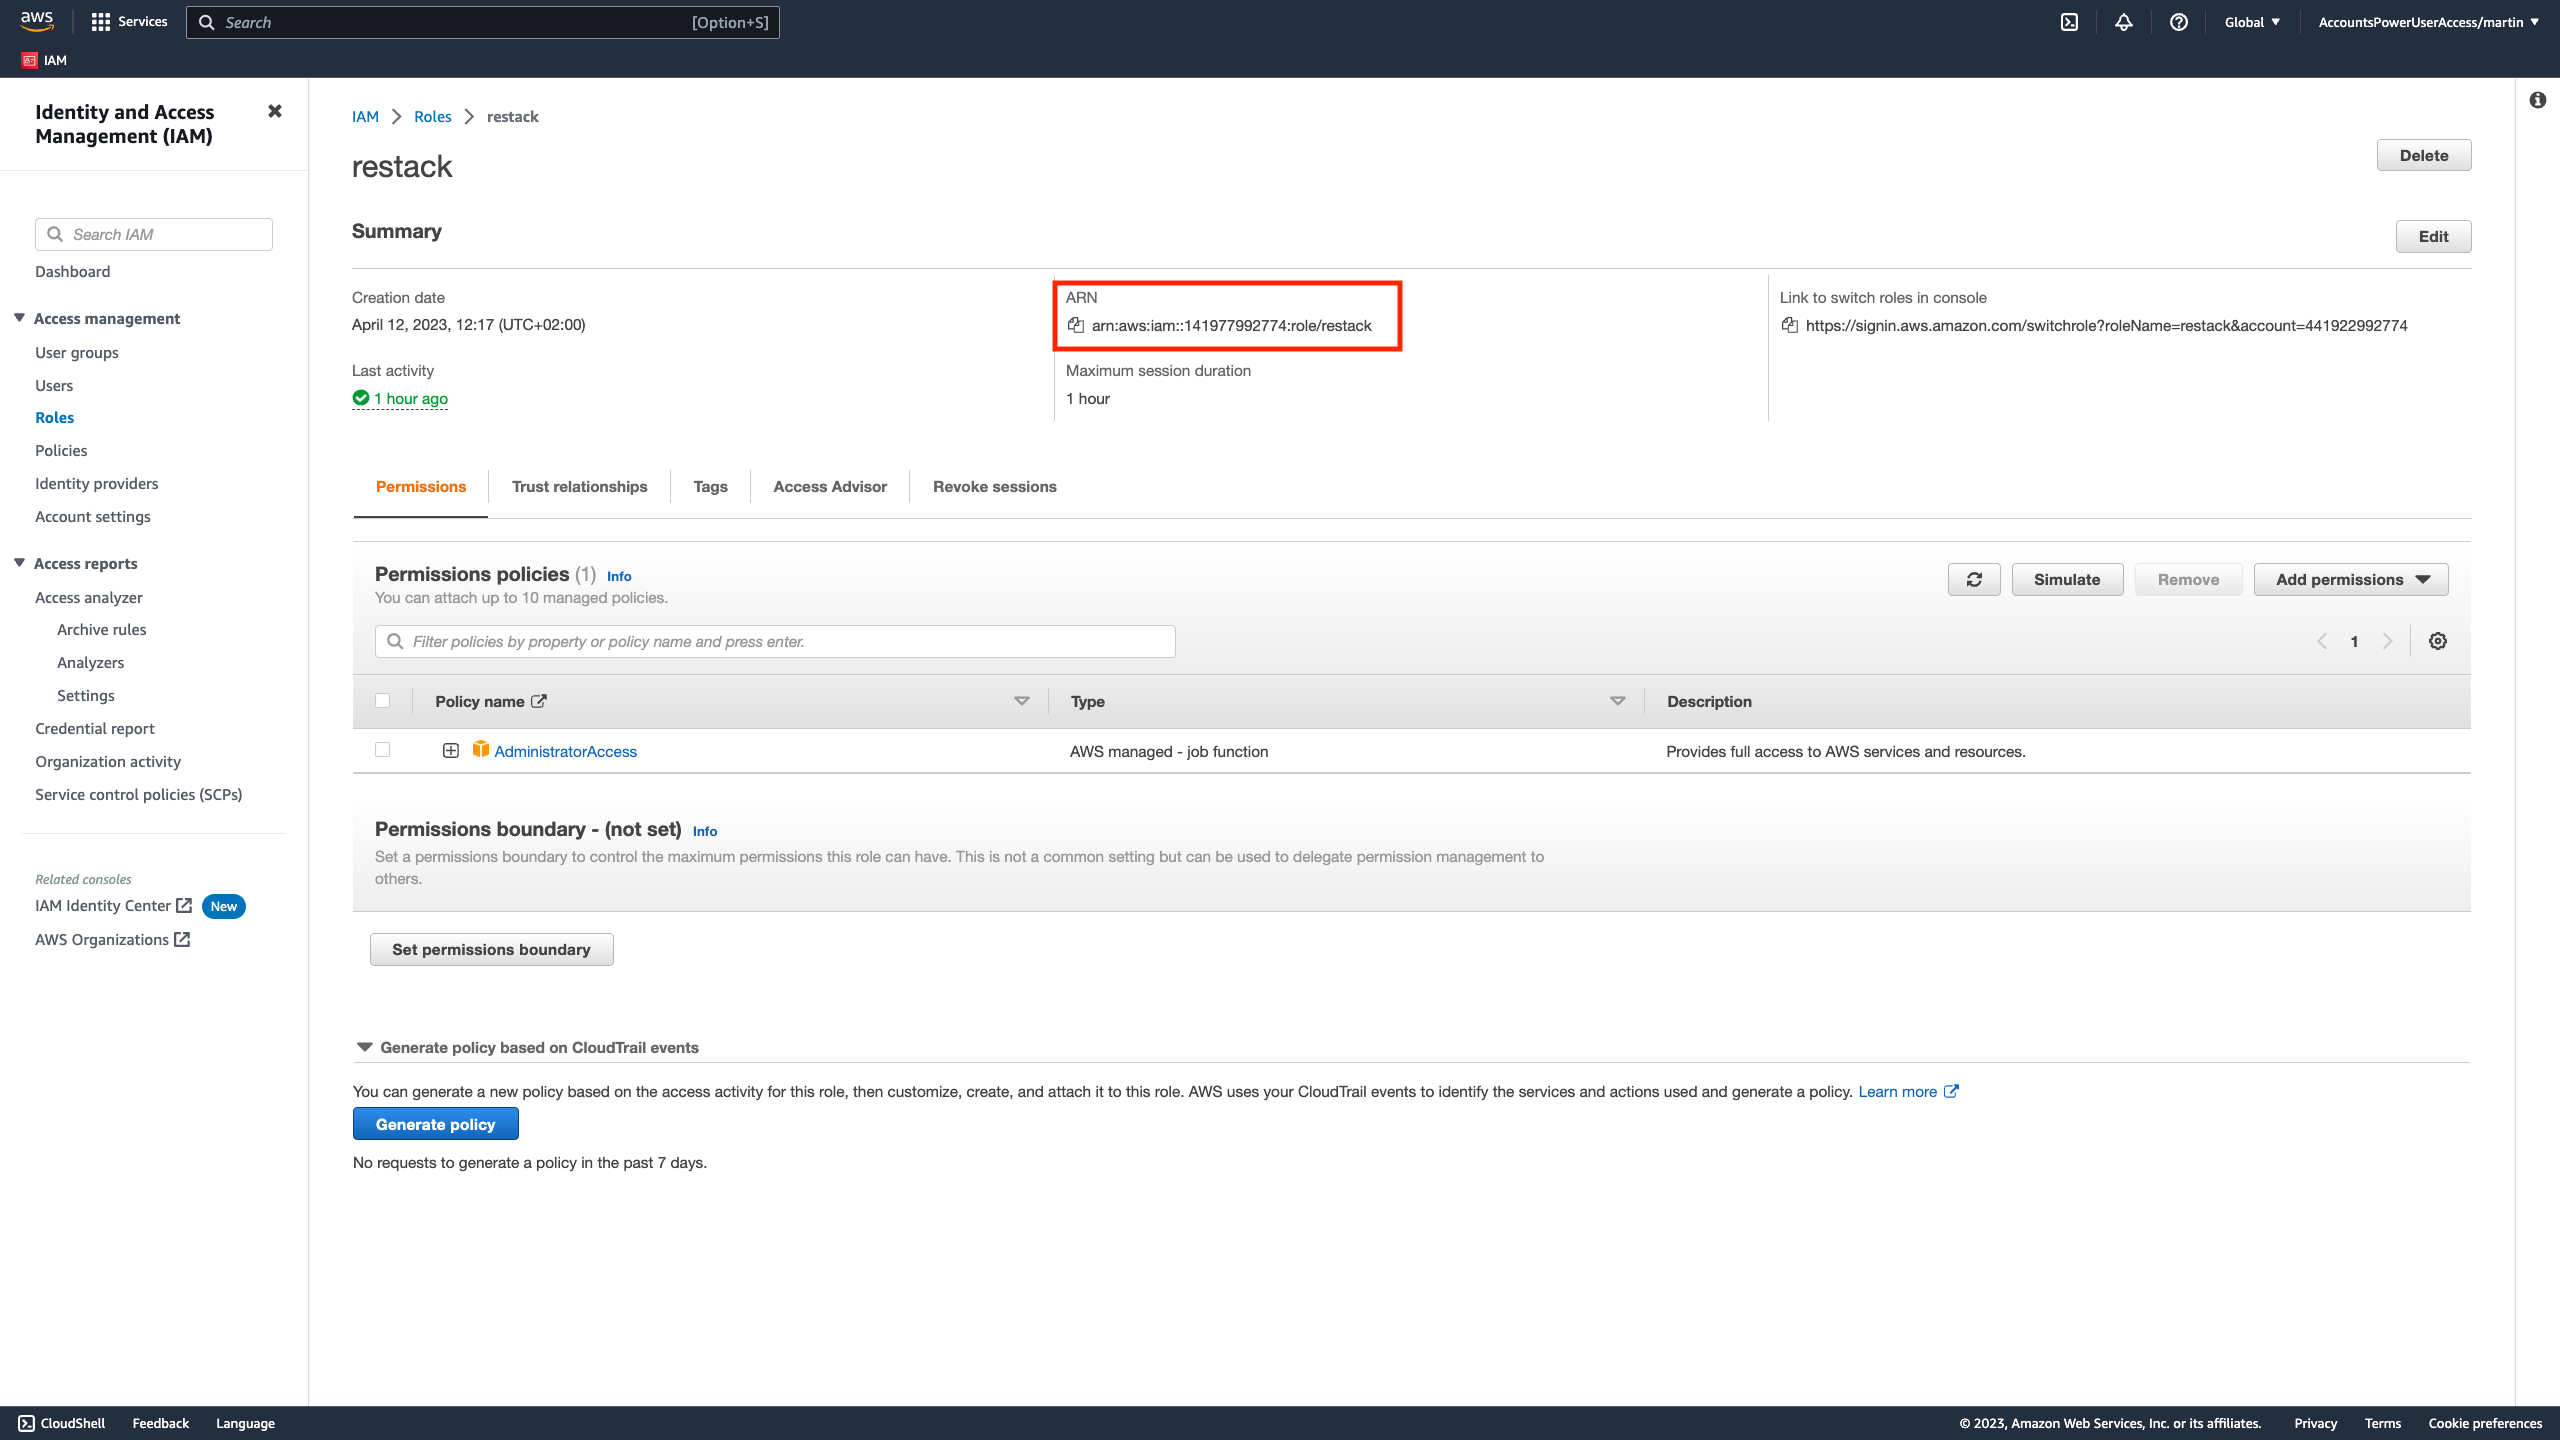
- Paste the Role ARN to Restack's user interface and validate the setup by clicking on the 'Connect cloud' button. This will validate if Restack can successfully assume the role in your AWS account.
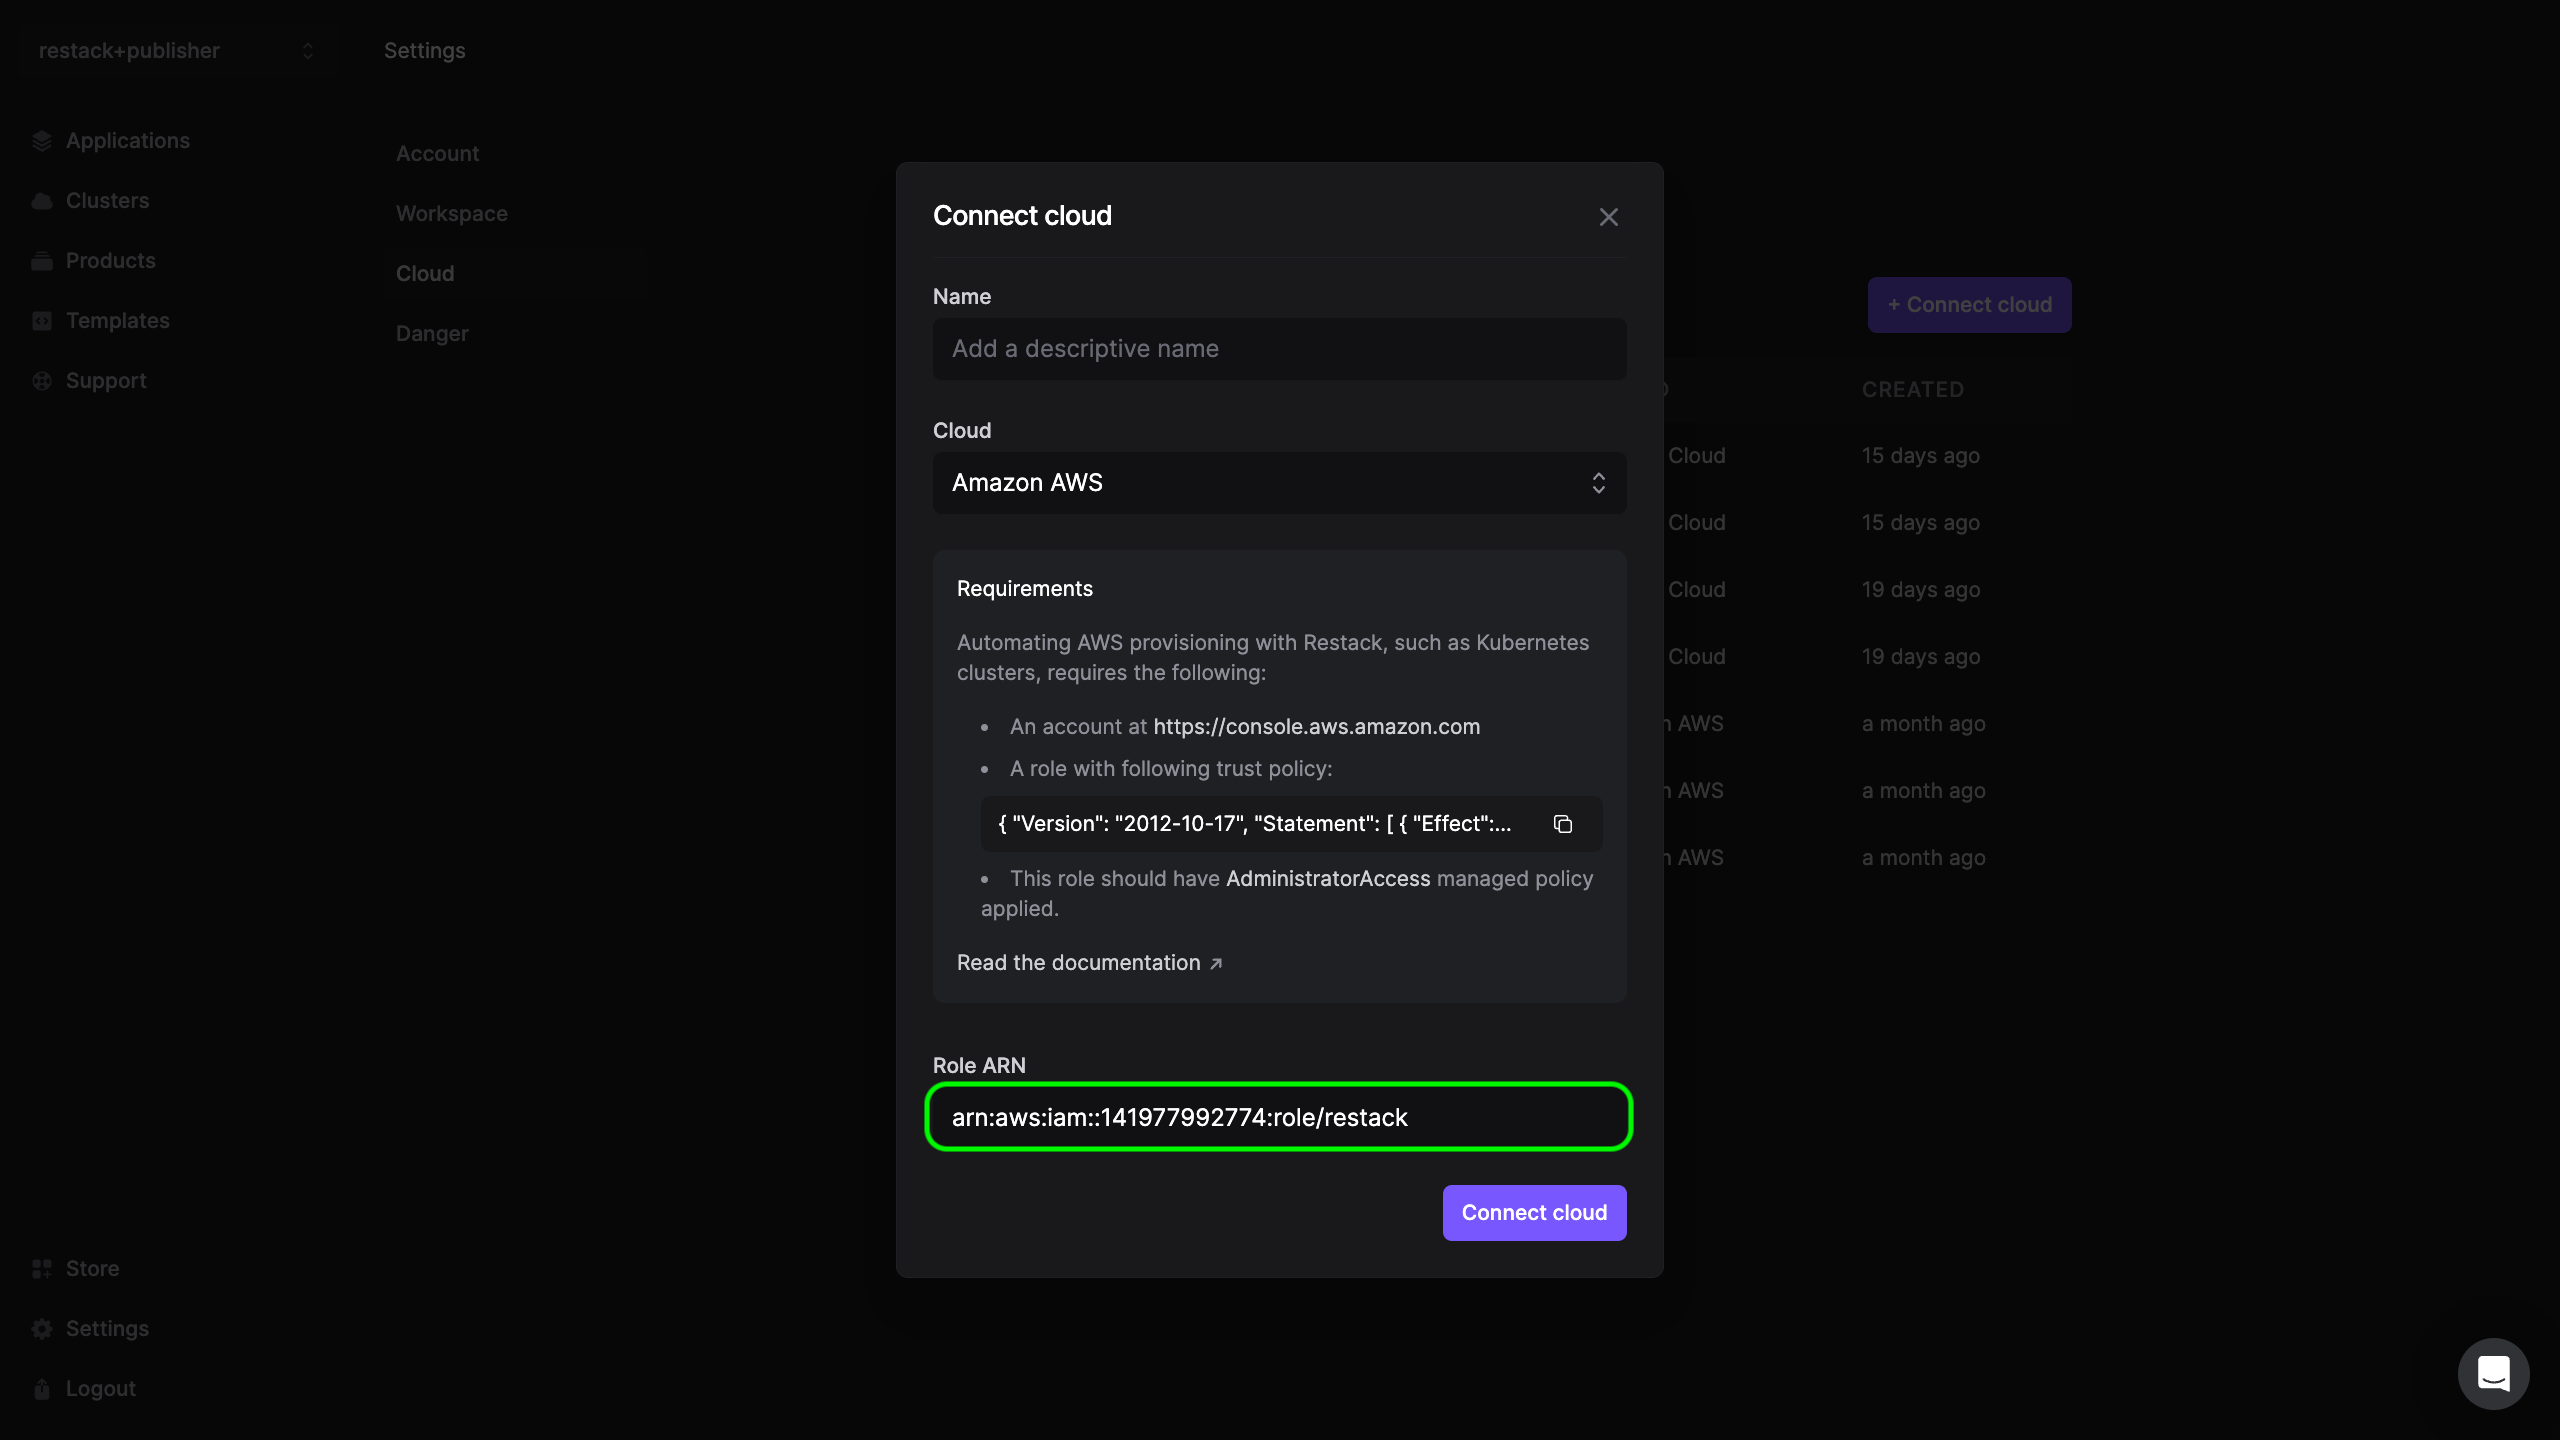
If the AWS cloud account has been successfully added and Restack can connect to it, you can proceed to create a cluster and provision your Kestra instance.
How can restack assume the IAM role created in your account?
- The
sts:AssumeRoleis an AWS Security Token Service (STS) API operation that allows an IAM user or role in one account to assume a role in another AWS account. This allows the user or role to access resources in the second account that they would not normally have access to. - The
sts:AssumeRoleoperation returns a set of temporary security credentials that the user or role can use to access resources in the second account. These credentials include an access key, a secret access key, and a session token, which can be used to make AWS API requests.
Connect your GCP account
You can connect your GCP account to Restack in just a few steps.
First, make sure that the following requirements are satisfied:
- You have an active Google Cloud account or organization
- You have an active project that can be used to deploy resources from Restack
- You have an active billing profile associated with that project
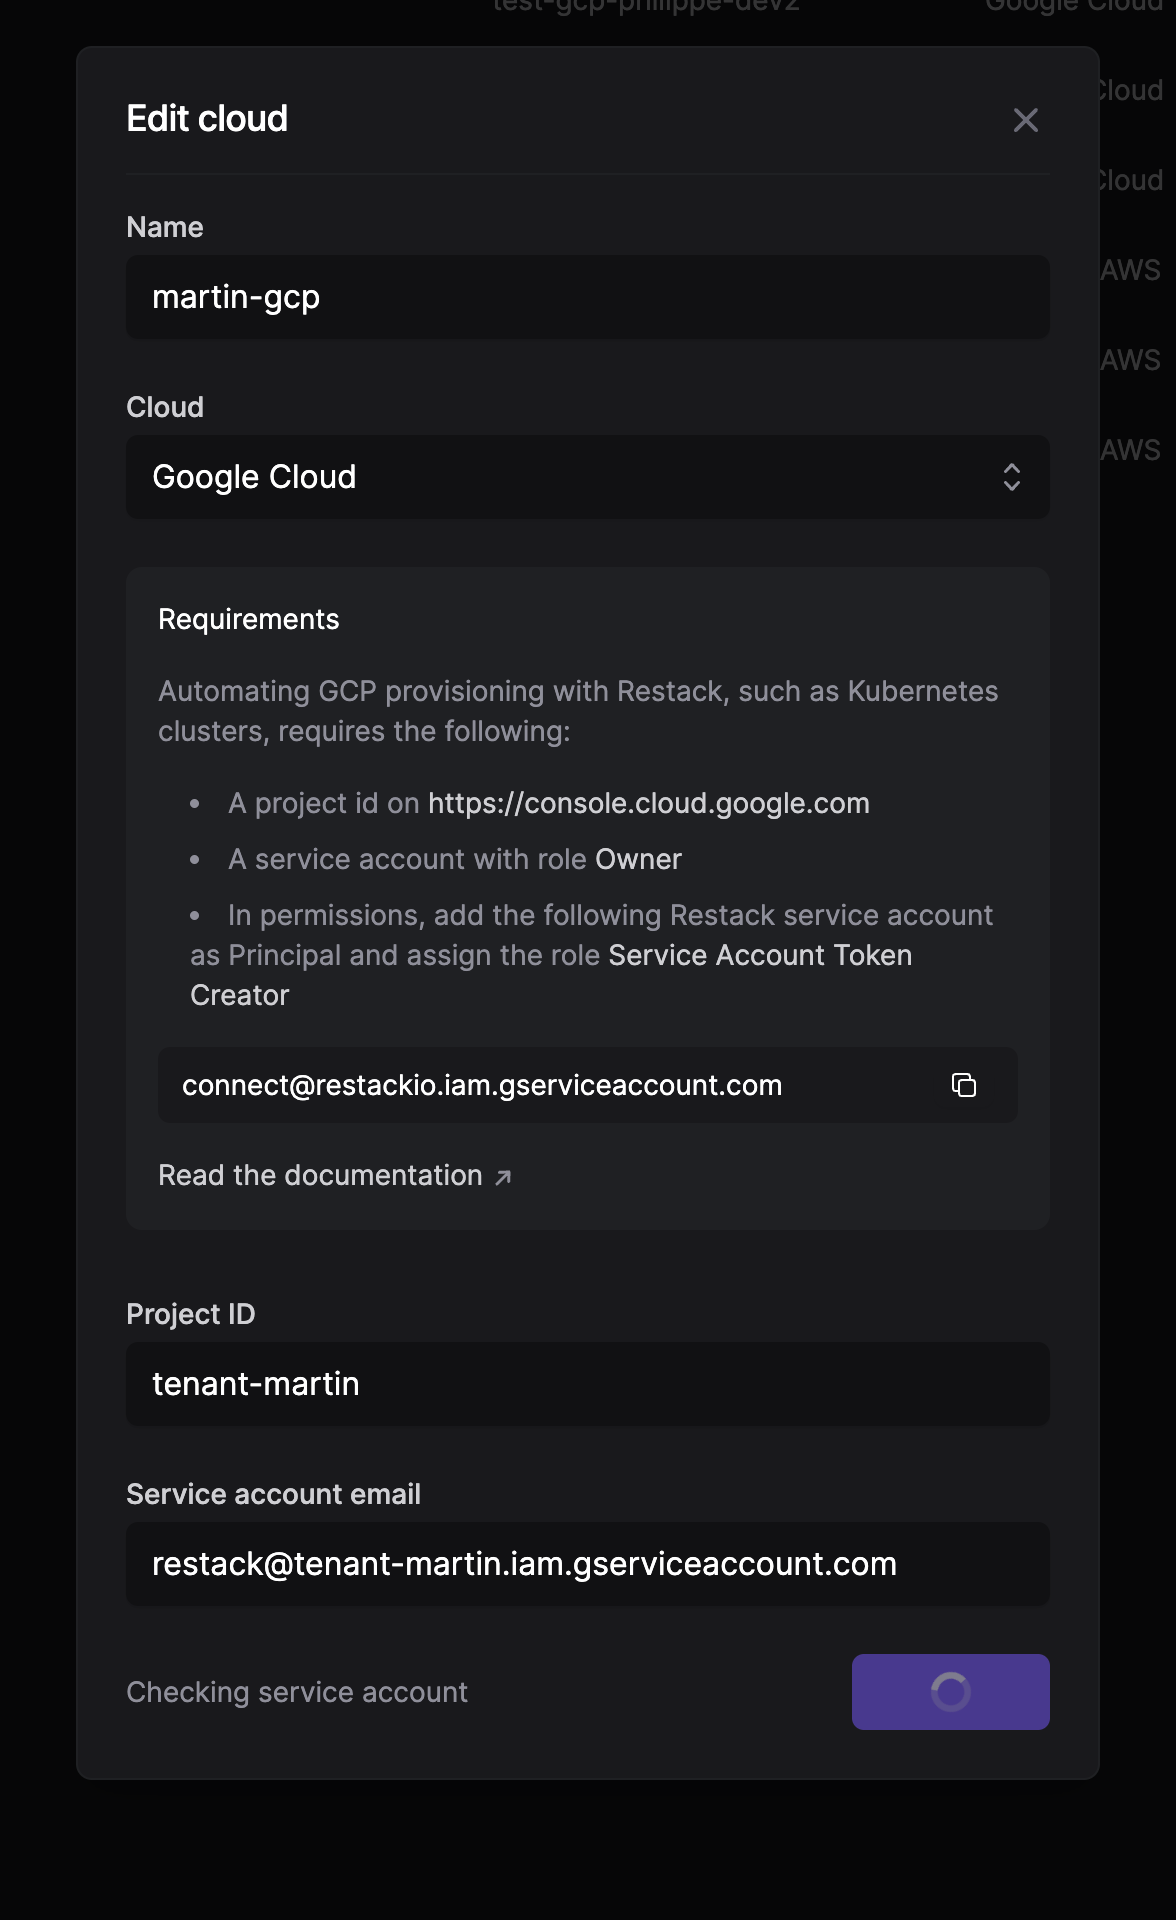
- Create a new service account in your Google project. This service account will be used to manage permissions to deploy resources with Restack.
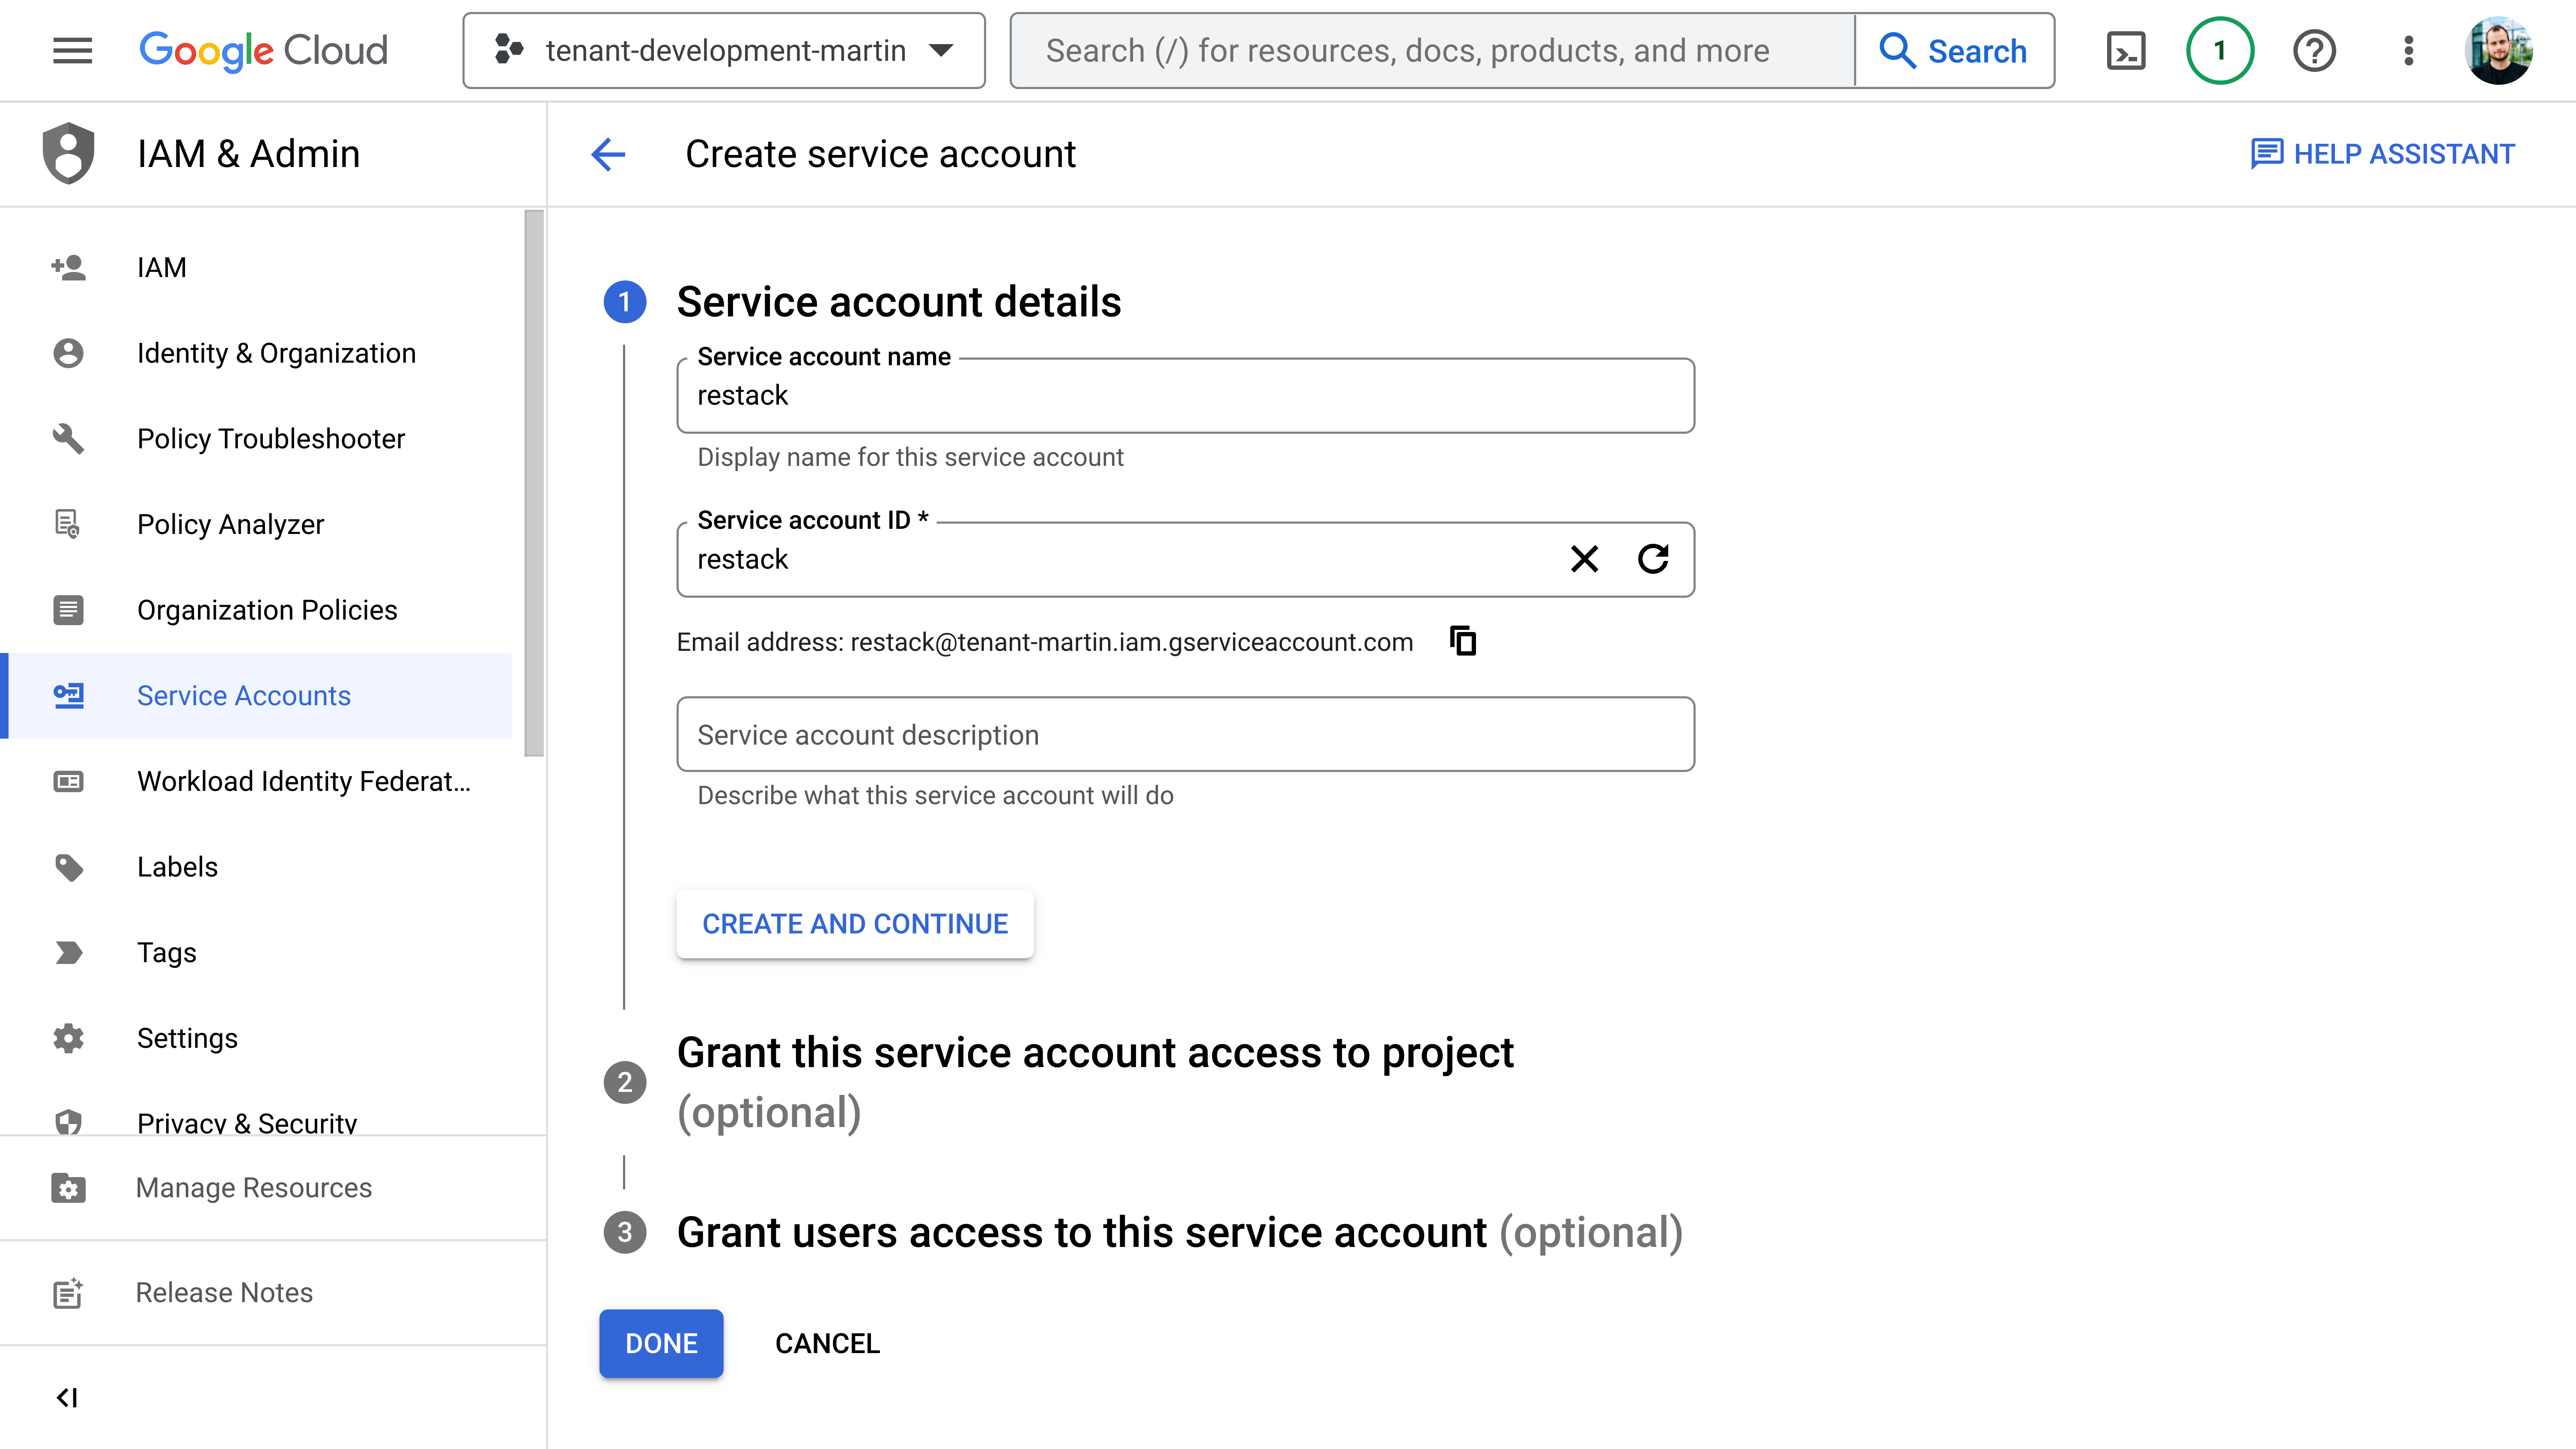
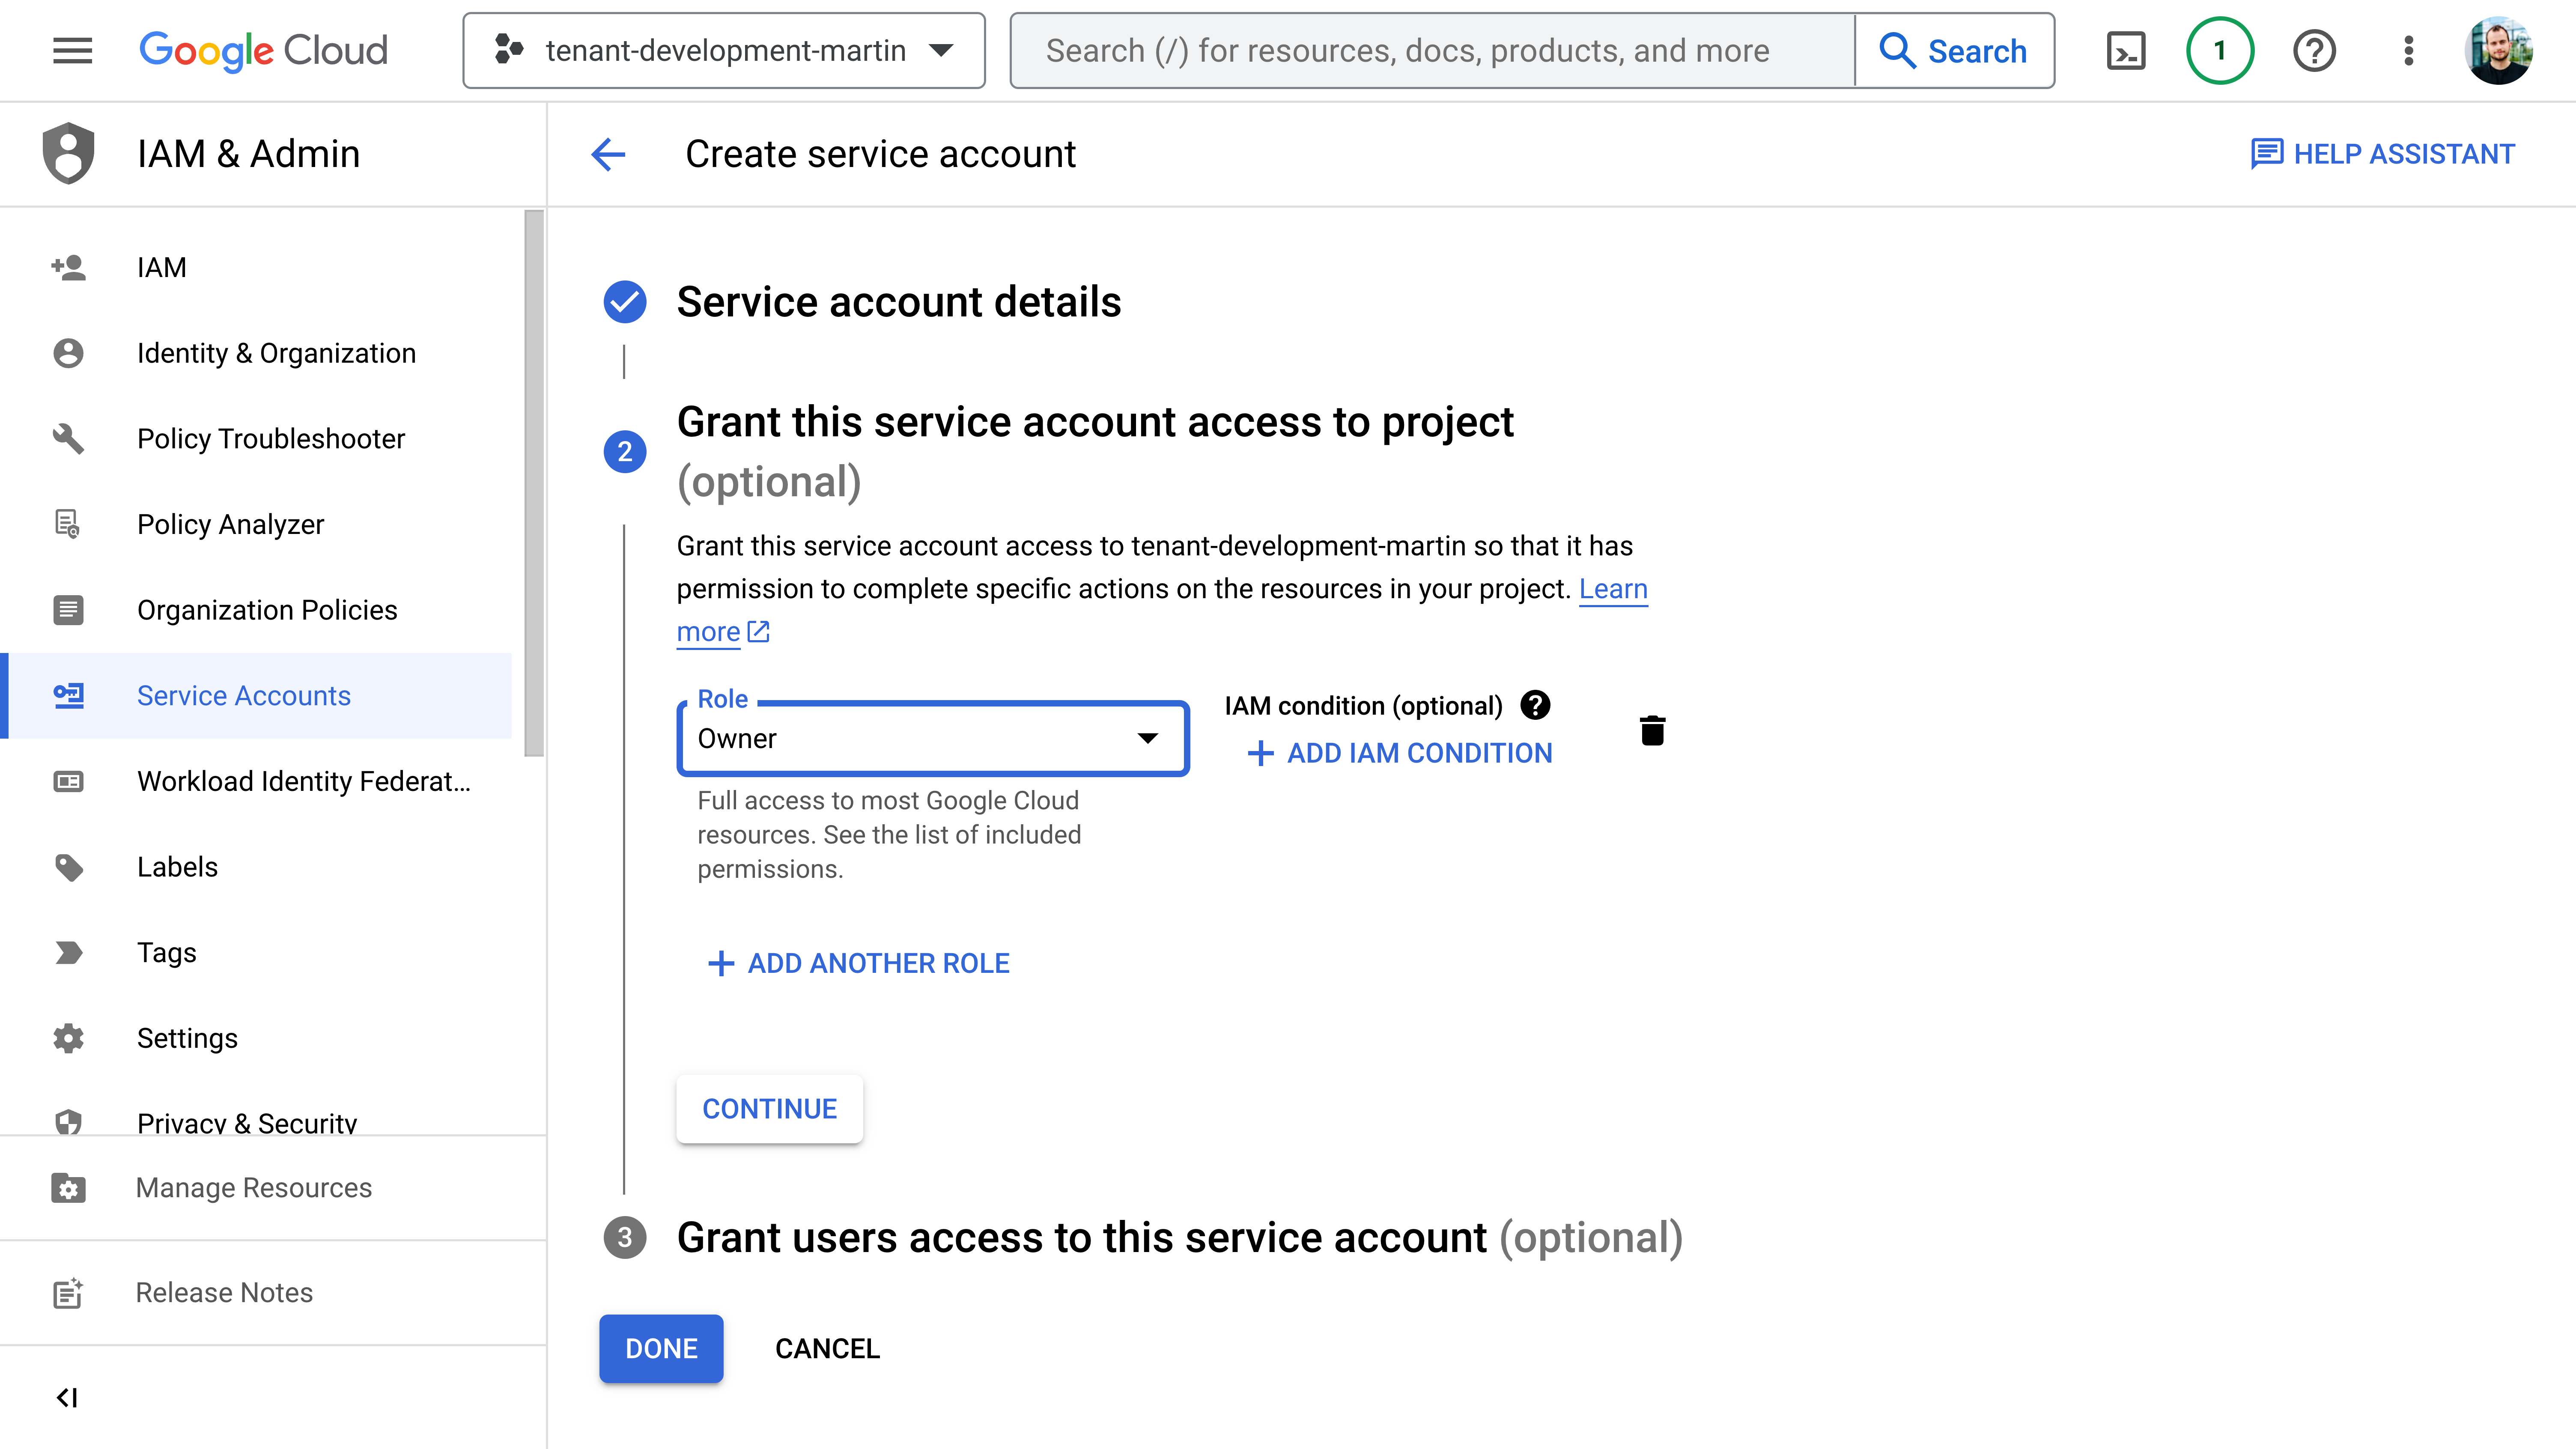
- Grant this service account access to the project with the
Ownerrole
- Click on "Grant access" and add the
[email protected]as a new principal. Then, assign theService Account Token Creatorrole to that user, as shown in the image below
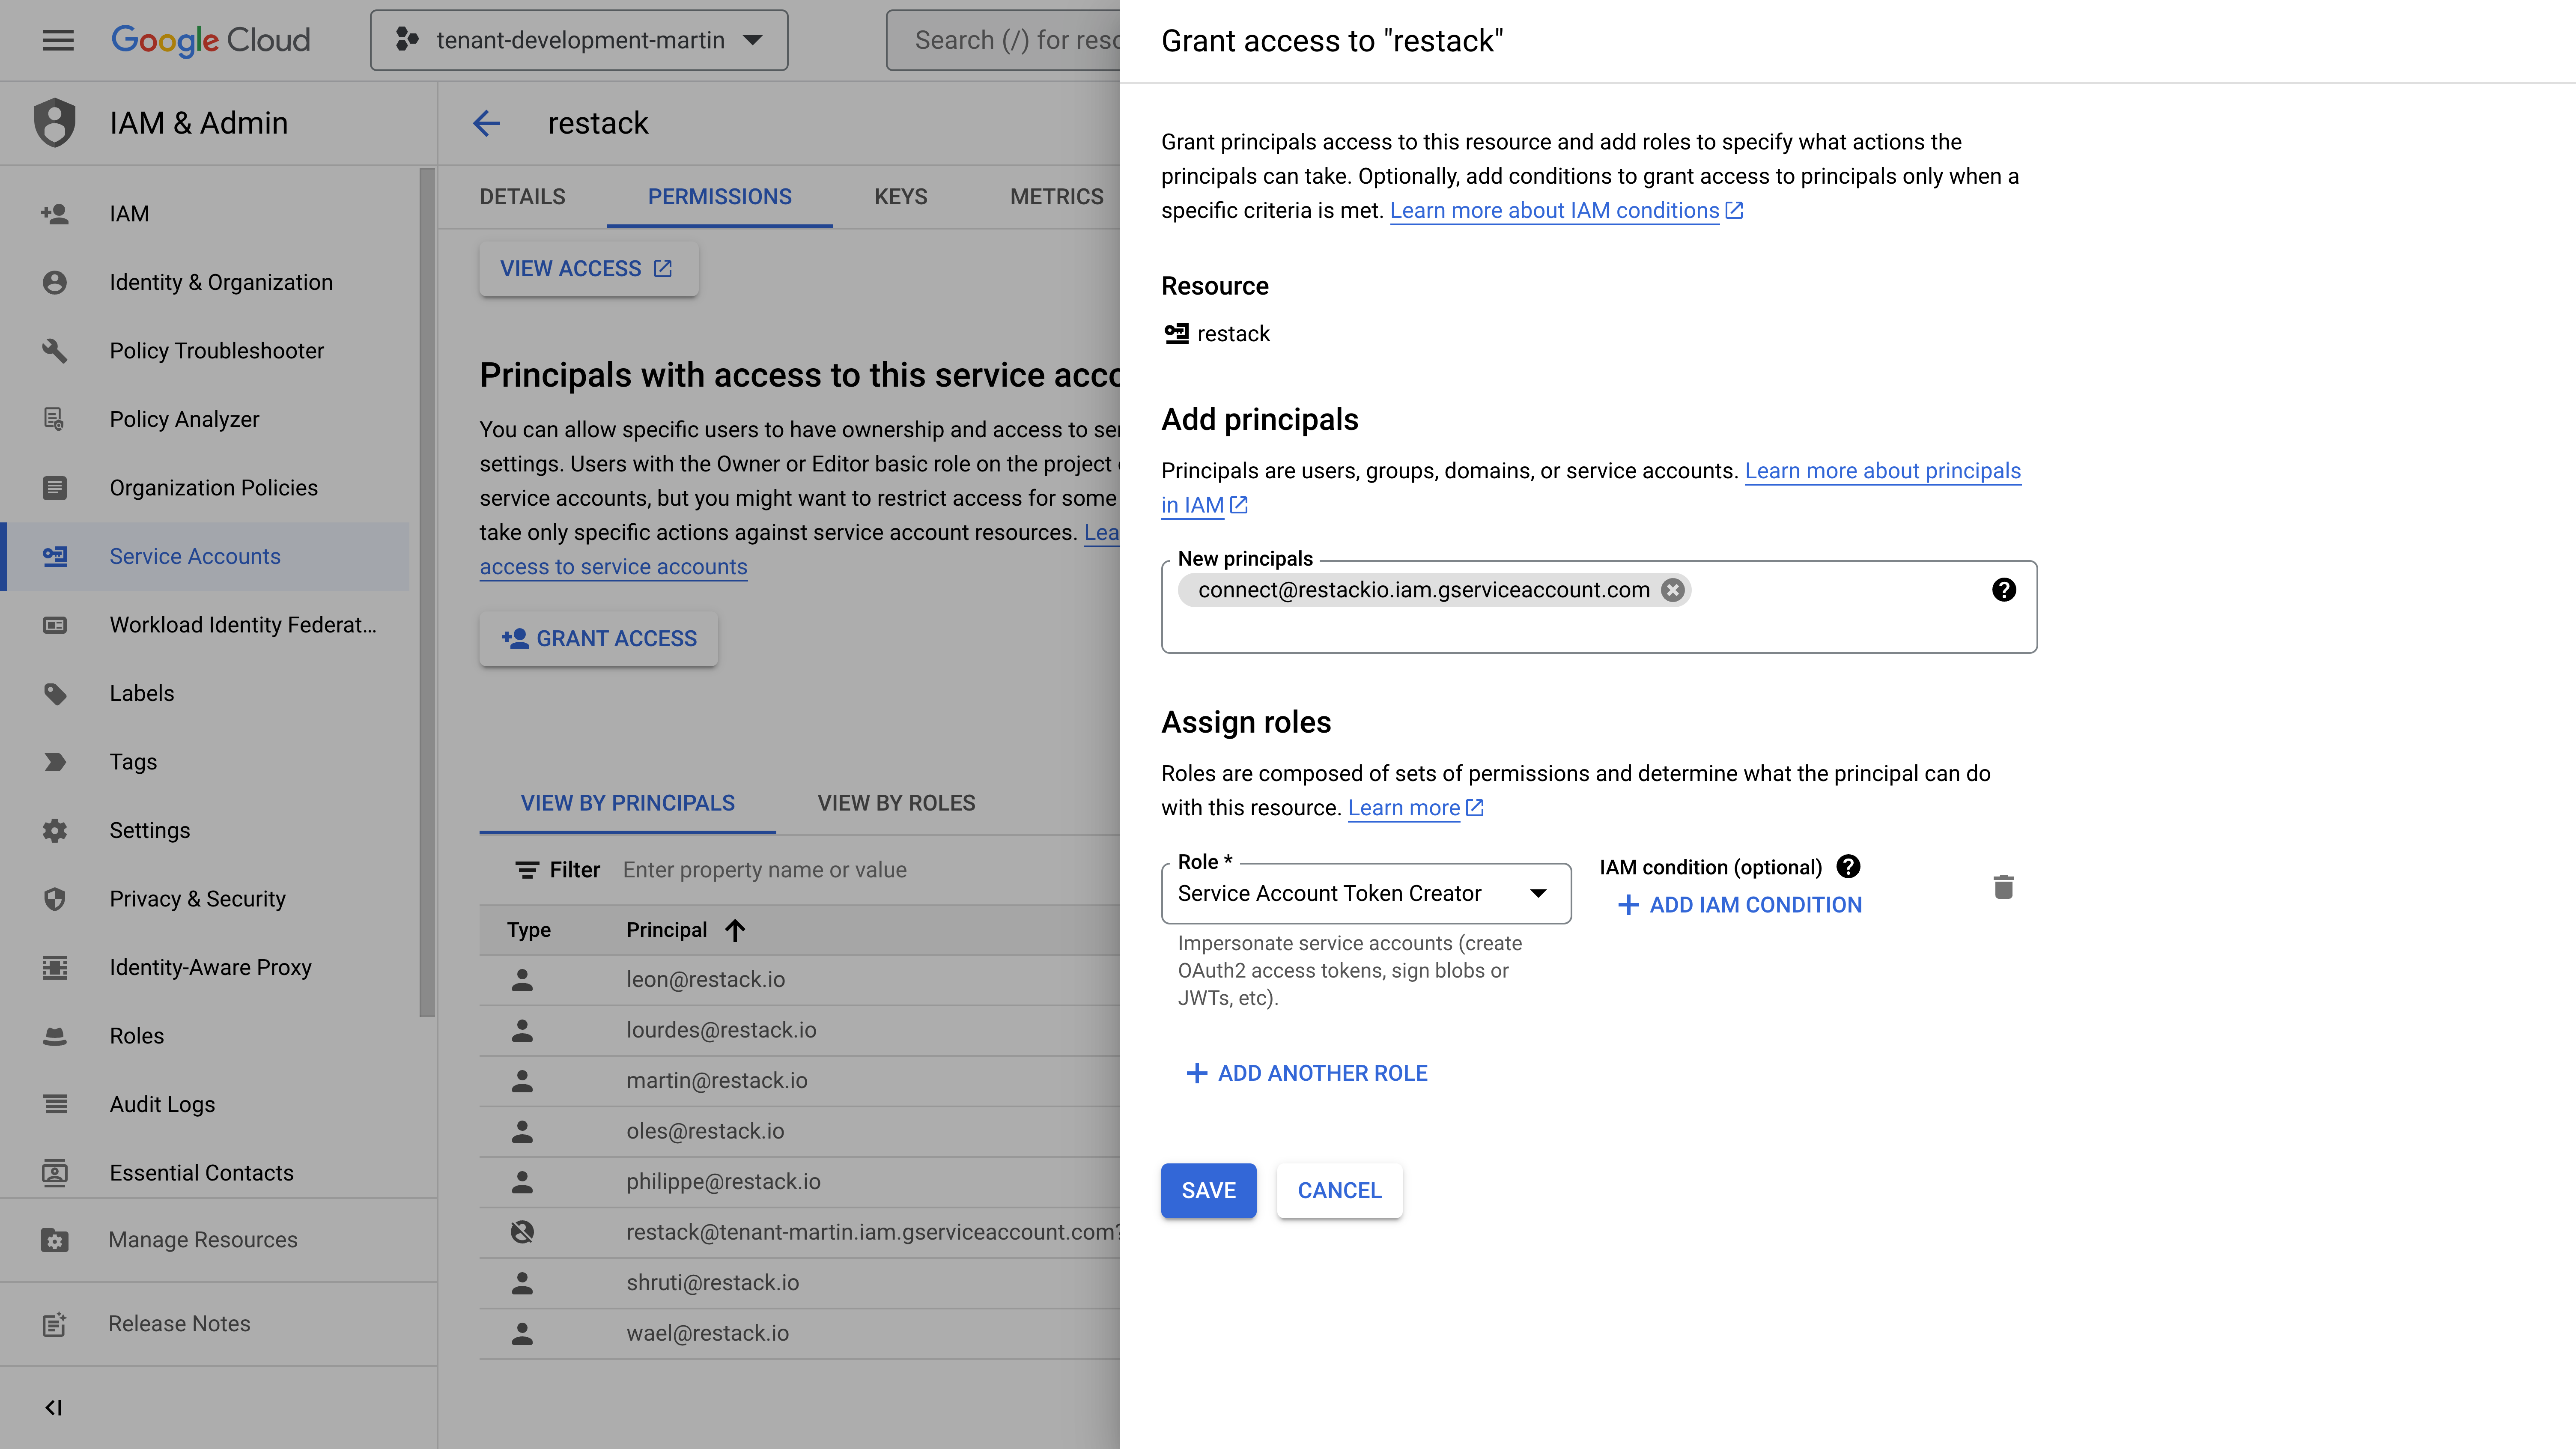
- Finally, click on "Save" and "Done" to finish the service account creation process.
- Add your GCP project ID and the email of your service account to Restack's user interface in order to add your GCP cloud account and validate the connectivity established via the service account.
Connect your Azure account
You can connect your Microsoft Azure account to Restack in just a few steps.
First, make sure that the following requirements are satisfied:
- You have an active Azure account
- You have an active Azure subscription
- You have an active Azure user with the "Owner" role.
Follow these steps to create a new Azure App Registration in order to authenticate your Azure account with Restack and deploy Azure resources from Restack.
- Create a new App Registration in your Azure Active Directory
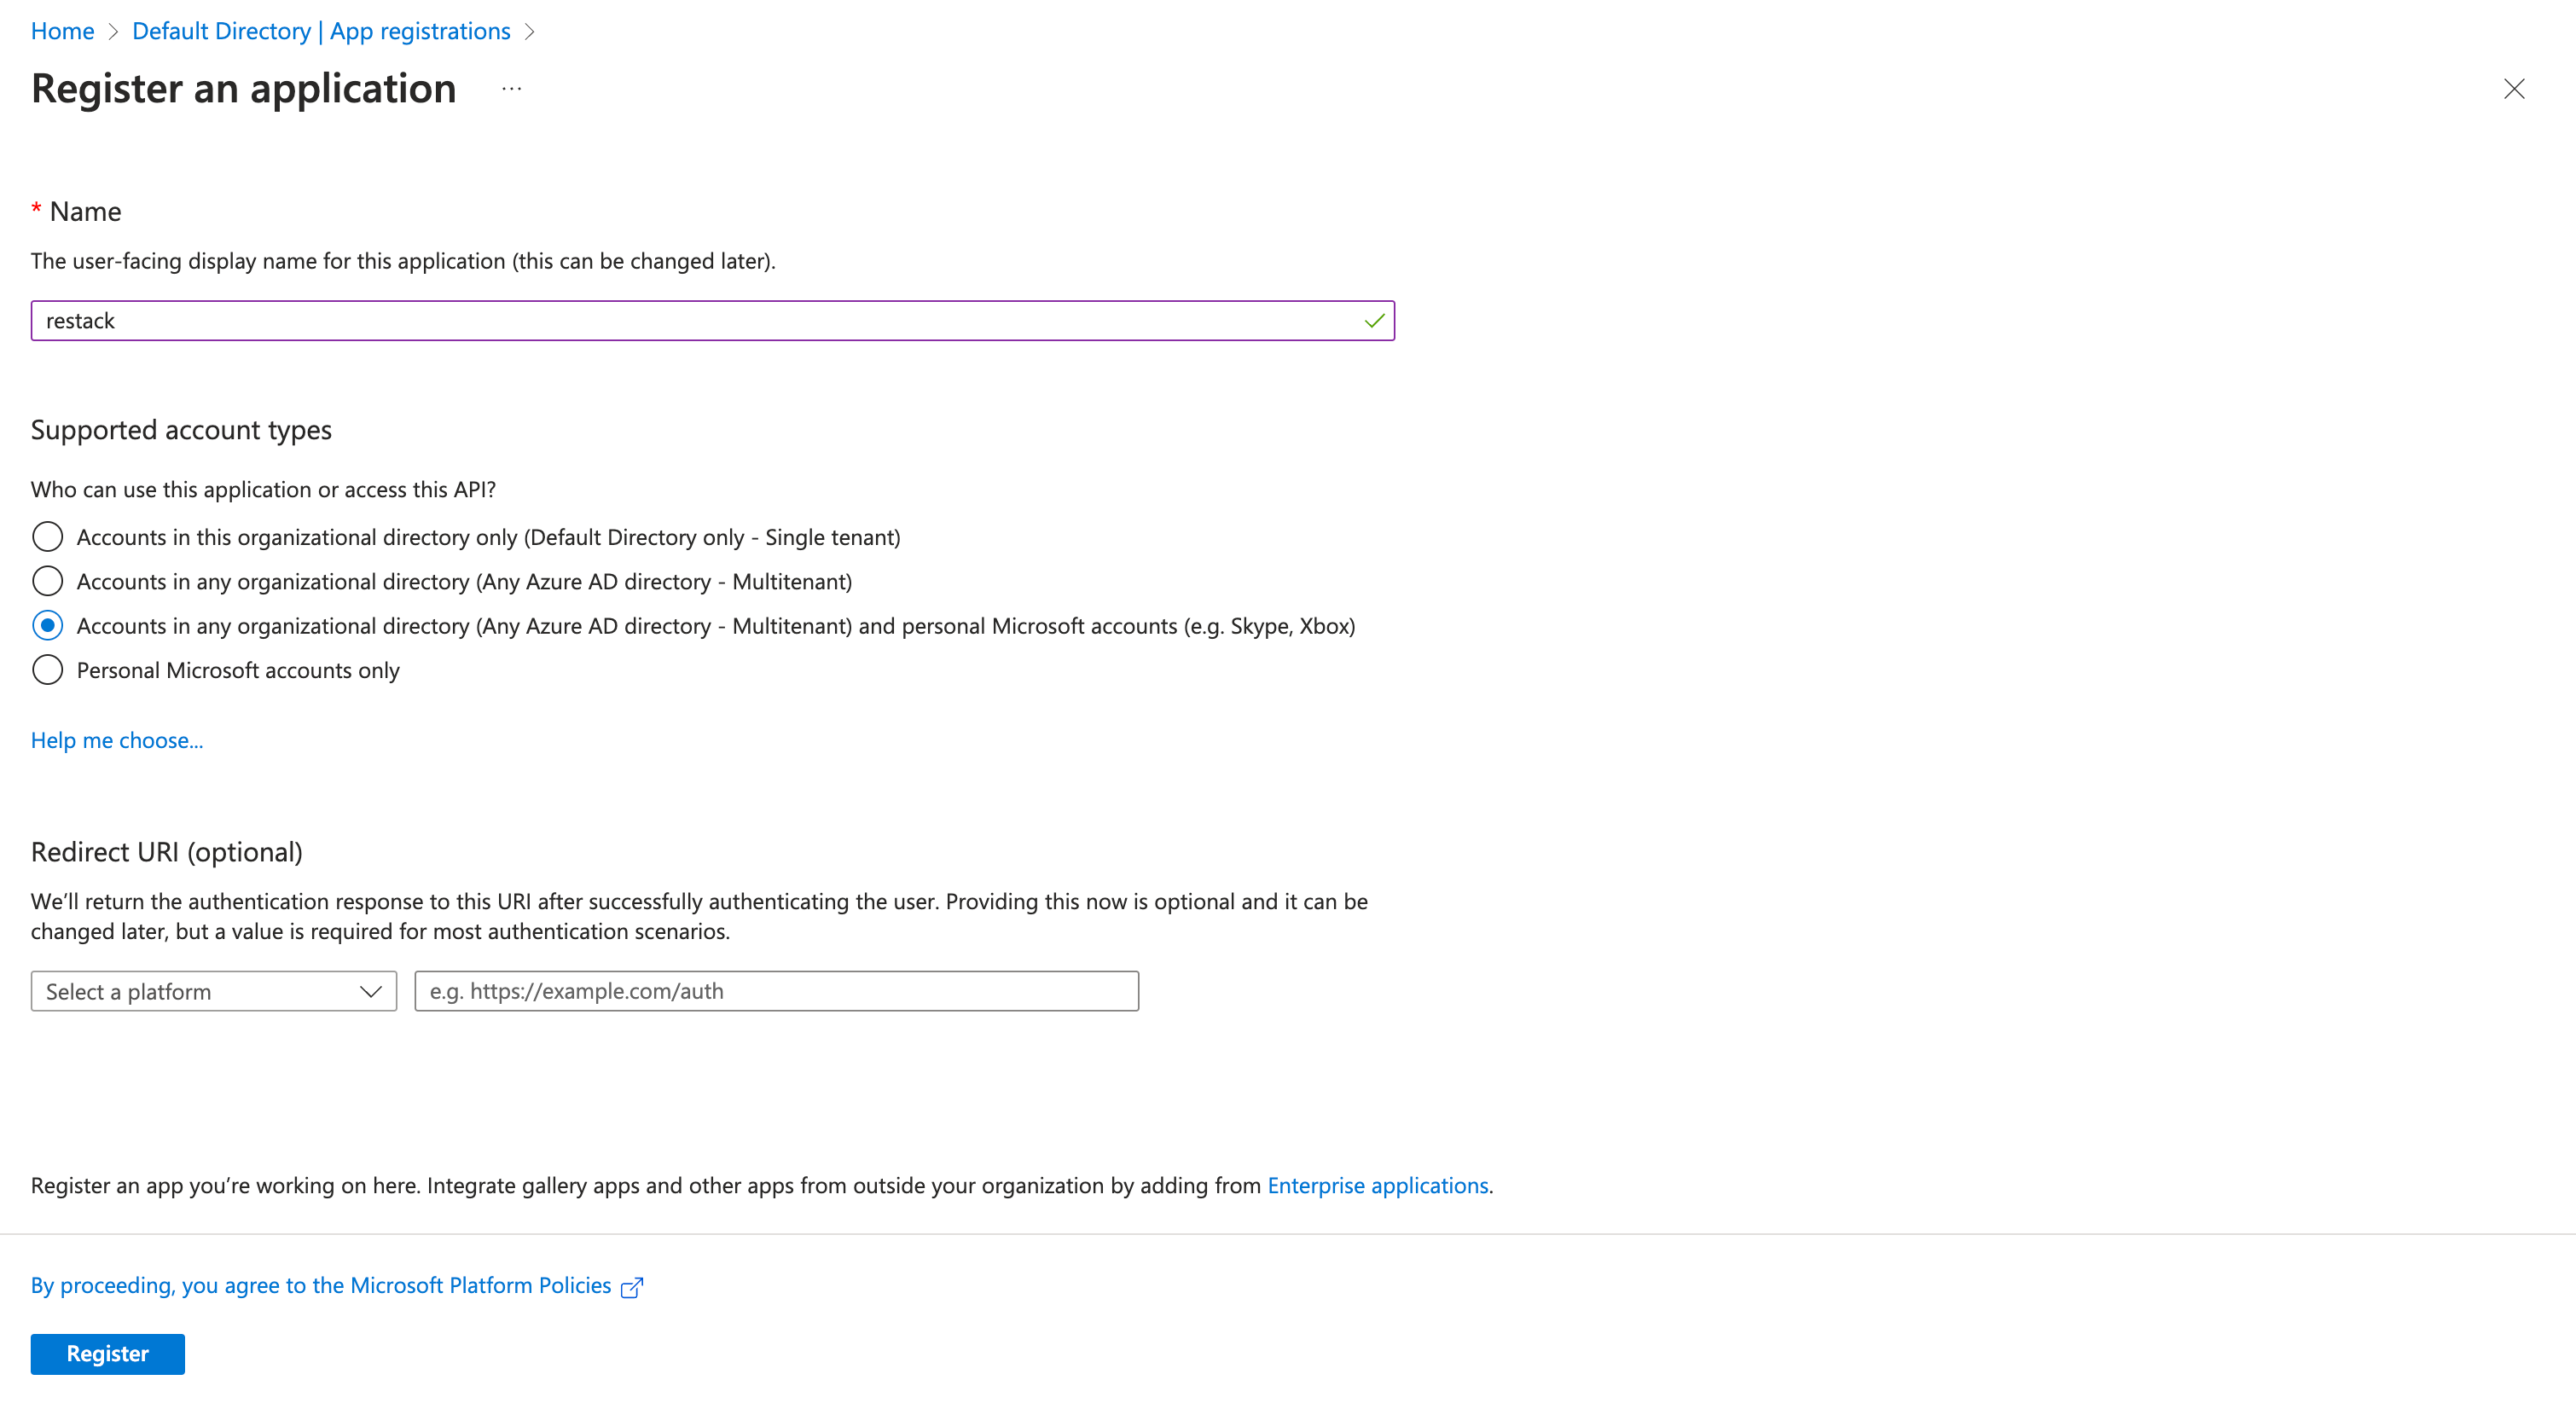
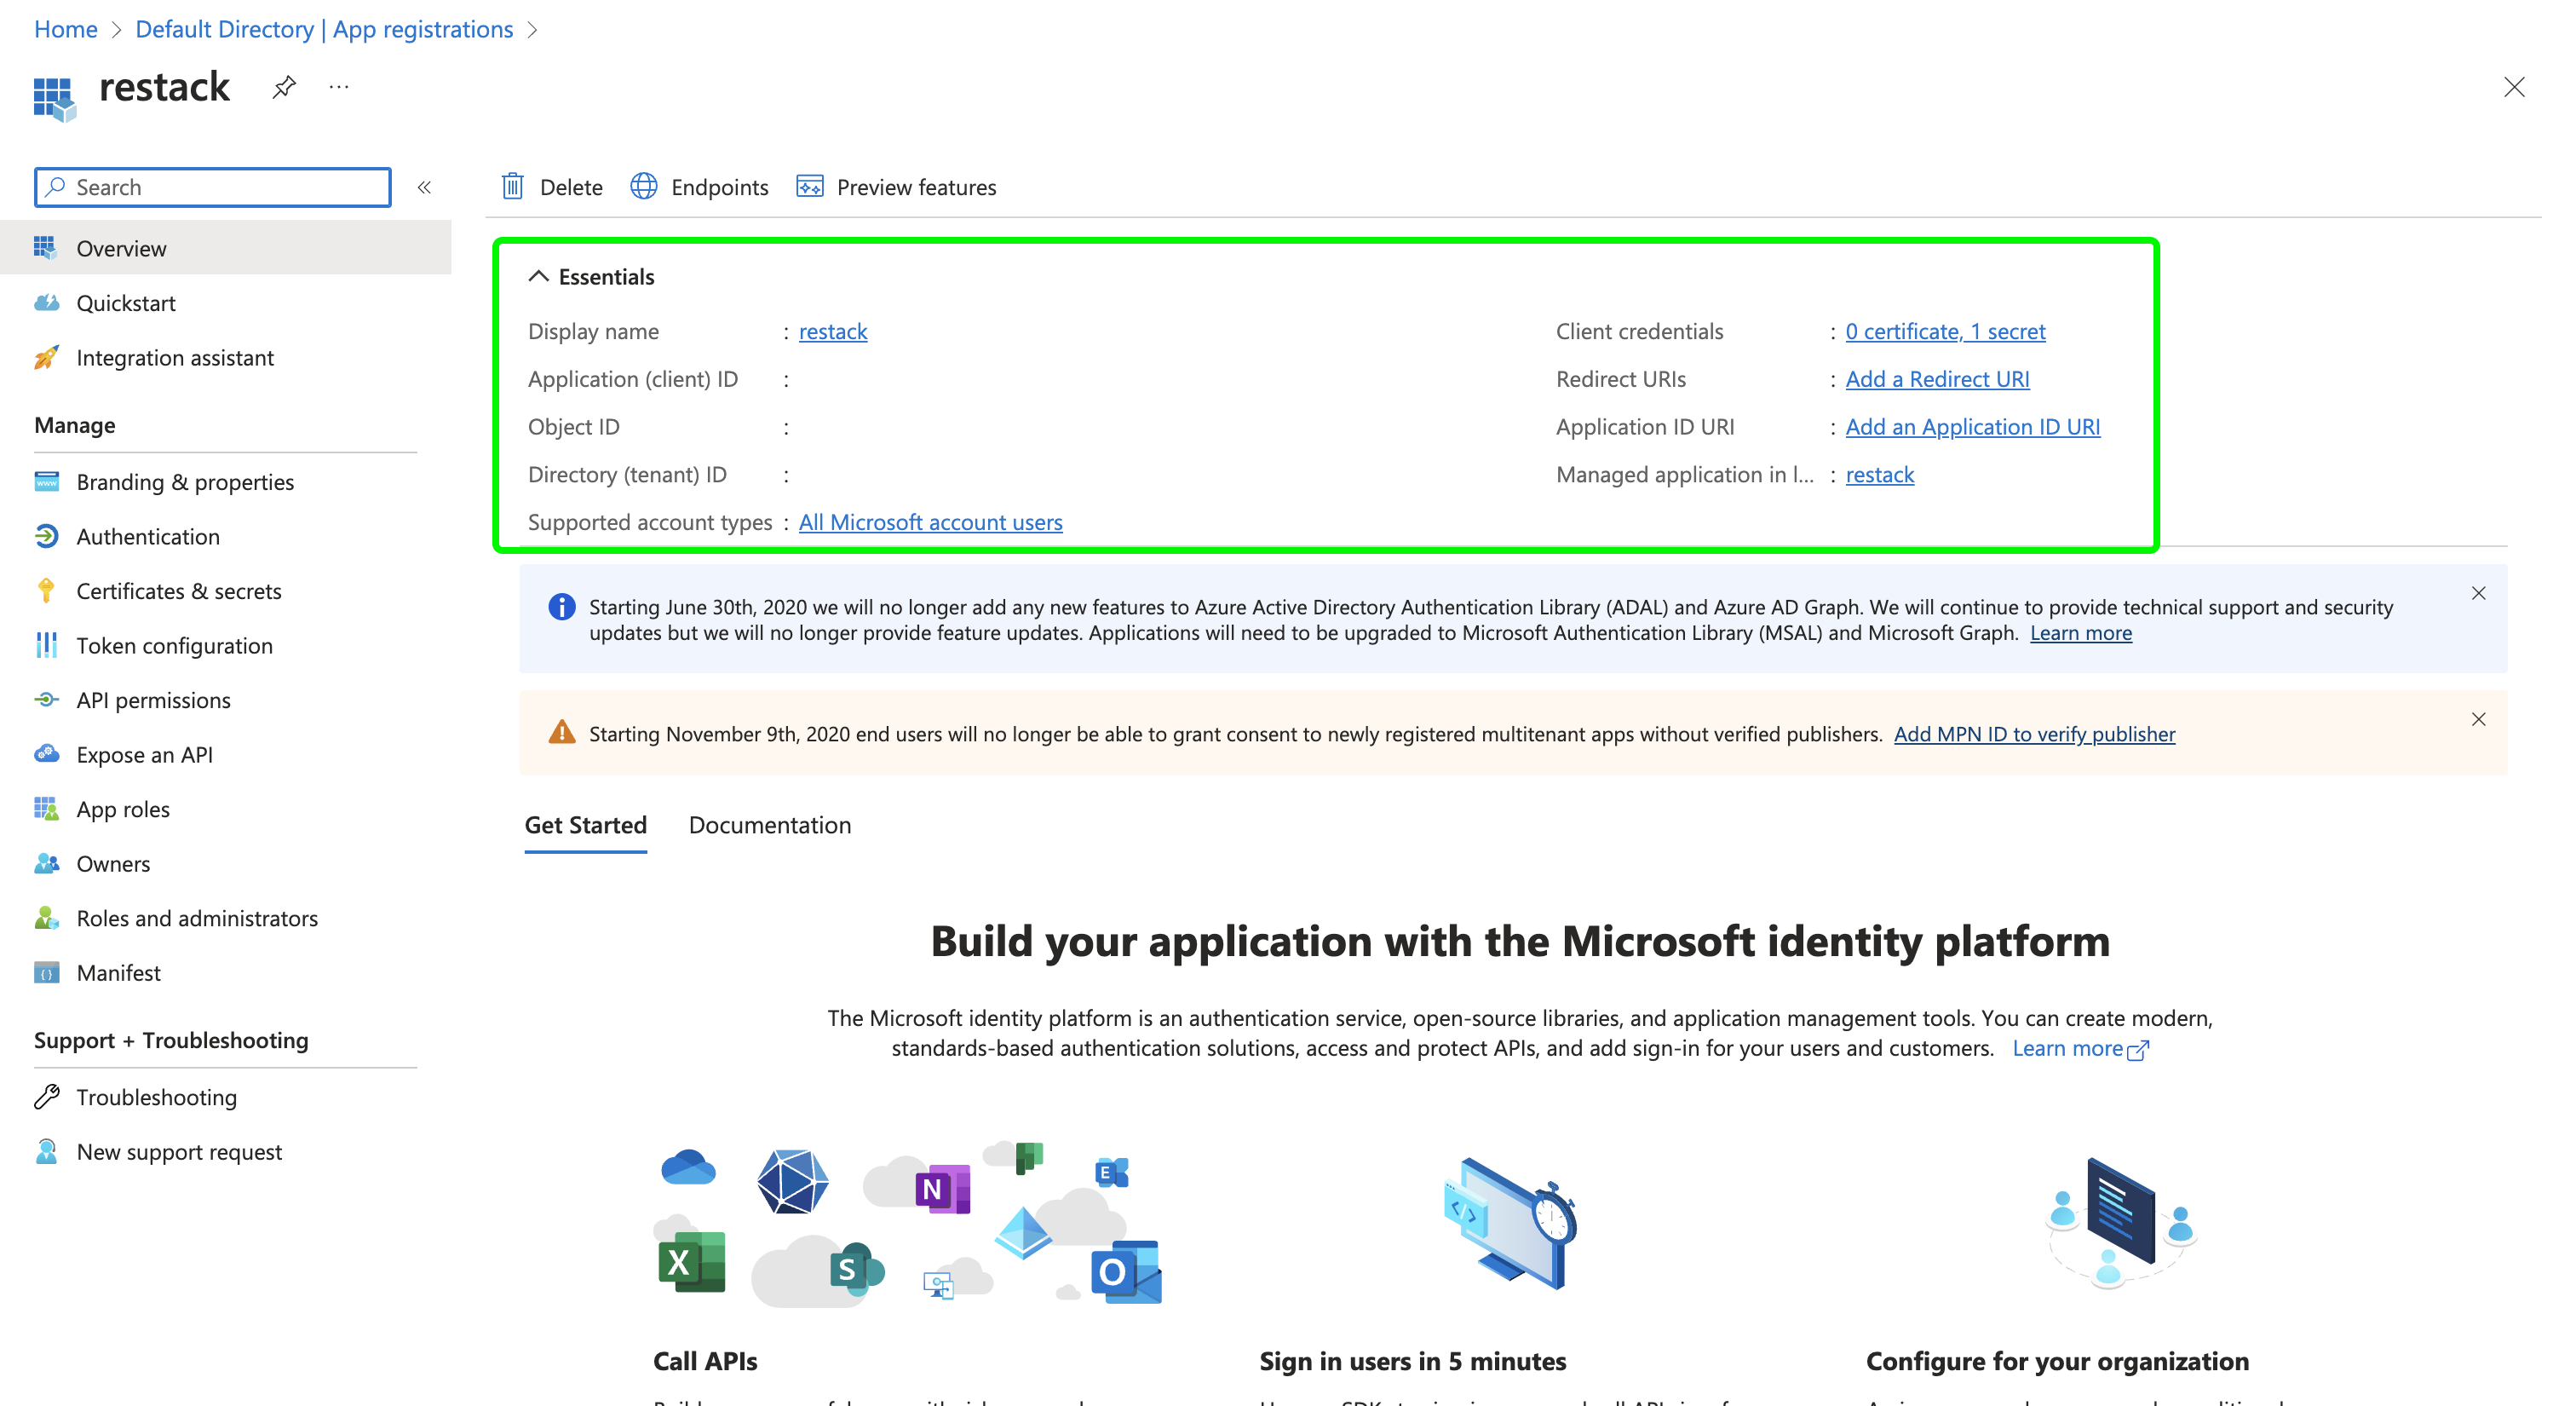
- Copy the Application (client) ID and paste it into the Restack UI setup as the Client ID.
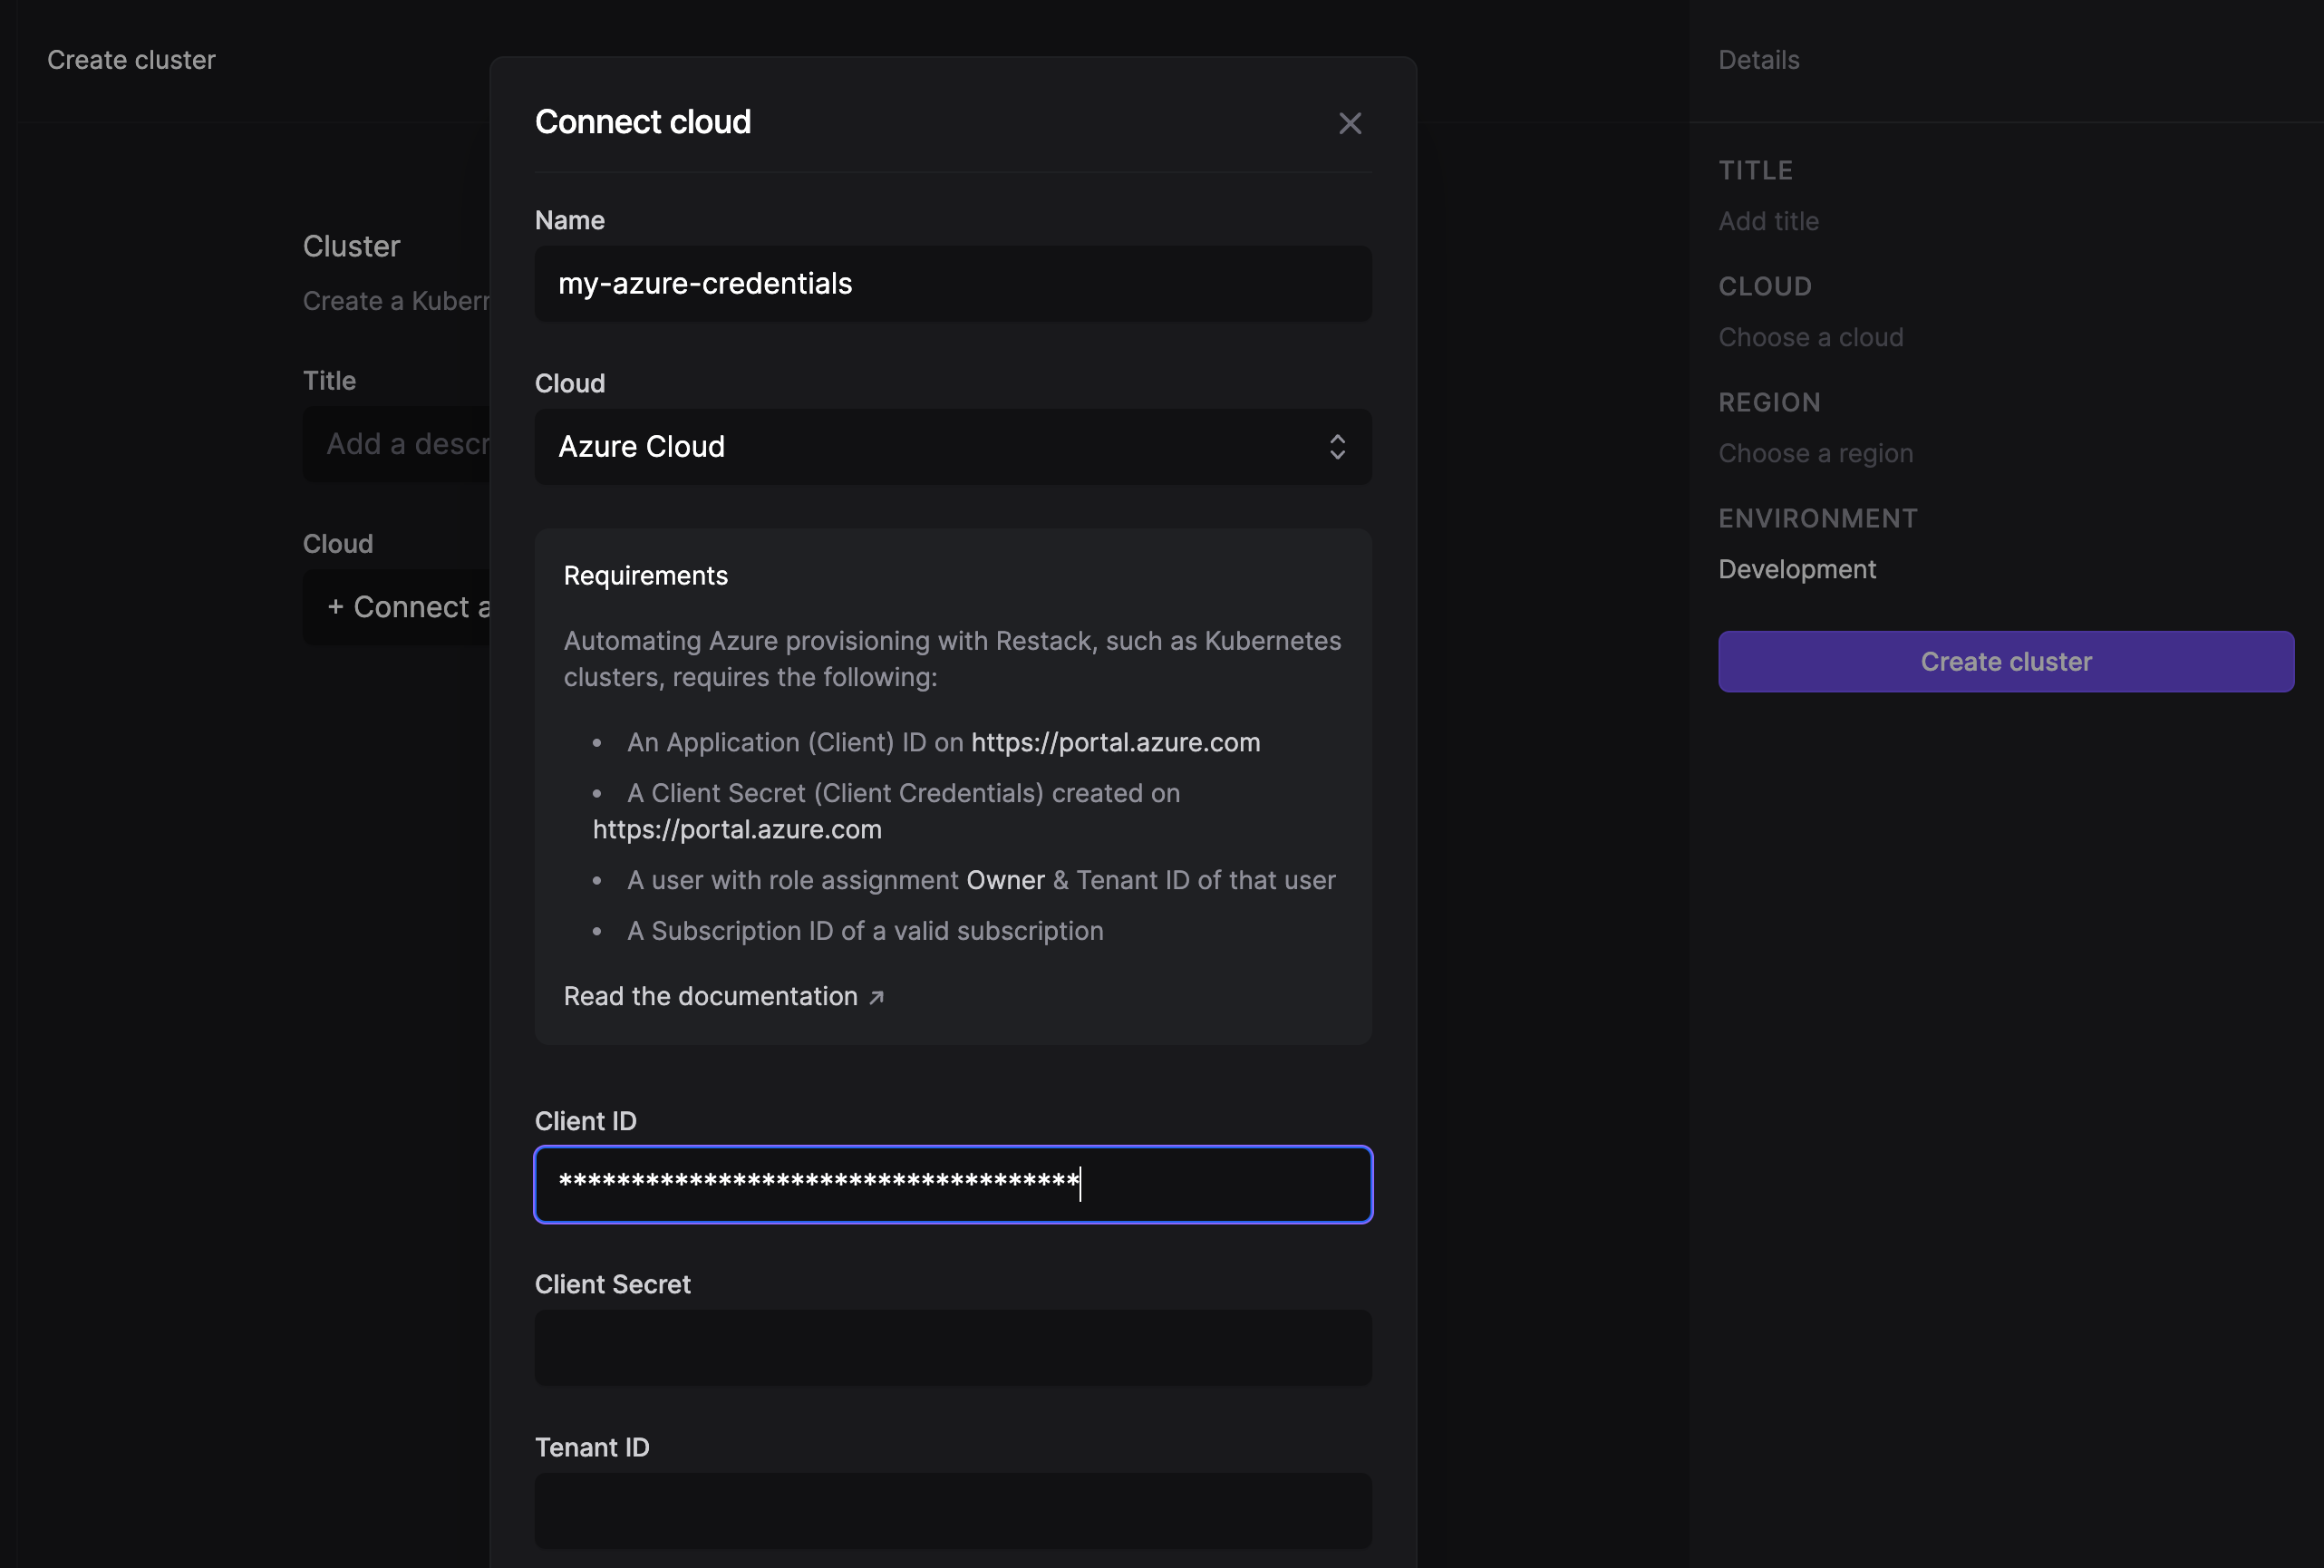
- Copy the Directory (tenant) ID and paste it in Restack UI as the Tenant ID.
- For your newly created App Registration, add an API Permission called "user_impersonation".

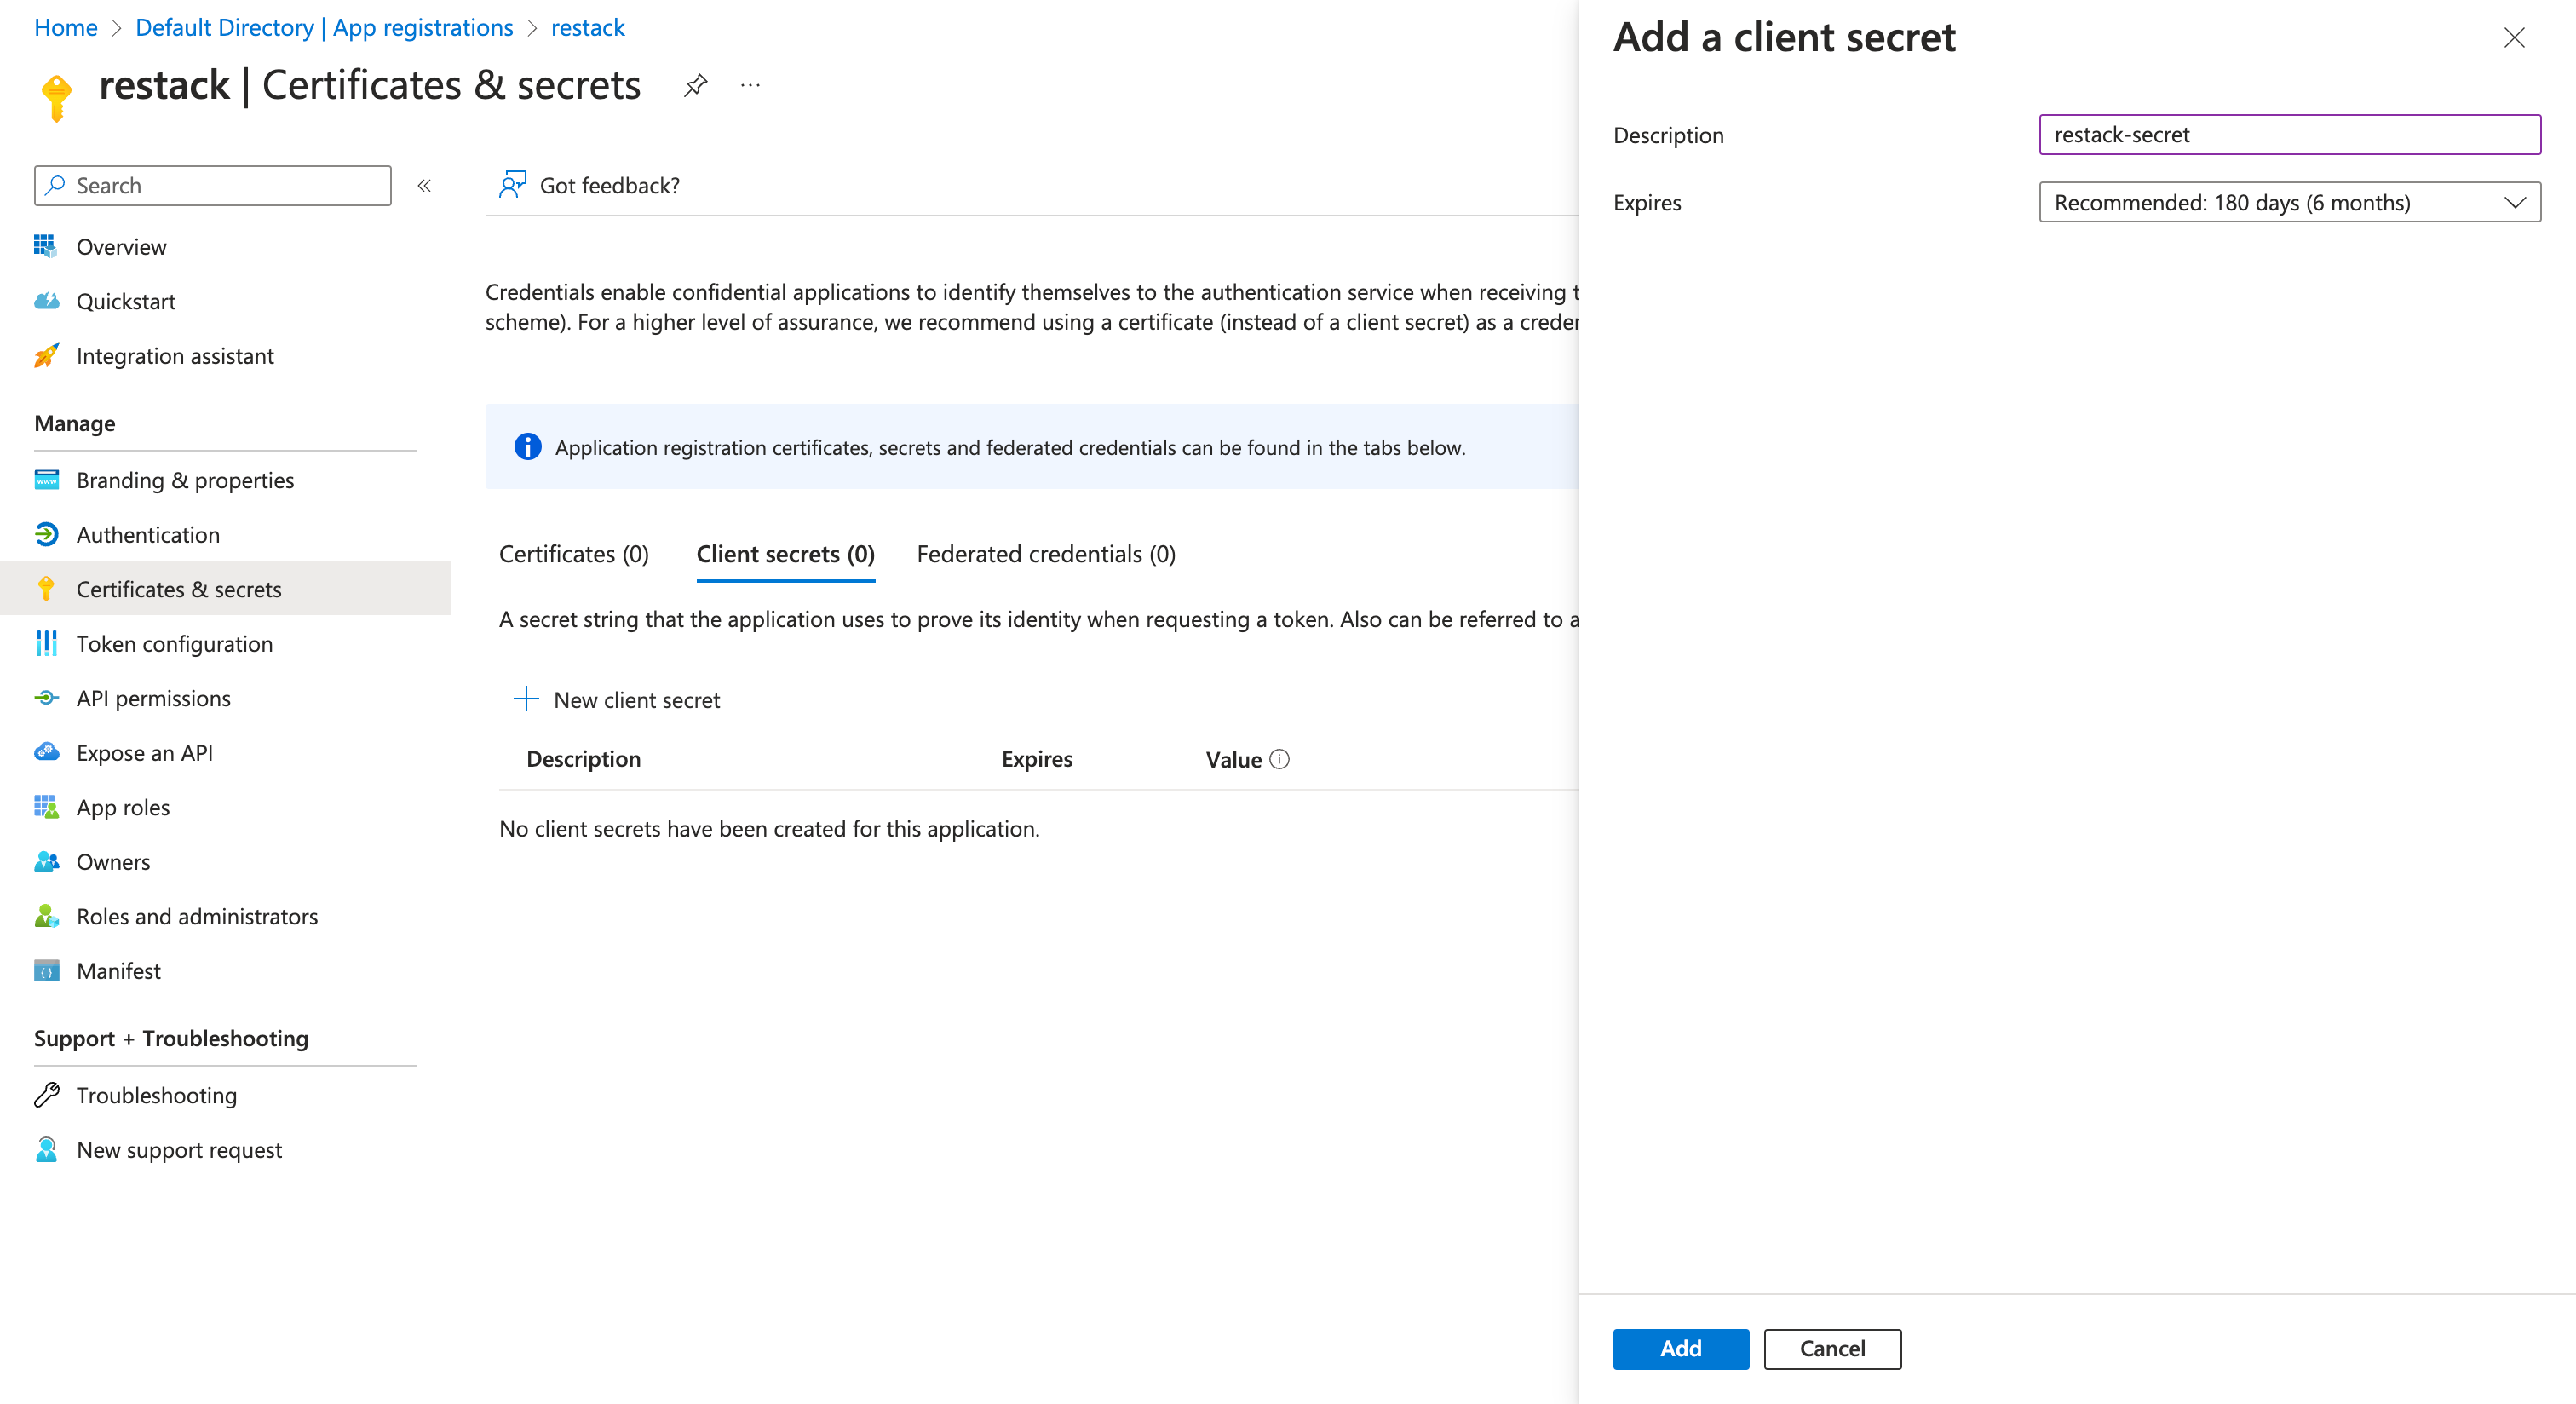
- For your App Registration, go to "Certificates & secrets" and create a new client secret. Copy the value of the secret and paste it in Restack UI as the Client Secret.
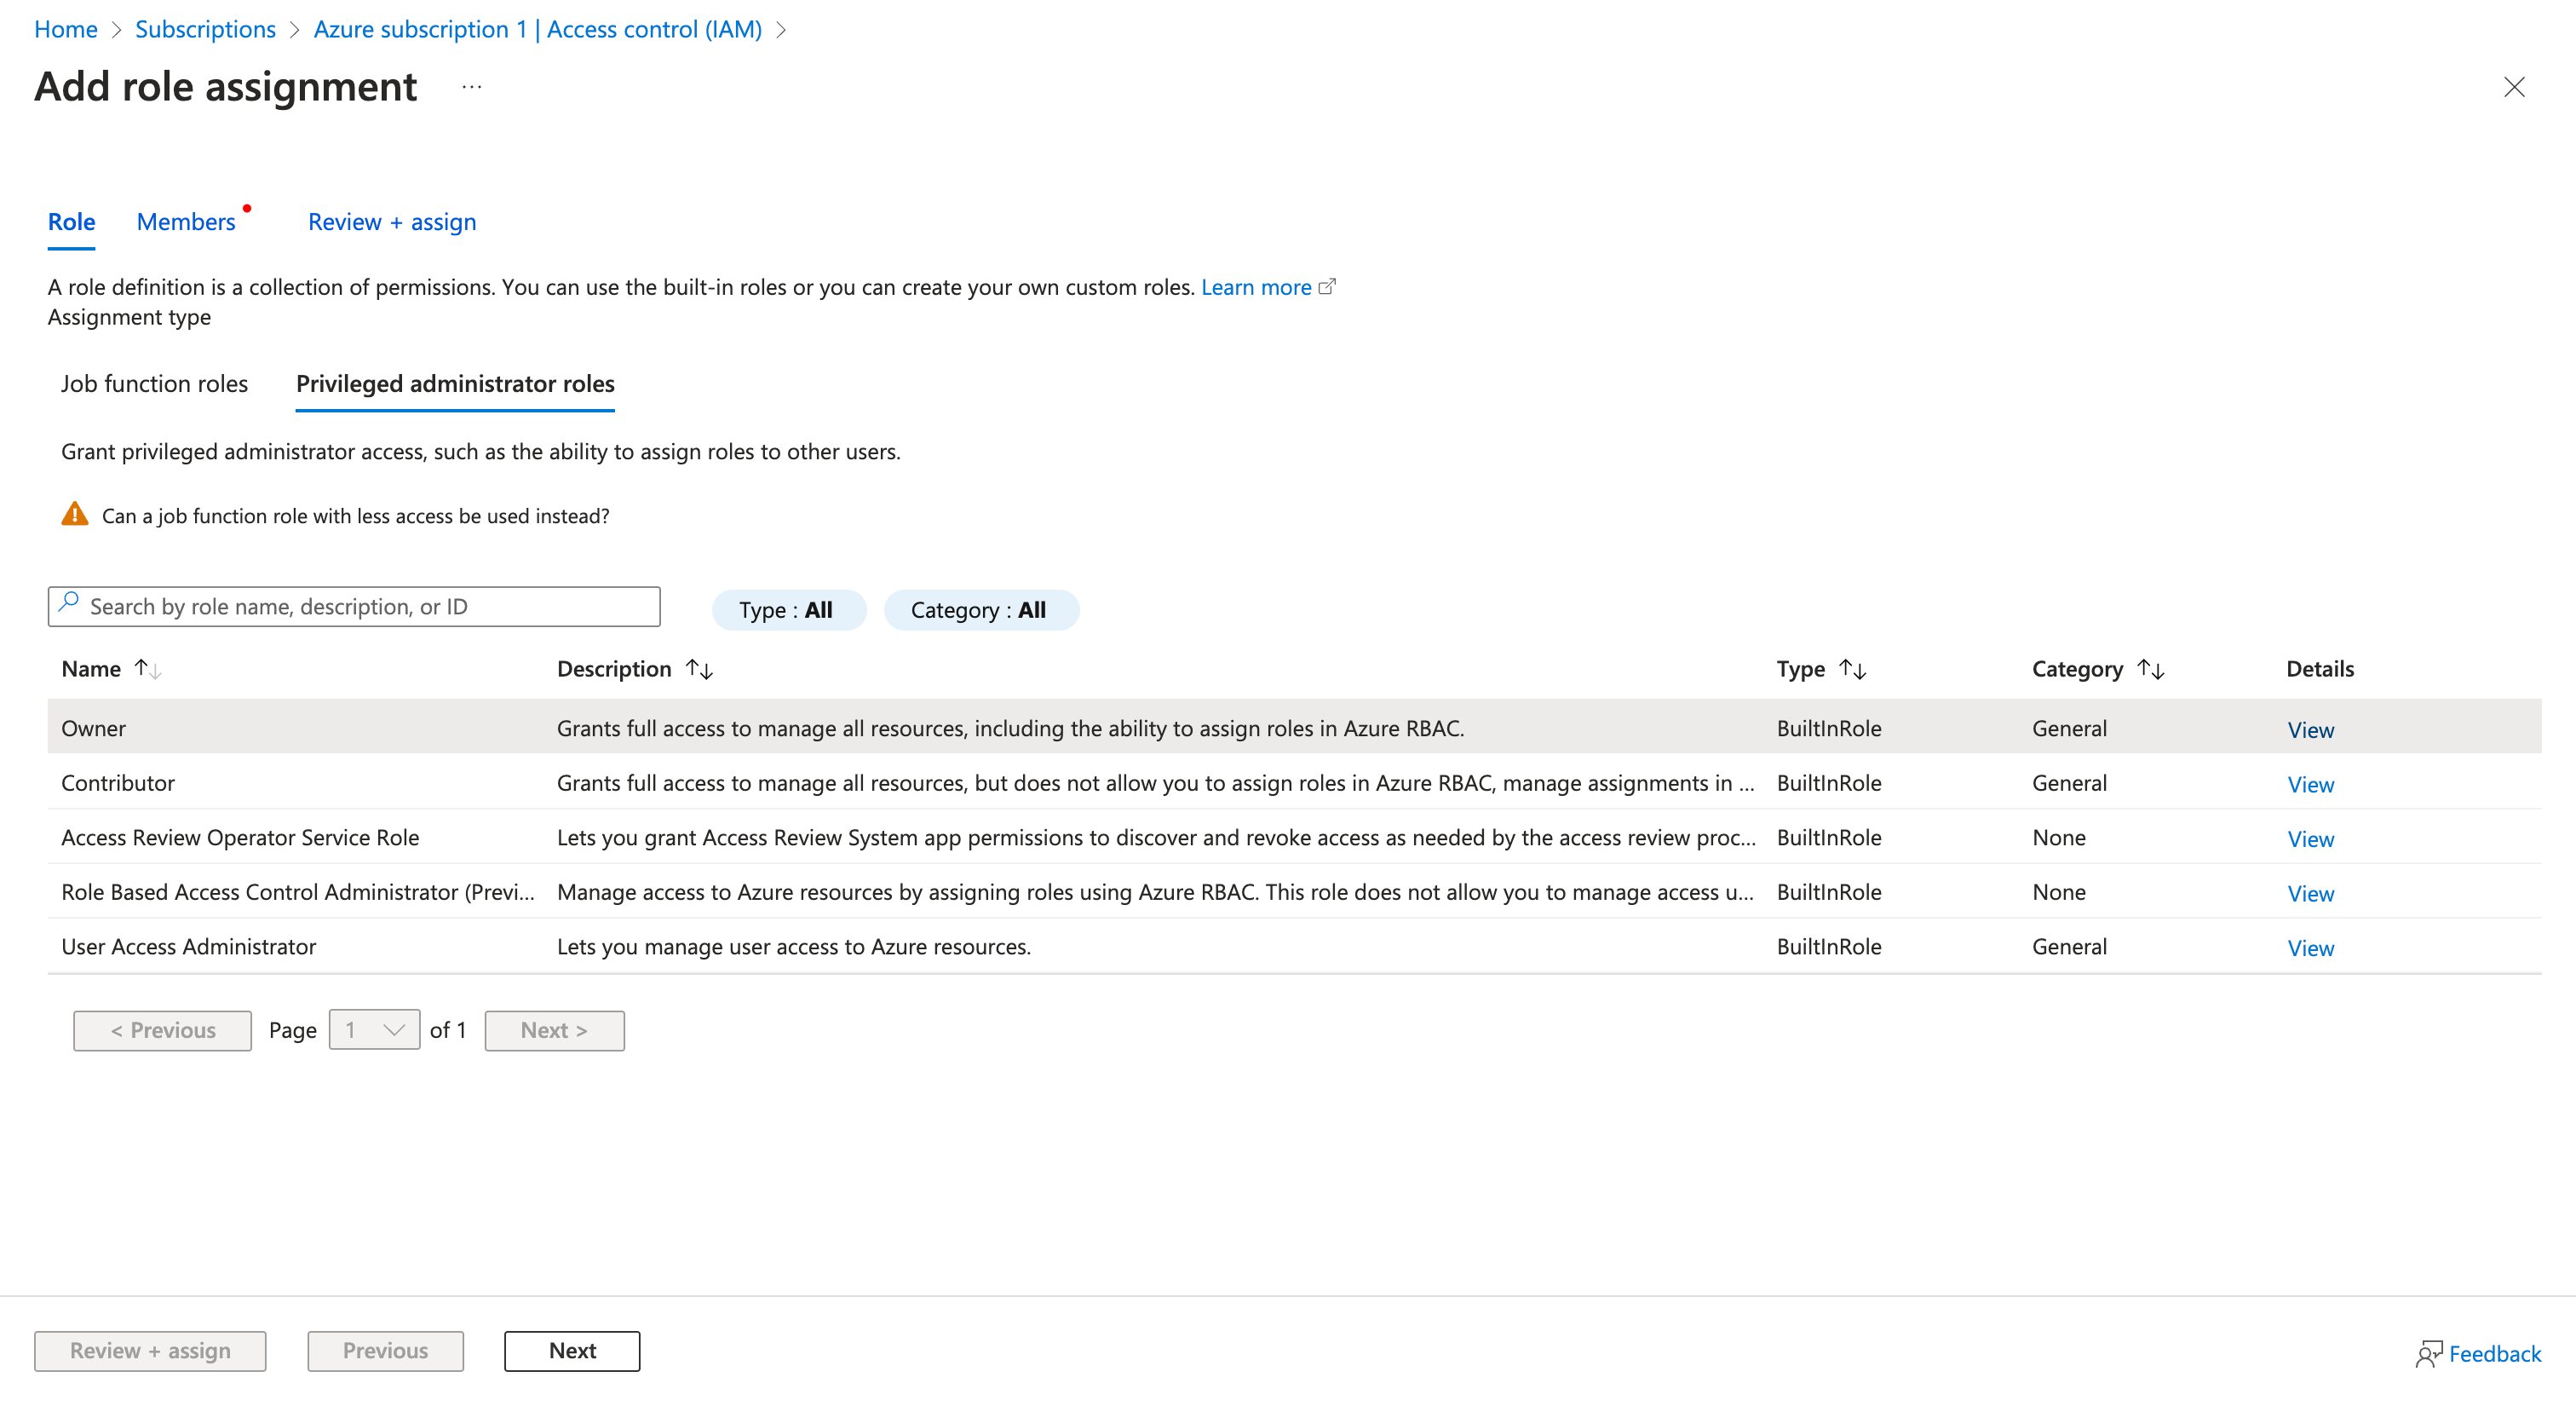
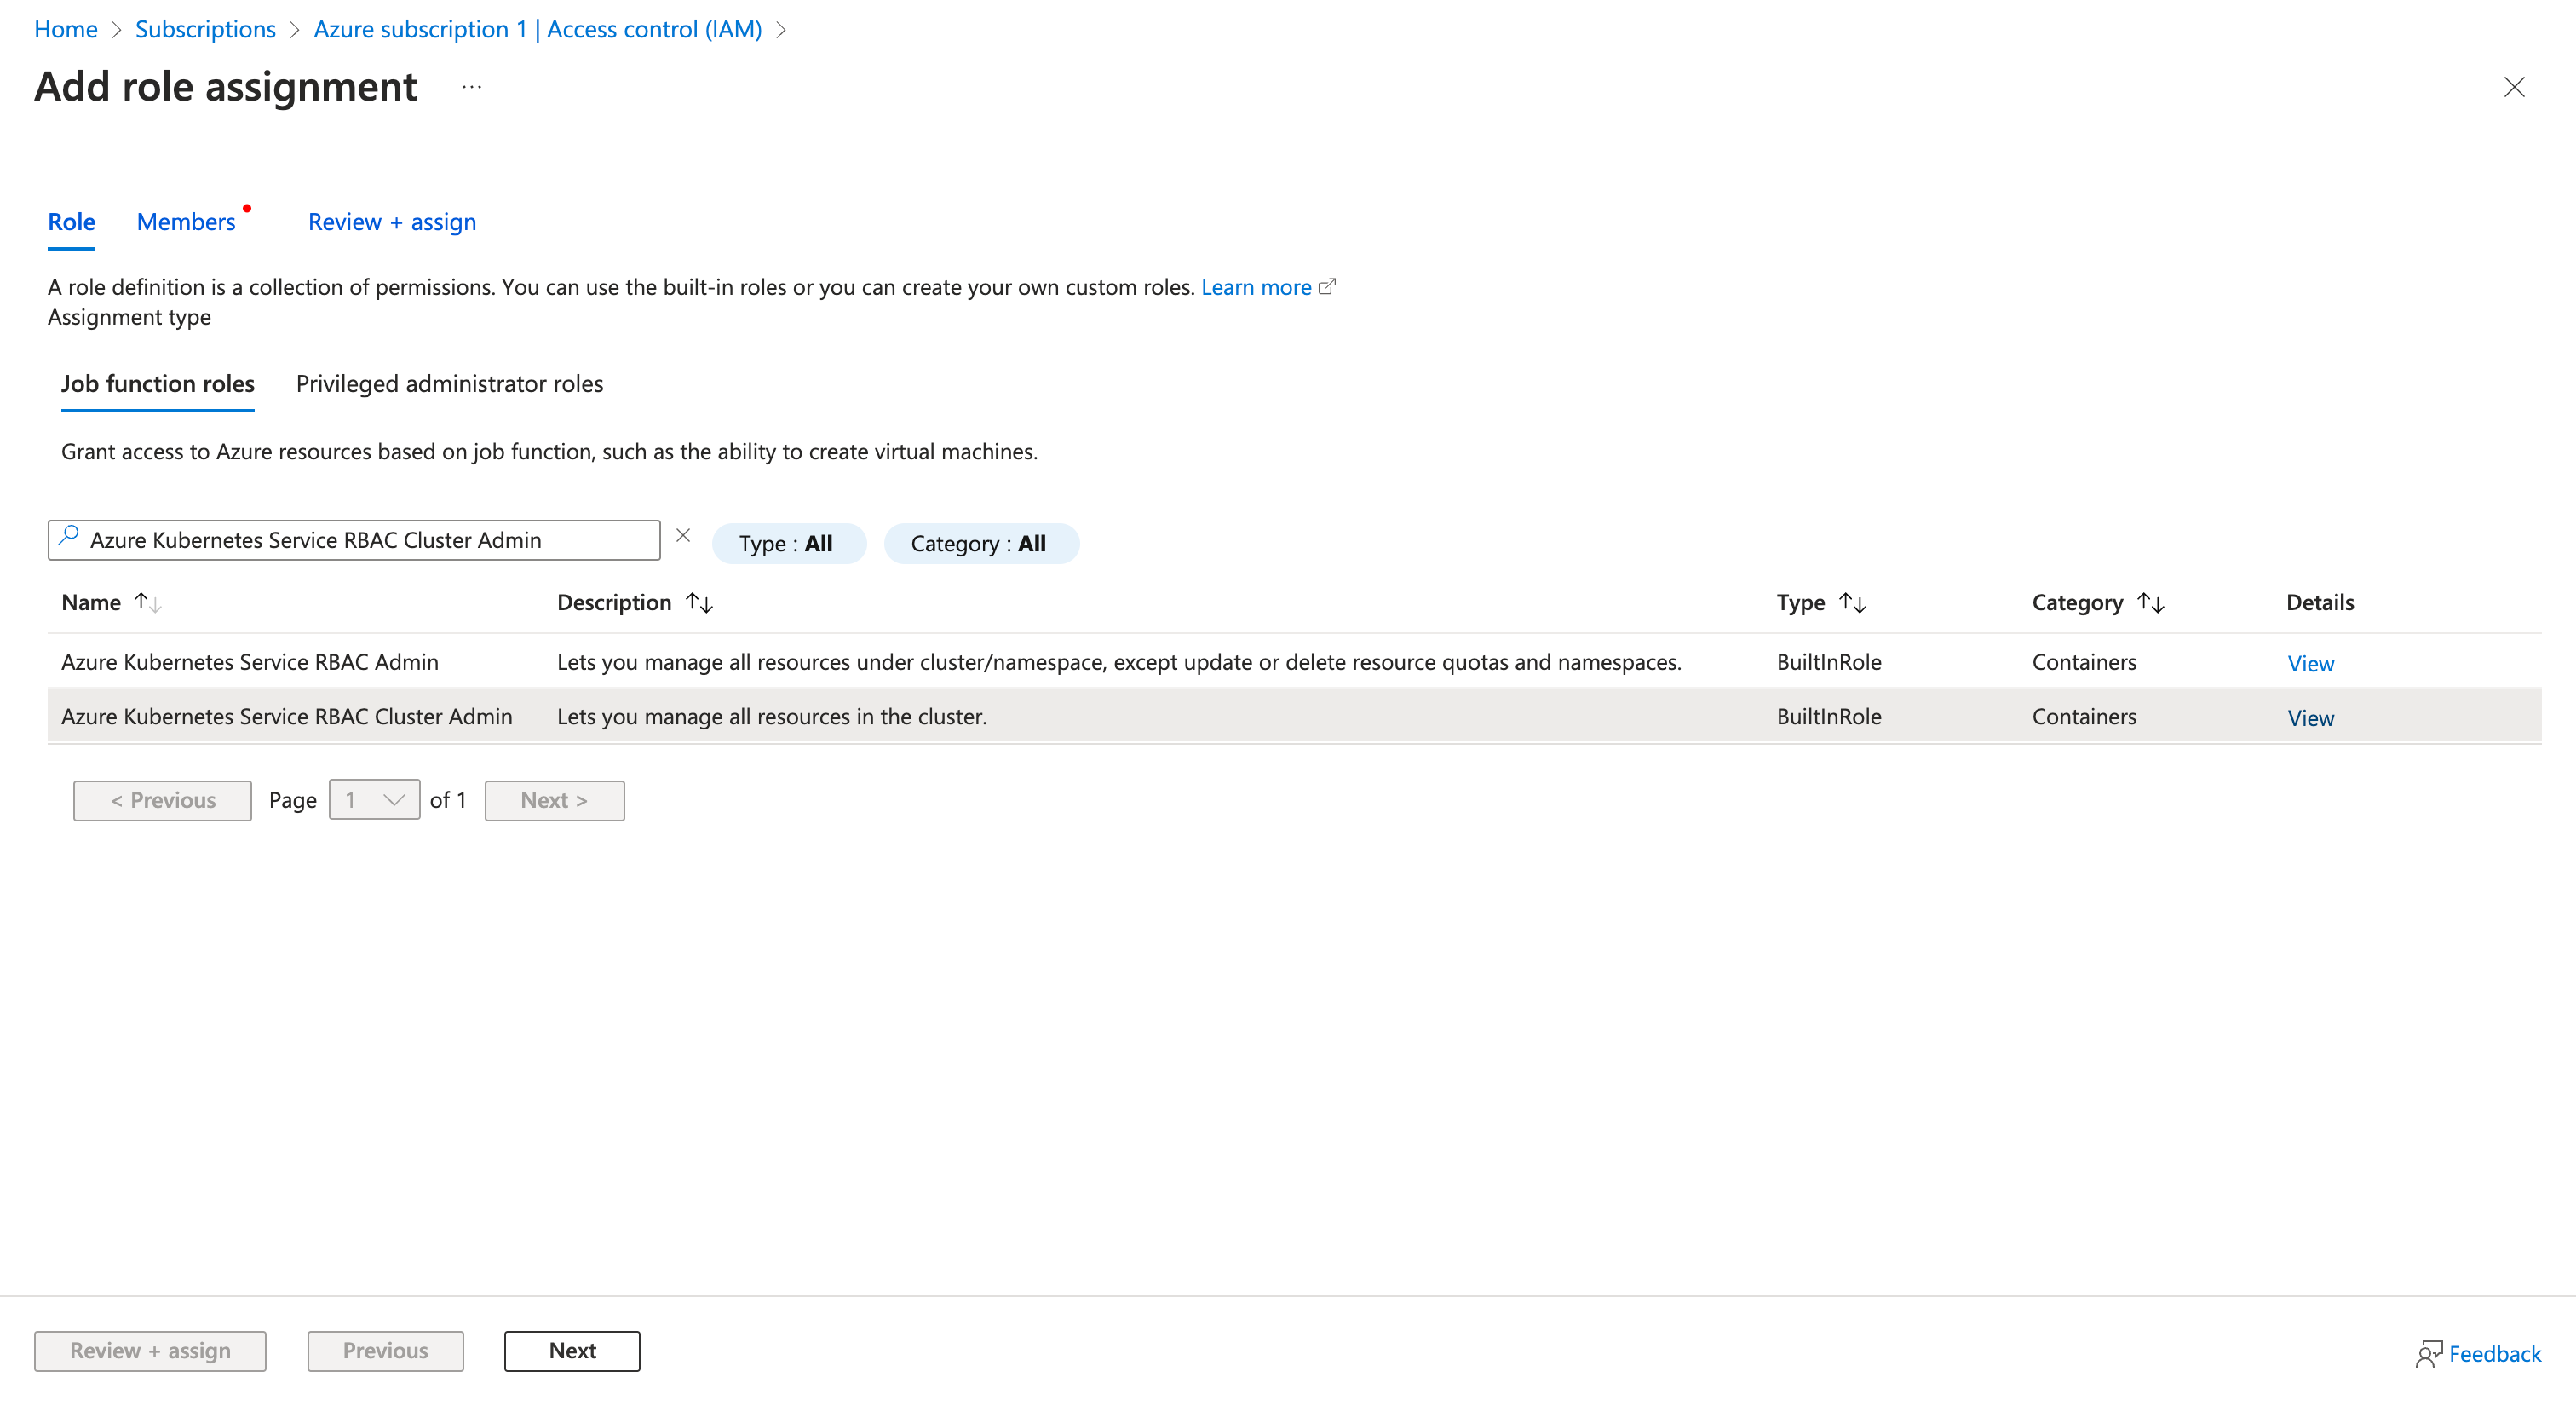
- Go to your "Subscriptions", and choose the subscription you want to use for Restack. In the "Access Control (IAM)" section, access "Role assignments" and add a new role assignment. Choose the "Owner" role (Privileged administrator roles) & Azure Kubernetes Service RBAC Cluster Admin (Job function roles) and click "Next".
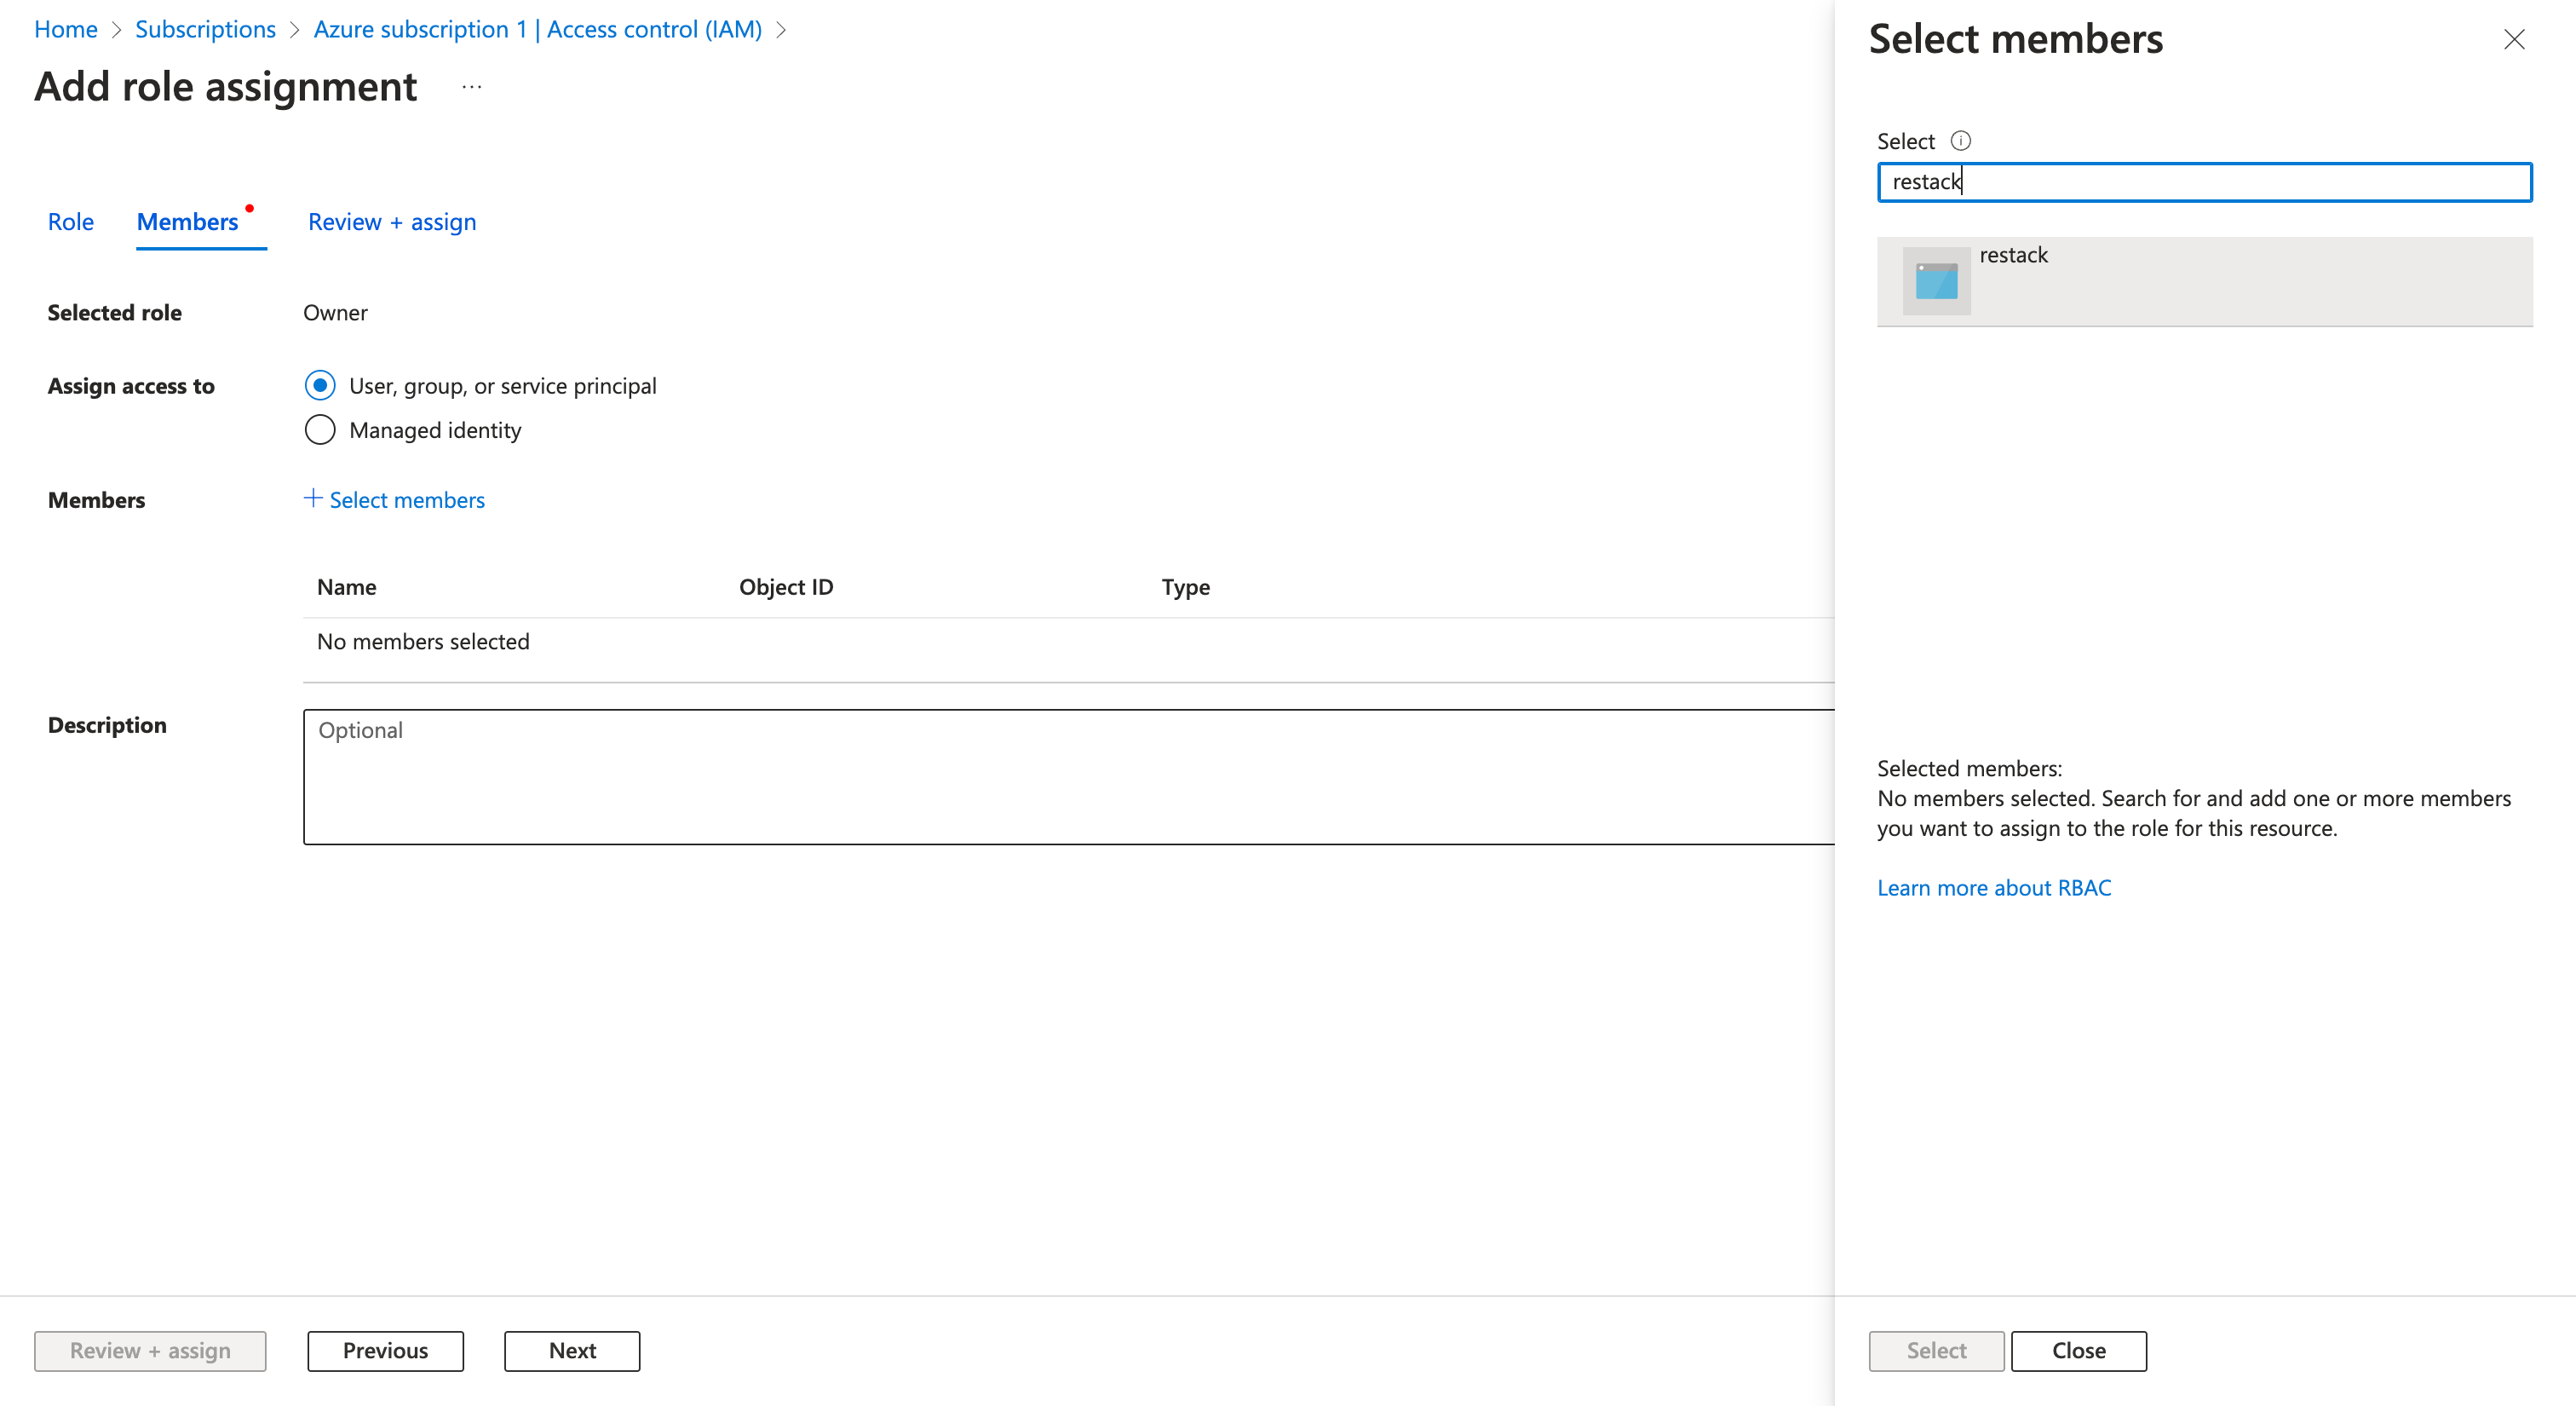
- Choose "User, group or service principal" in "Assign access to" and click on "Select members". In the opened search bar, type in "restack". The "restack" App Registration you've created should pop up. Select it and click on "Next". Lastly, click on "Review + assign". Now in the "Role assignments" section, you should see the "restack" app.
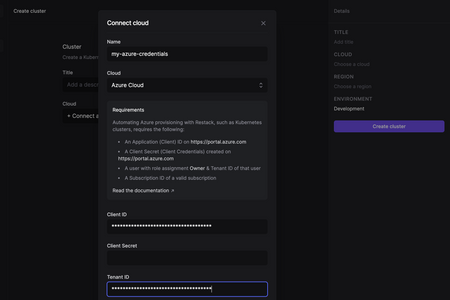
- Go to "Subscriptions", copy the Subscription ID, and paste it into the Restack UI.
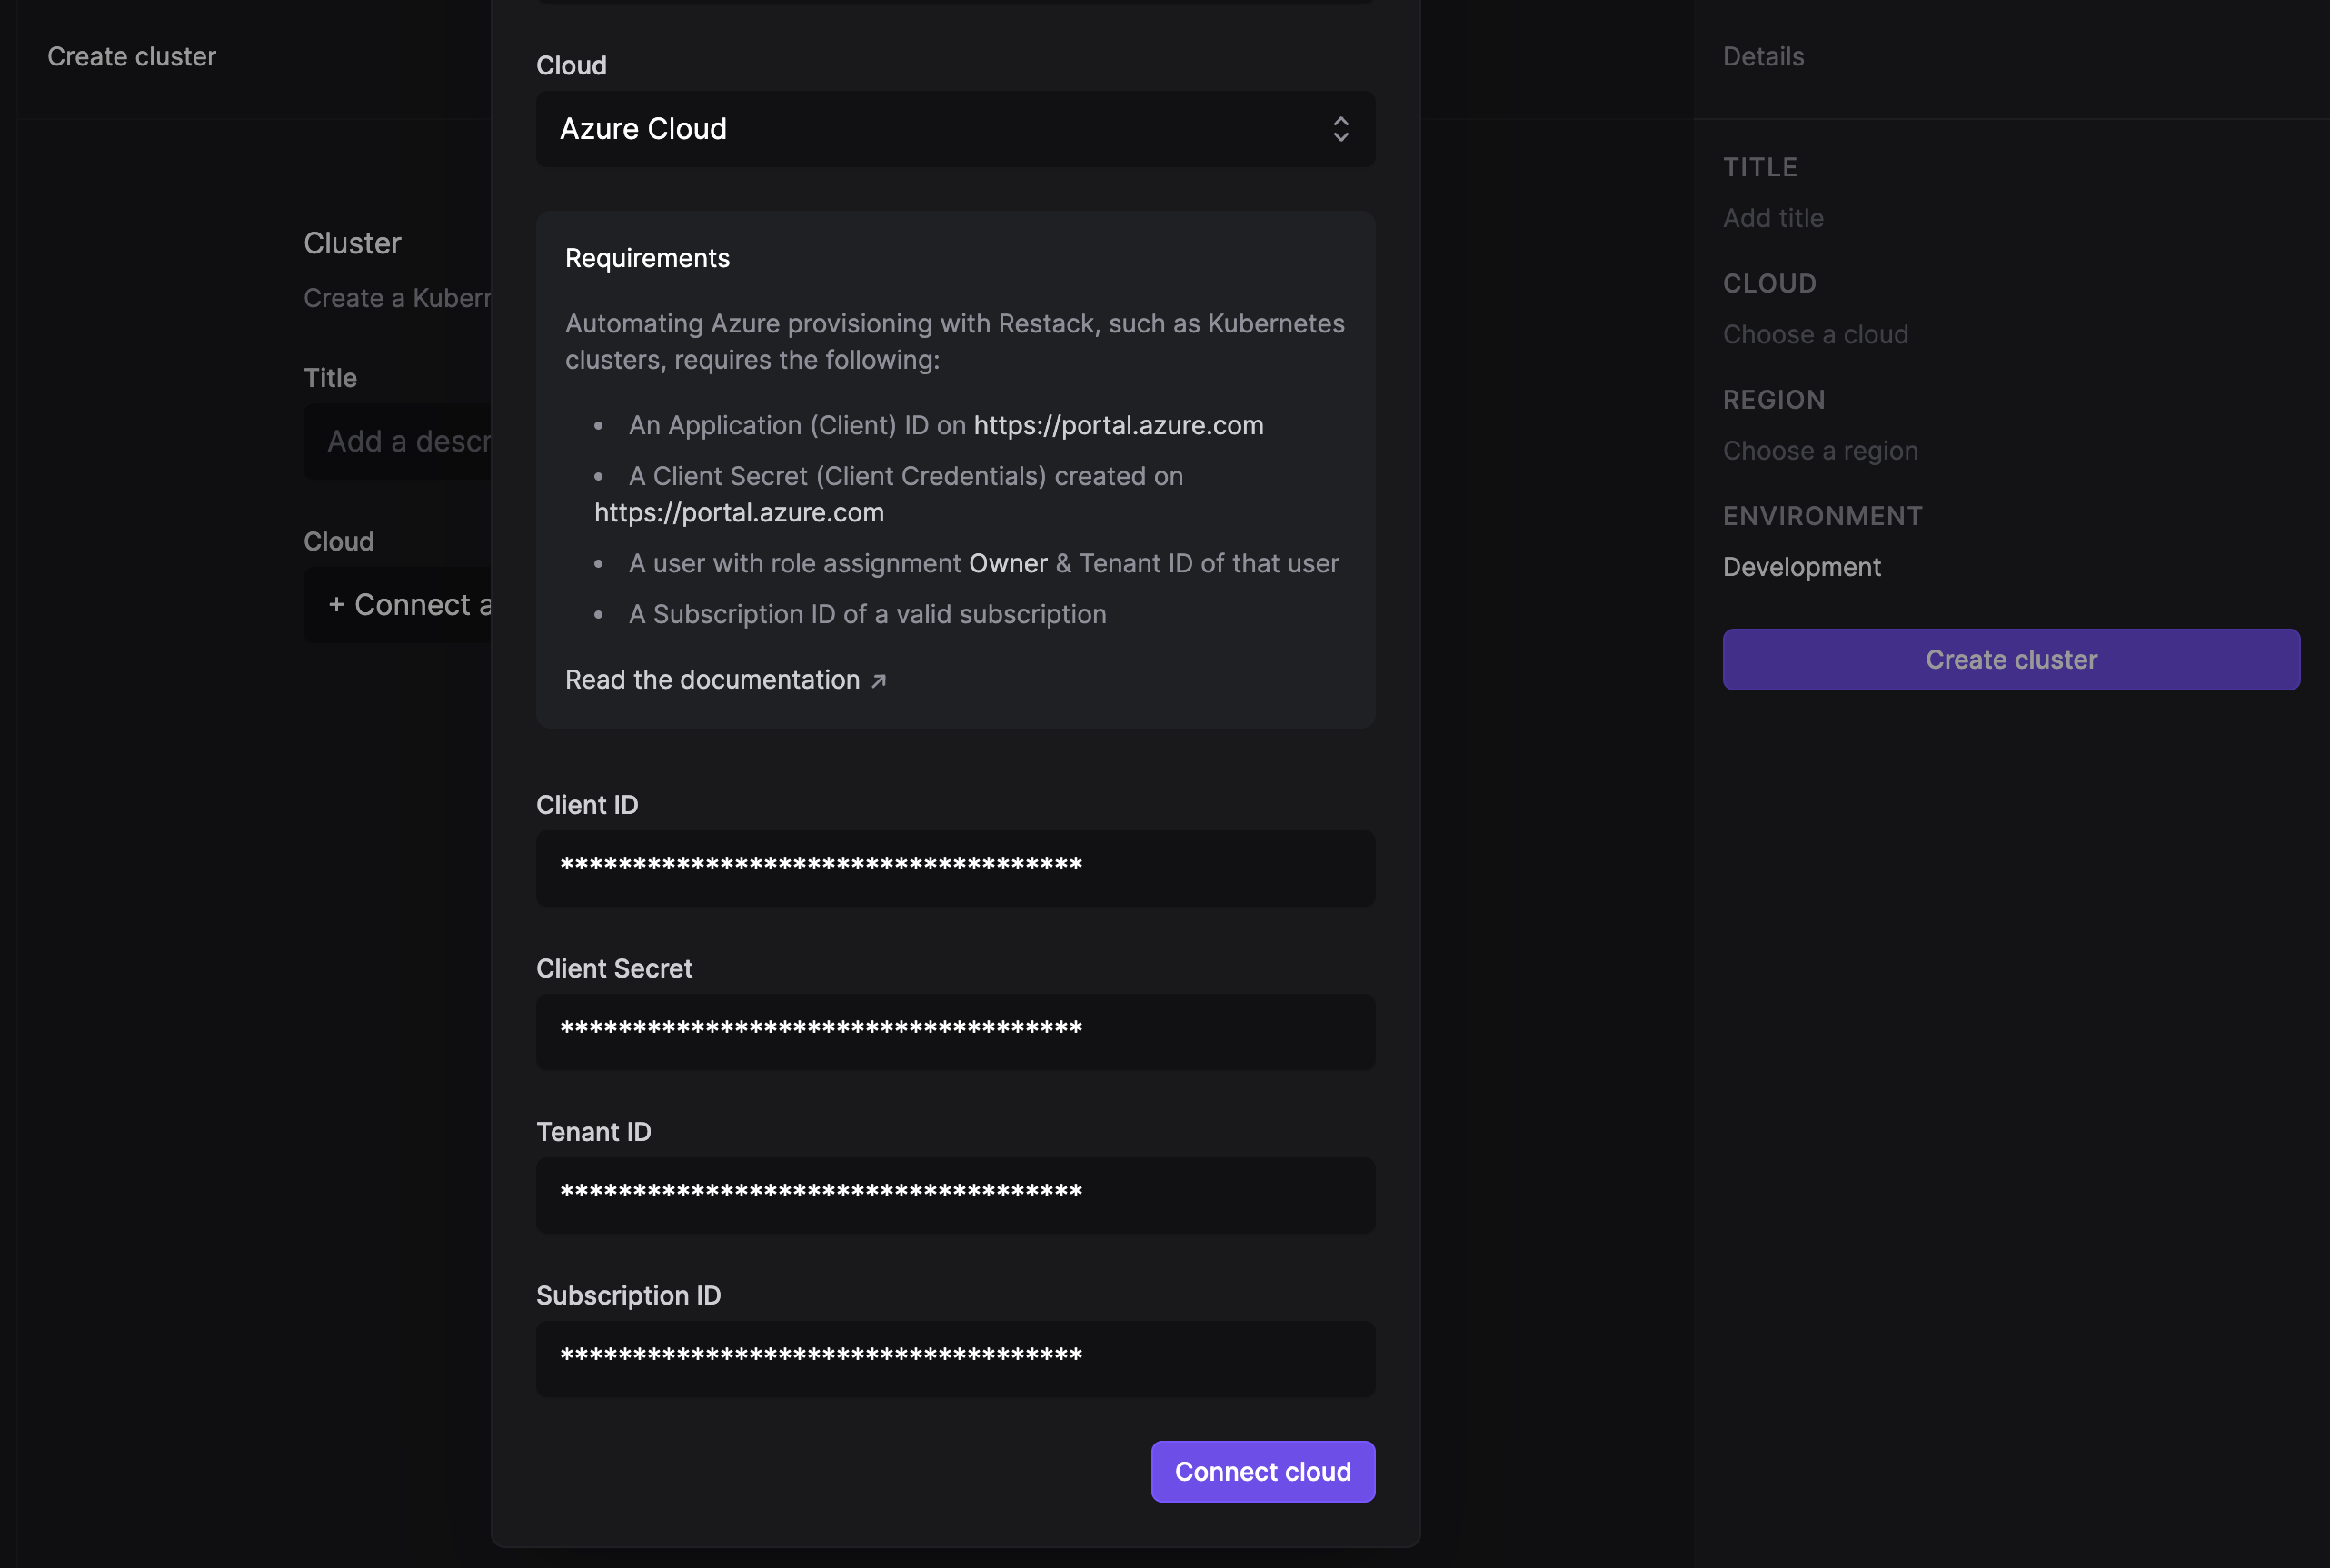
- Click on "Connect cloud".
If the cloud account has been successfully added and Restack can connect to it, you can proceed to create a cluster and provision your Kestra instance.
One-click cluster creation with Restack
- Navigate to the Clusters tab and click on Create cluster.
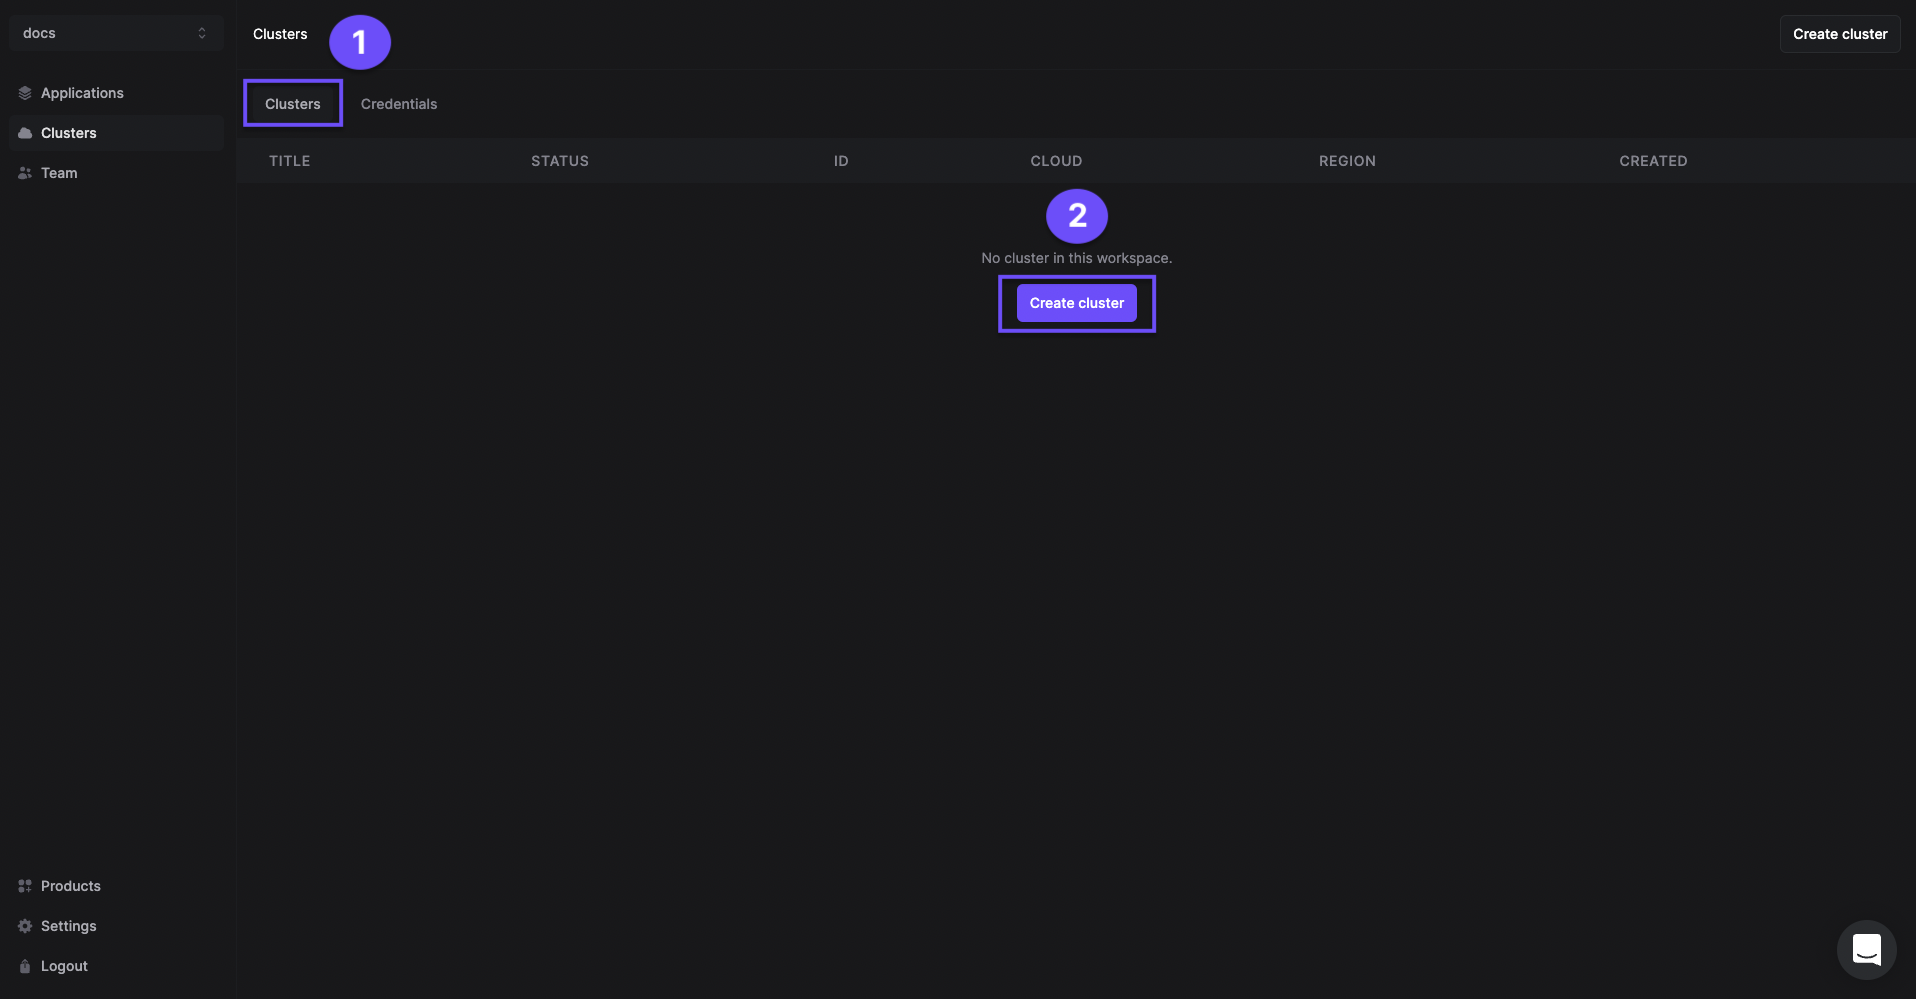
- Give a name to your cluster.
- Select the region you want to deploy the cluster in.
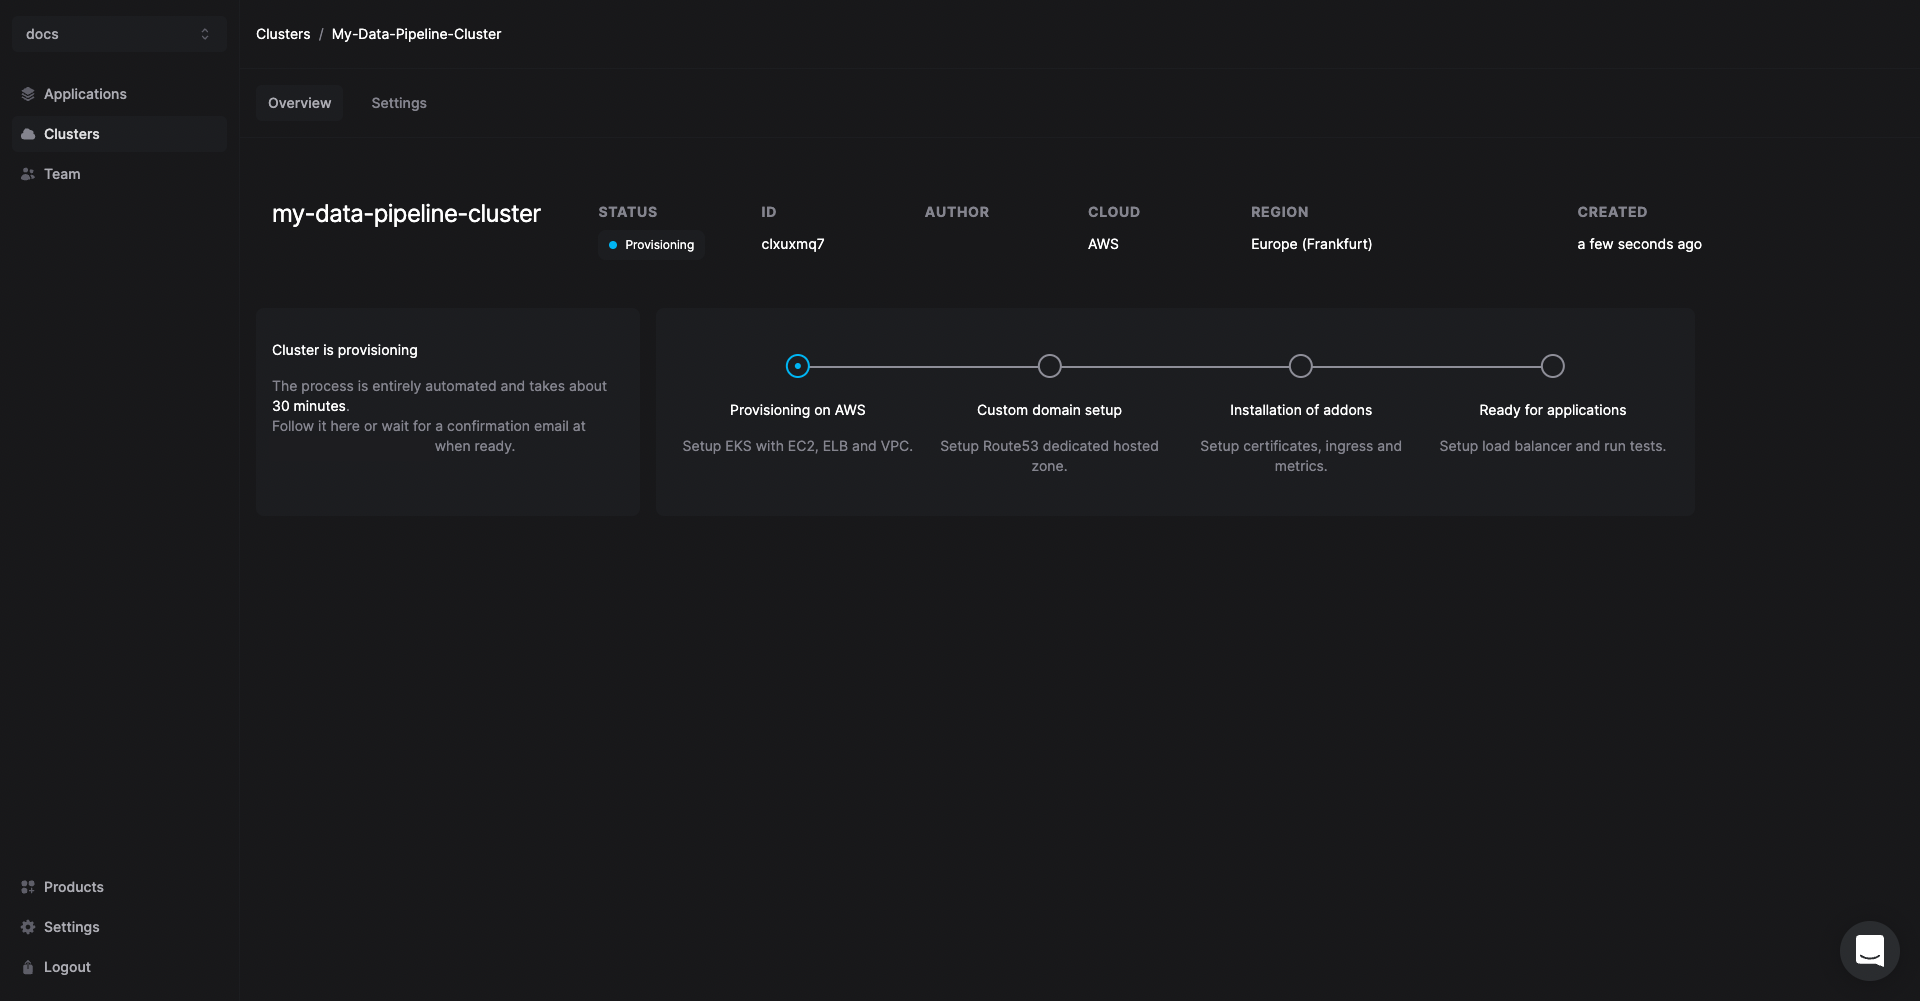
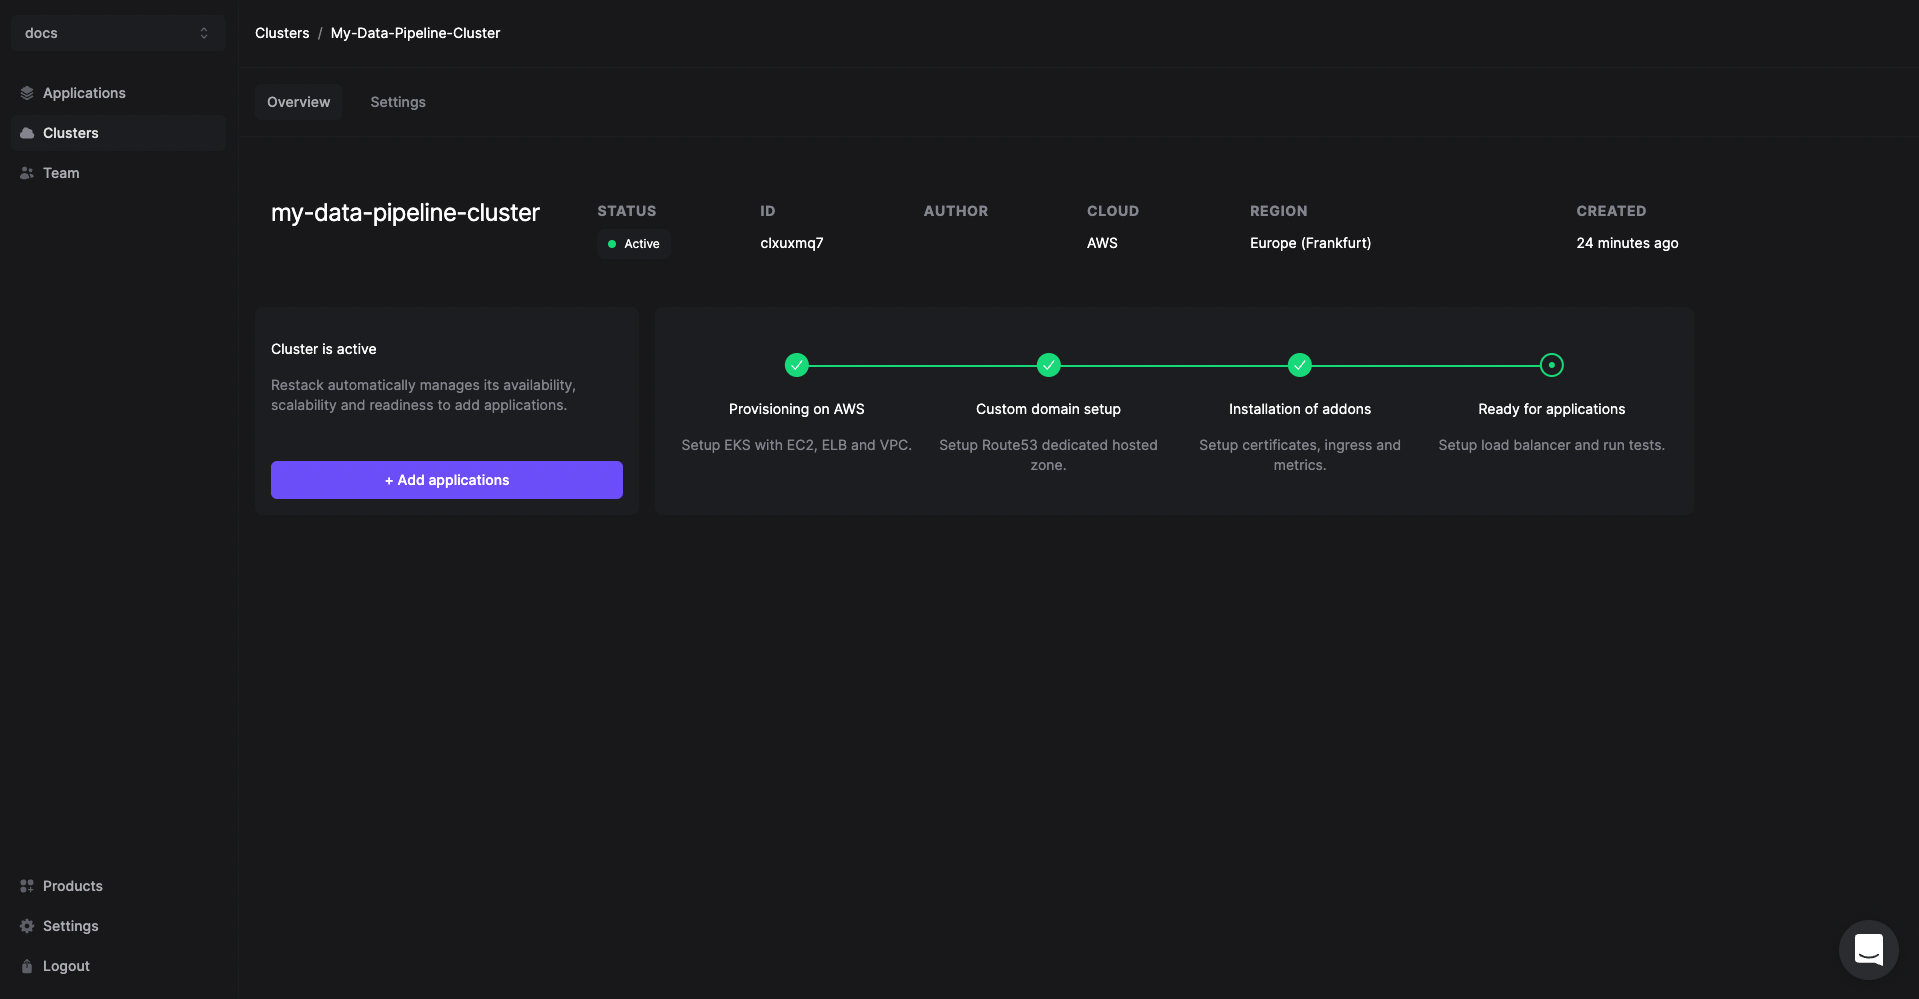
The cluster creation process will start automatically. Once the cluster is ready, you will receive an email with the confirmation.
Creating a cluster is a one-time process. From here you can add other open source tools or multiple instances of Kestra in the same cluster.
Deploy Kestra on Restack
- Click Add application from the Cluster description or go to the Applications tab in the left hand side navigation.
- Click Kestra.
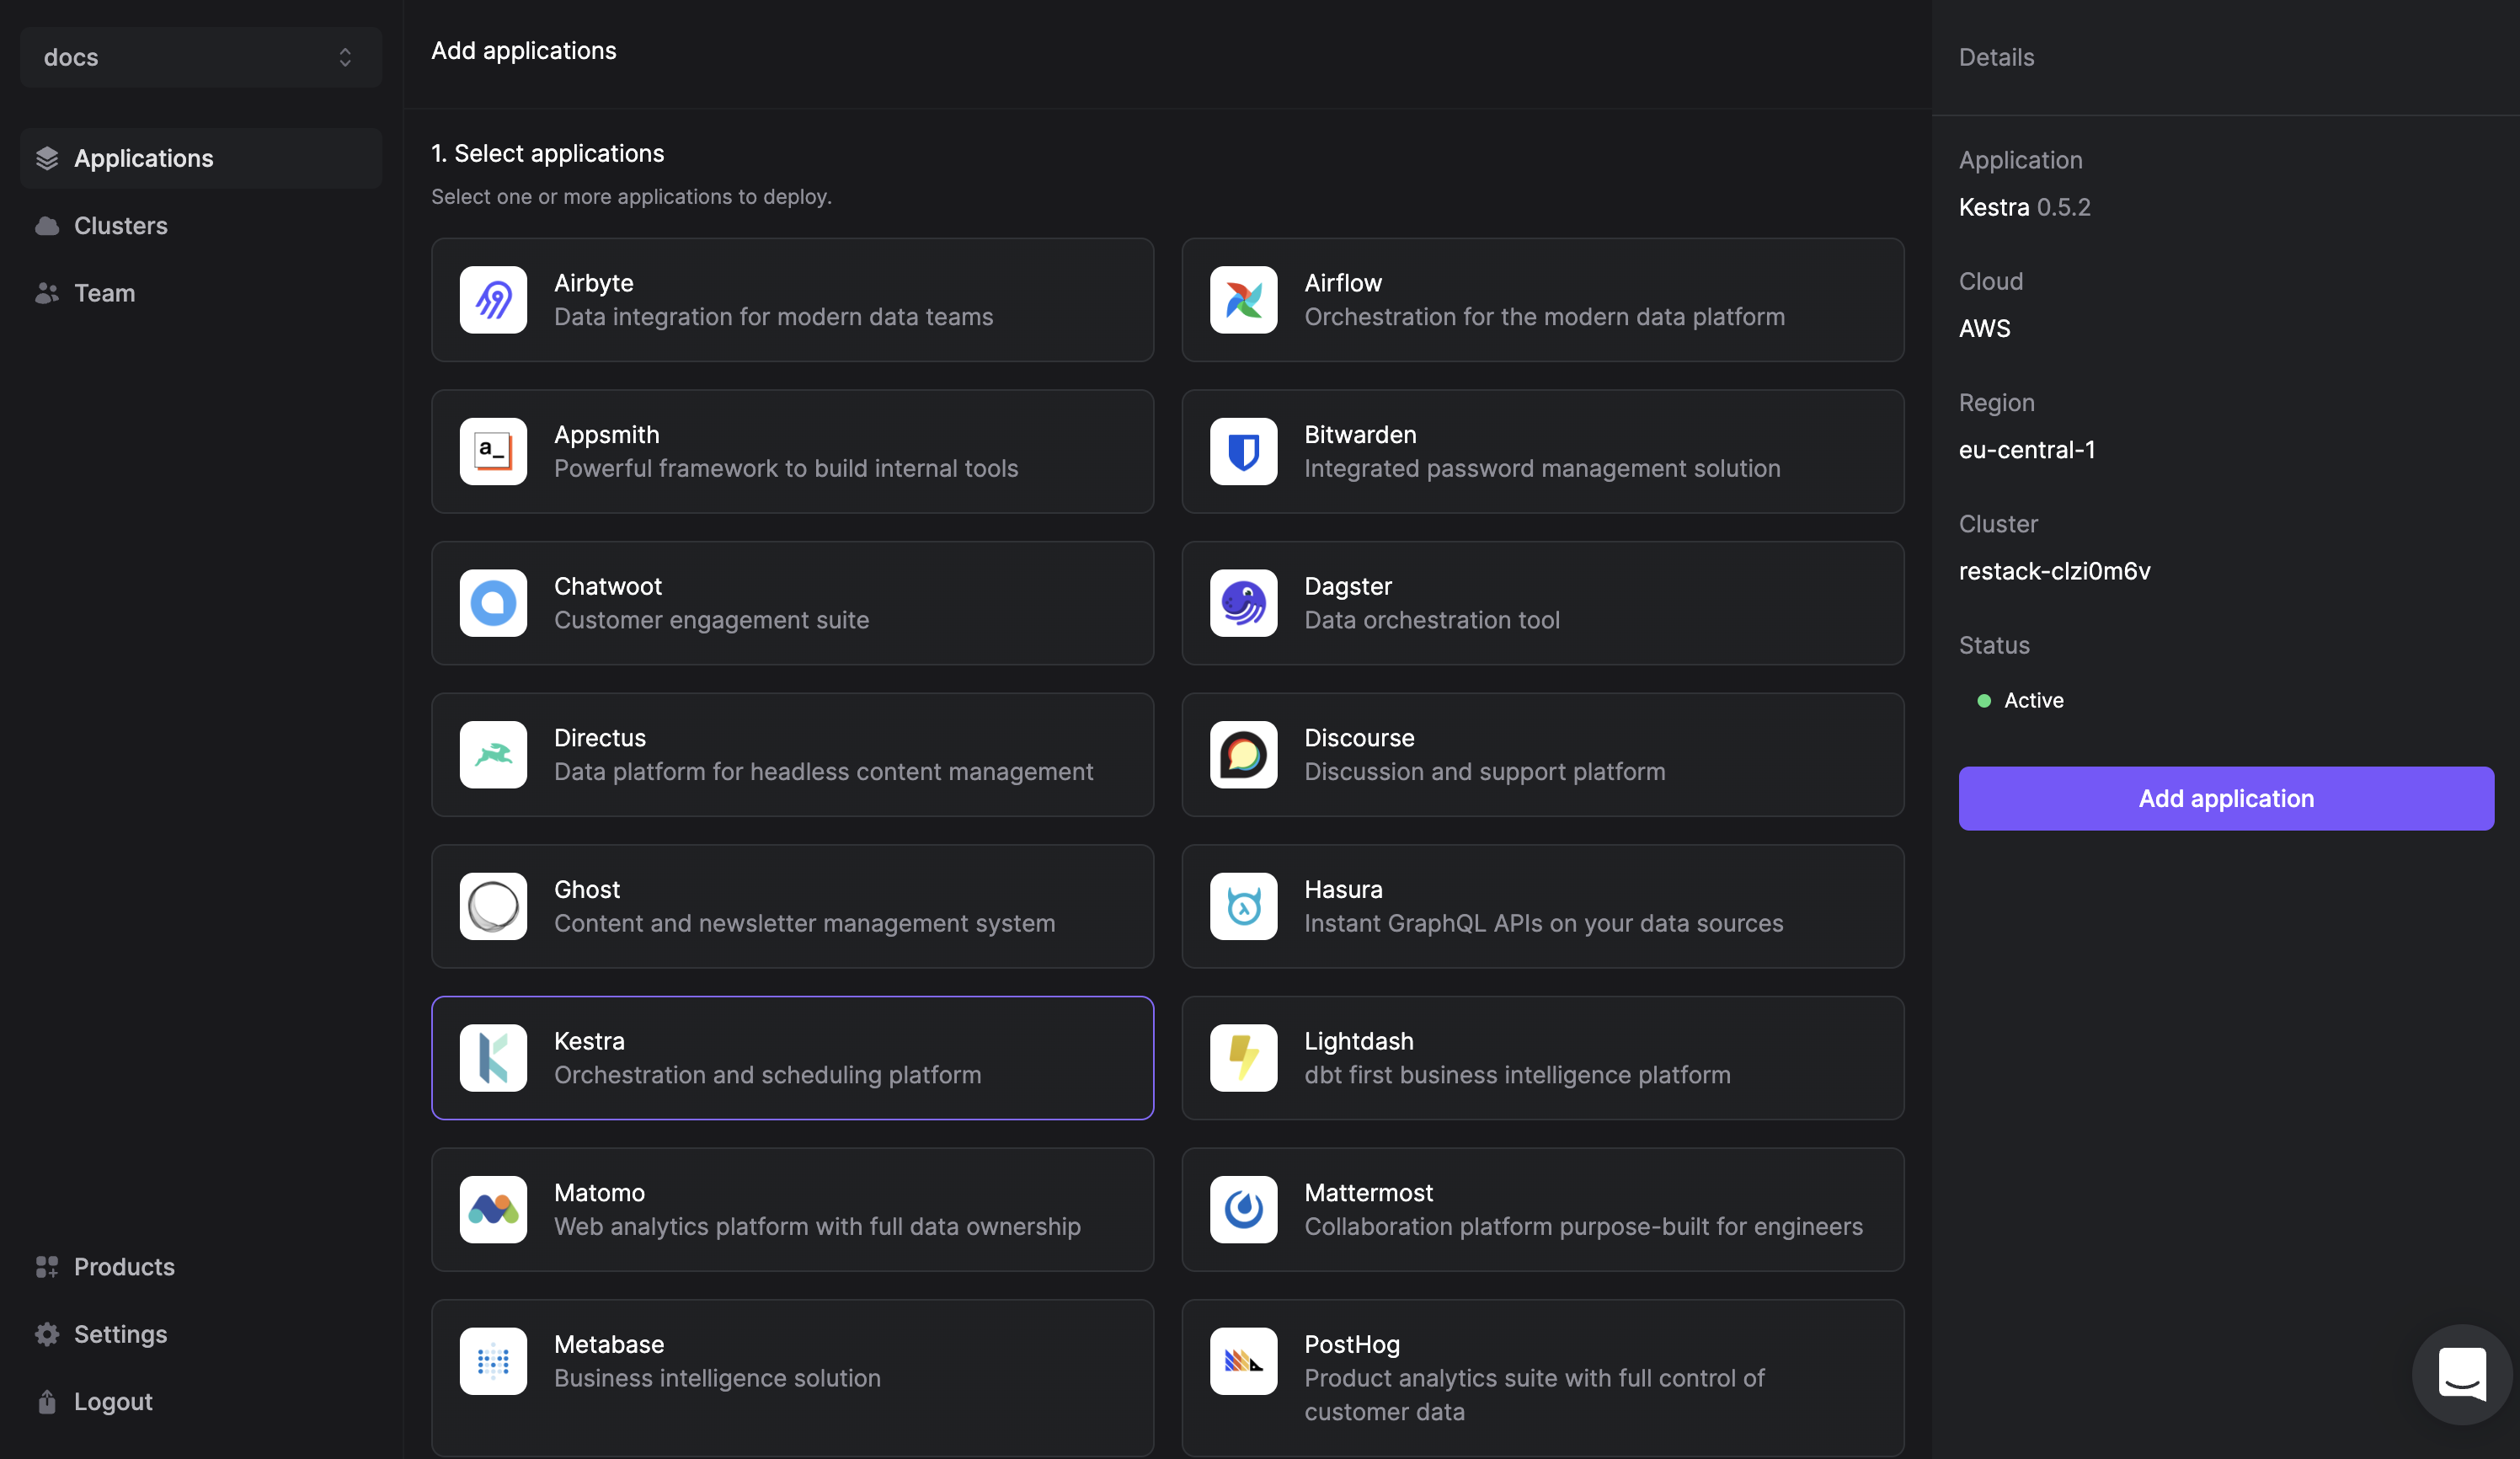
- Select the cluster you have already provisioned.
- Click Add application.
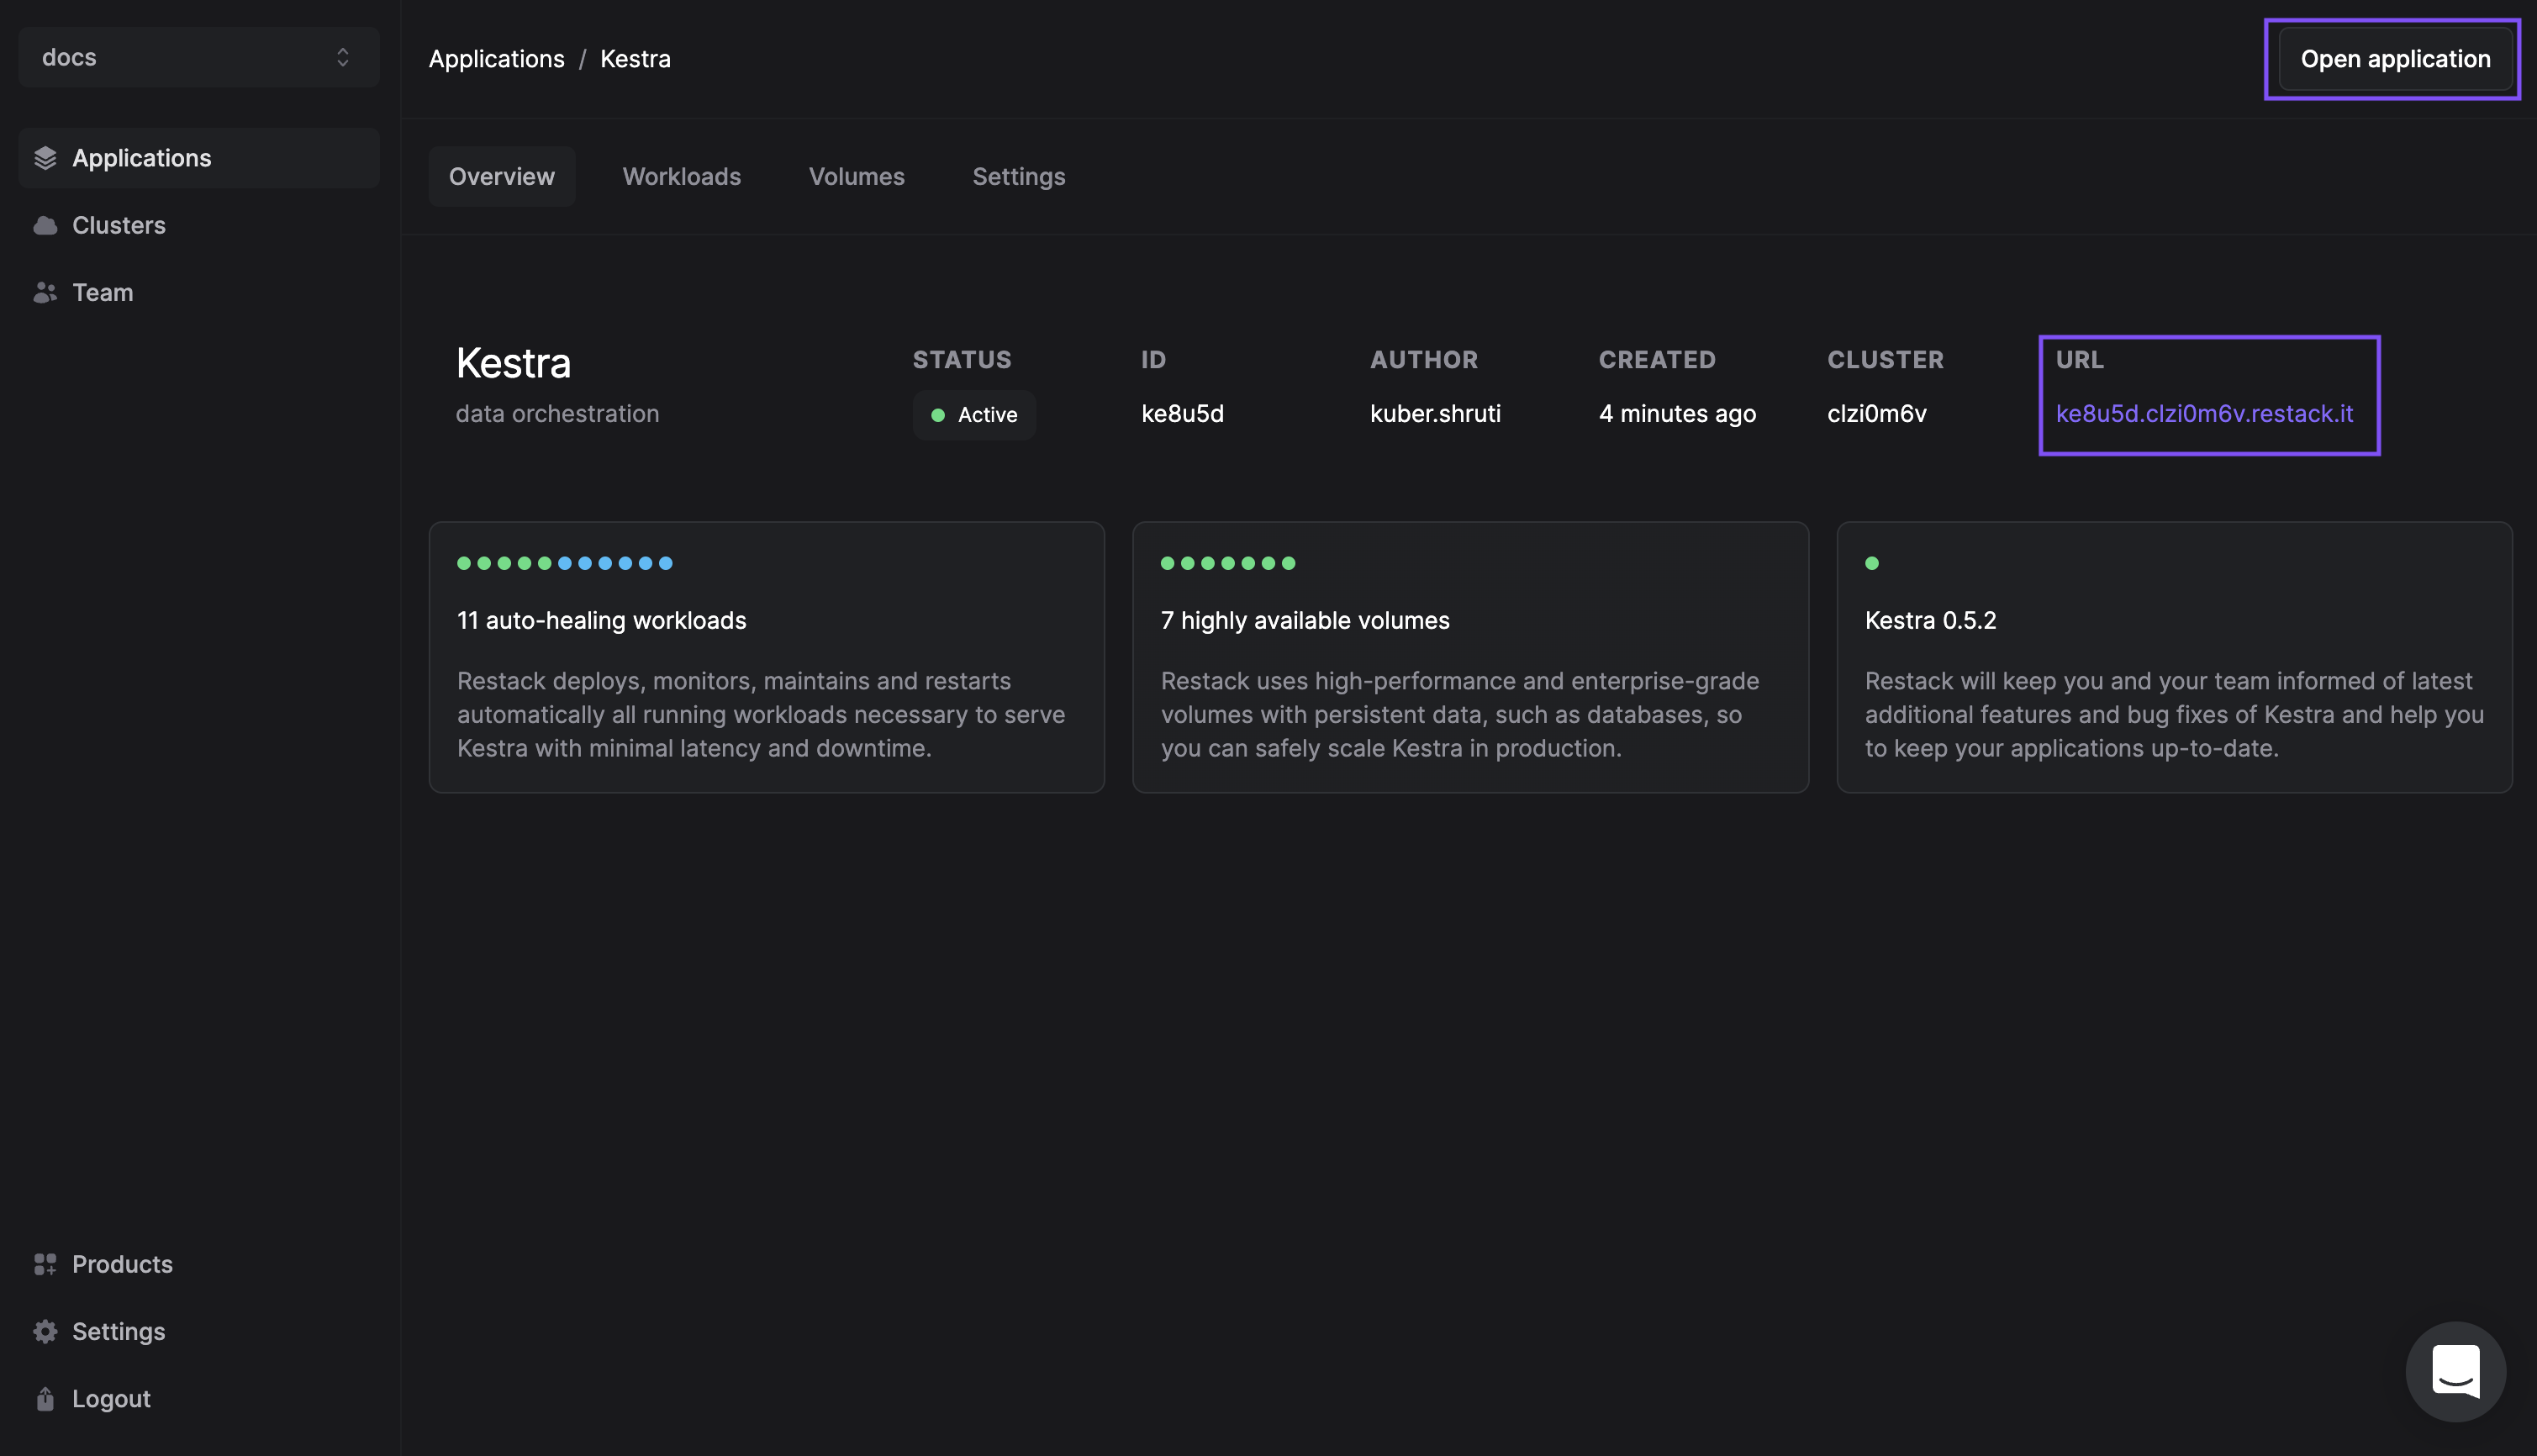
Start using Kestra
Kestra will be deployed on your cluster and you can access it using the link under the URL tab.
Deploy your Kestra image
Activate Restack CI/CD previews under Stack > Settings to deploy a custom Kestra image by connecting your GitHub repository.
With CI/CD preview activated, every time you make a pull request to your GitHub repo, Restack takes every file and deploys them to your cloud.
For every pull request, Restack provides you with a URL with a preview environment, allowing you to review the pull request. Once you merge your pull request, Restack flushes the preview environments and builds the deployed code from the repository into your production environment.
The following Kestra Restack repository can help you get started.
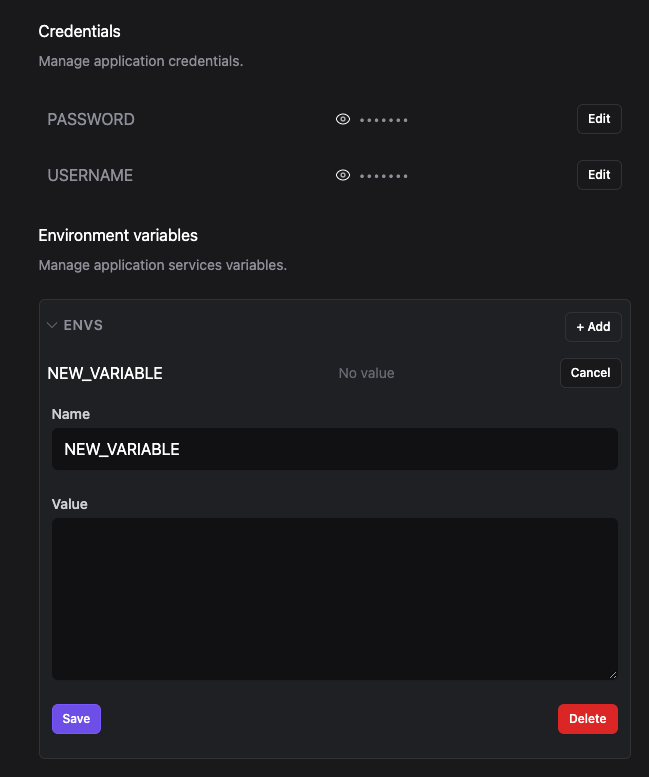
Manage secrets and environment variables
You can edit Kestra secrets and environment variables directly in the Restack UI.
On the Restack UI, click on Stacks, then on your application, and then on Settings. From there, you will be able to add, modify, or delete your secrets and environment variables.
When adding a new environment variable, consider the following:
First, add an environment key and value in lowercase with no hyphens or underscores in the Restack UI. Here is an example:
Key: openai
Value: my openai key
Then, in the Kestra Flow, you can use globals to get the value. Following the previous example, you can use the following syntax:
{{ globals.openai }}
For more information about global environment variables, check the following documentation page.
Was this page helpful?