React to Events Instantly with Realtime Triggers
For the complete documentation index, see llms.txt. For a full content snapshot, see llms-full.txt. Append.mdto anykestra.io/docs/*URL for plain Markdown.
How to React to events as they happen with millisecond latency.
As soon as you add a Realtime Trigger to your workflow, Kestra starts an always-on thread that listens to the external system for new events. When a new event occurs, Kestra starts a workflow execution to process the event.
The following examples show how to implement Realtime Triggers for common messaging systems.
Apache Kafka
To setup Apache Kafka locally, follow the instructions mentioned in the official documentation. Once Apache Kafka is installed, you can create the logs topic, and start producing data into the topic using the following commands:
## Create topic$ bin/kafka-topics.sh --create --topic logs --bootstrap-server localhost:9092
## Produce data into Kafka topic$ bin/kafka-console-producer.sh --topic logs --bootstrap-server localhost:9092> Hello World
You can use the Apache Kafka RealtimeTrigger in the Kestra flow as follows:
id: kafkanamespace: company.team
tasks:  - id: log    type: io.kestra.plugin.core.log.Log    message: "{{ trigger.value }}"
triggers:  - id: realtime_trigger    type: io.kestra.plugin.kafka.RealtimeTrigger    topic: logs    properties:      bootstrap.servers: localhost:9092    serdeProperties:      valueDeserializer: STRING    groupId: kestraConsumerGroup
When any message is pushed into the logs Kafka topic, this flow will get triggered immediately.
Apache Pulsar
To setup Apache Pulsar locally, you can install the standalone cluster or docker cluster for Apache Pulsar. For docker cluster, you can run the pulsar-admin commands from the Apache Pulsar docker container.
You can run the following commands to create the topic, and produce data to the topic:
- Setup a tenant
bin/pulsar-admin tenants create apache
- Create a namespace
bin/pulsar-admin namespaces create apache/pulsar
- Create a topic
bin/pulsar-admin topics create-partitioned-topic apache/pulsar/logs -p 4
- Produce data to topic
bin/pulsar-client produce apache/pulsar/logs -m '--Hello World--' -n 1
You can use the Apache Pulsar RealtimeTrigger in the Kestra flow as follows:
id: pulsarnamespace: company.team
tasks:  - id: log    type: io.kestra.plugin.core.log.Log    message: "{{ trigger.value }}"
triggers:  - id: realtime_trigger    type: io.kestra.plugin.pulsar.RealtimeTrigger    topic: apache/pulsar/logs    uri: pulsar://localhost:26650    subscriptionName: kestra_trigger_sub
When any message is pushed into the apache/pulsar/logs Pulsar topic, this flow will get triggered immediately.
AWS SQS
We will first create the SQS queue from the AWS Console. You can also AWS CLI for this purpose. This is how you can create the AWS SQS from the console:
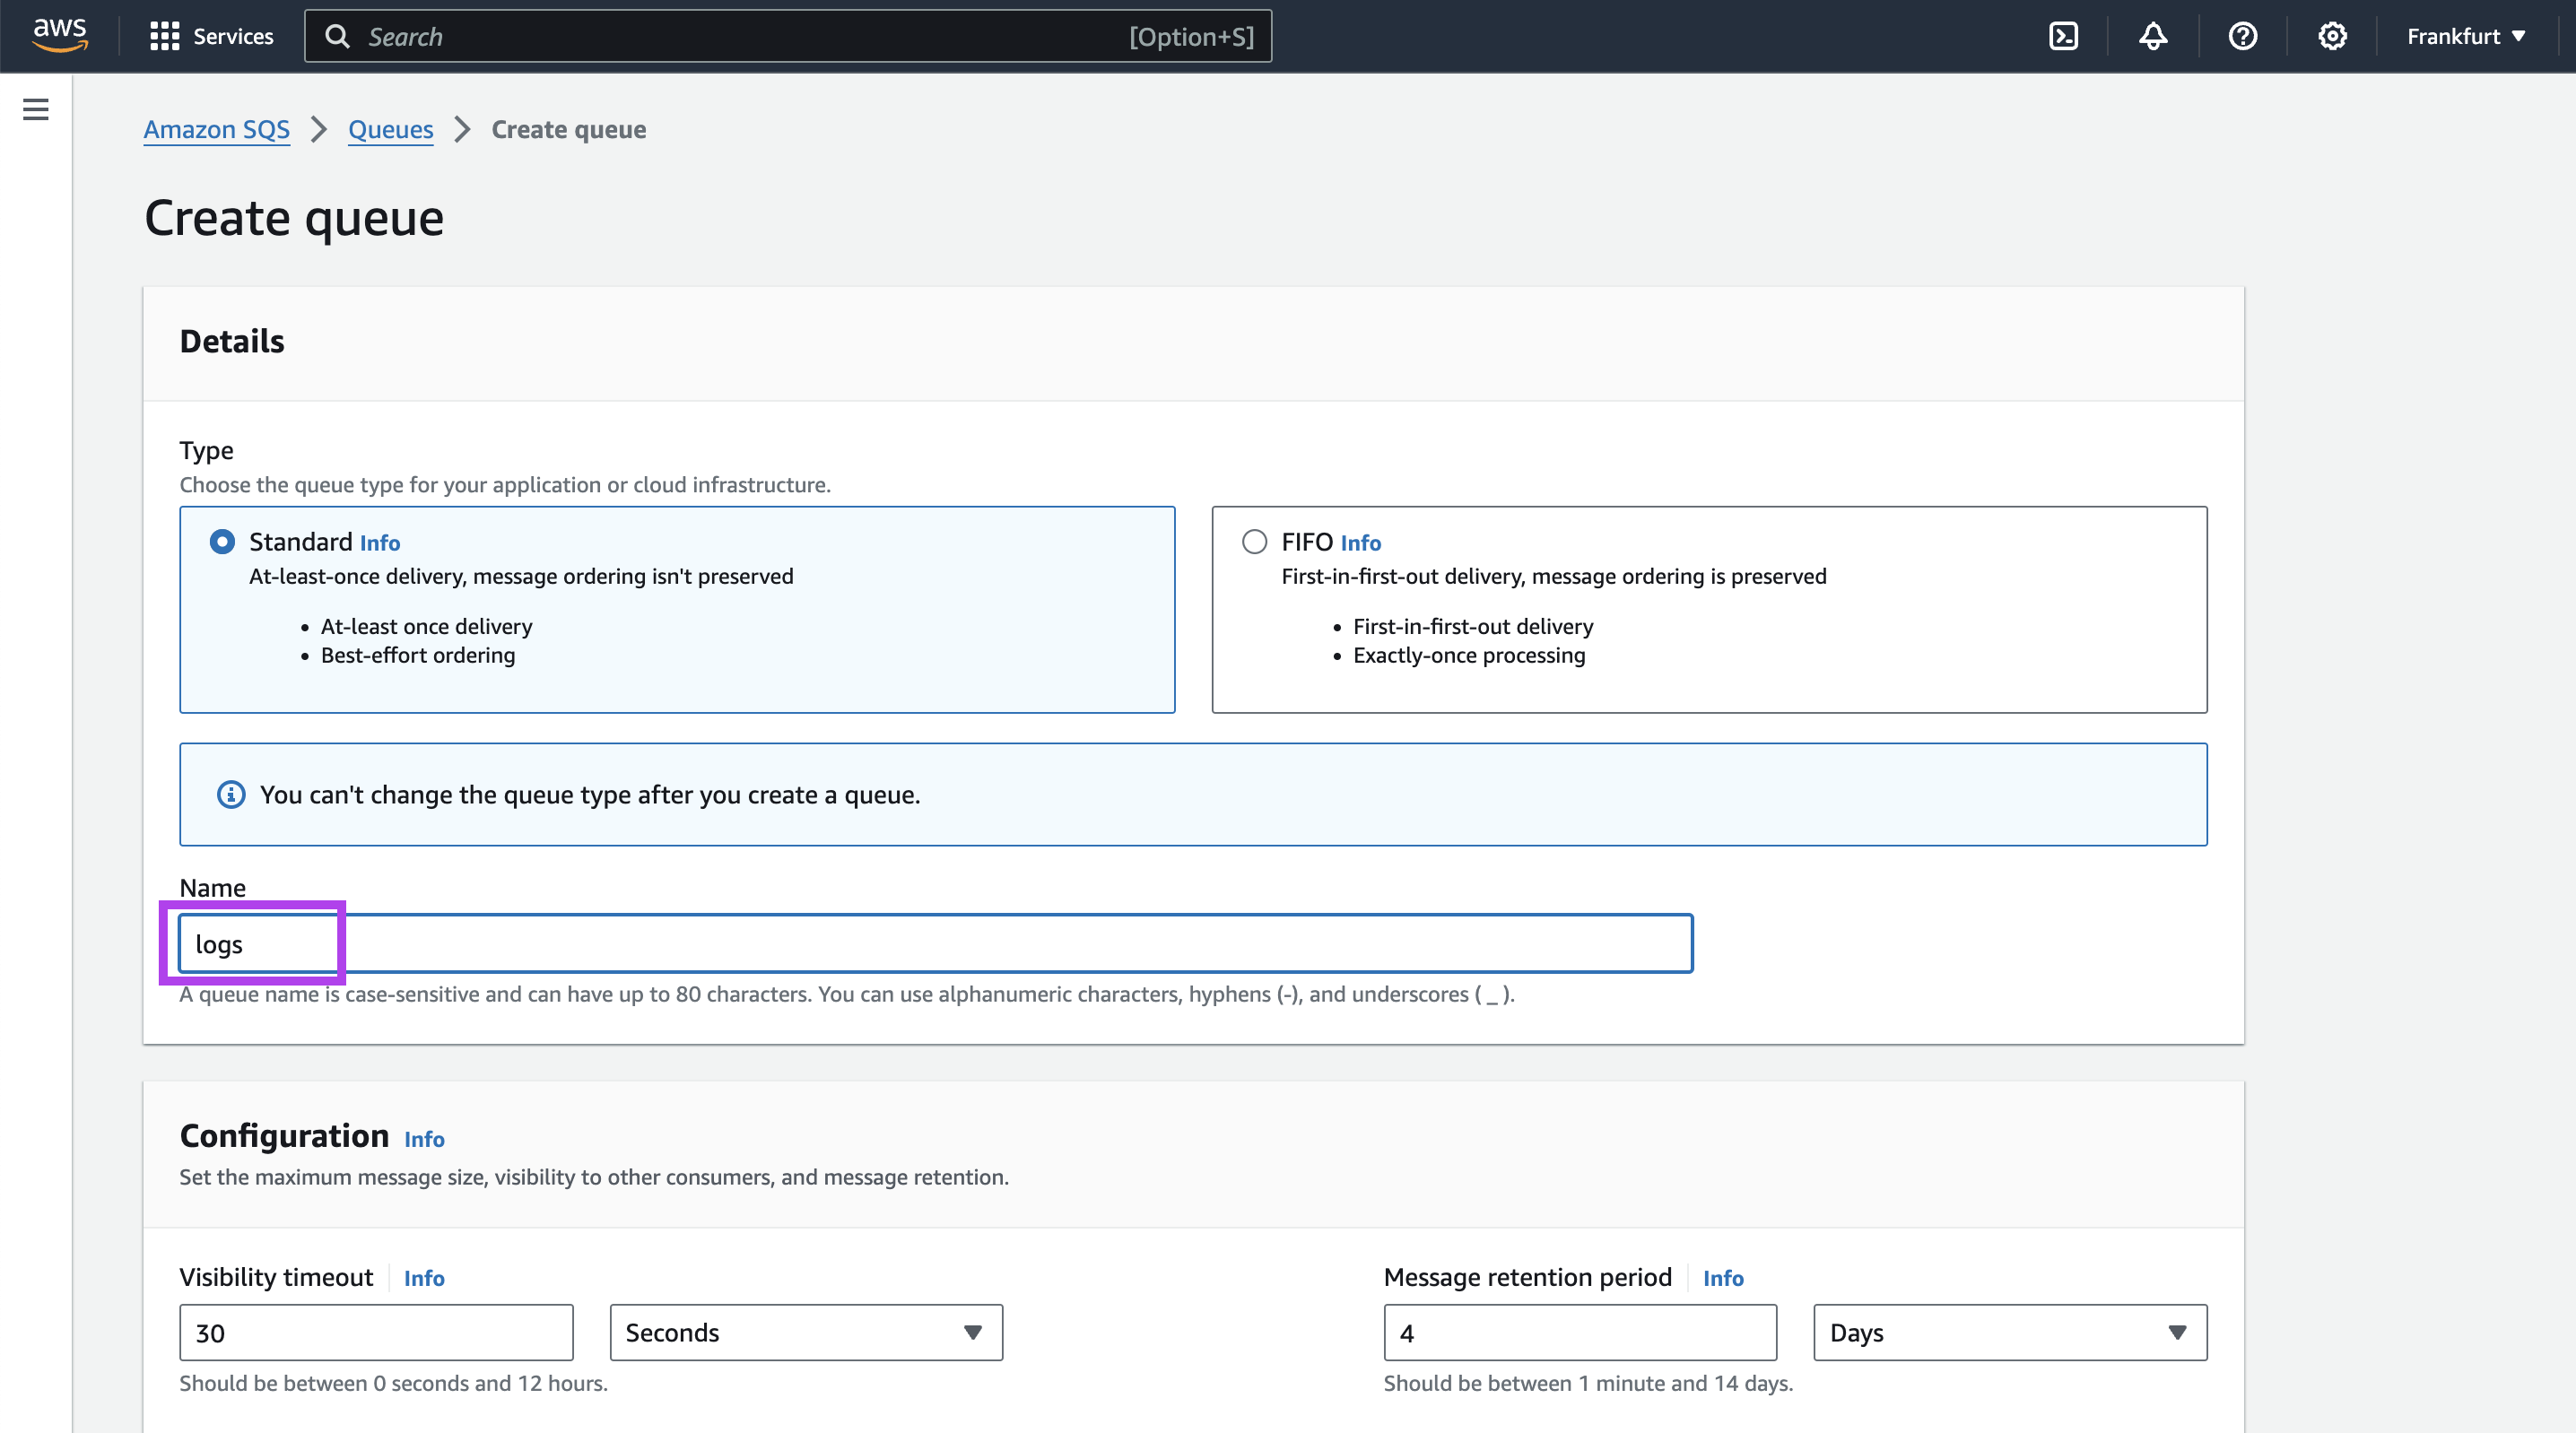
You only need to put in the Queue name. Rest all the configuration can be kept as is, and click on “Create Queue” at the bottom of the page.
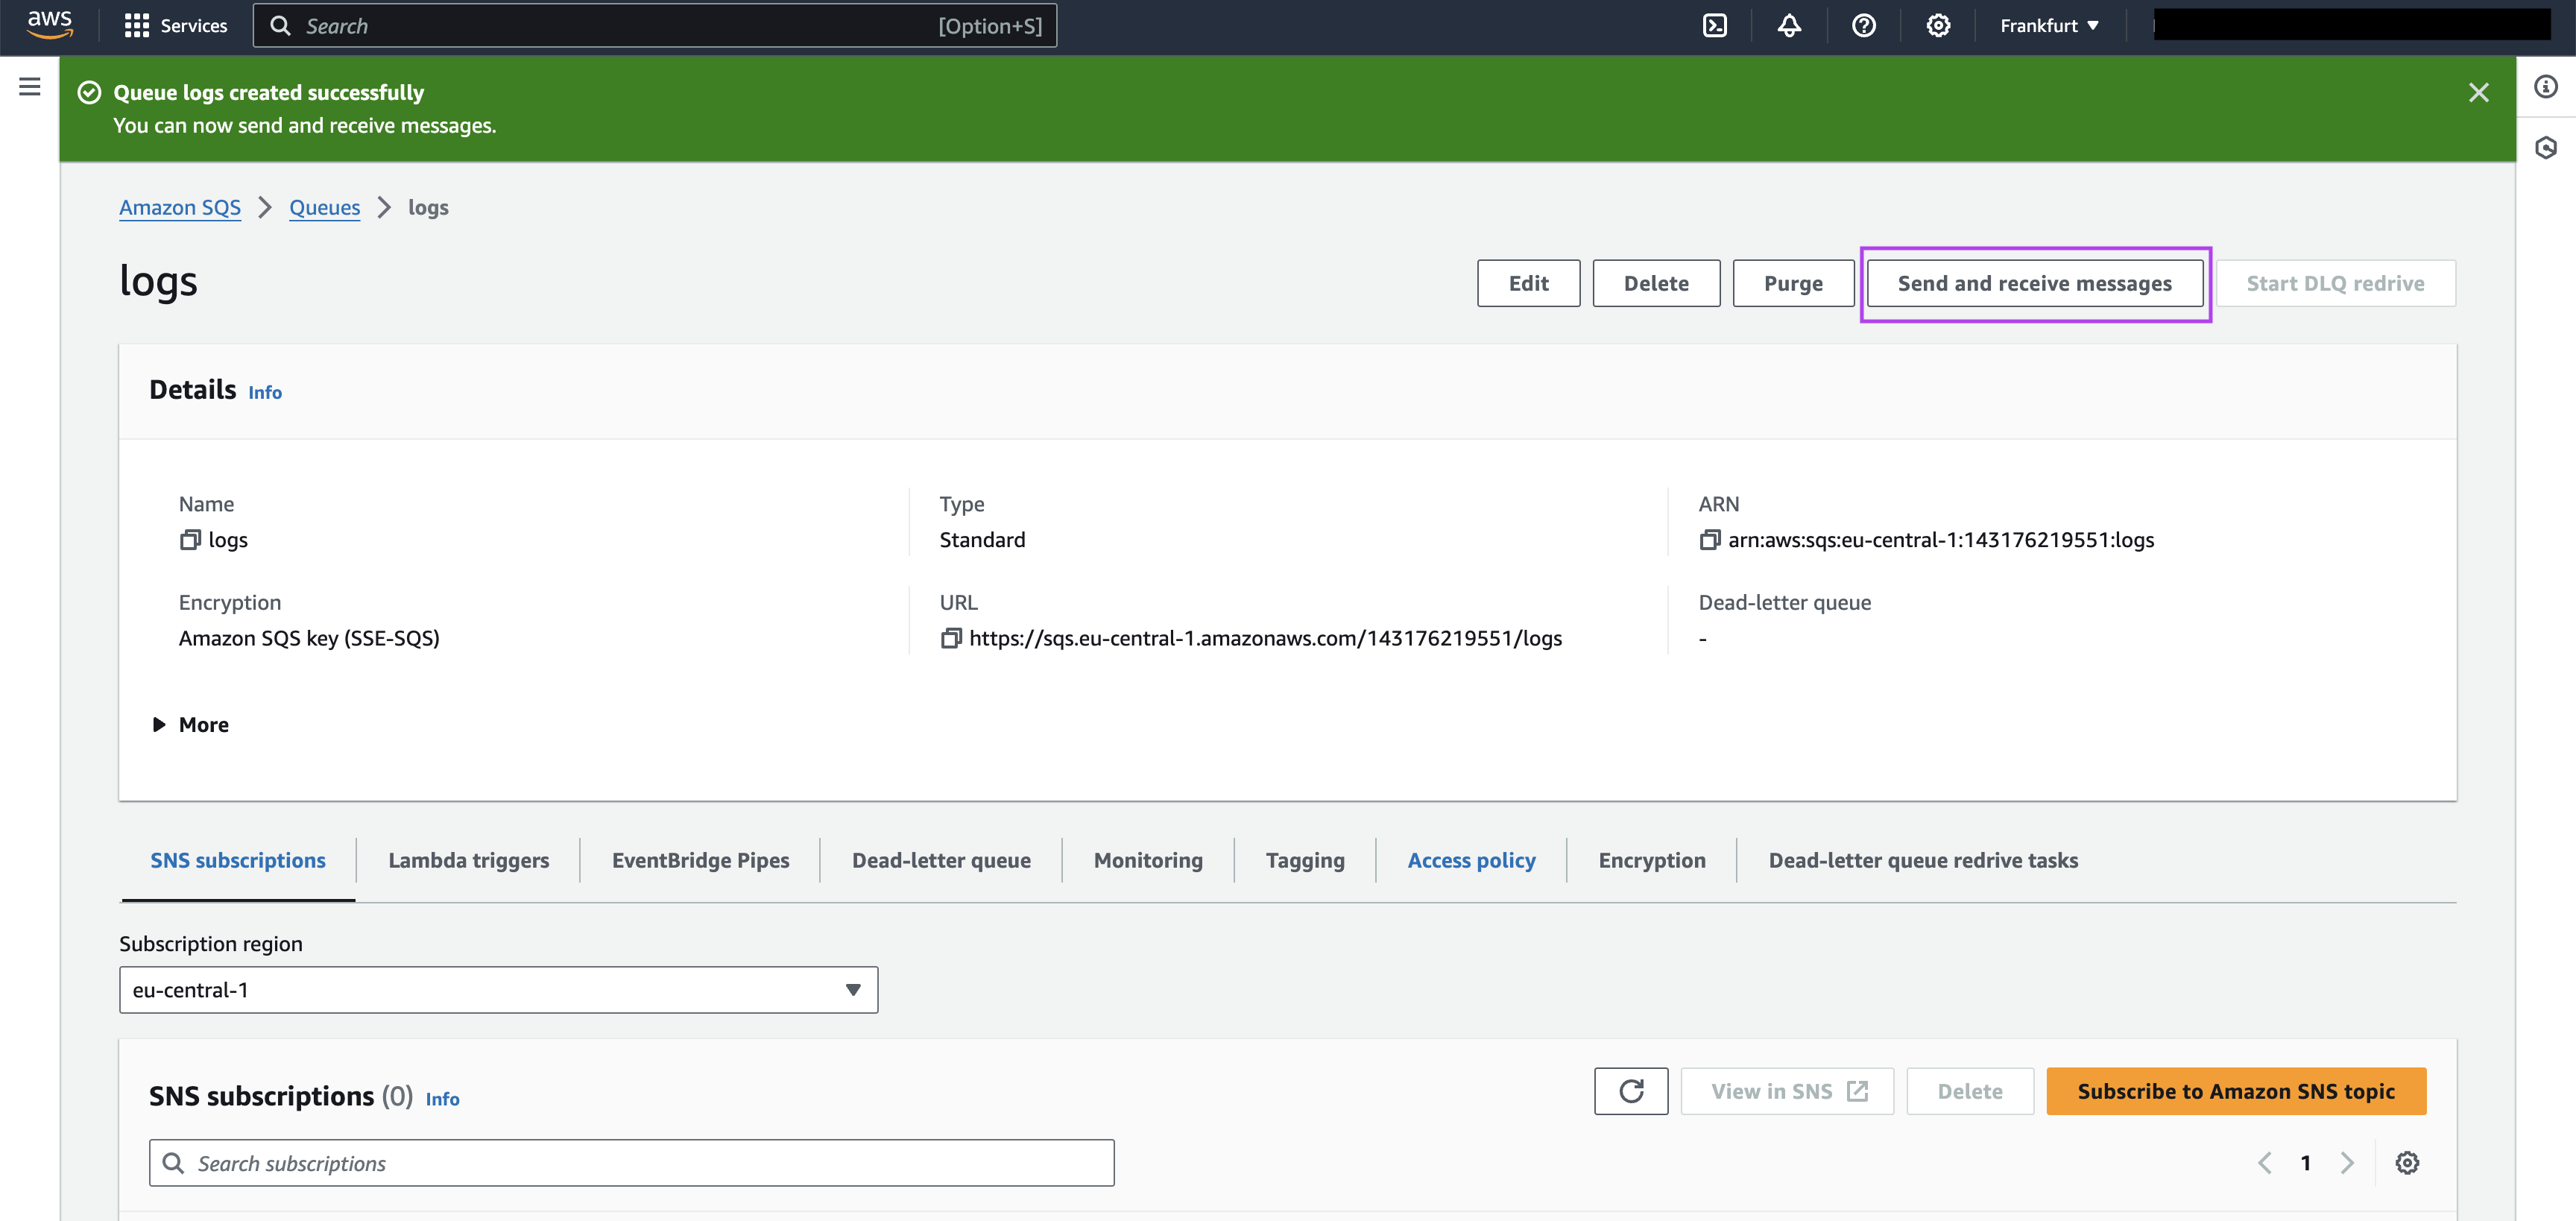
You can now send messages to this queue by clicking on “Send and receive messages” button on the top of the page.
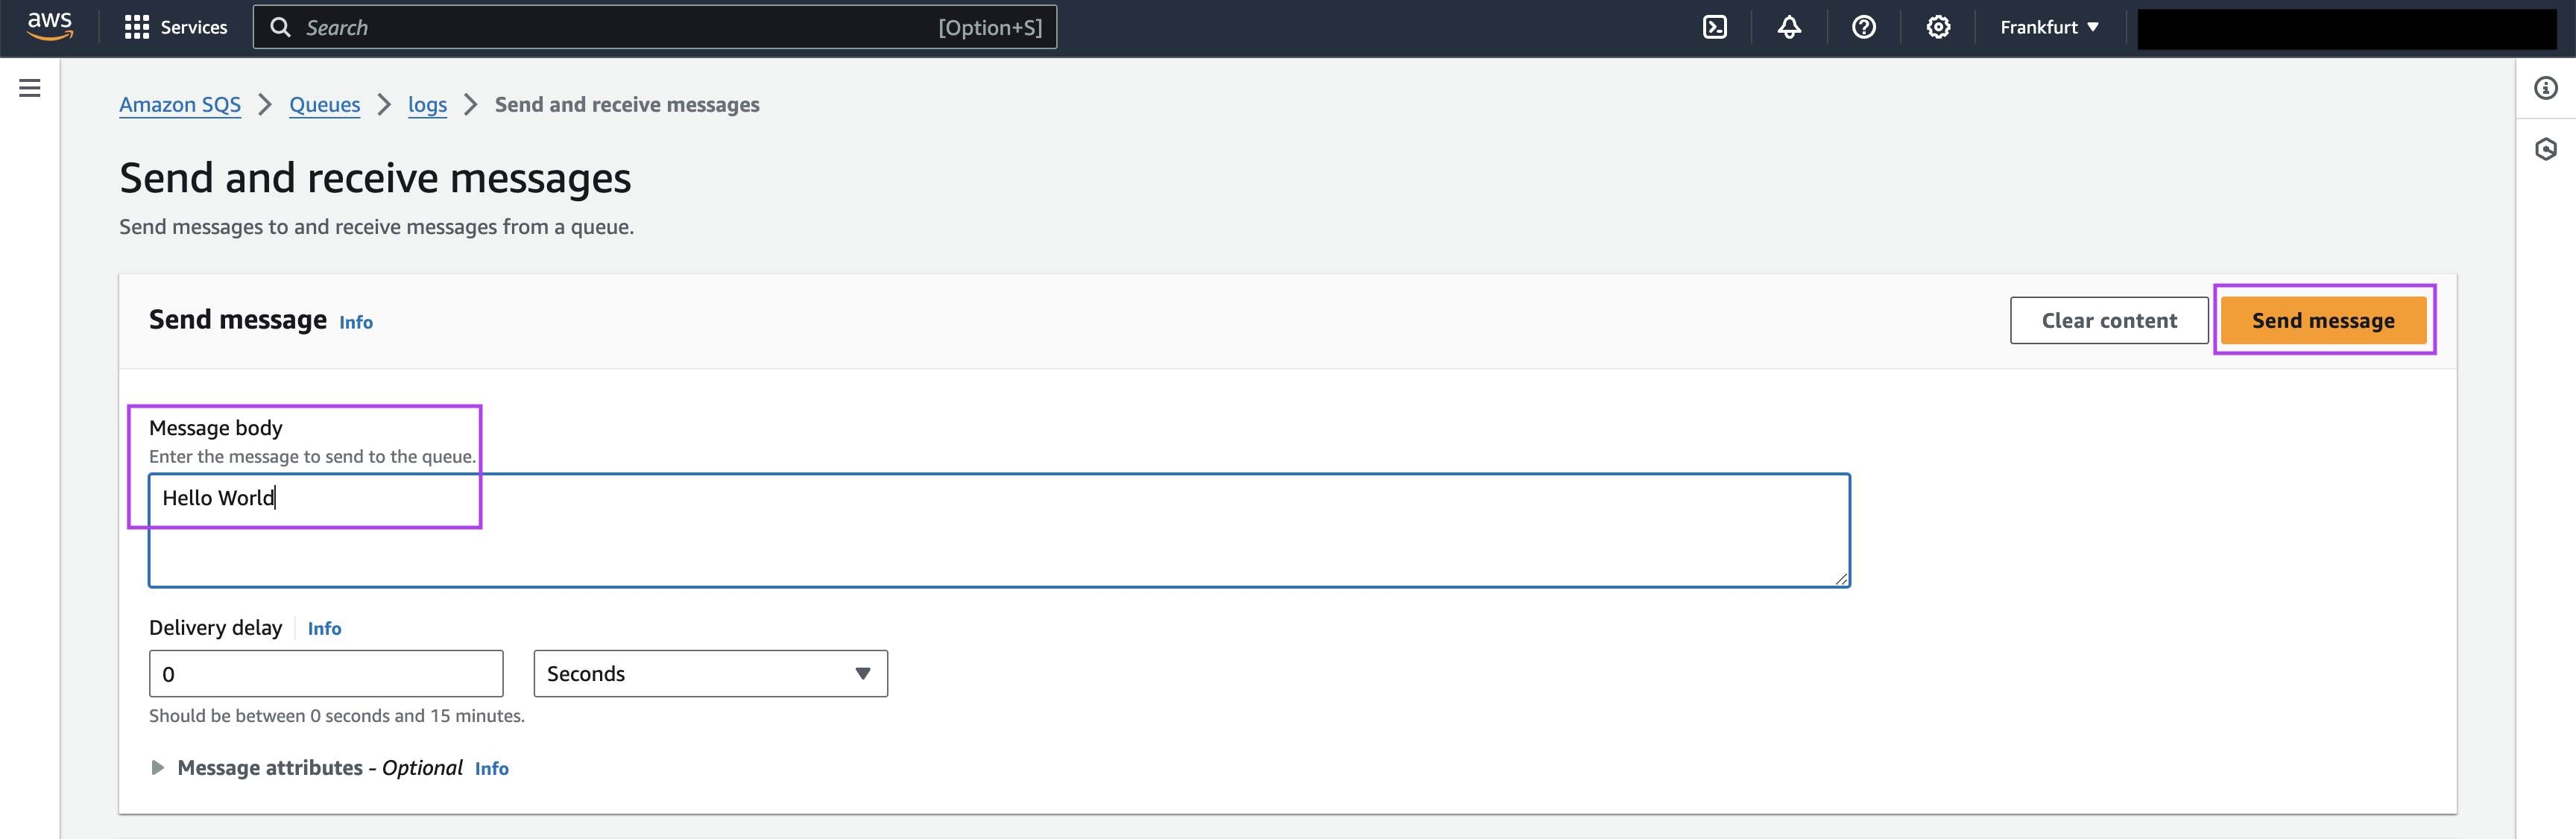
On the Send and Receive messages page, you can put the Message body under the Send message section, and click on the “Send message” button to send the message to the queue.
You can use the AWS SQS RealtimeTrigger in the Kestra flow as follows:
id: aws-sqsnamespace: company.team
tasks:  - id: log    type: io.kestra.plugin.core.log.Log    message: "{{ trigger.data }}"
triggers:  - id: "realtime_trigger"    type: io.kestra.plugin.aws.sqs.RealtimeTrigger    accessKeyId: "{{ secret('AWS_ACCESS_KEY_ID') }}"    secretKeyId: "{{ secret('AWS_SECRET_KEY_ID') }}"    region: "eu-central-1"    queueUrl: "https://sqs.eu-central-1.amazonaws.com/000000000000/logs"
When any message is pushed into the logs SQS queue, this flow will get triggered immediately.
GCP Pub/Sub
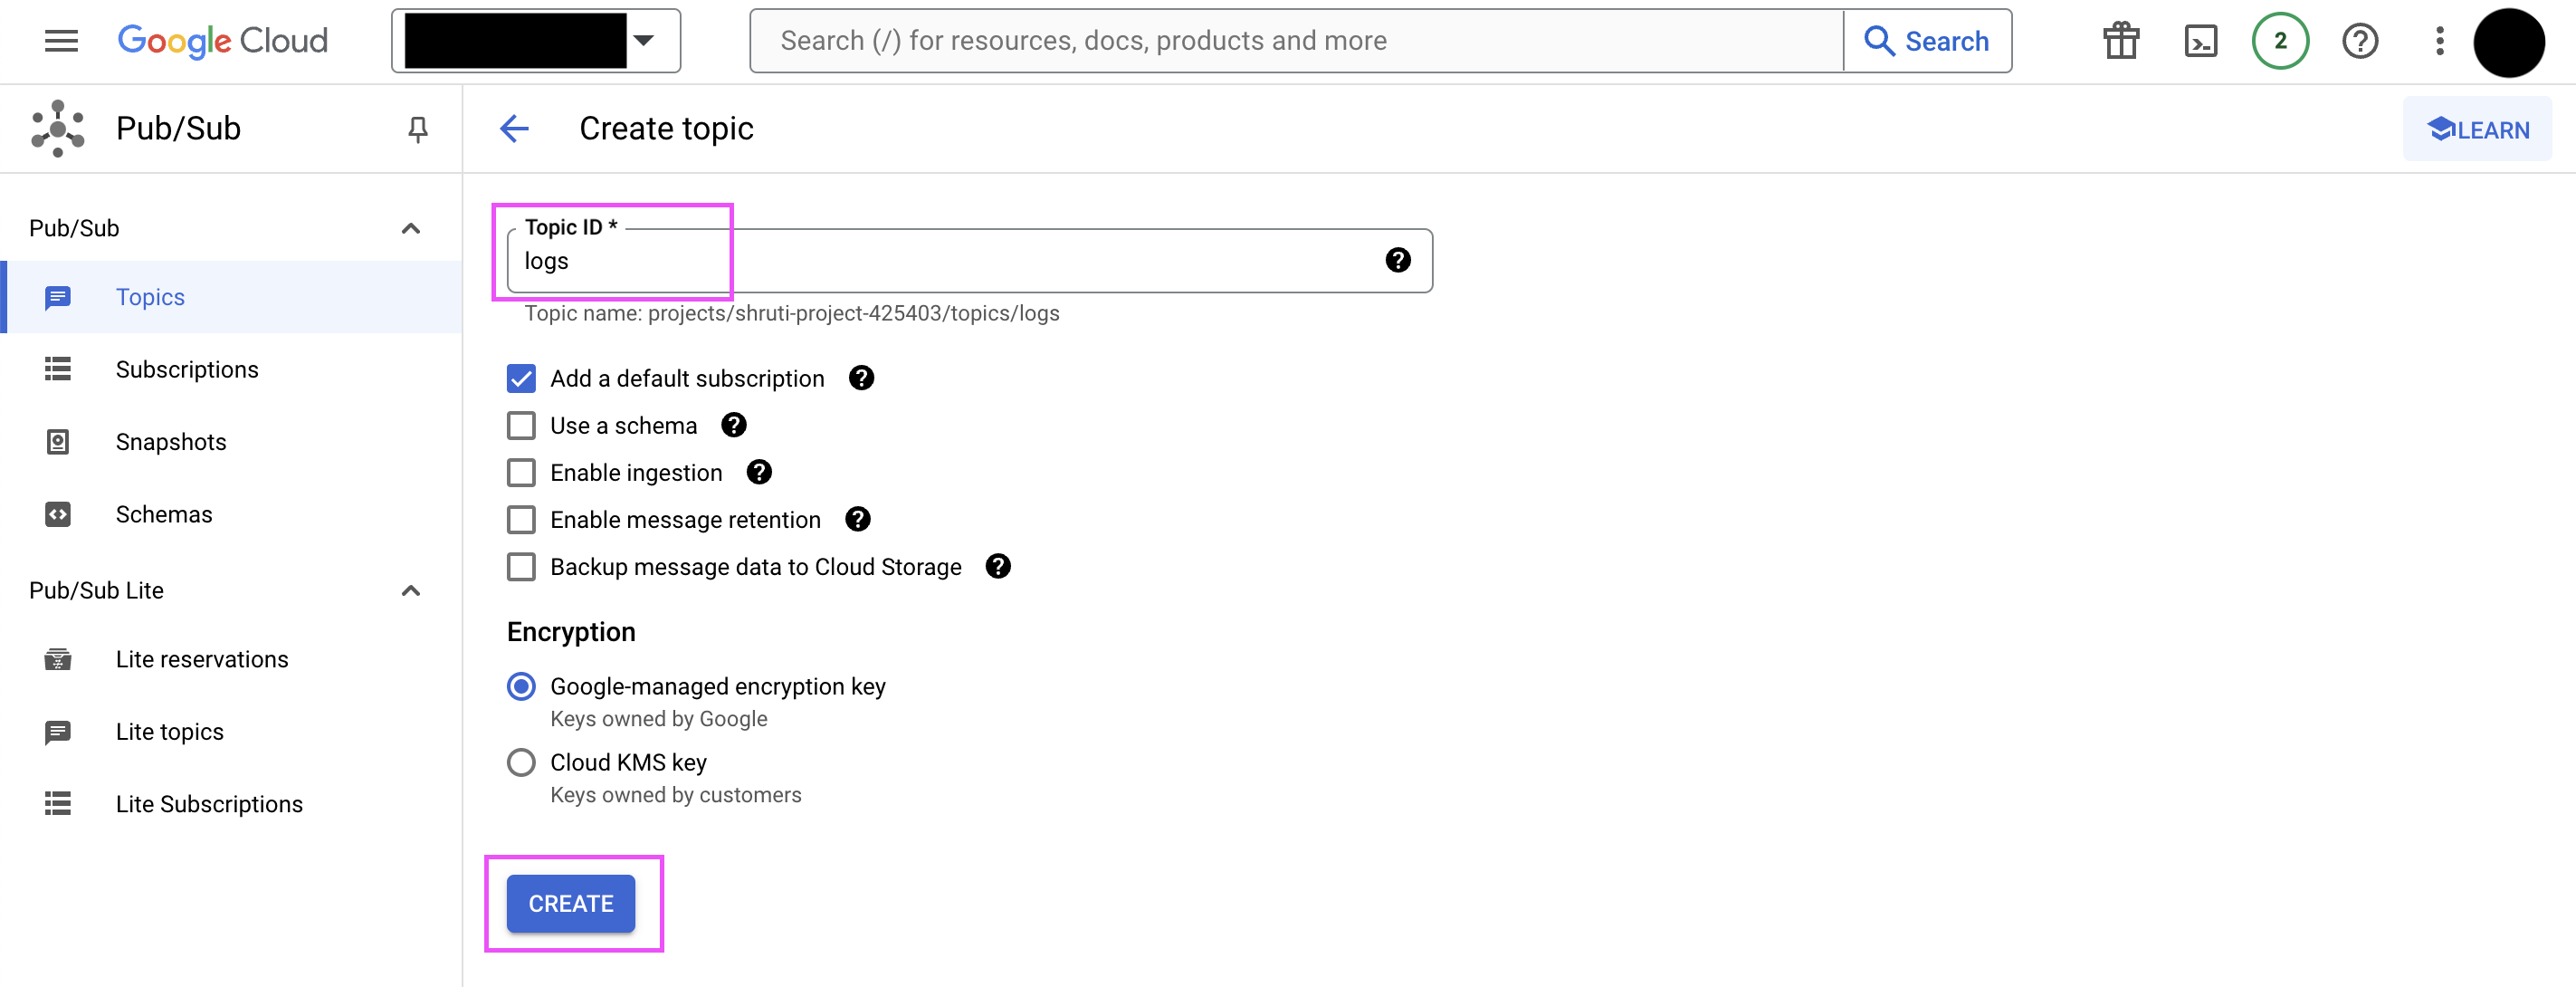
We will first create the Pub/Sub topic from the GCP console. For this, click on “Create topic” button on the GCP Pub/Sub console. On the Create topic page, put the topic name logs in the Topic ID text box, and leave the rest of the settings as default. Ensure the “Add a default subscription” checkbox is ticked. Click on “CREATE” button at the bottom. This will create the logs Pub/Sub topic with the default subscription logs-sub.
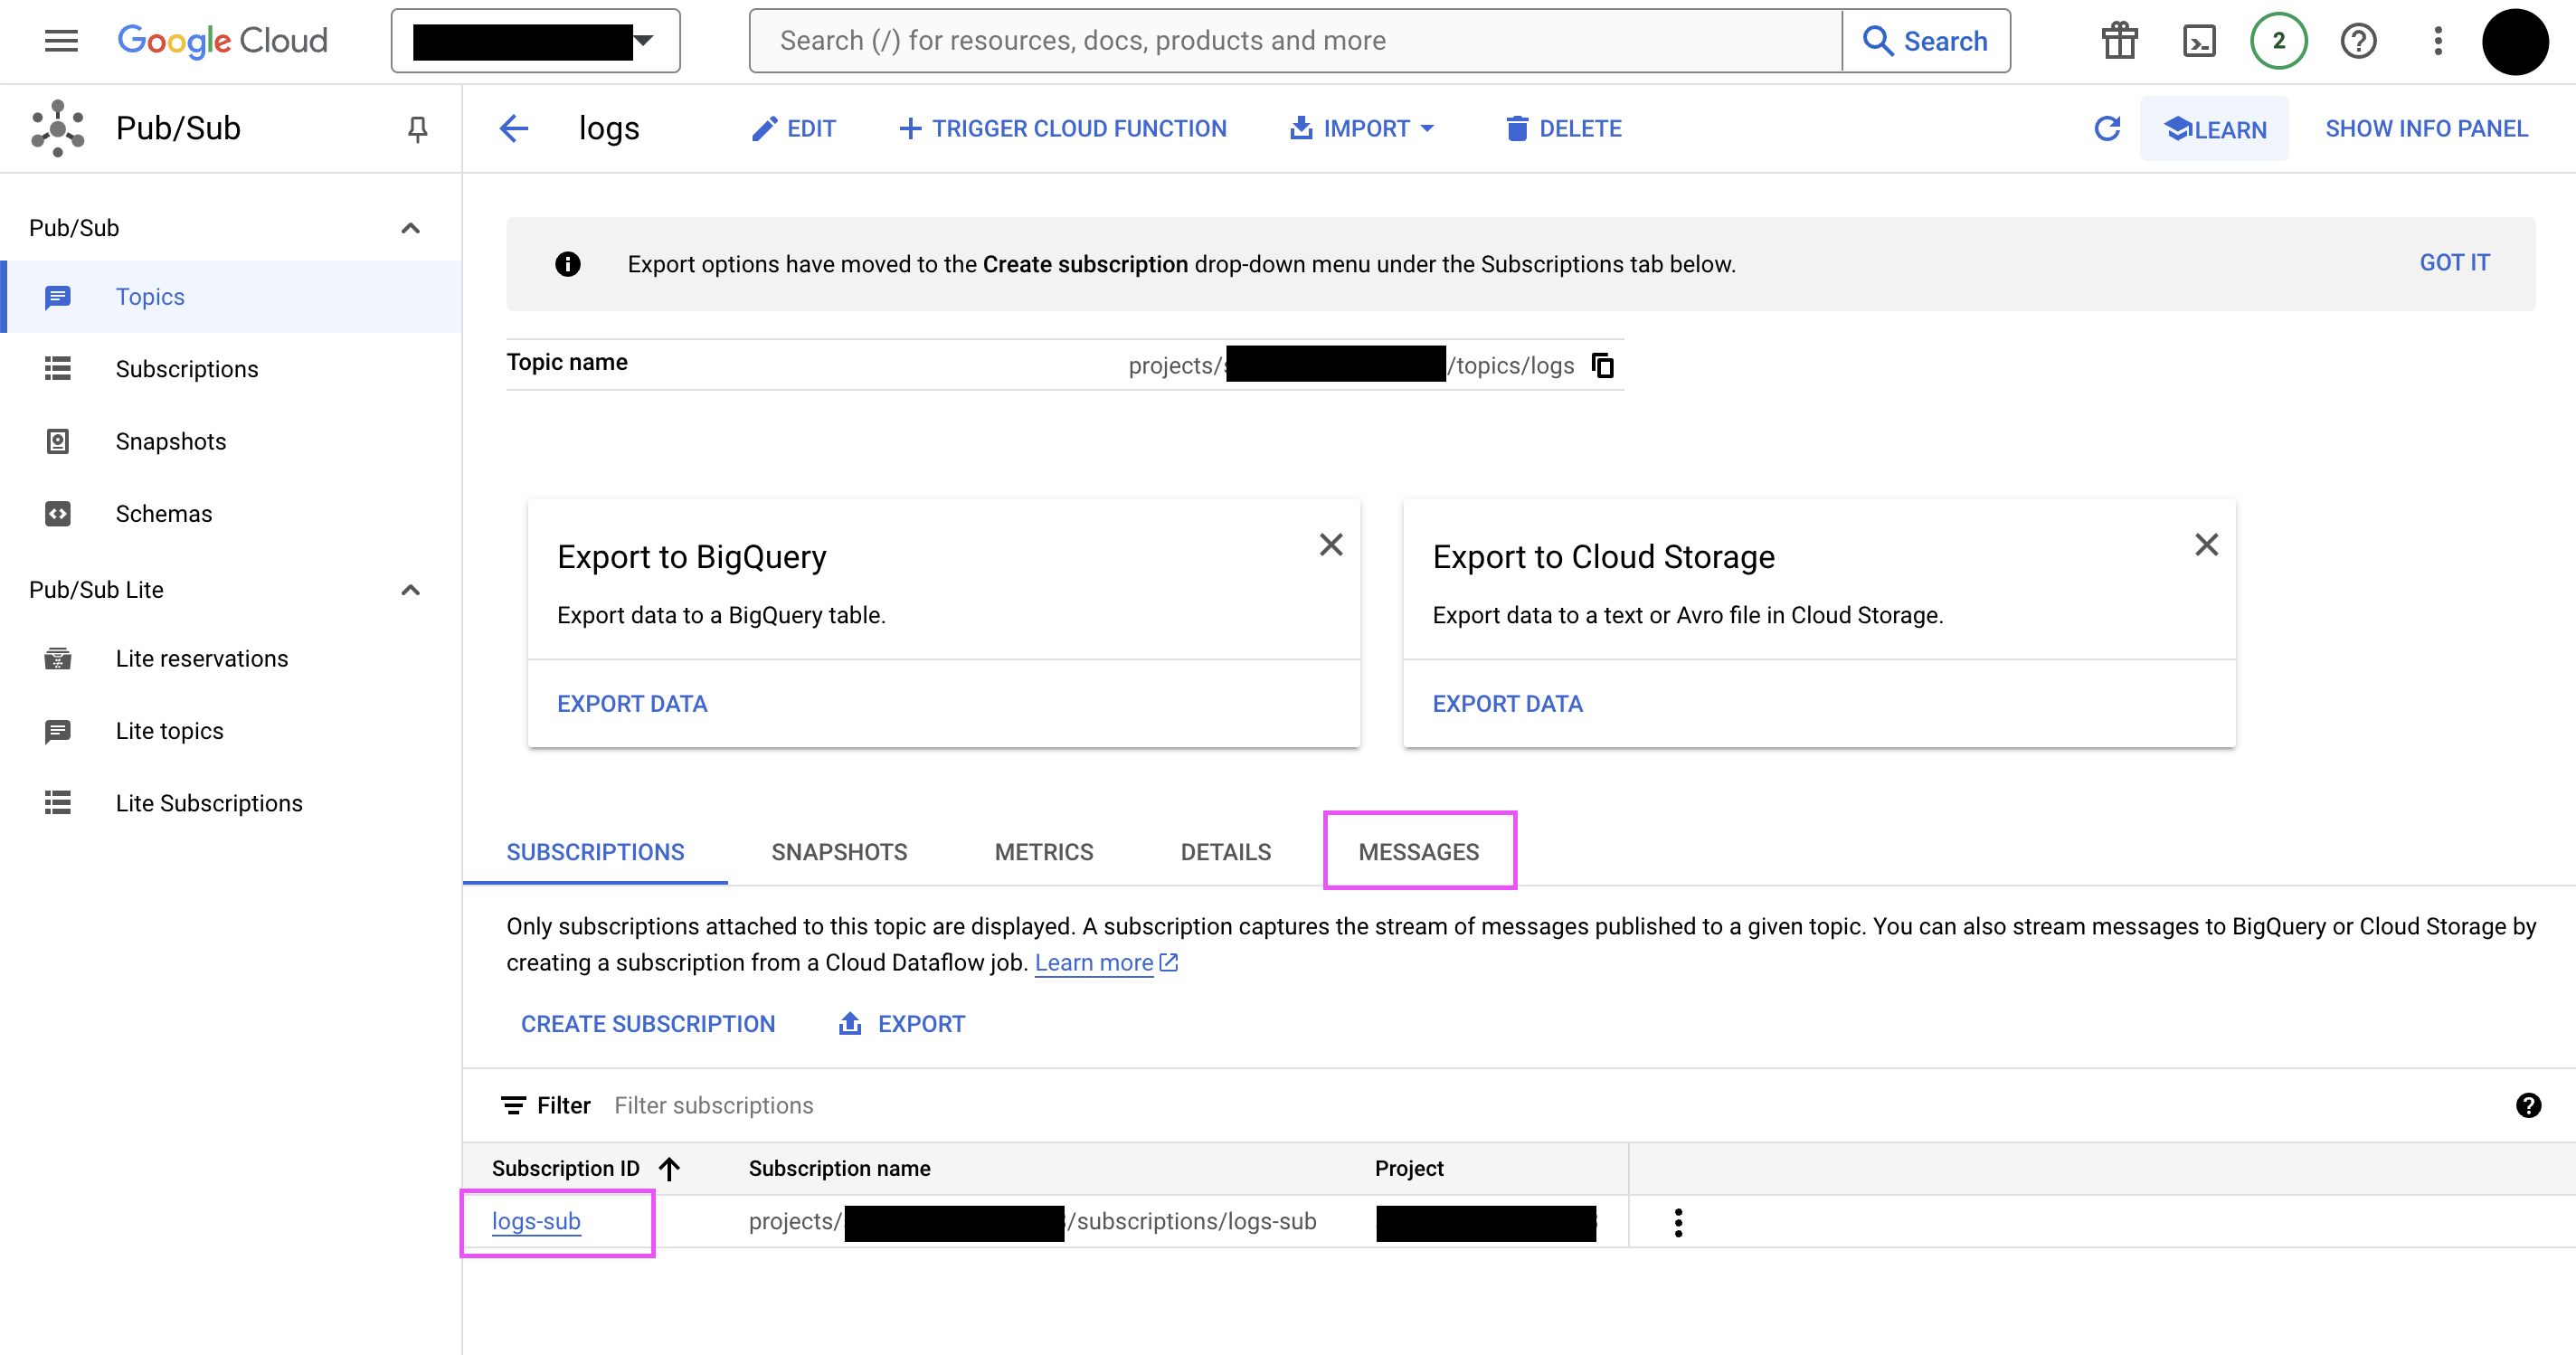
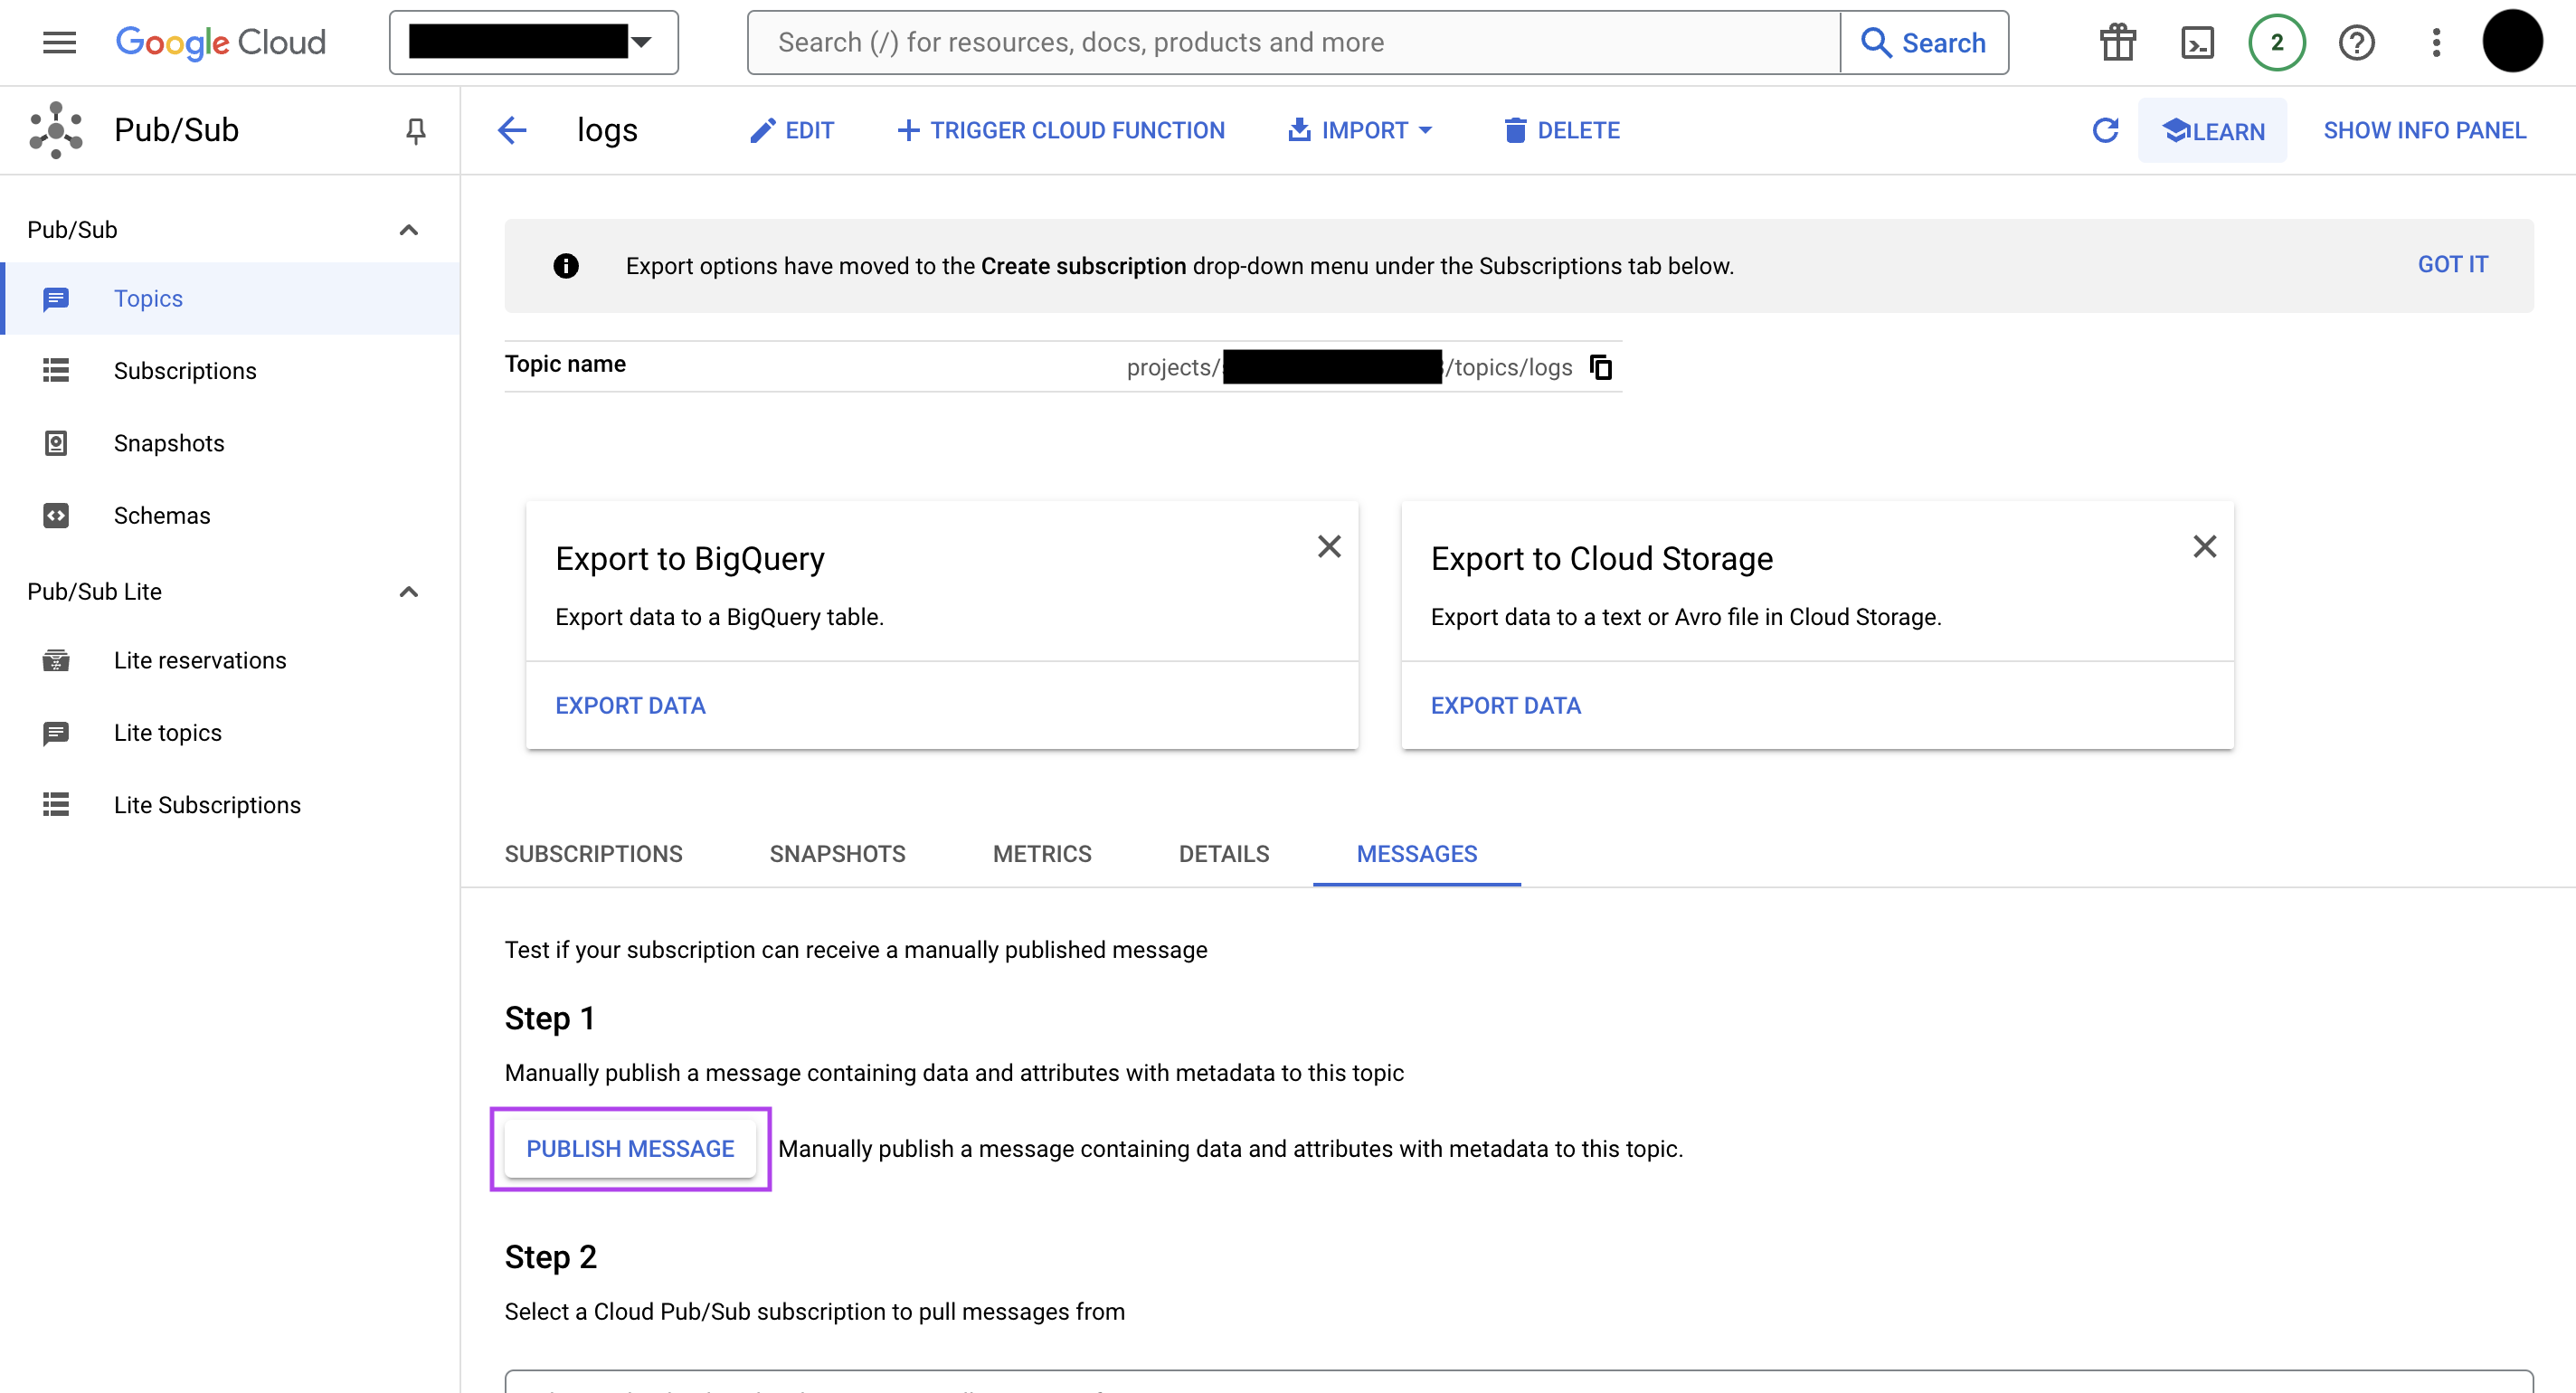
Navigate to the “MESSAGES” tab. On this tab, click on the “PUBLISH MESSAGE” button.
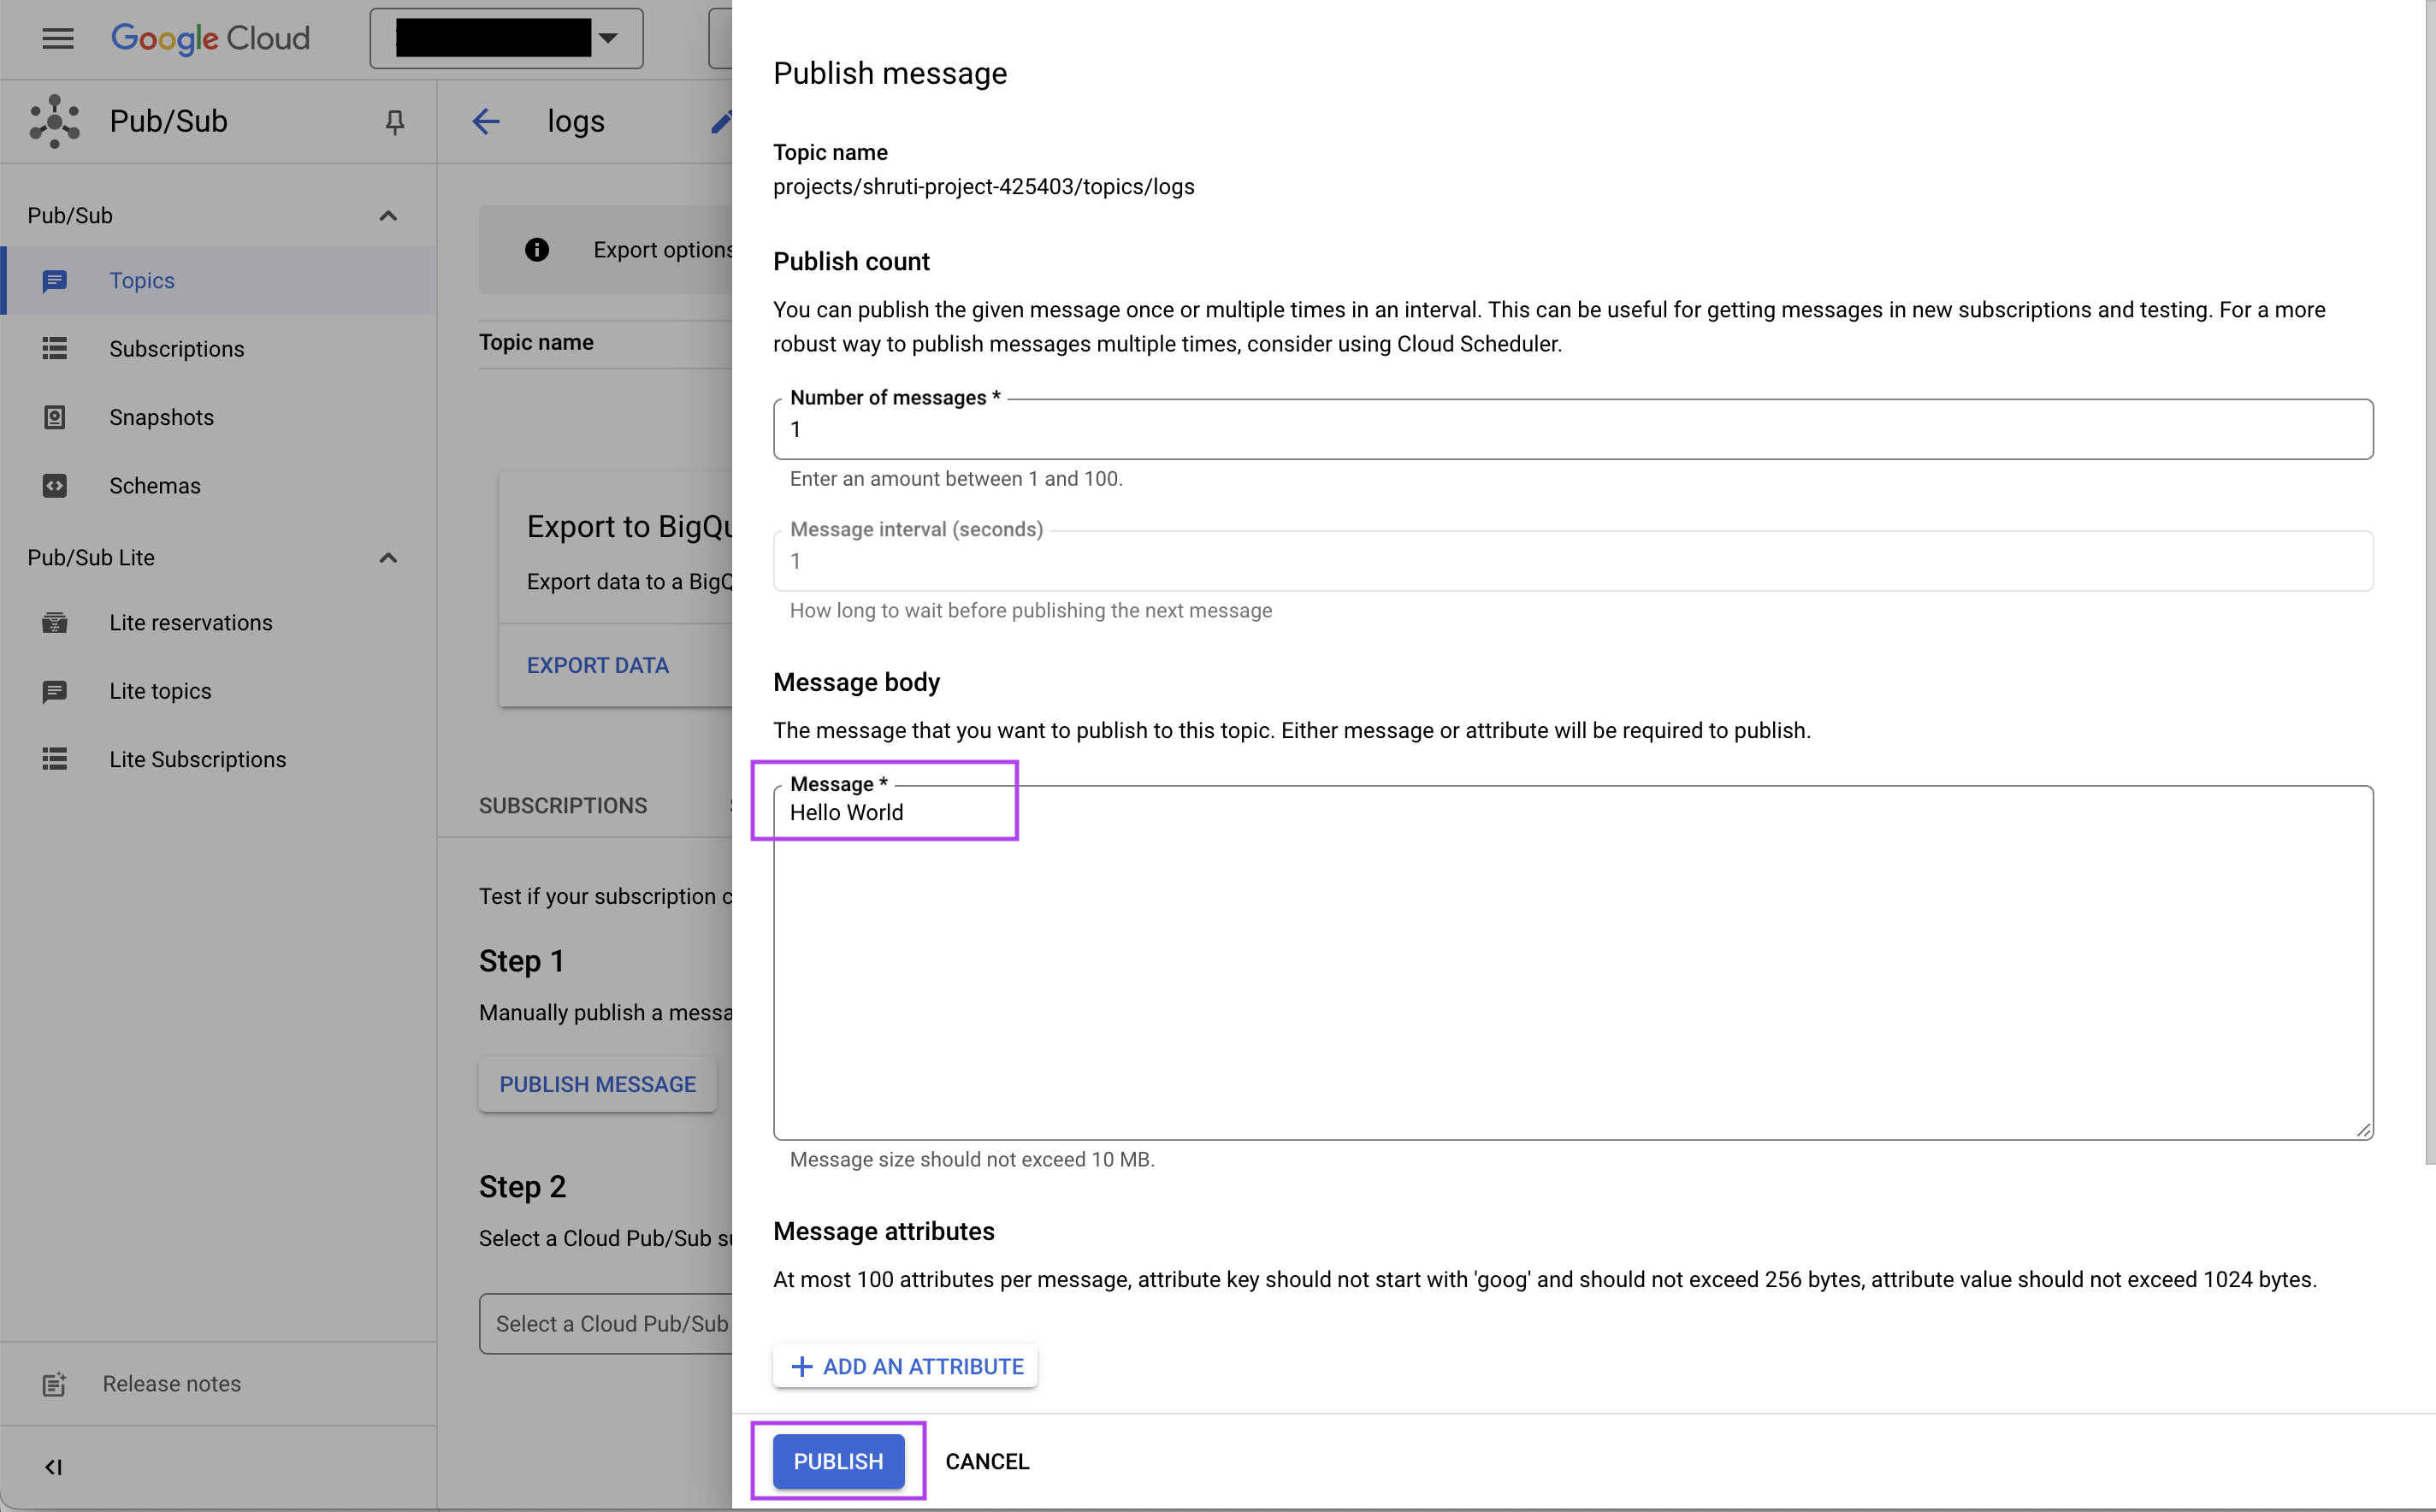
On the Publish message popup, put the message you would like to publish to the topic, and click on the “PUBLISH” button on the bottom of the page. This would publish the message to the Pub/Sub topic.
You can use the GCP Pub/Sub RealtimeTrigger in the Kestra flow as follows:
id: gcp-pubsubnamespace: company.team
tasks:  - id: log    type: io.kestra.plugin.core.log.Log    message: "{{ trigger.data }}"
triggers:  - id: trigger    type: io.kestra.plugin.gcp.pubsub.RealtimeTrigger    projectId: test-project-id    topic: logs    subscription: logs-sub
When any message is published into the logs Pub/Sub topic, this flow will get triggered immediately.
Azure Event Hubs
Create an Event Hub and a container for checkpoint storage:
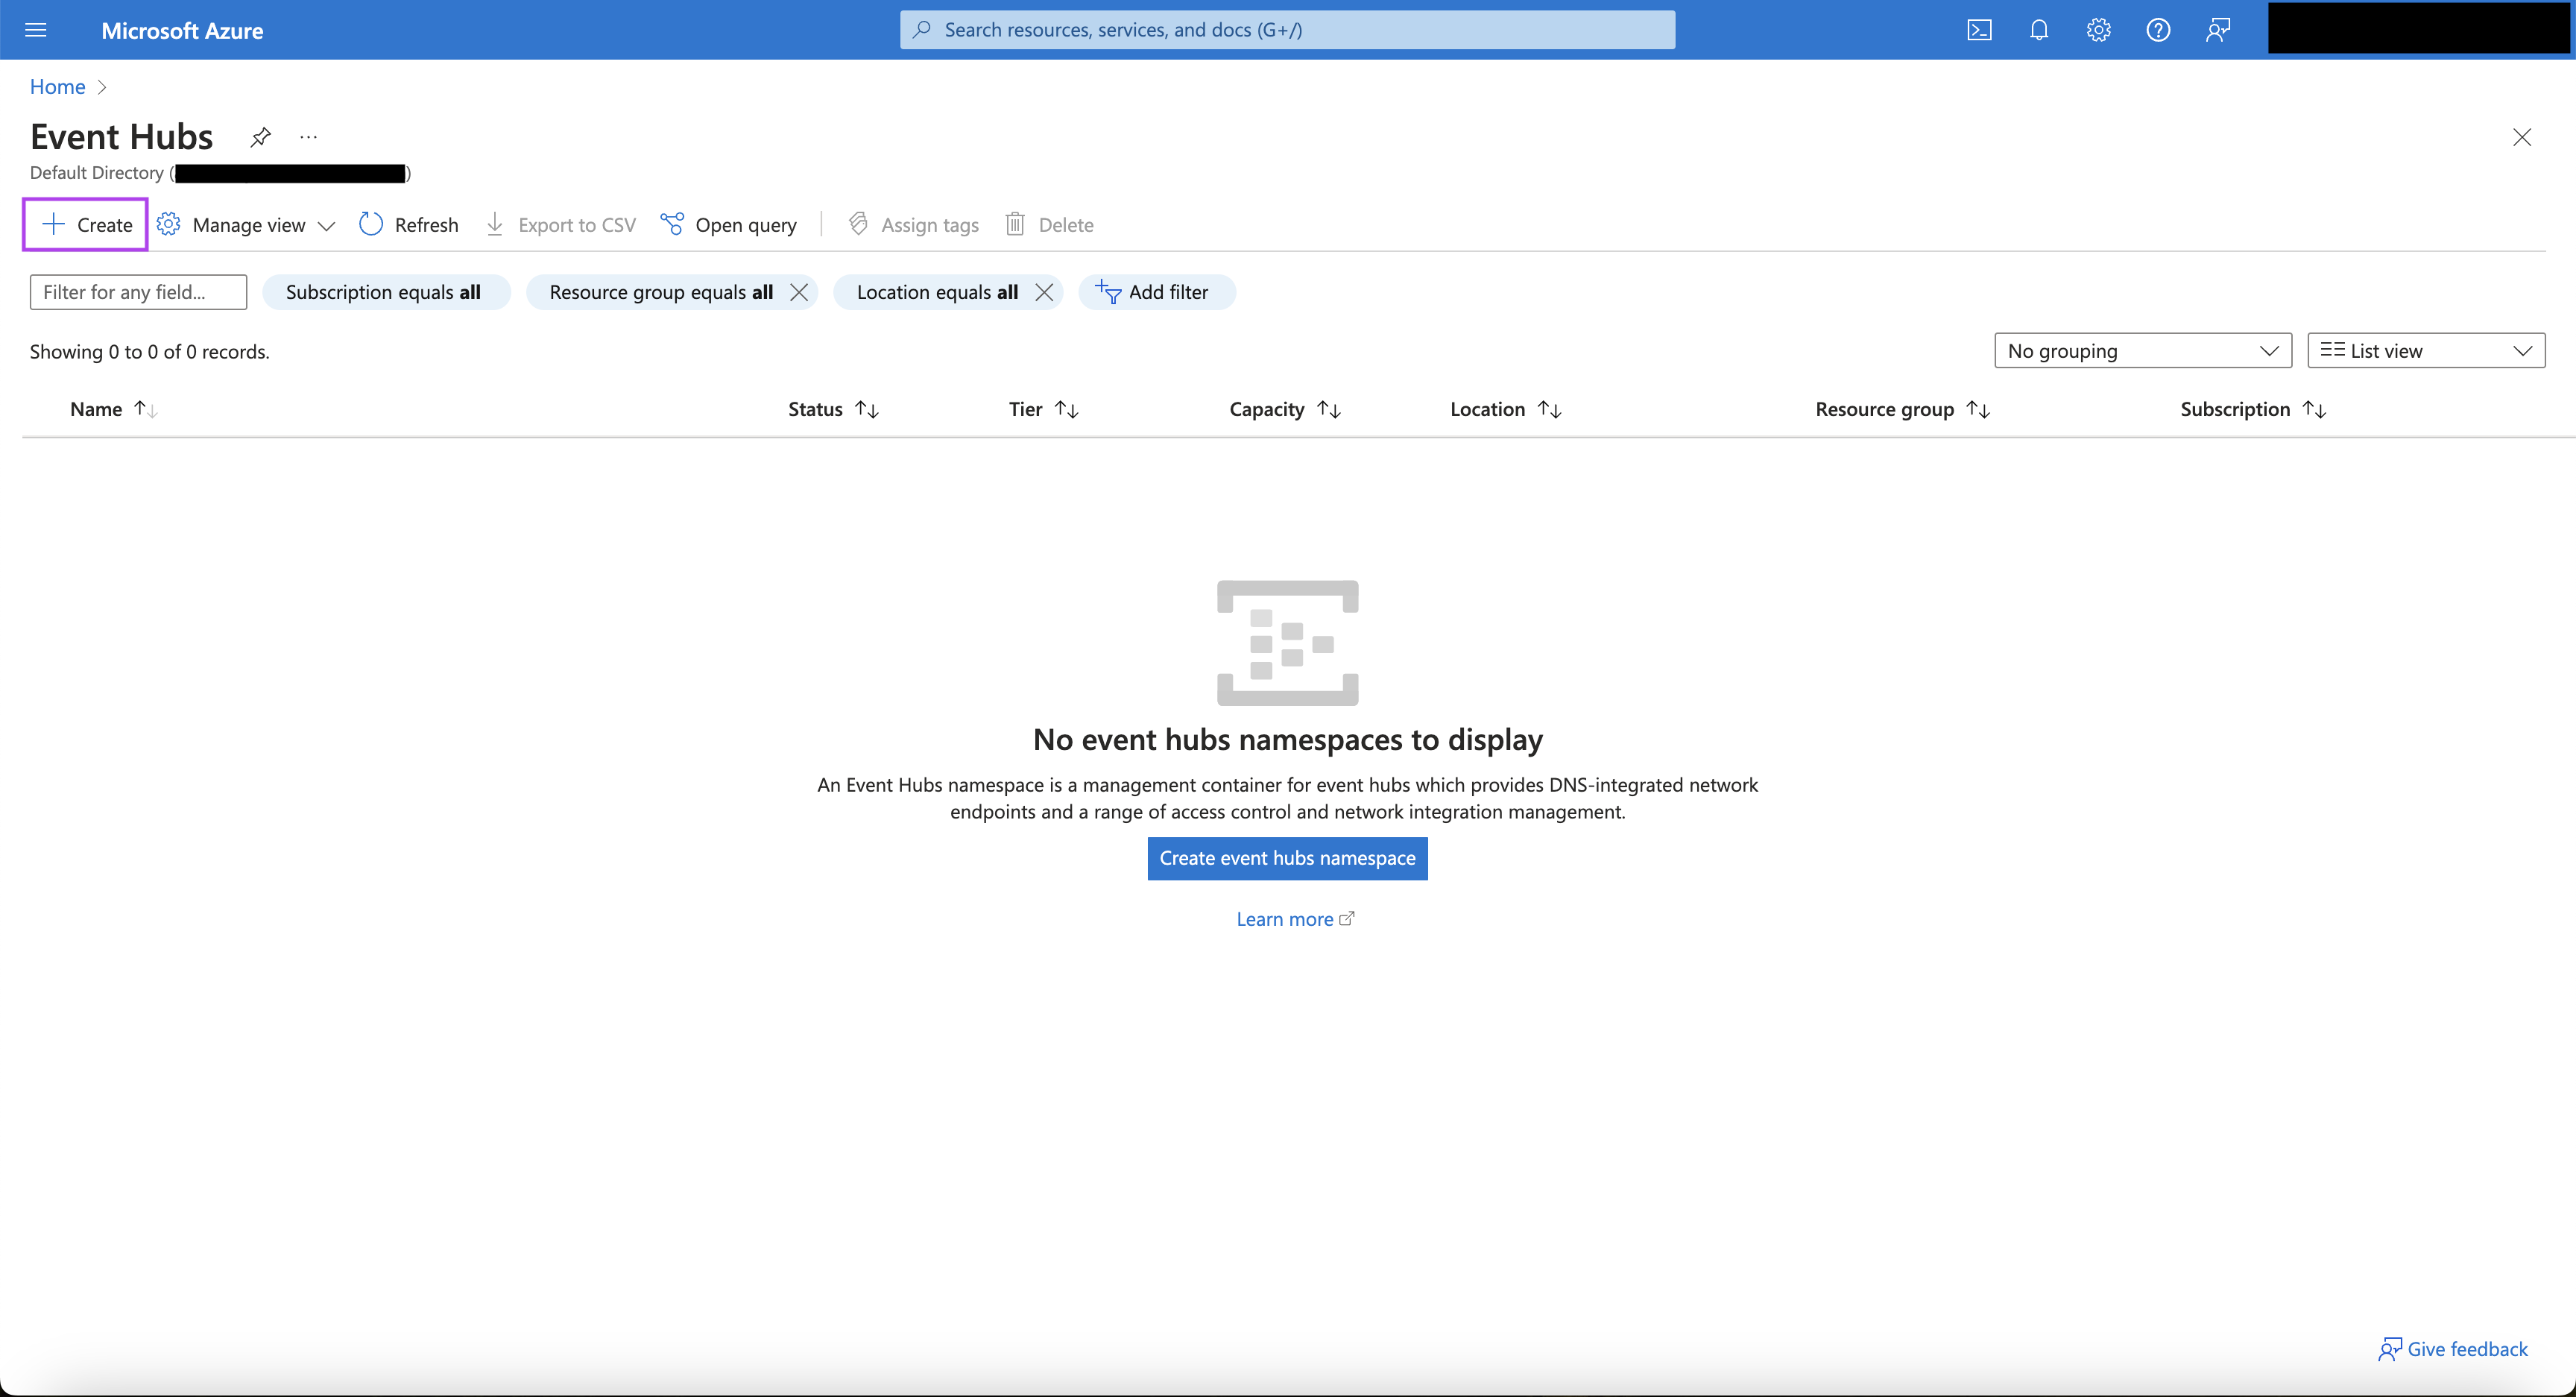
- Go to Event Hubs in the Azure portal.
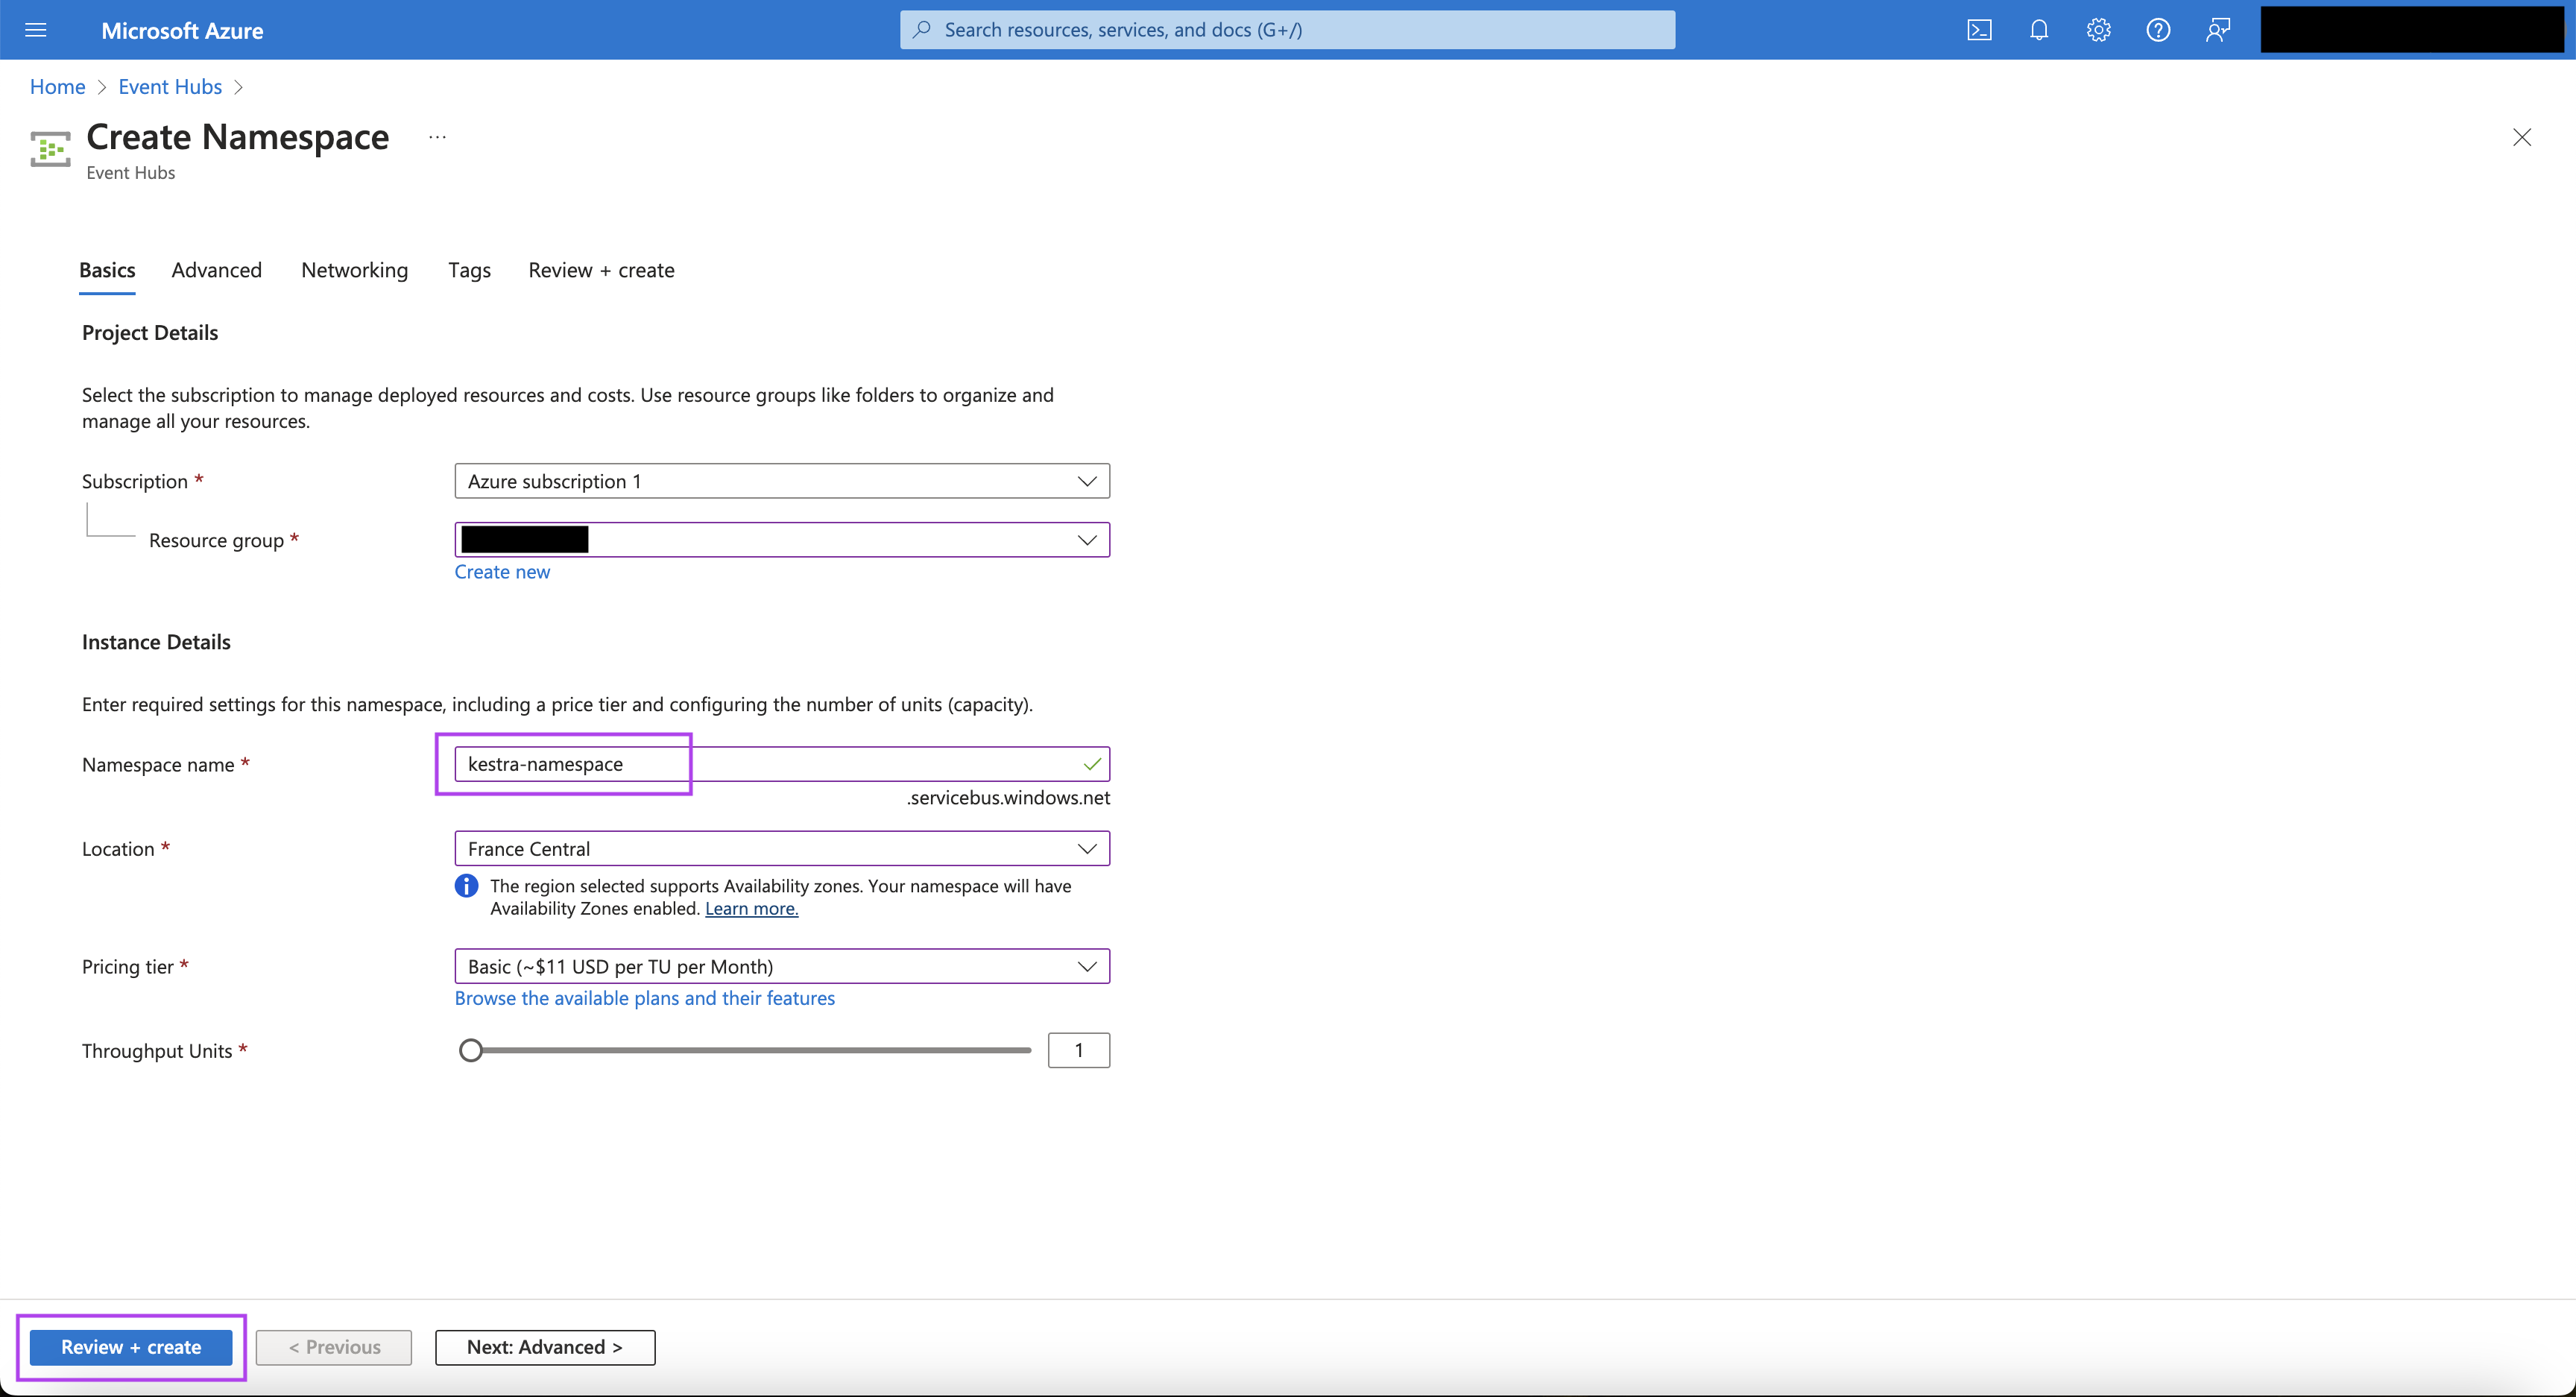
- Click on “Create” to create an Event Hubs namespace.
- On the Create Namespace page, choose an appropriate Subscription and Resource Group.
- Put an appropriate Namespace name, Location, Pricing tier and Throughput units.
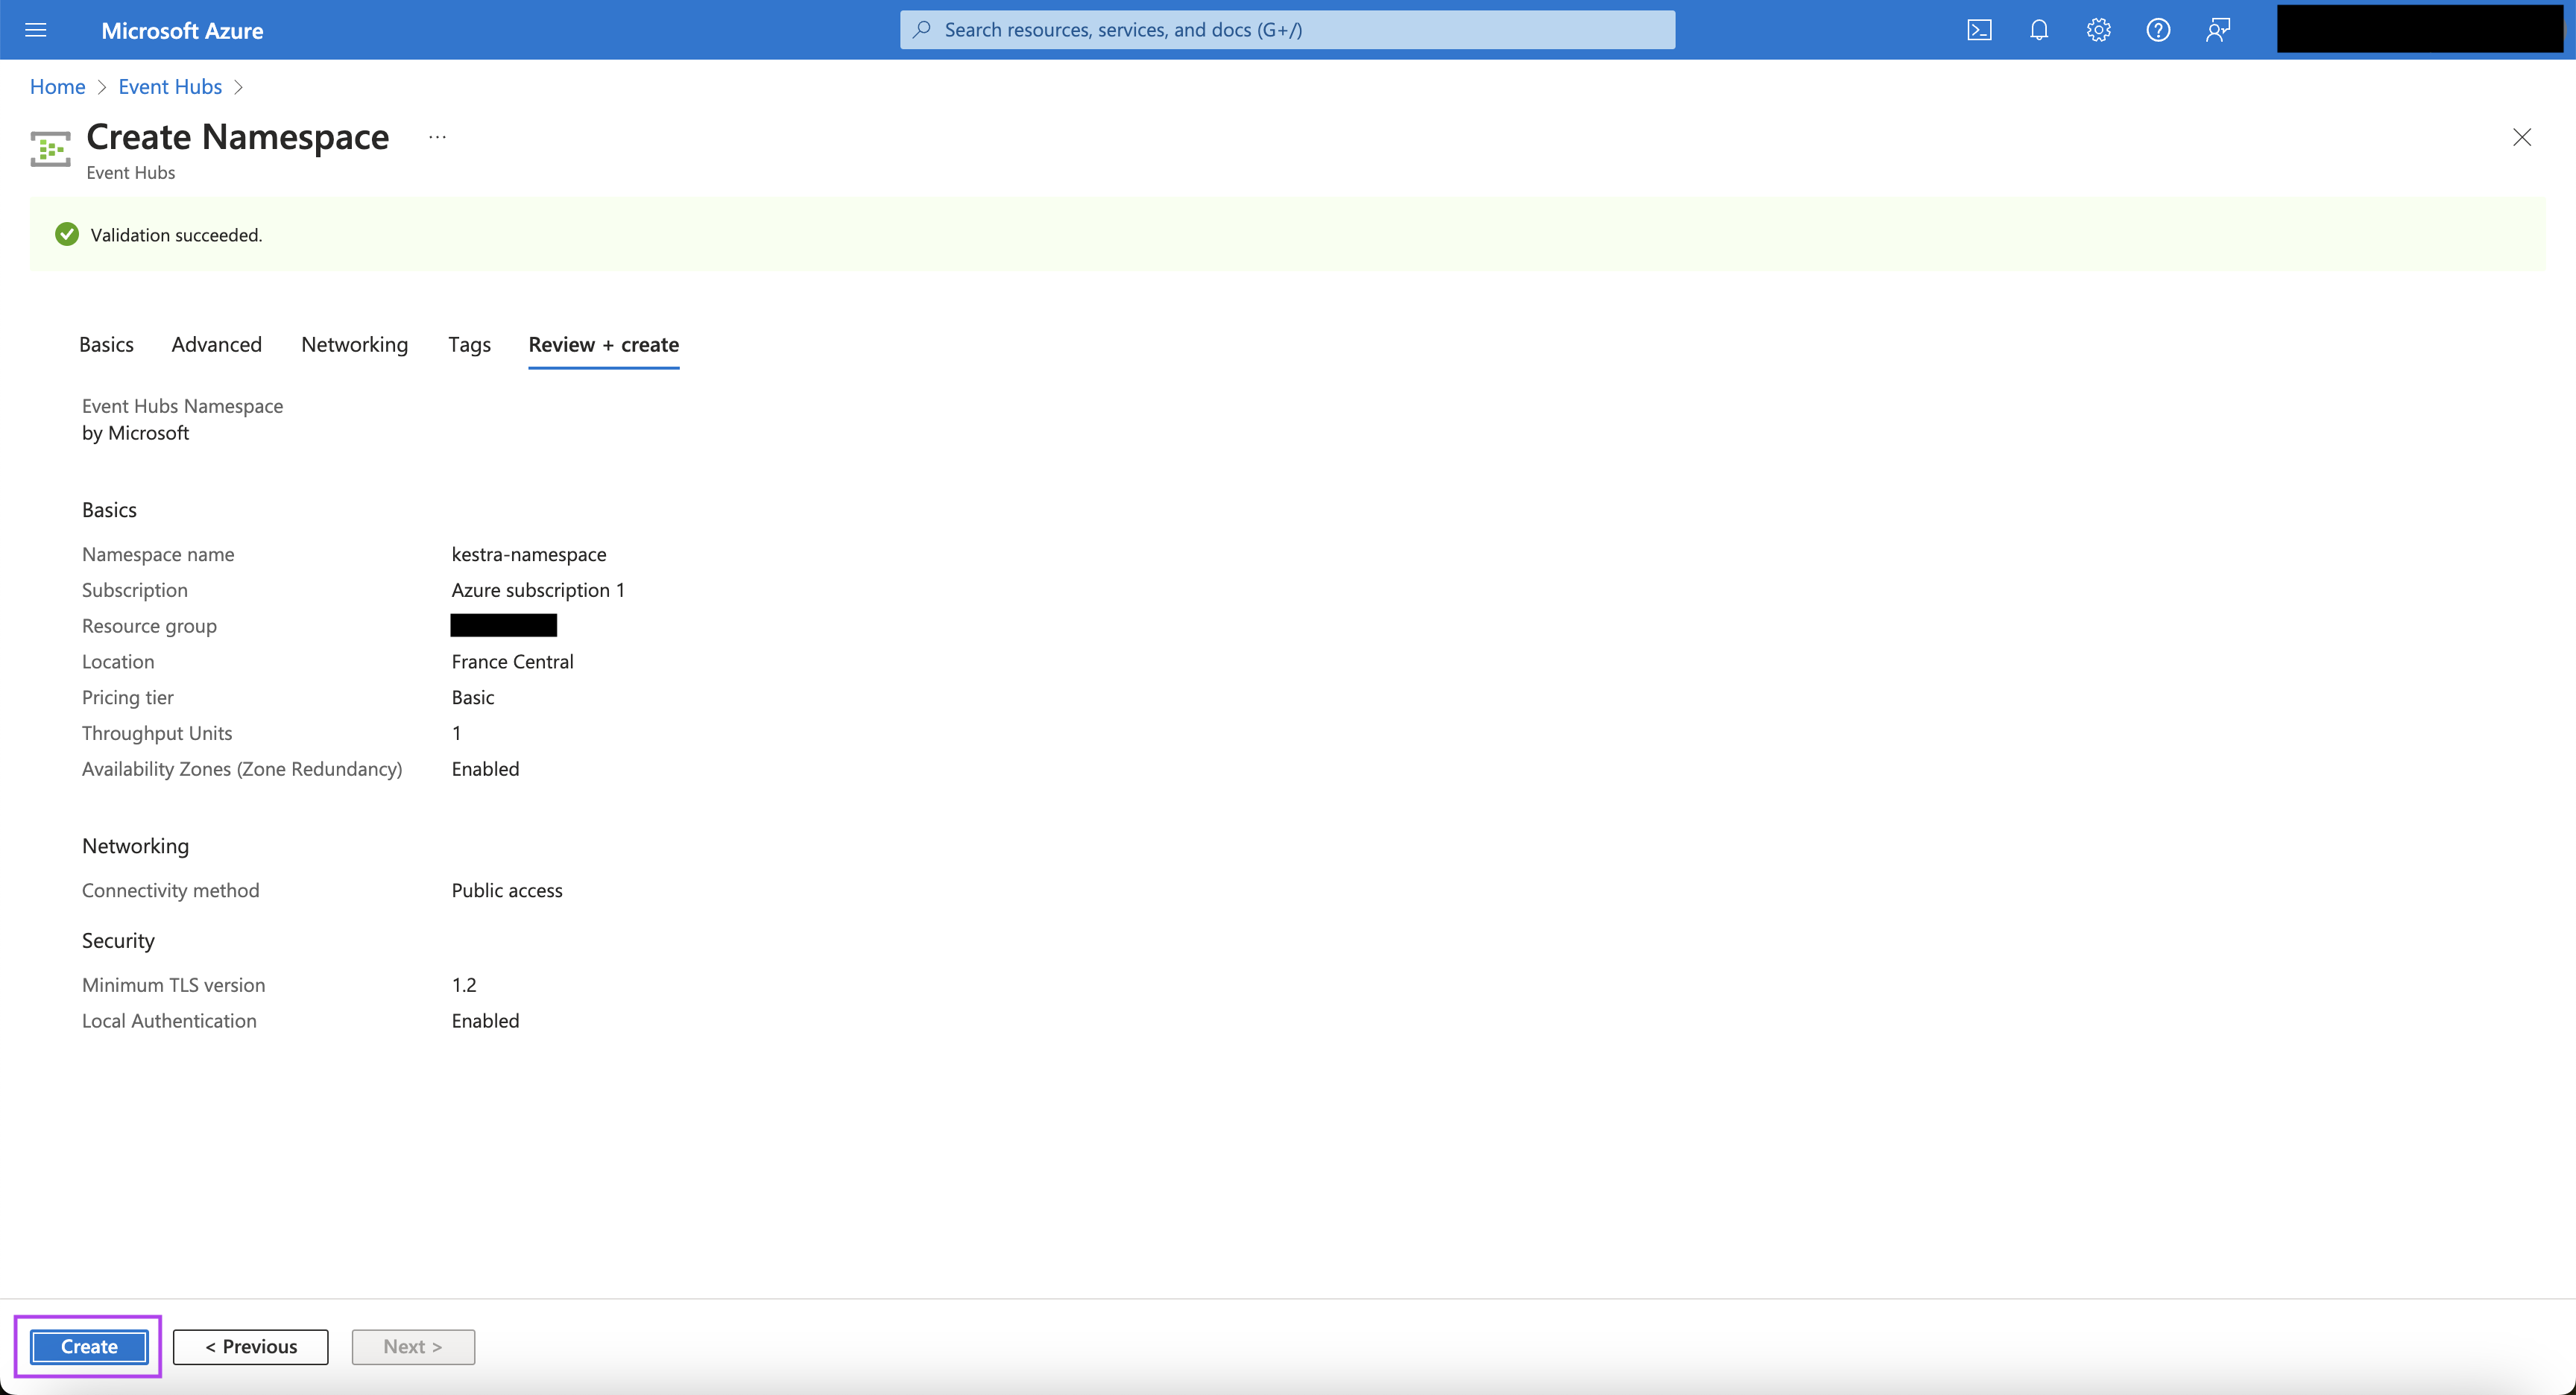
- Click on “Review + Create”. Once the validation is successful, click on “Create”.
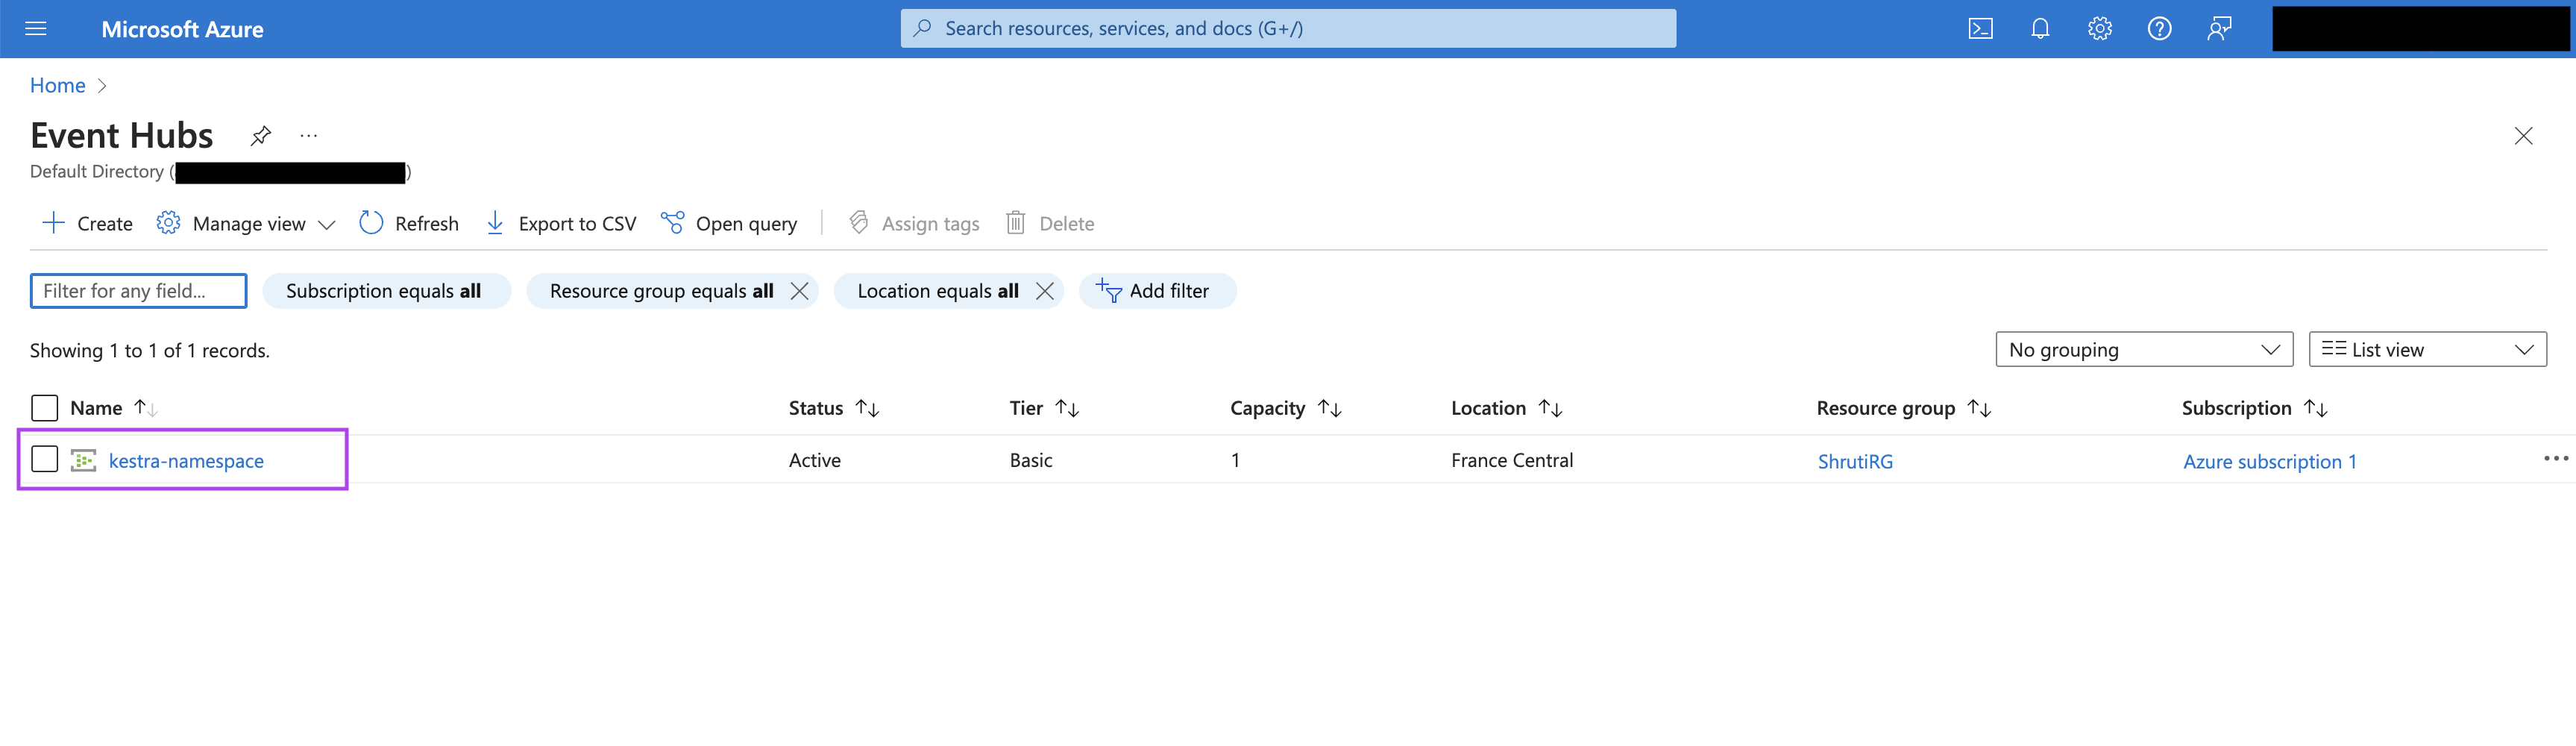
- Once the Event Hub namespace is created, click on the namespace.
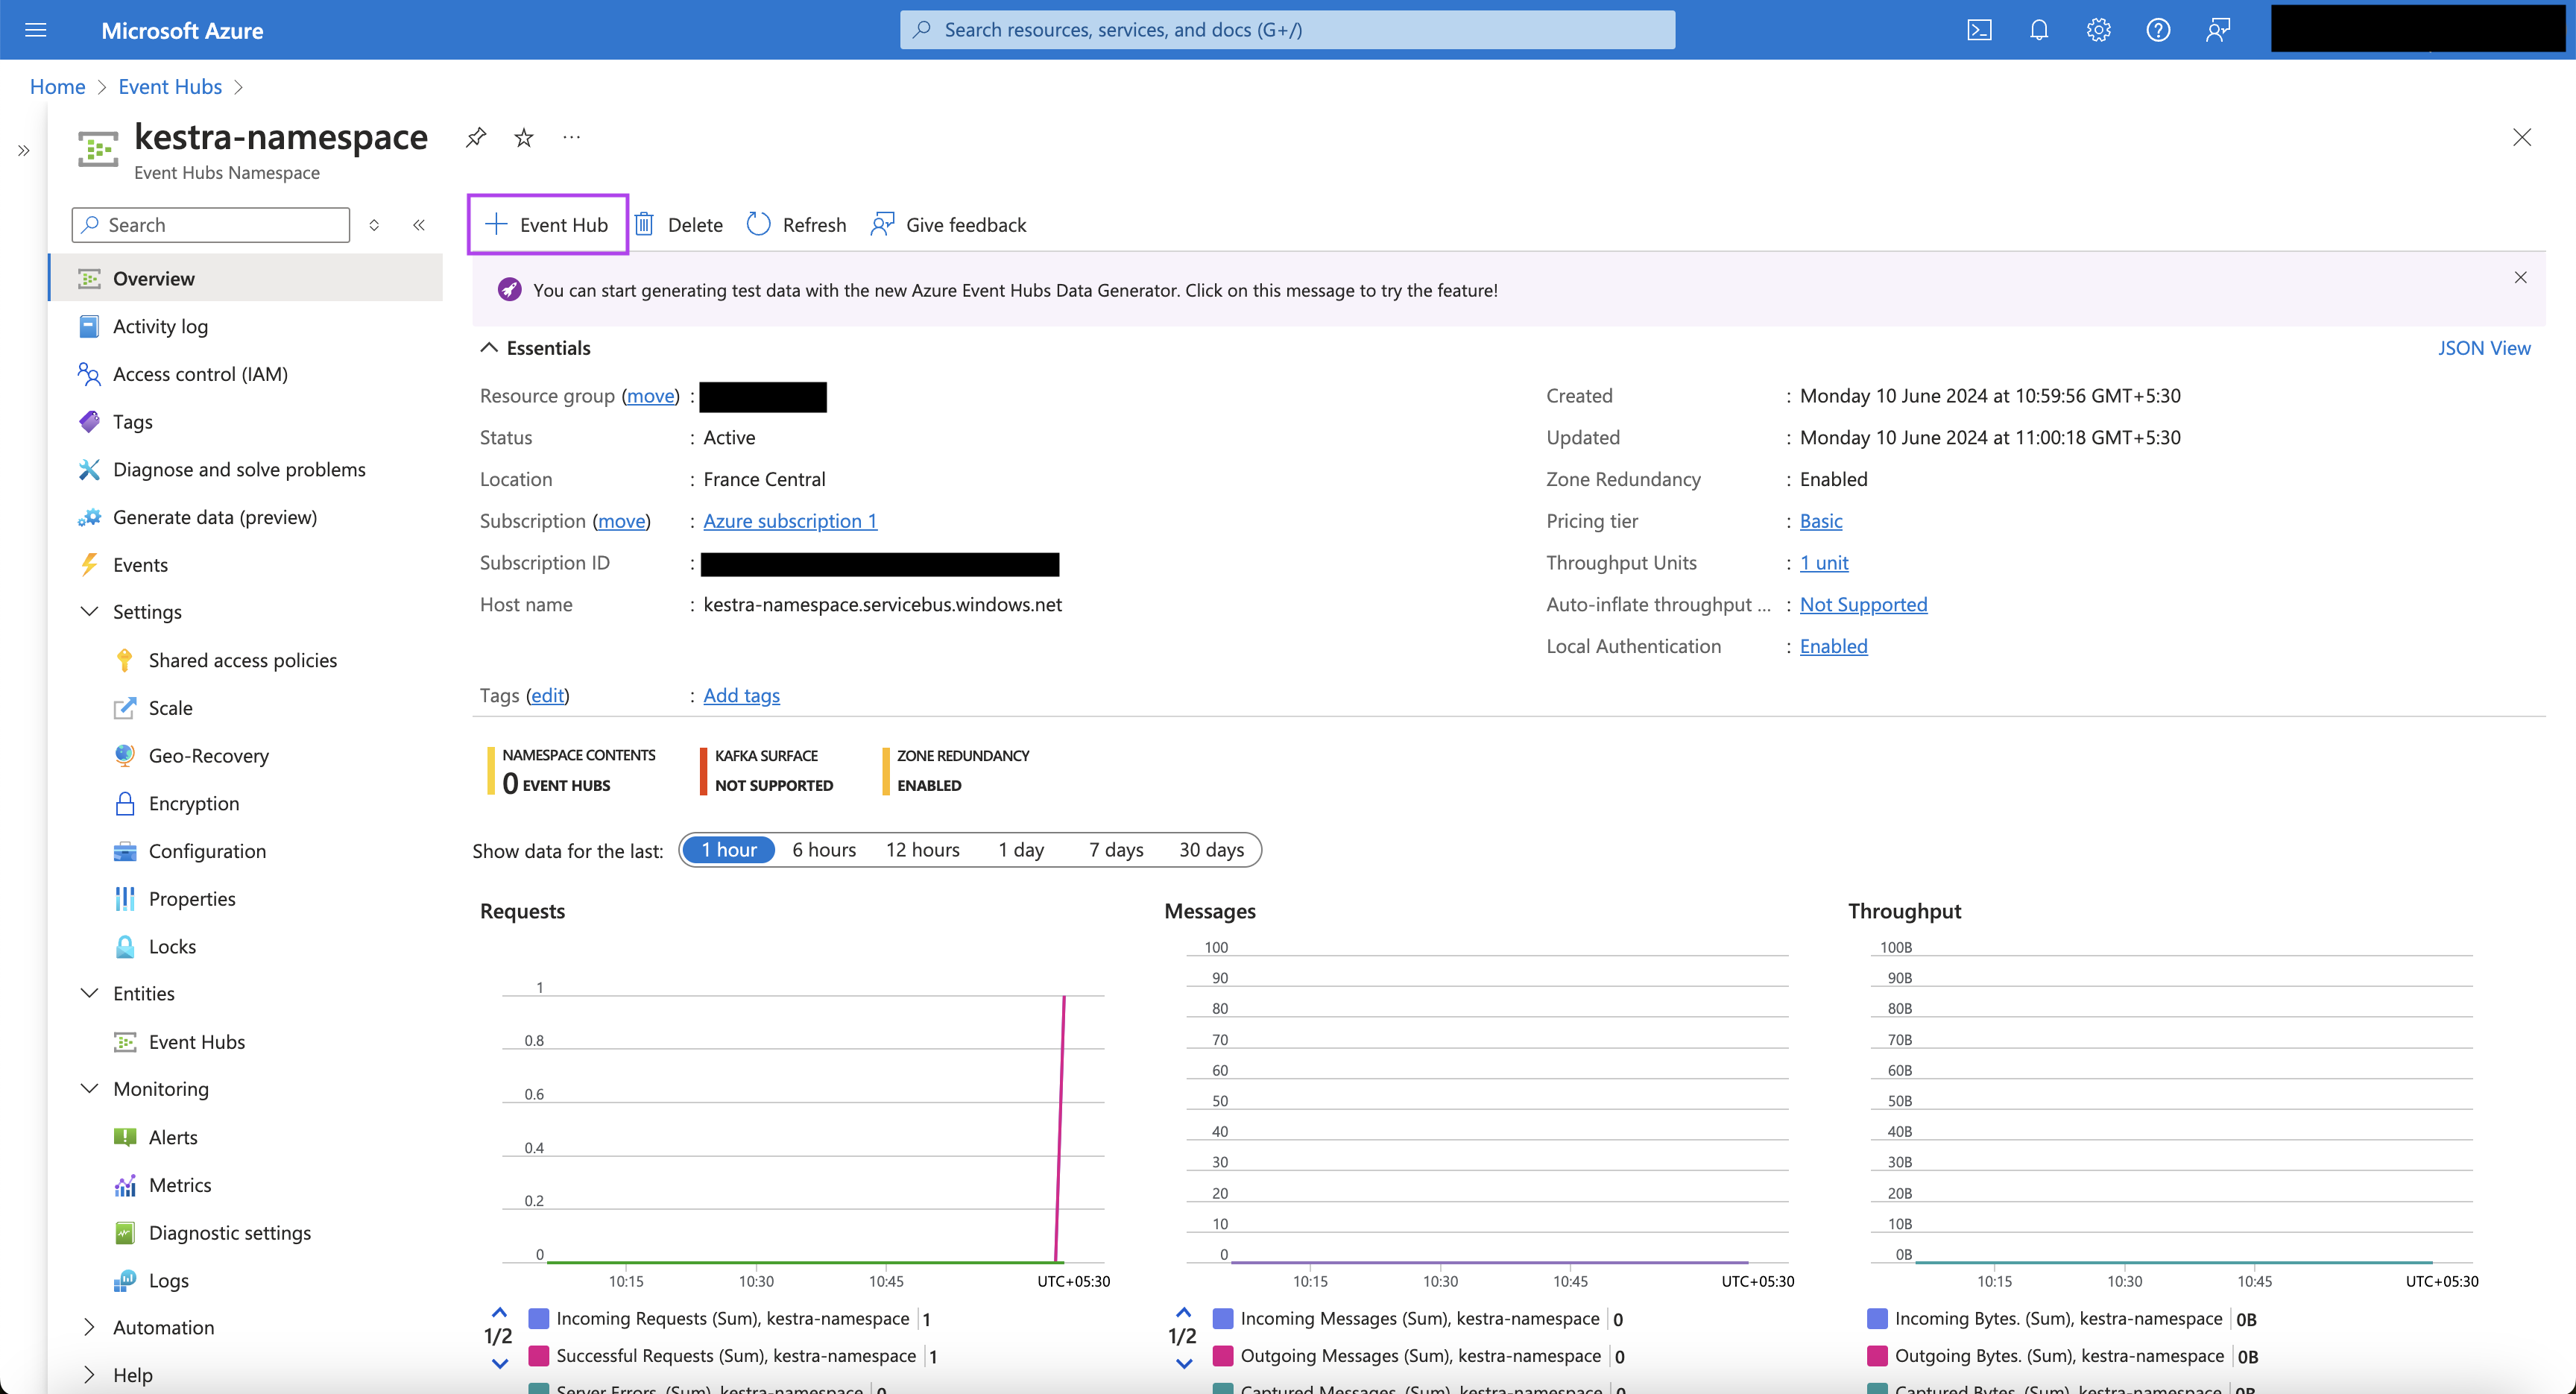
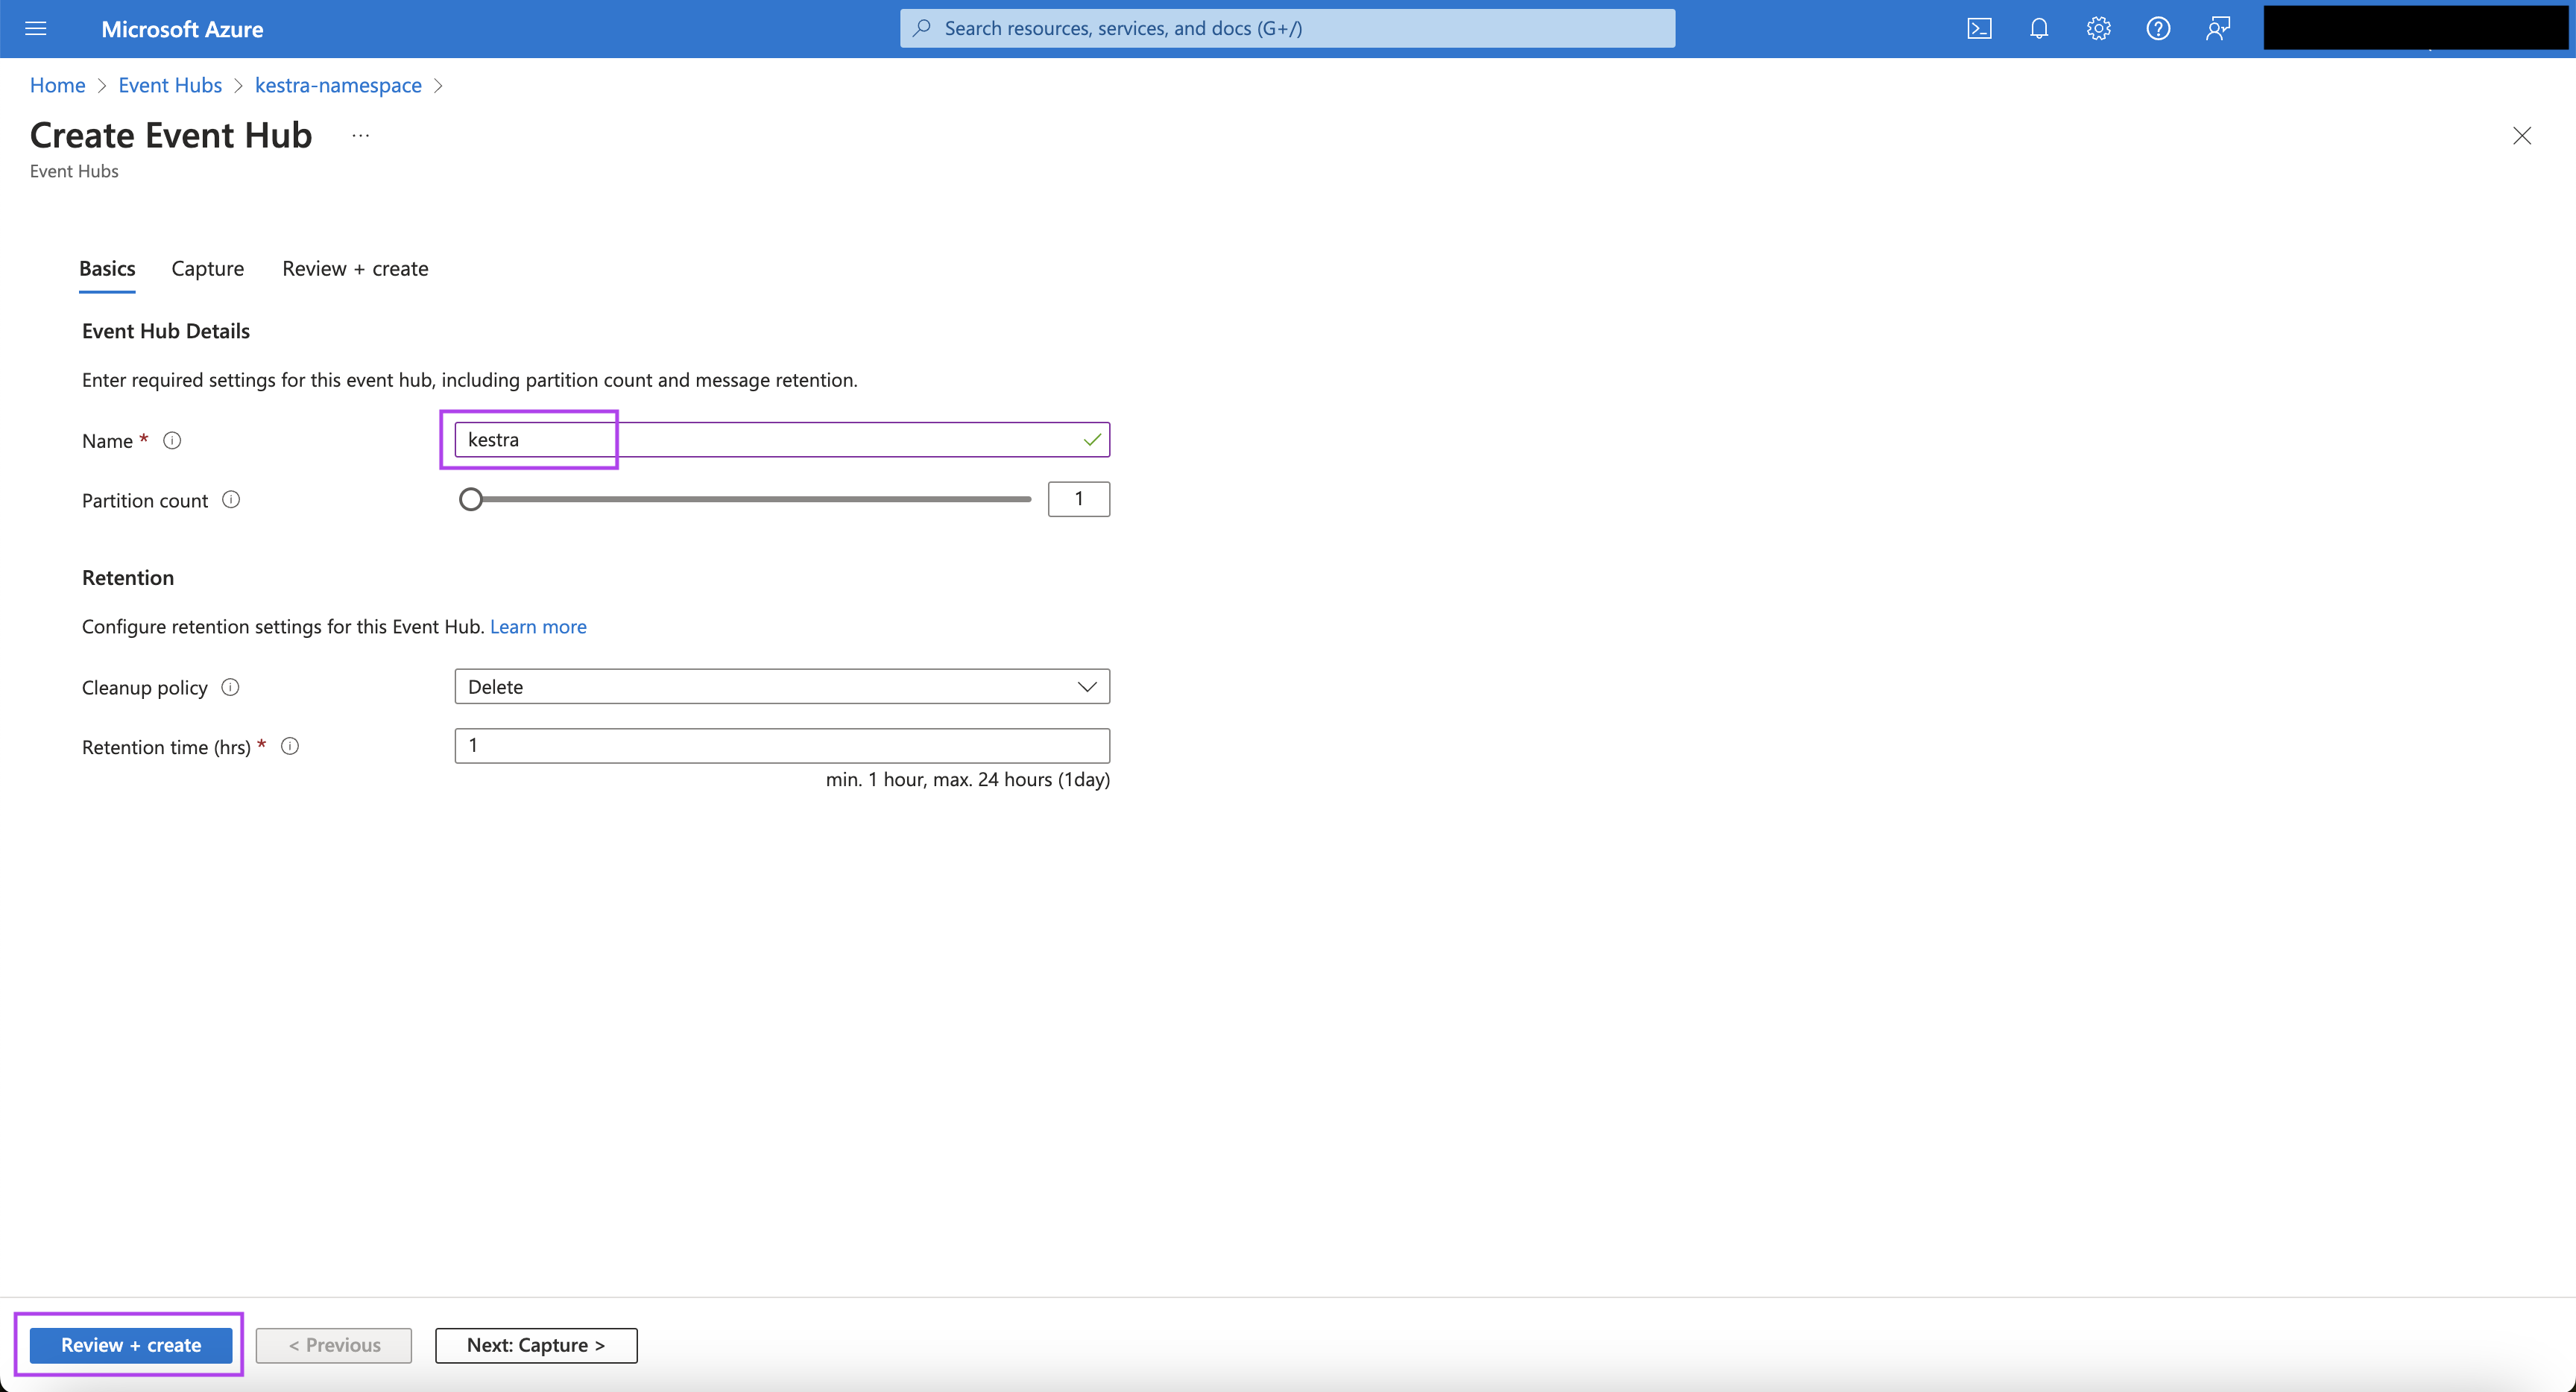
- Once on that particular namespace’s page, click on ”+ Event Hub” button to create an Event Hub.
- Put an appropriate Name for the Event Hub. You can change the remaining settings as per your requirements.
- Click on “Review + Create”. Once the validation is successful, click on “Create”.
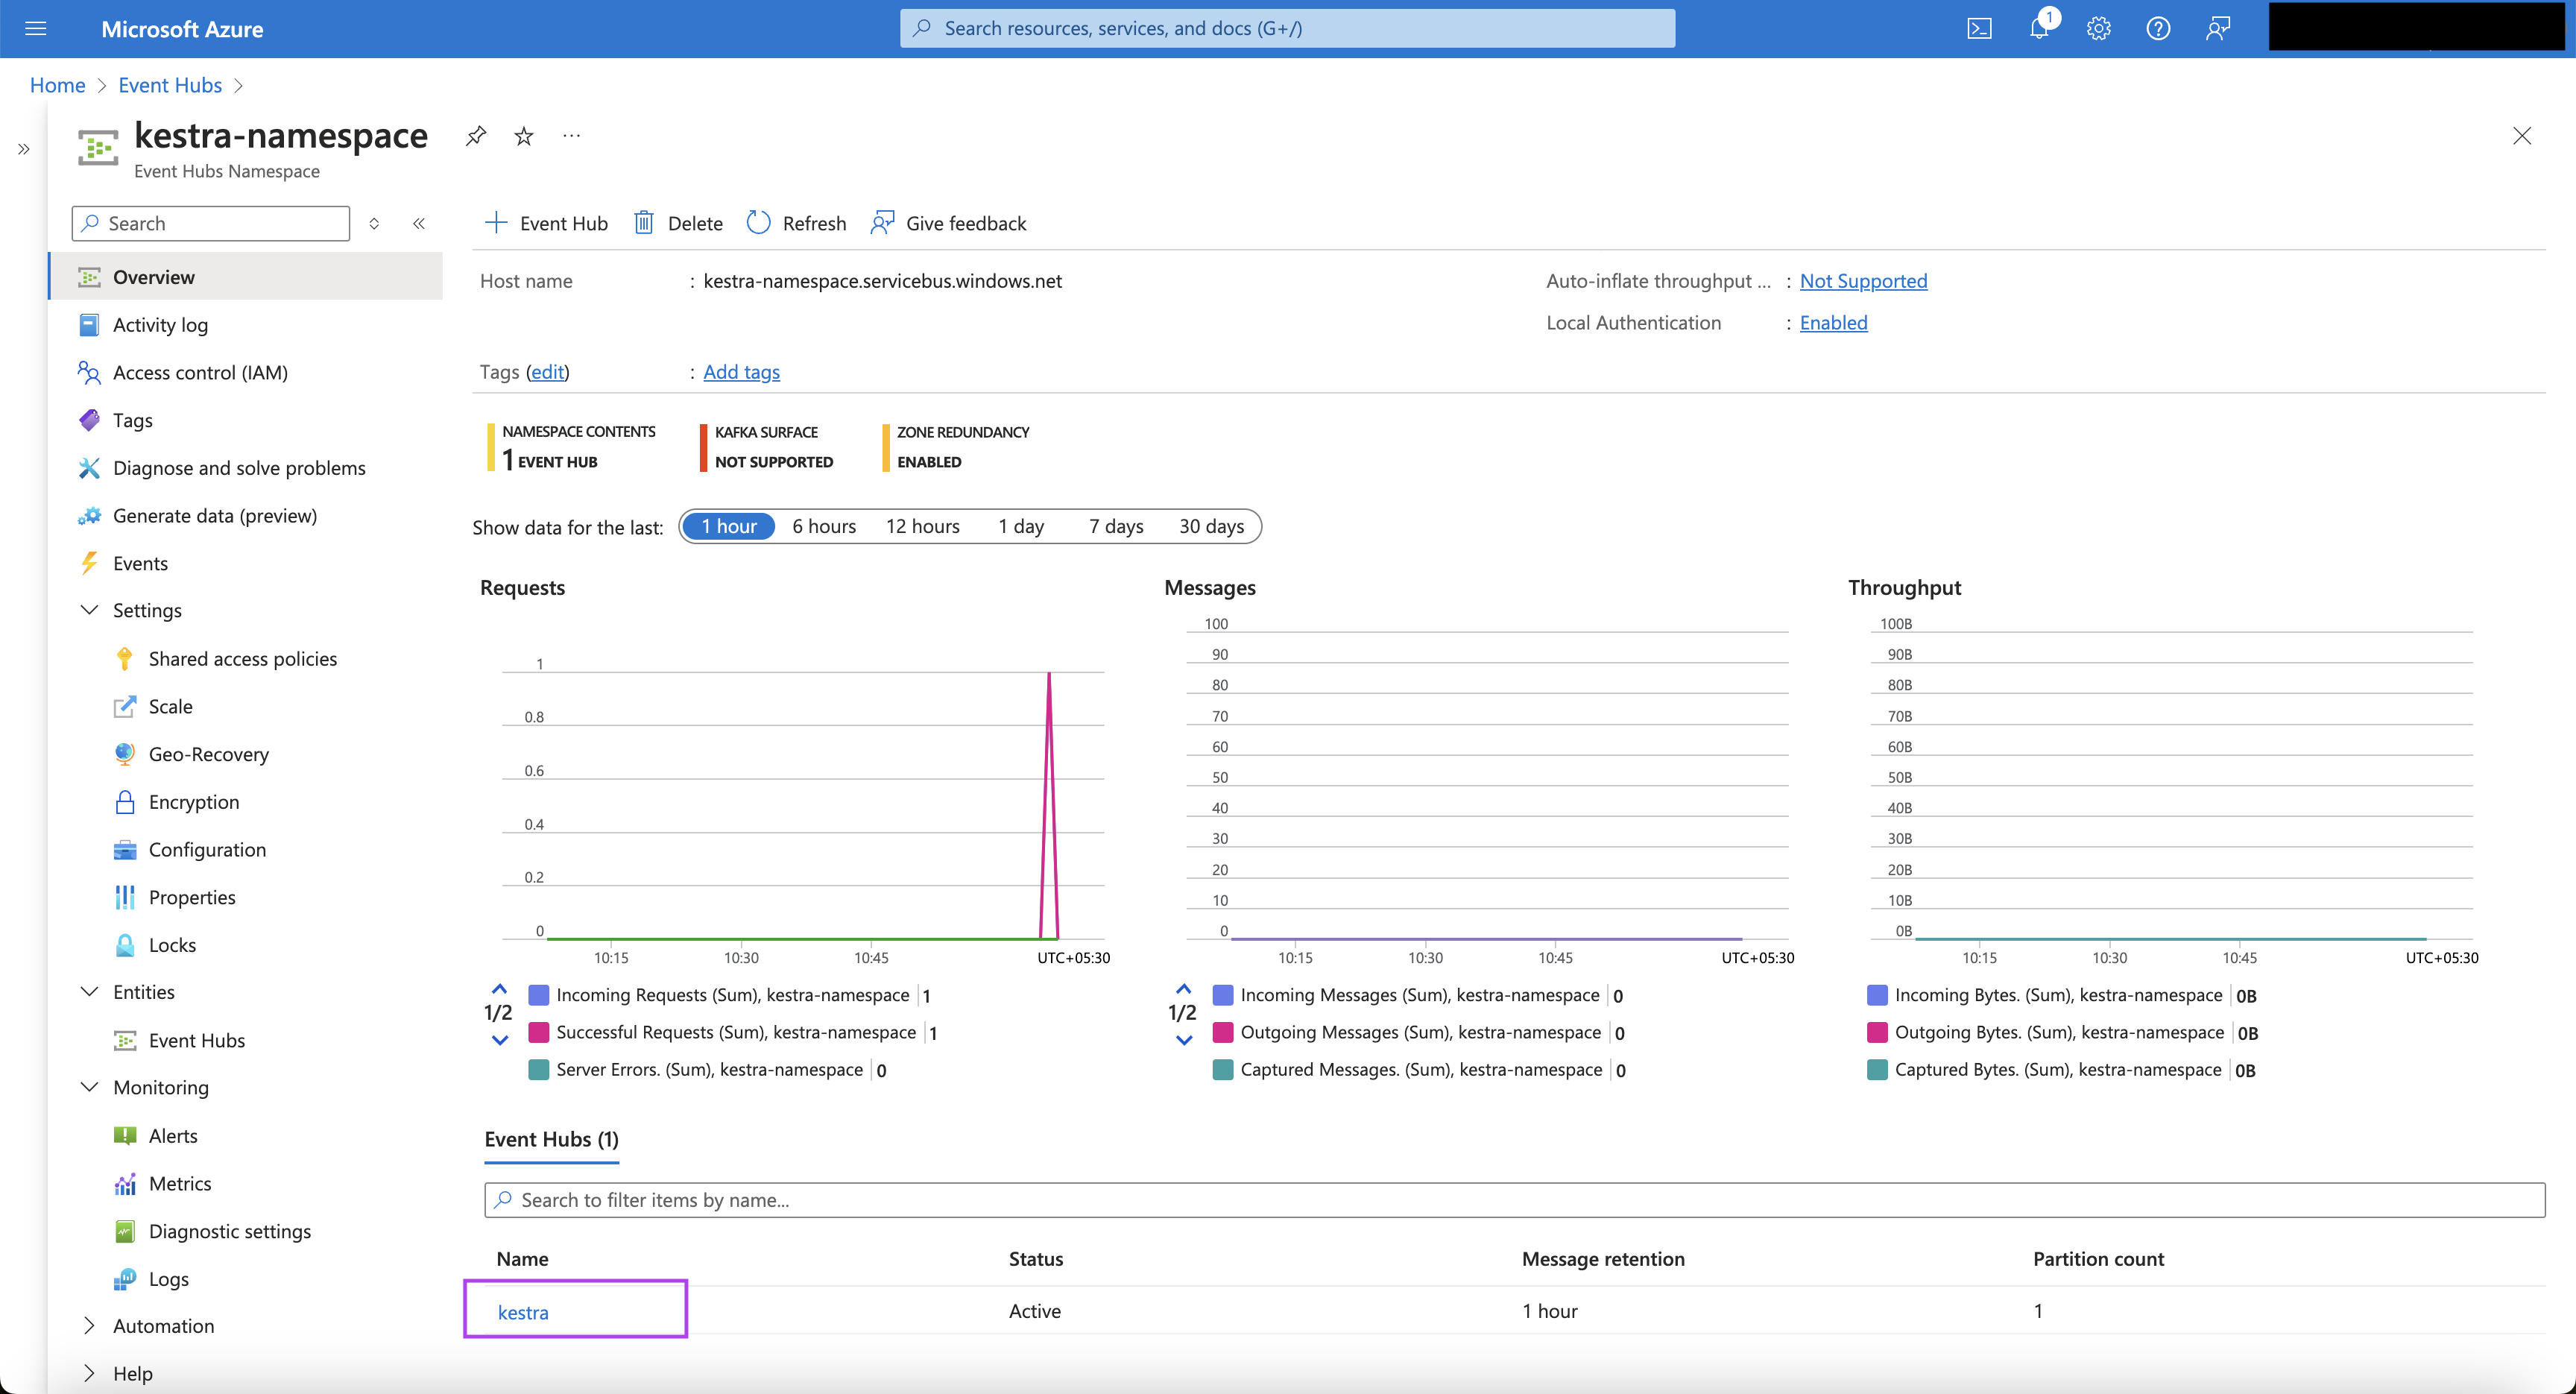
- On the particular Event Hub namespace page, you can now see the newly created Event Hub.
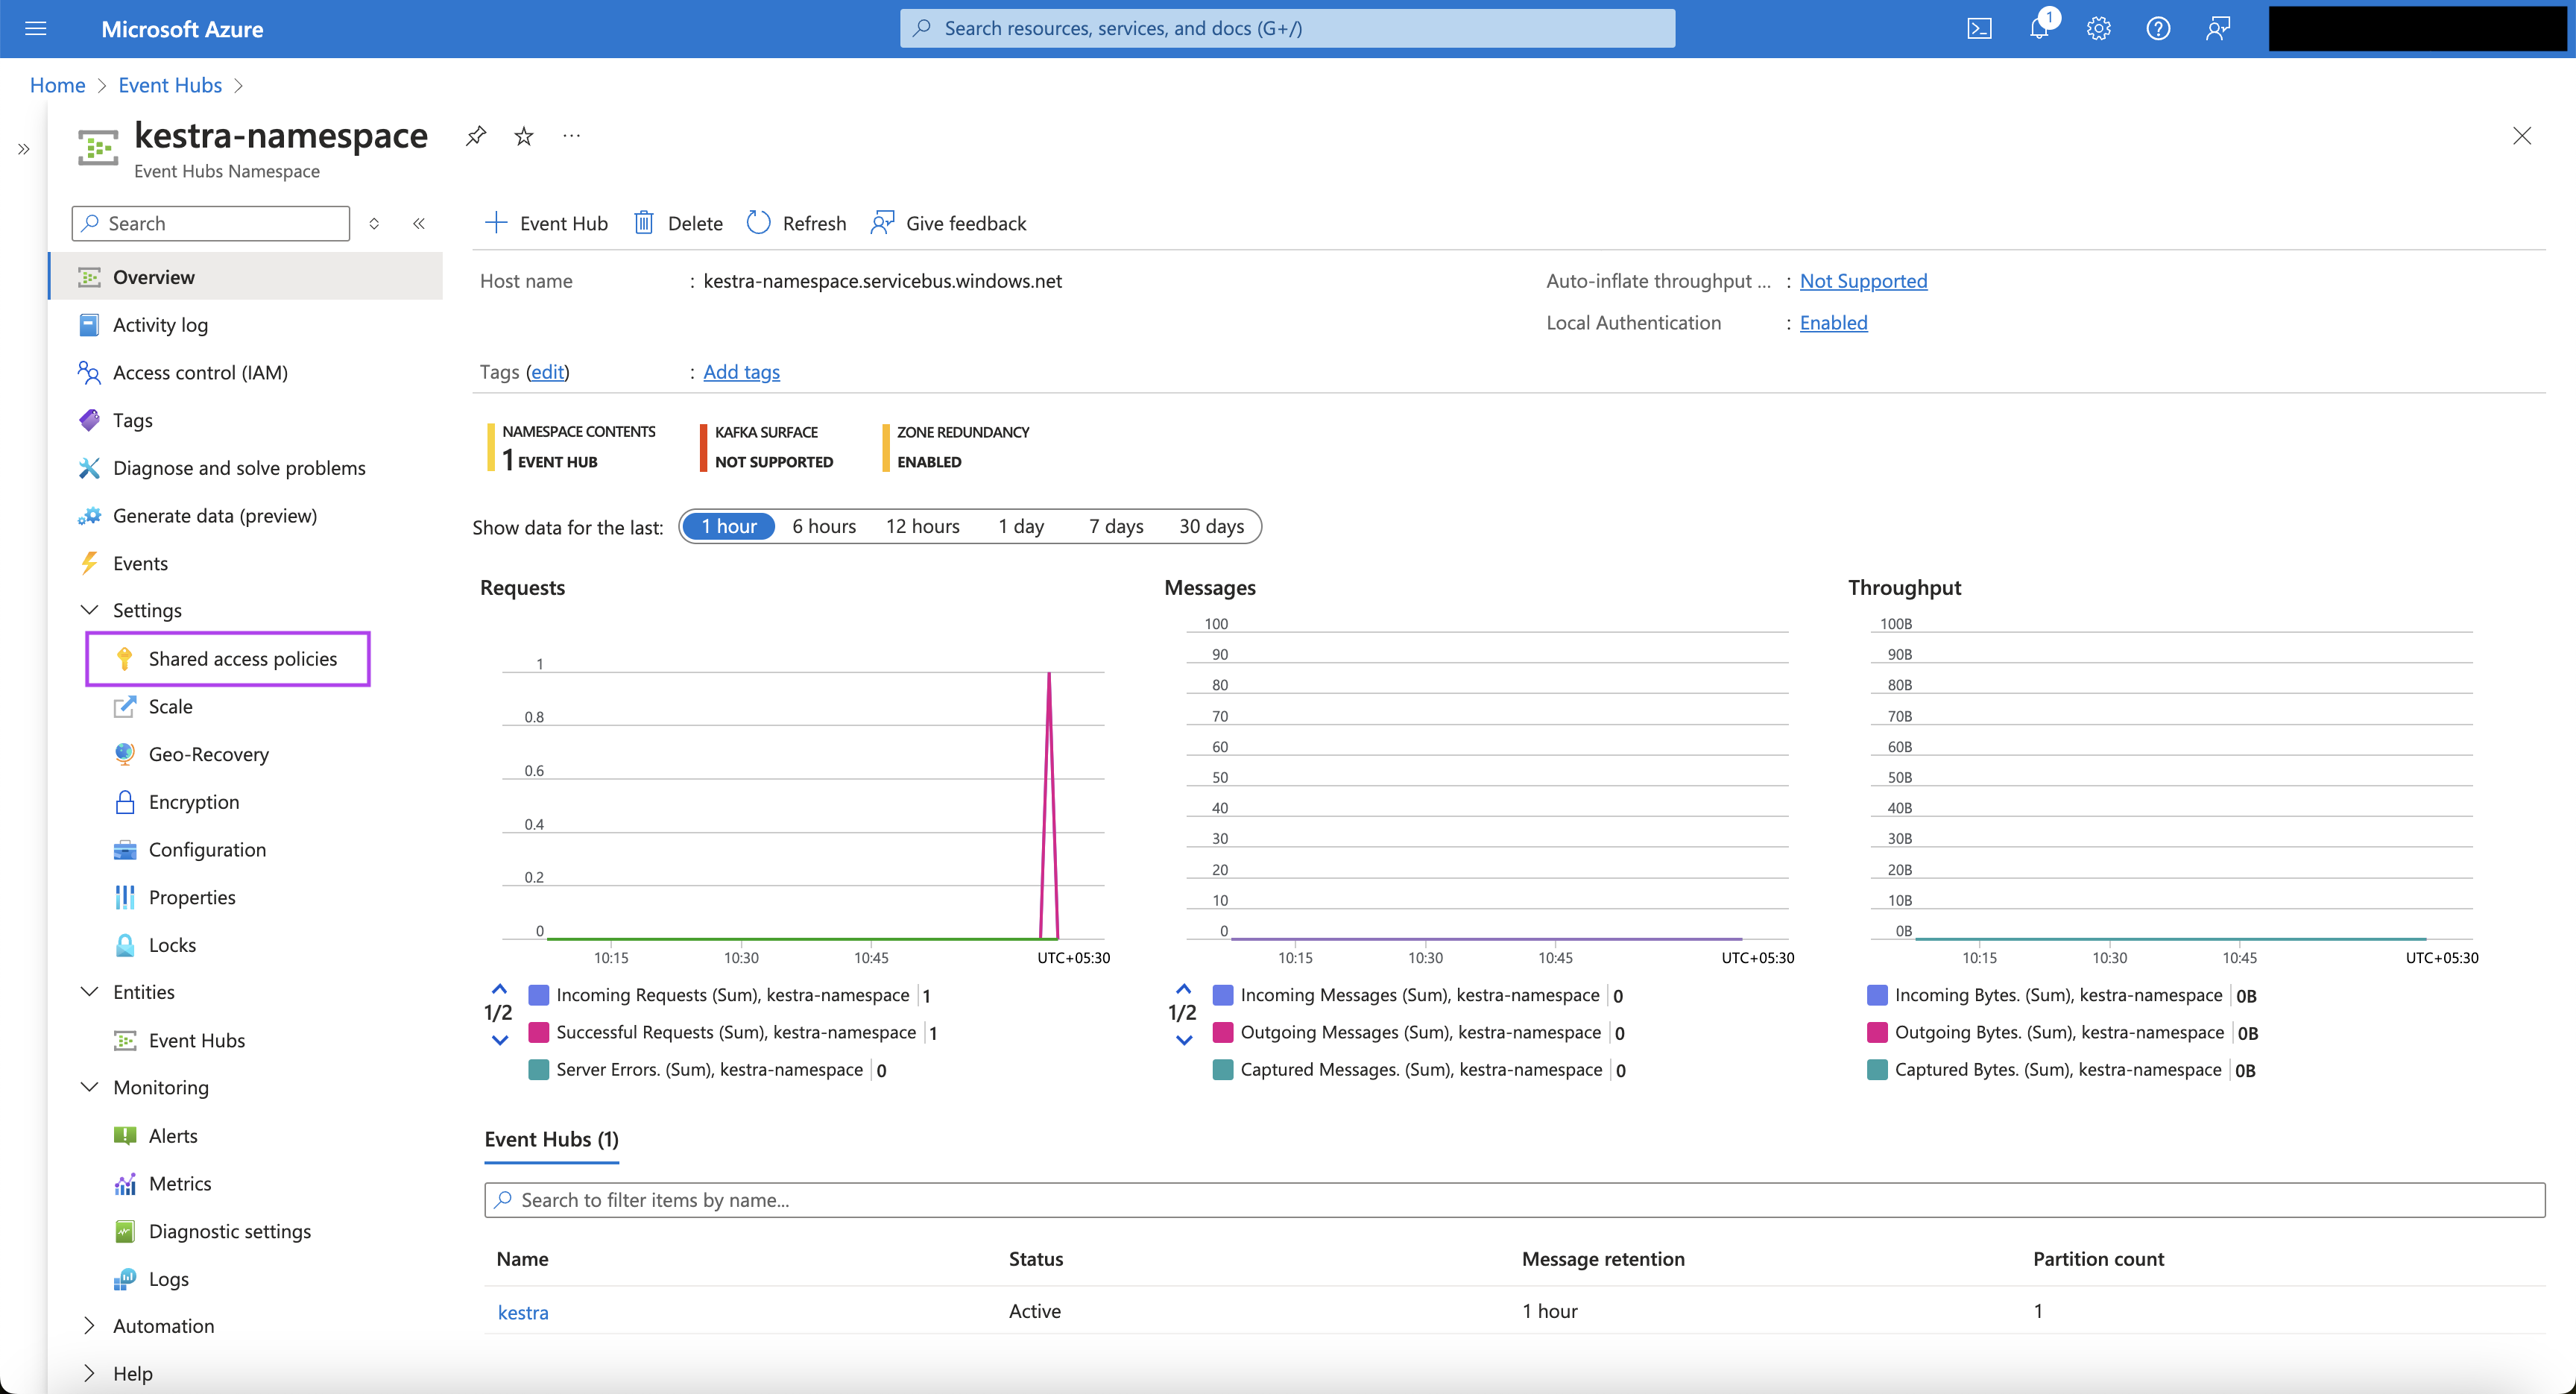
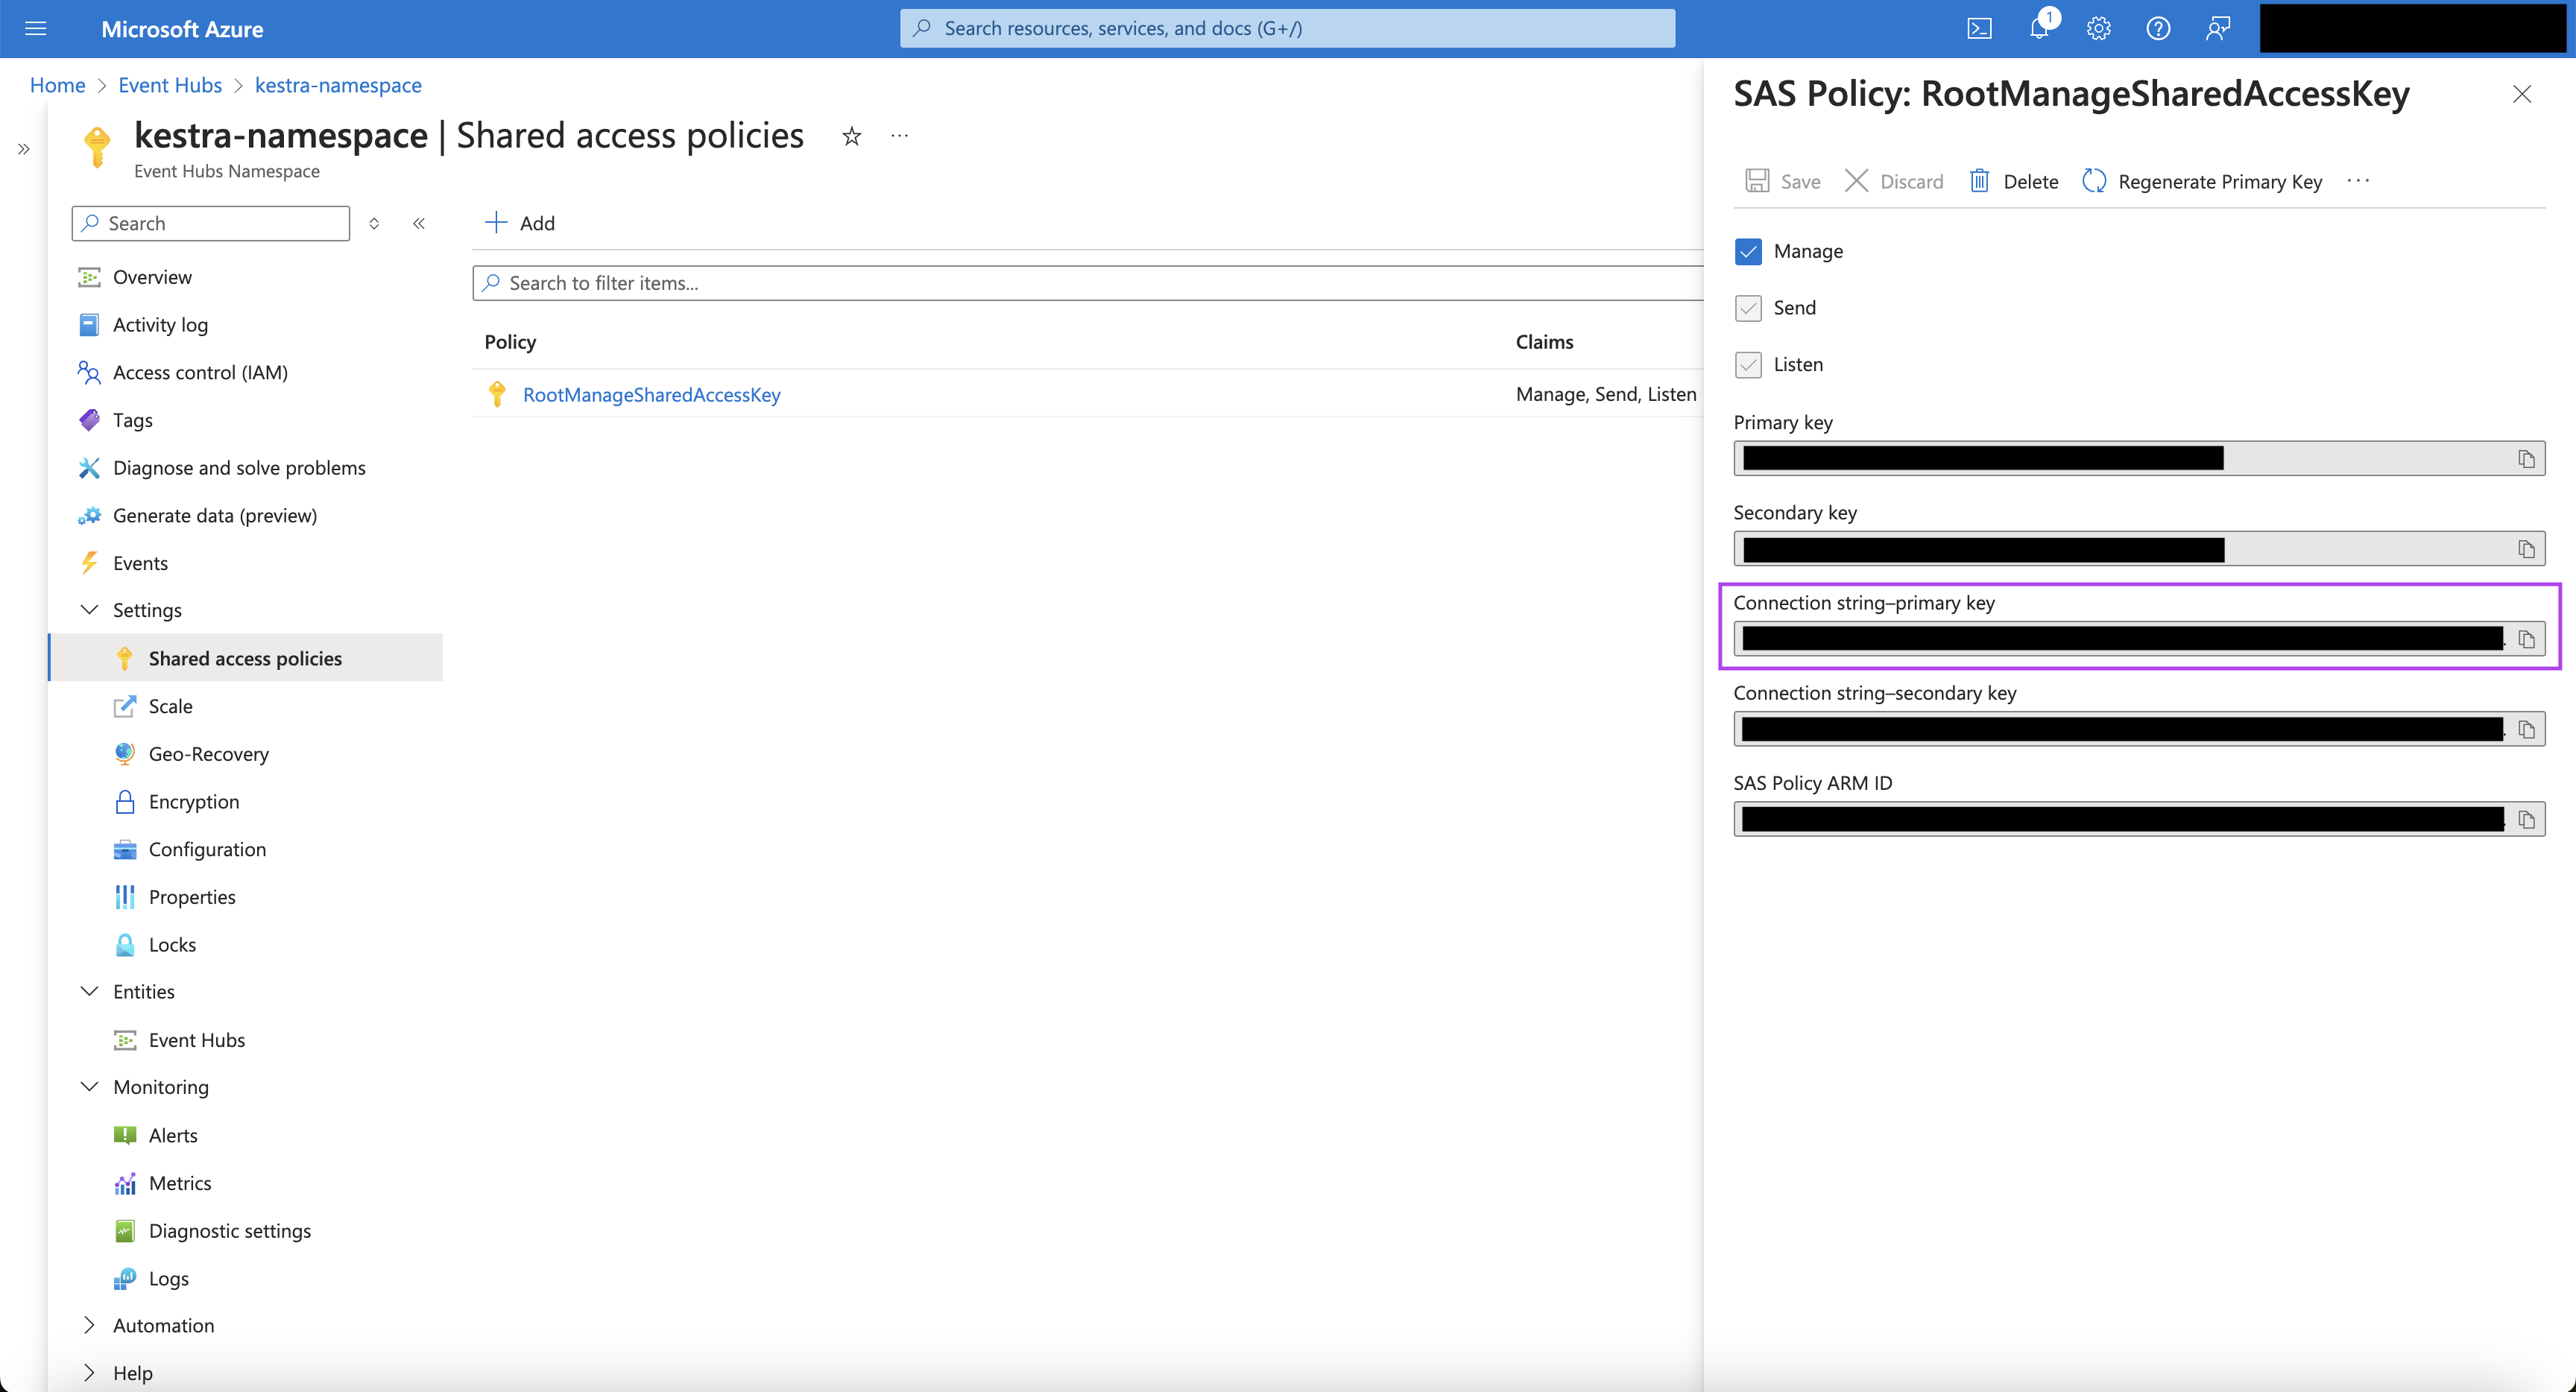
- On the namespace page, click on “Shared access policies” from the left menu bar.
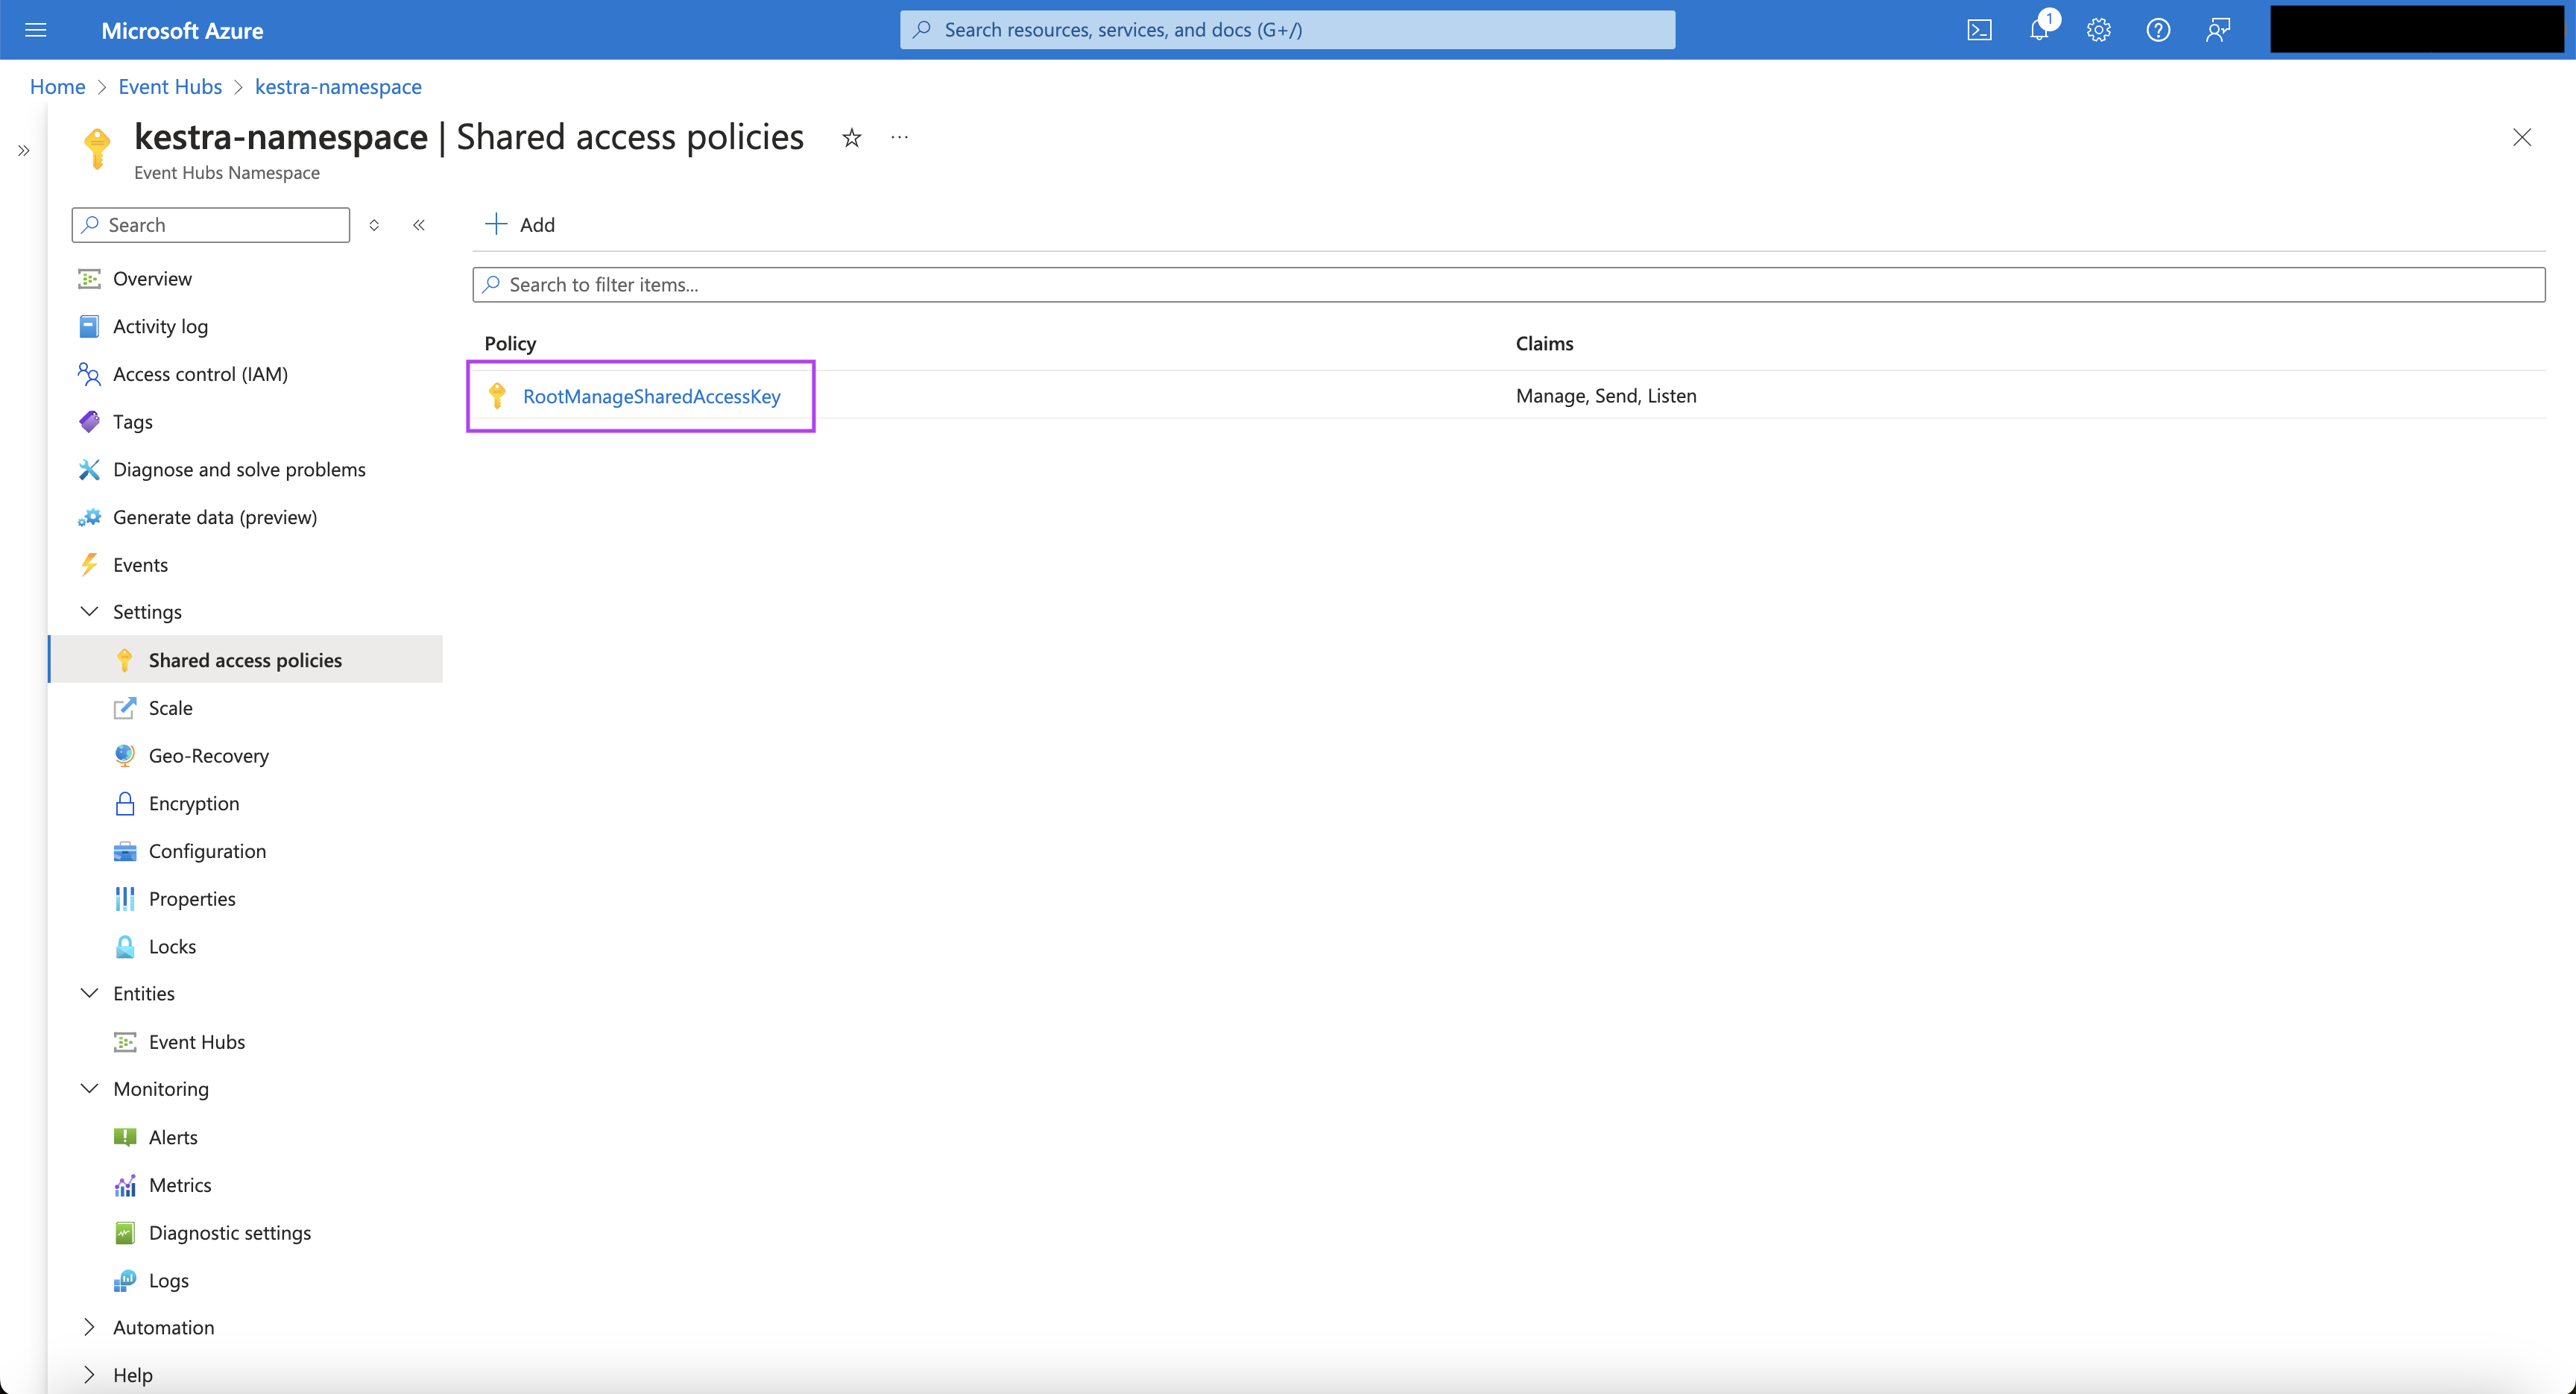
- Click on the “RootManageSharedAccessKey”.
- In the popup page that appears, you can copy the “Connection string – primary key” to be used later in the Kestra flow. With this, the Event Hub is created.
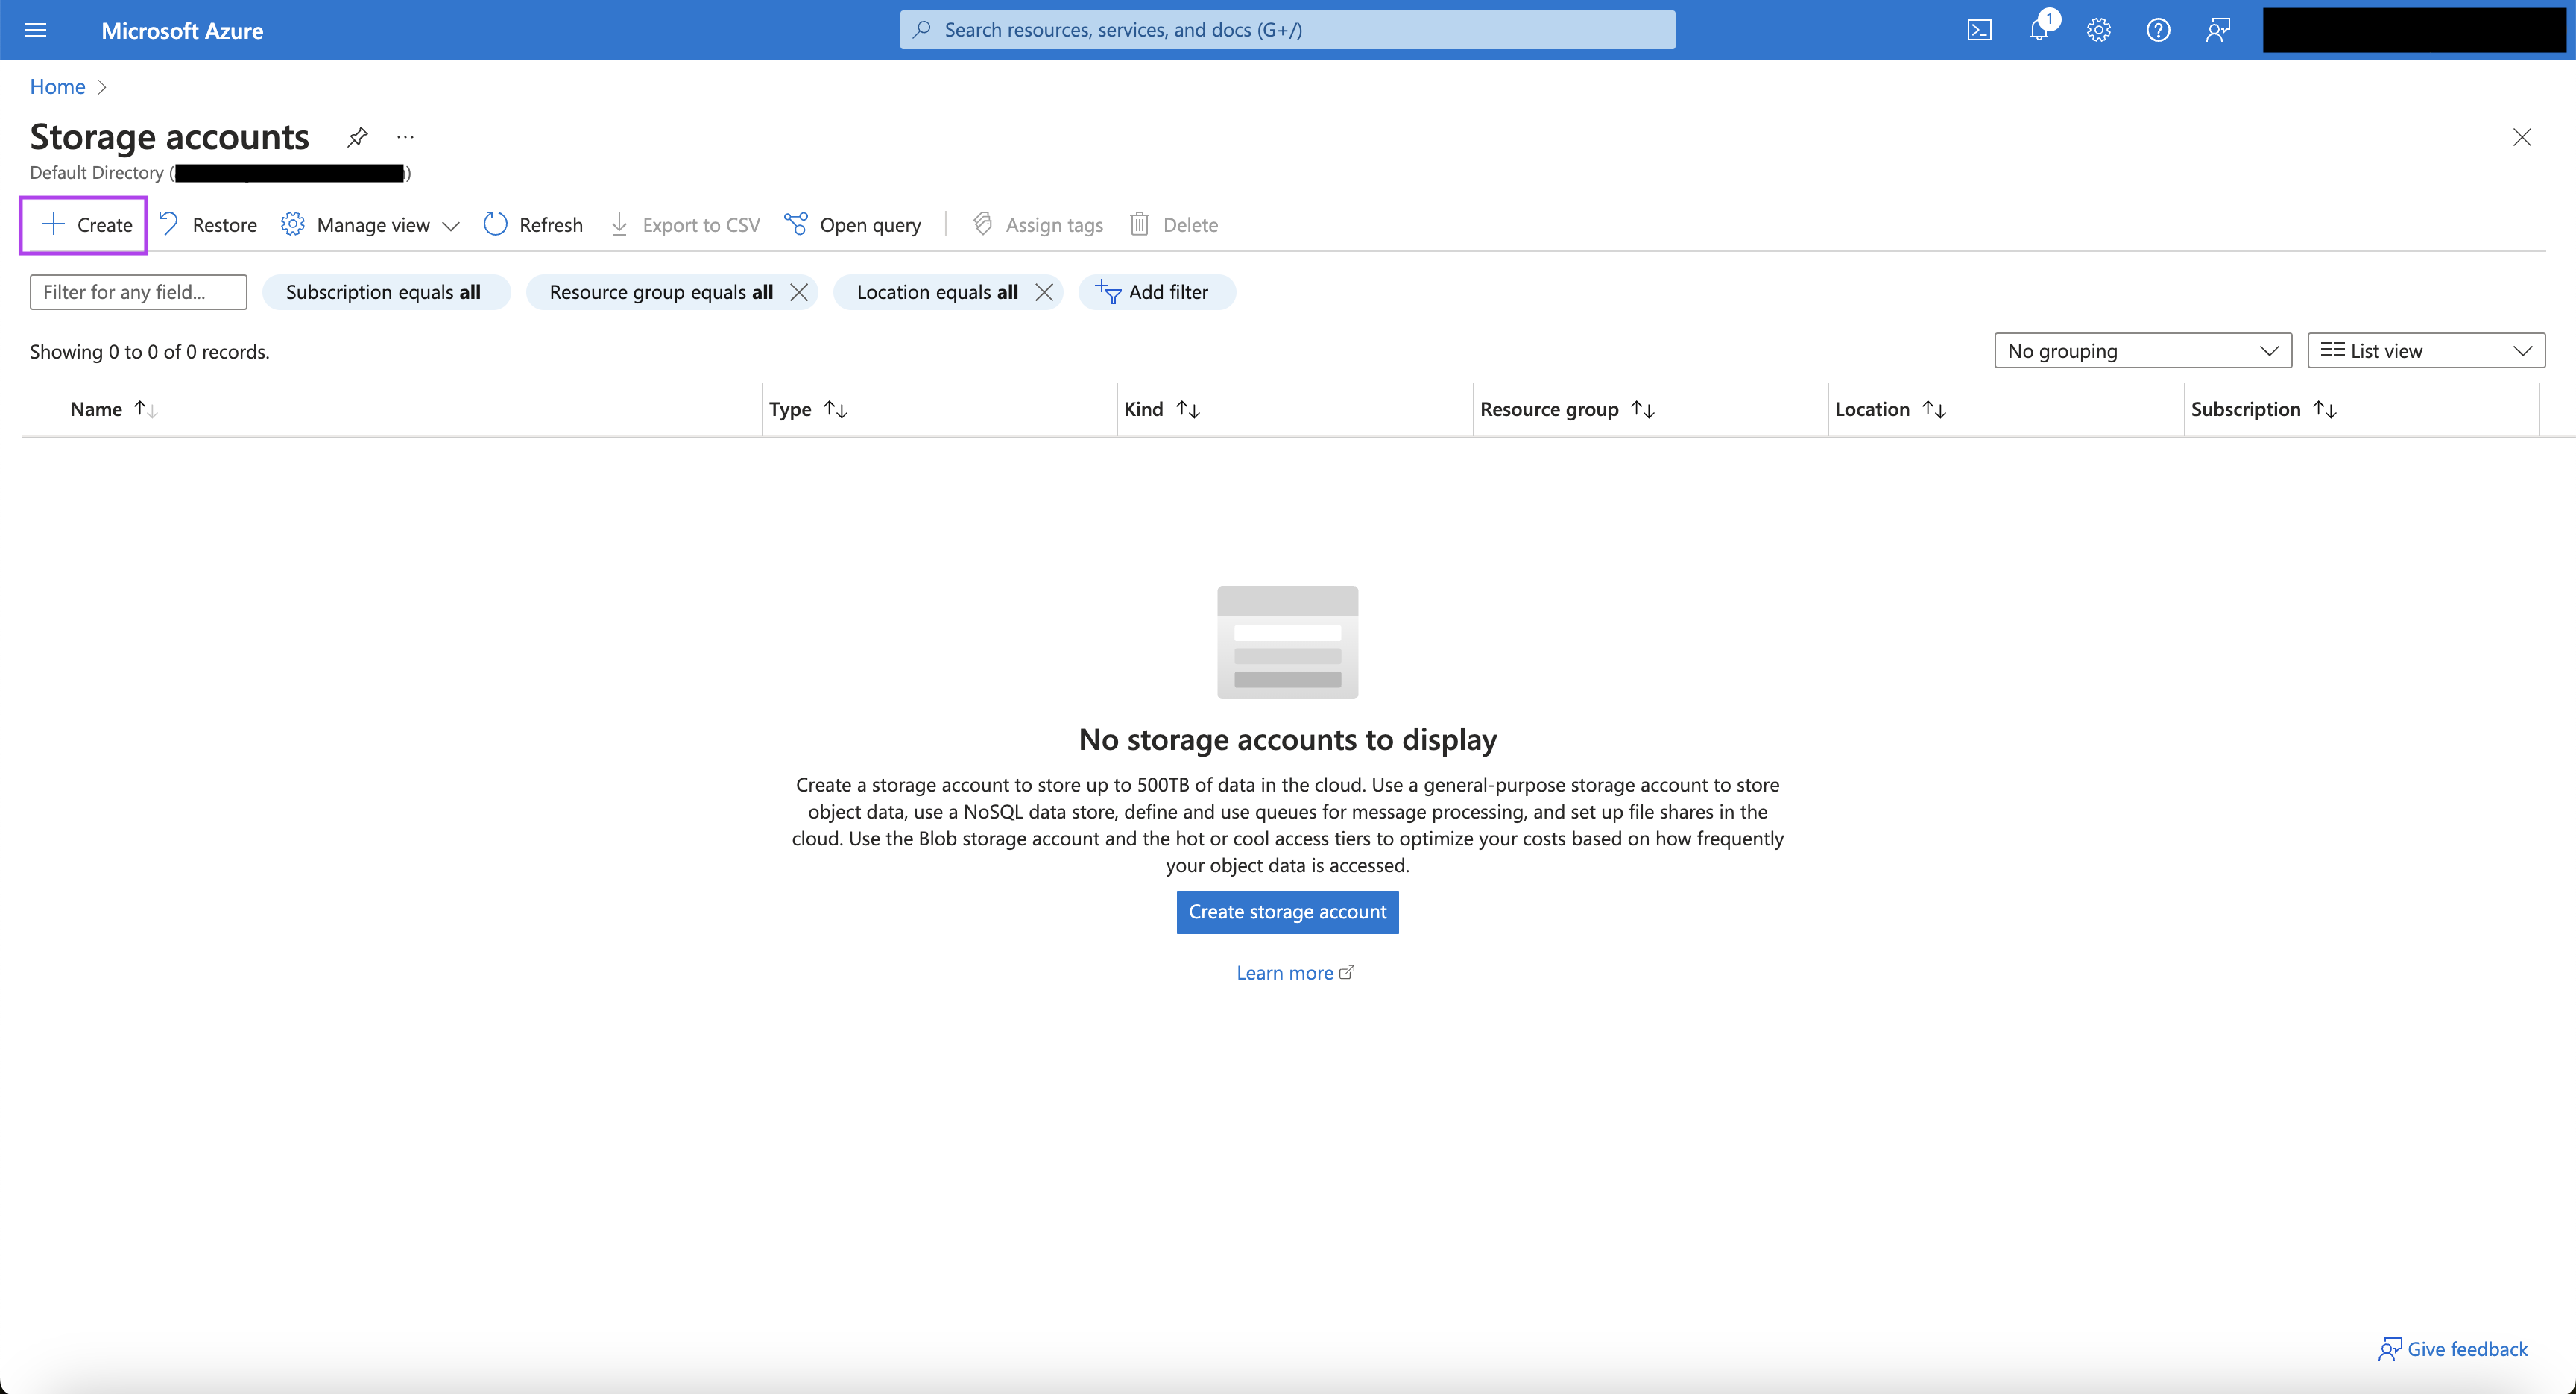
- Create the container. Go to Storage accounts.
- Click on “Create storage account”.
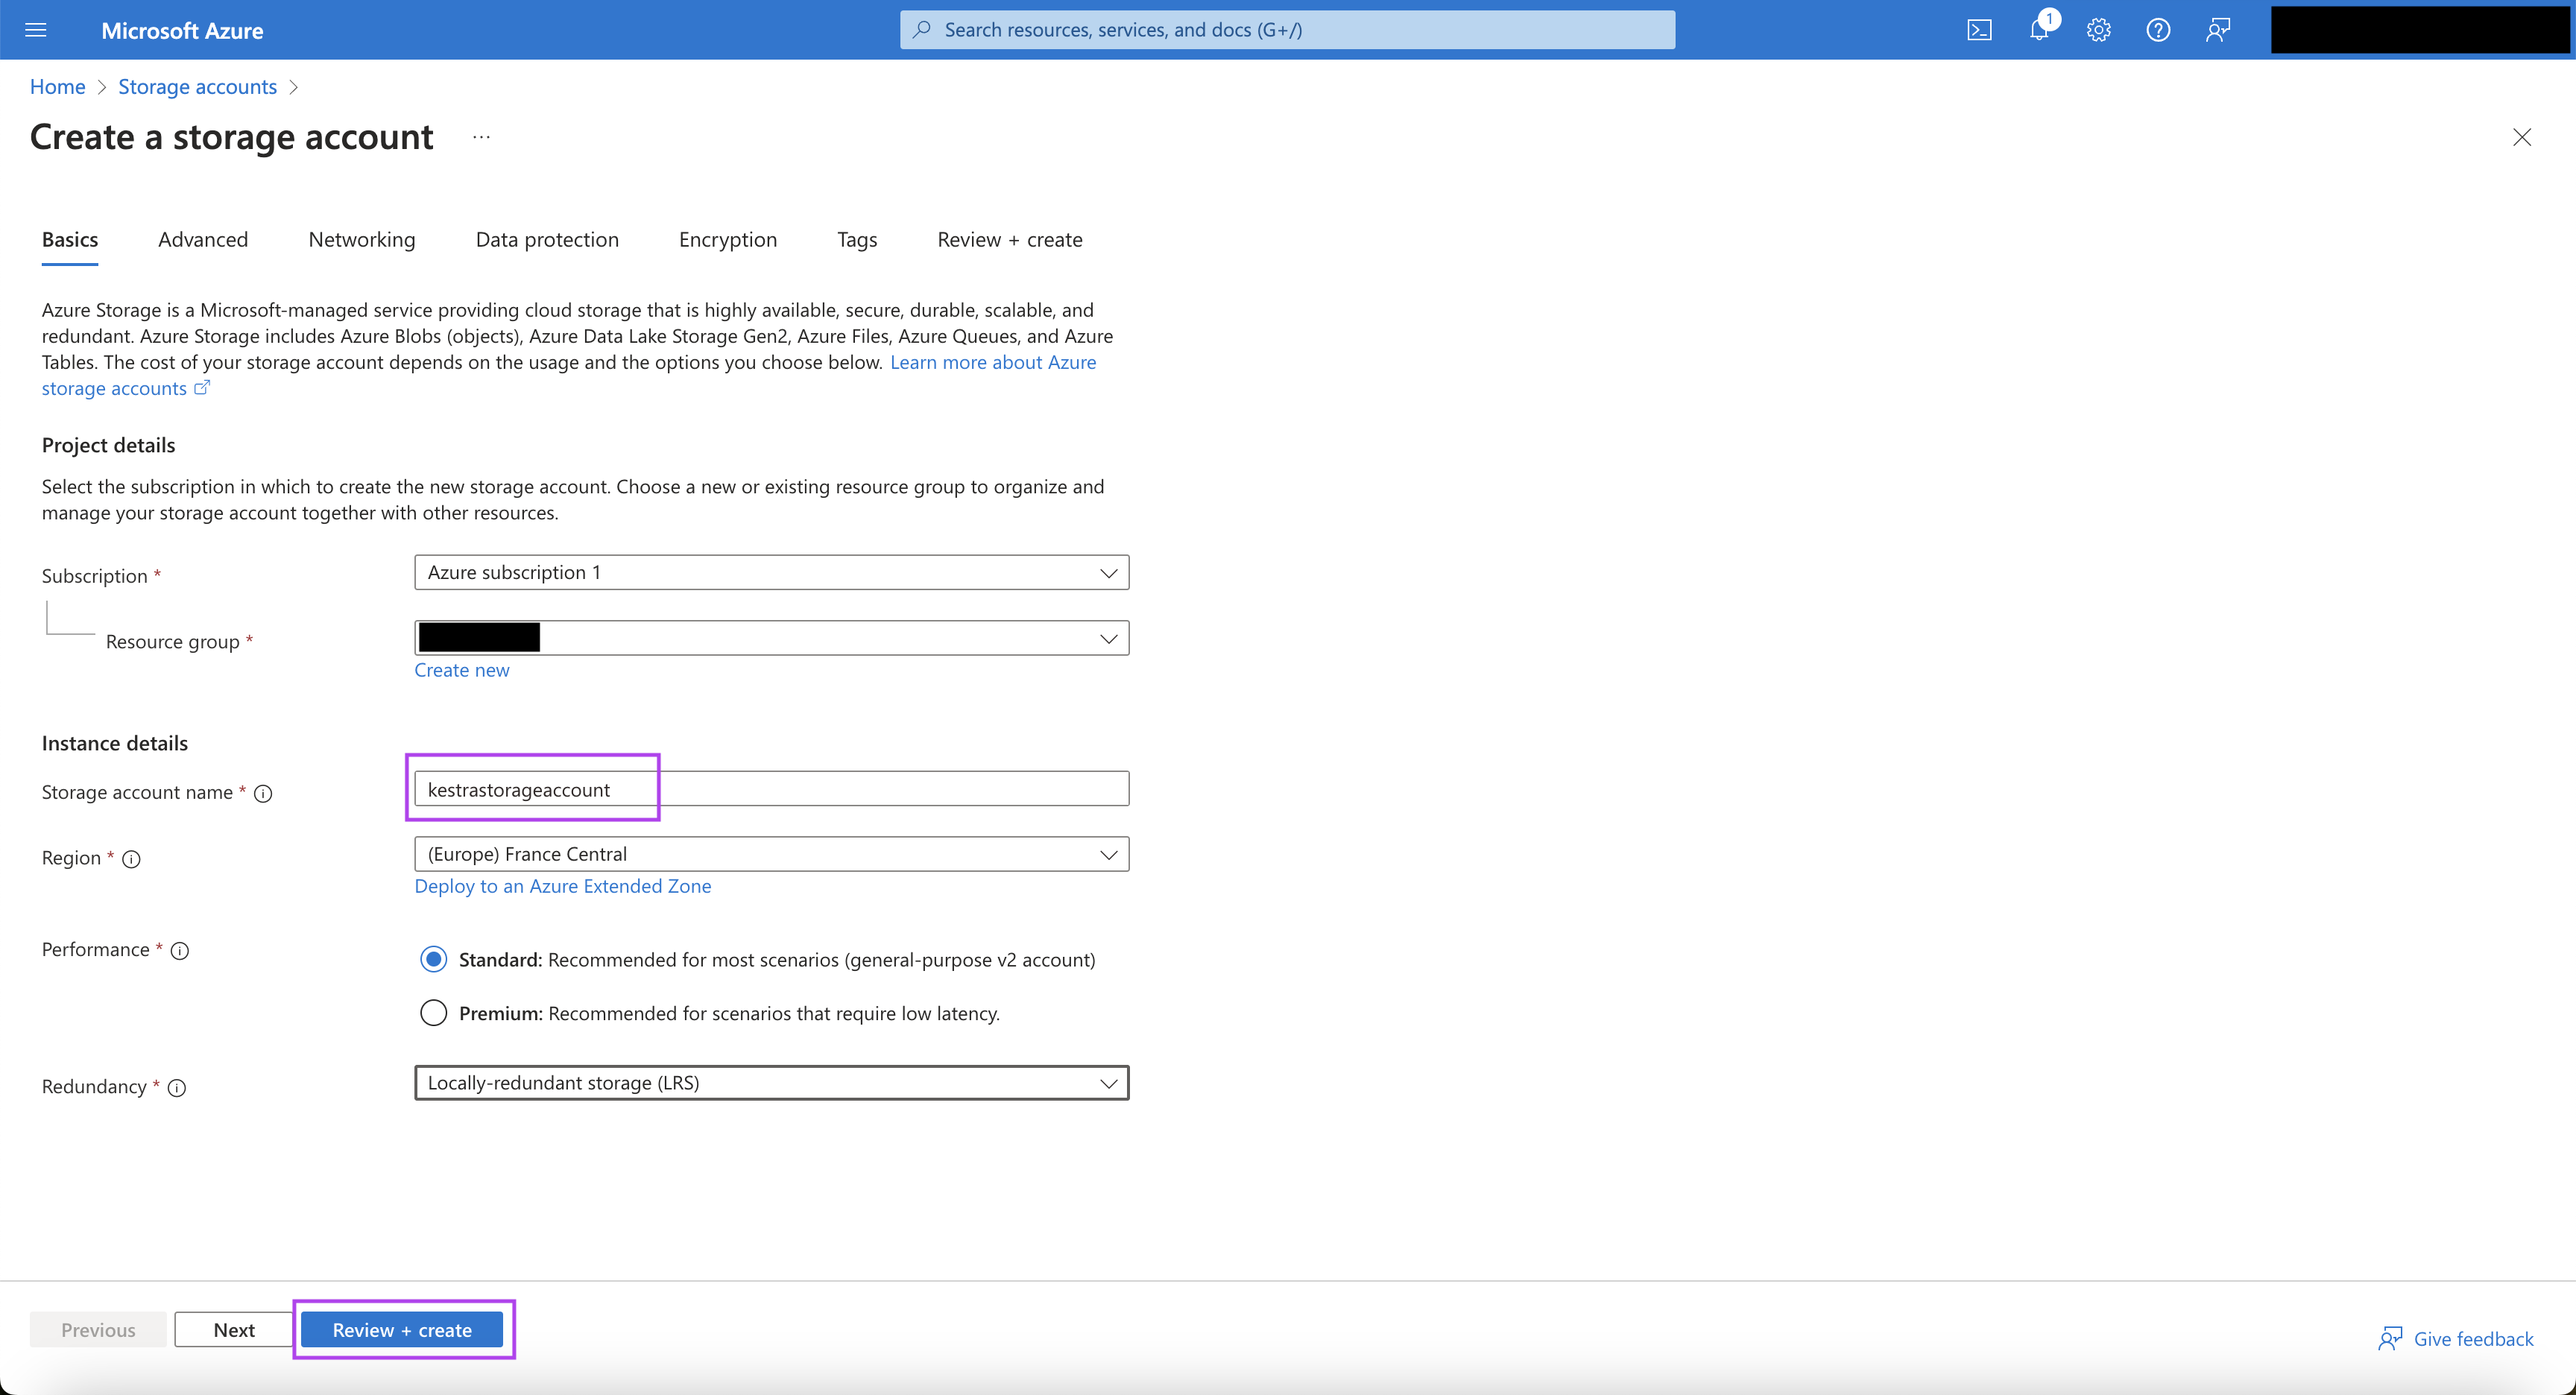
- On the “Create storage account” page, choose an appropriate Subscription and Resource Group.
- Put an appropriate Storage account name, Region, Performance, and Redundancy.
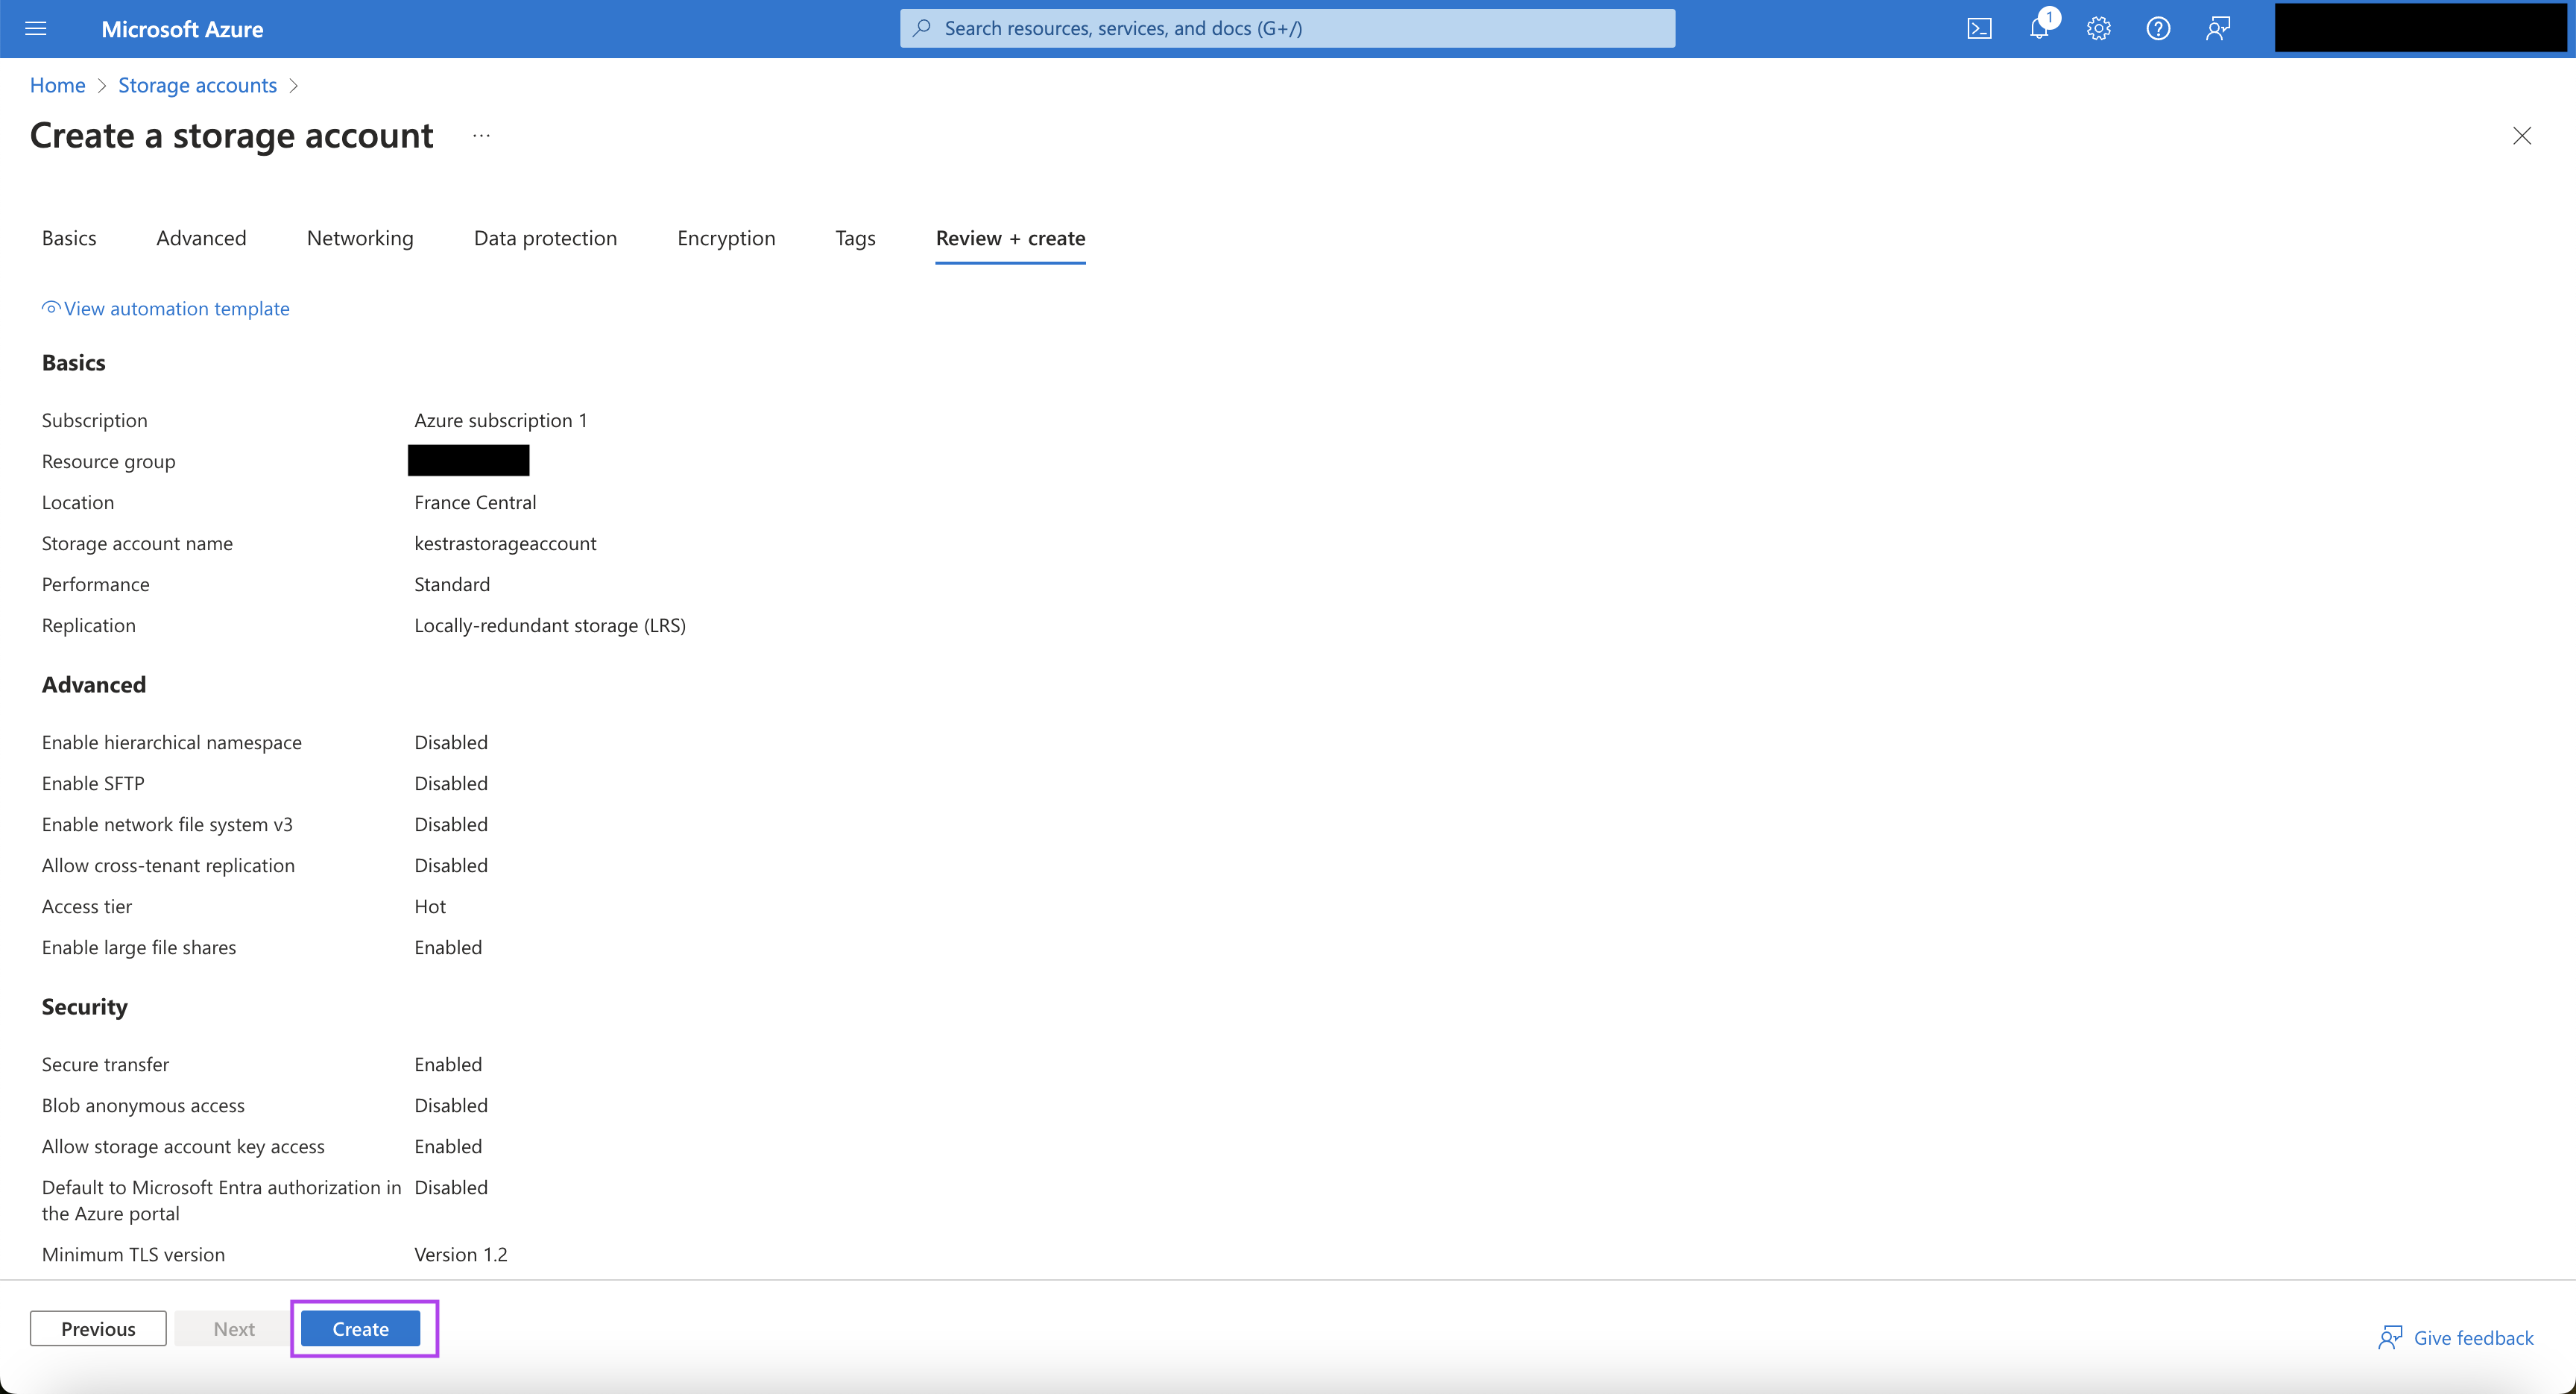
- Click on “Review + Create”. Once the validation is successful, click on “Create”.
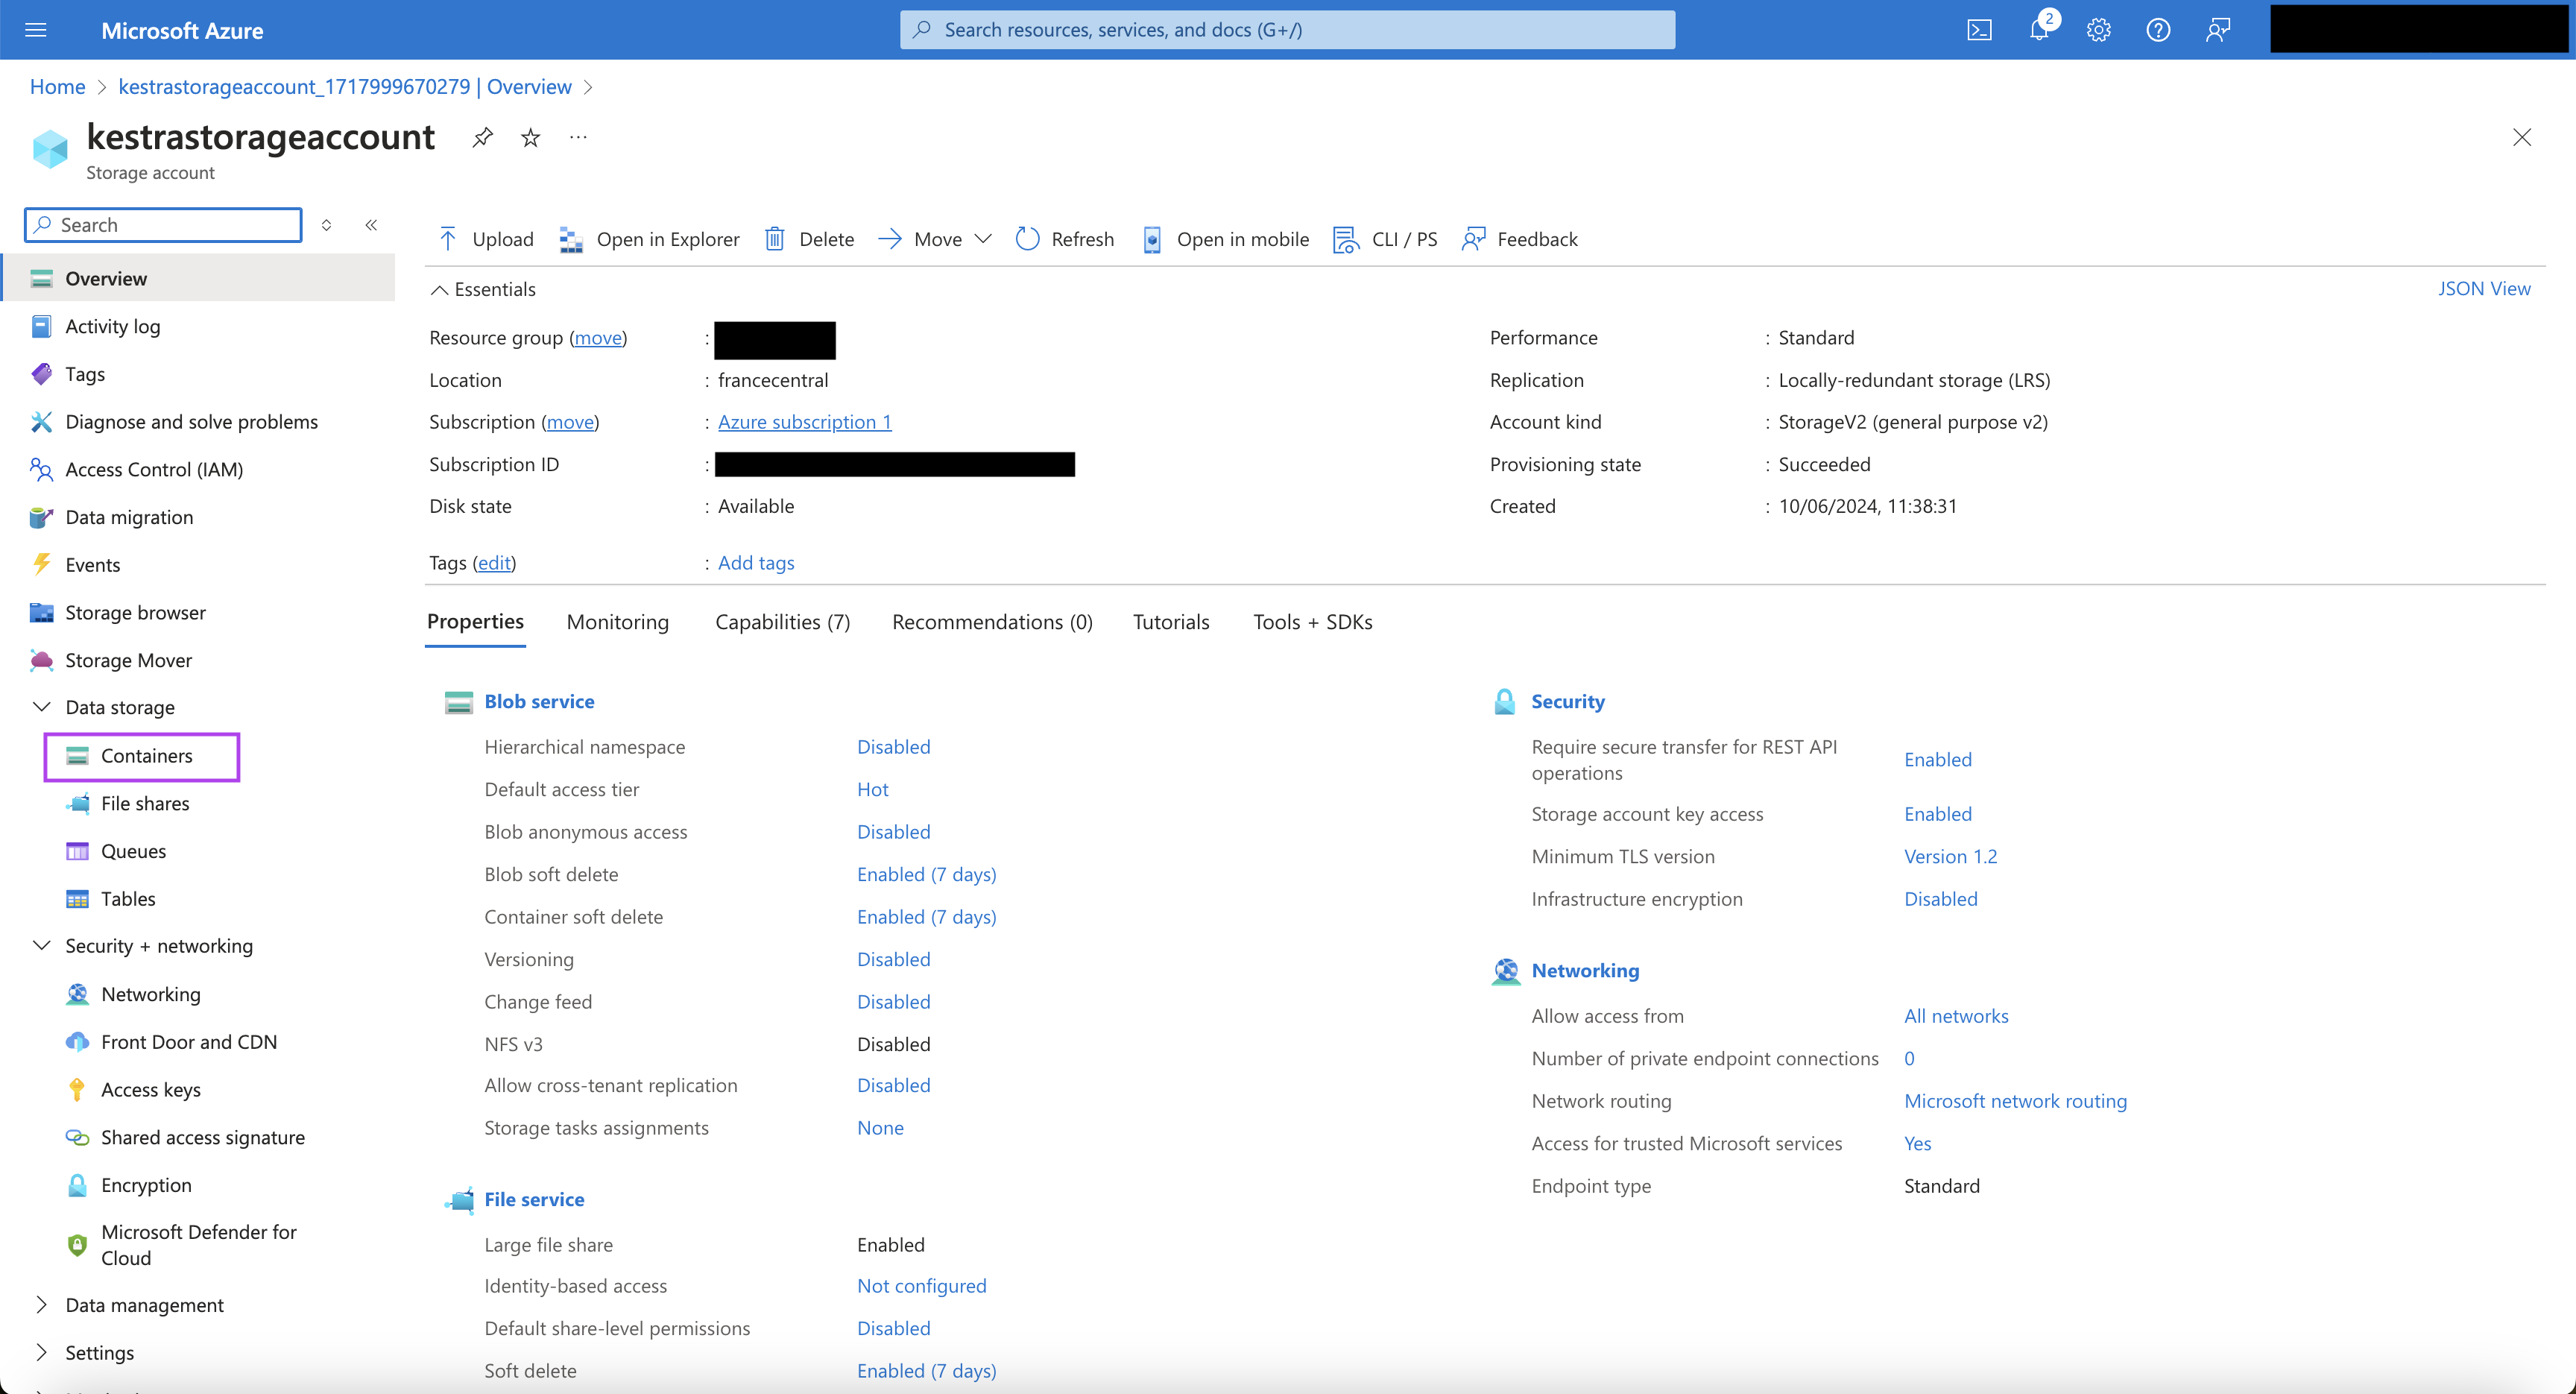
- Once the storage account is created, click on the storage account name.
- On the storage account page, navigate from the left menu bar to the “Data storage”, and then to “Containers”.
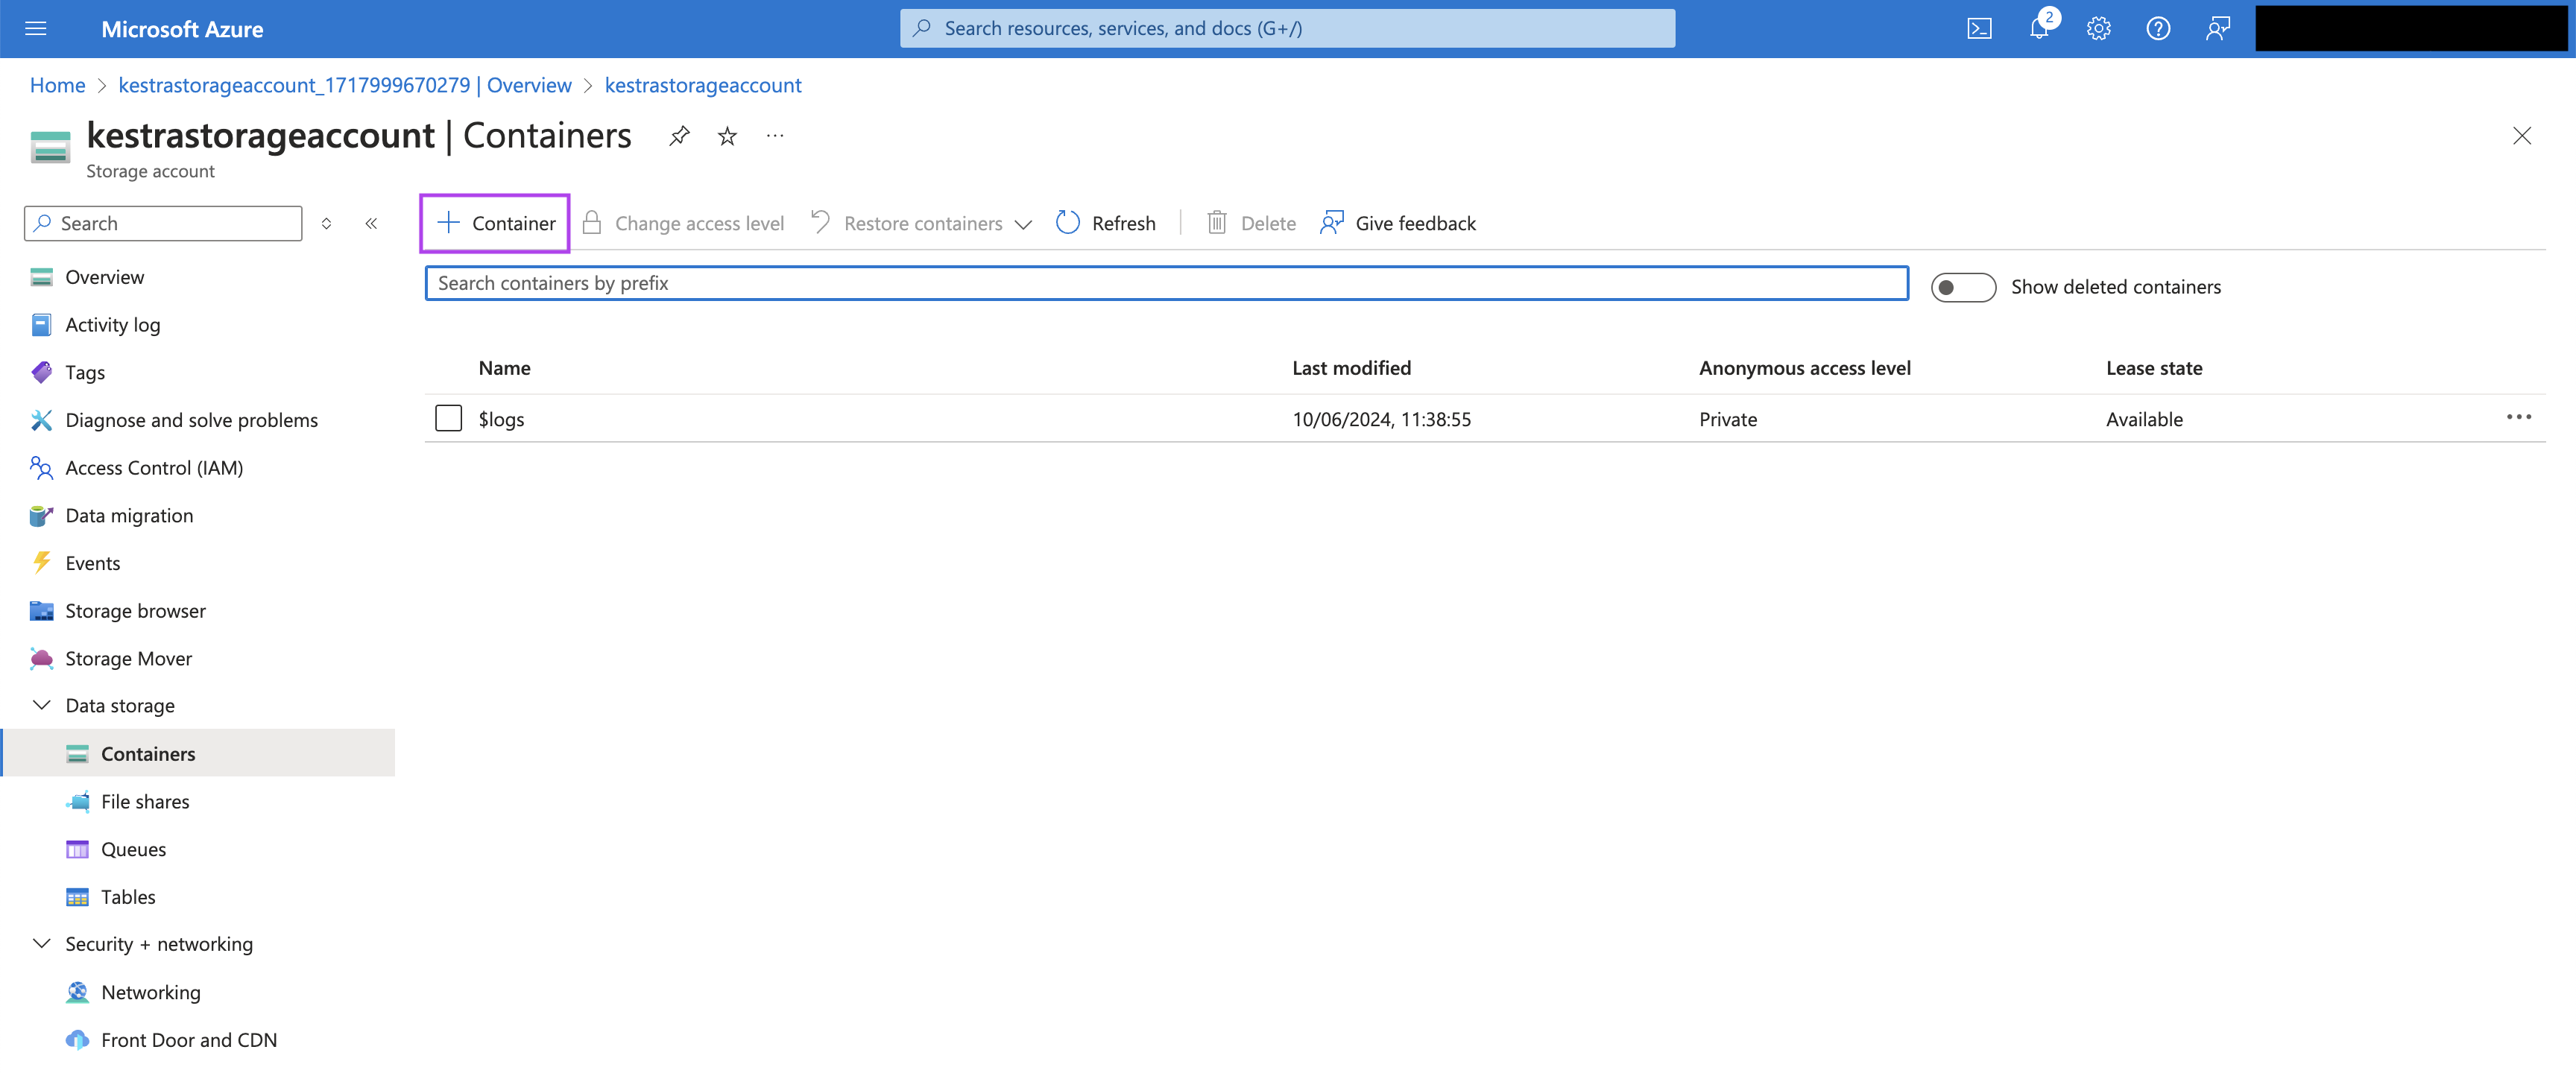
- Click on the ”+ Container” button to create a container.
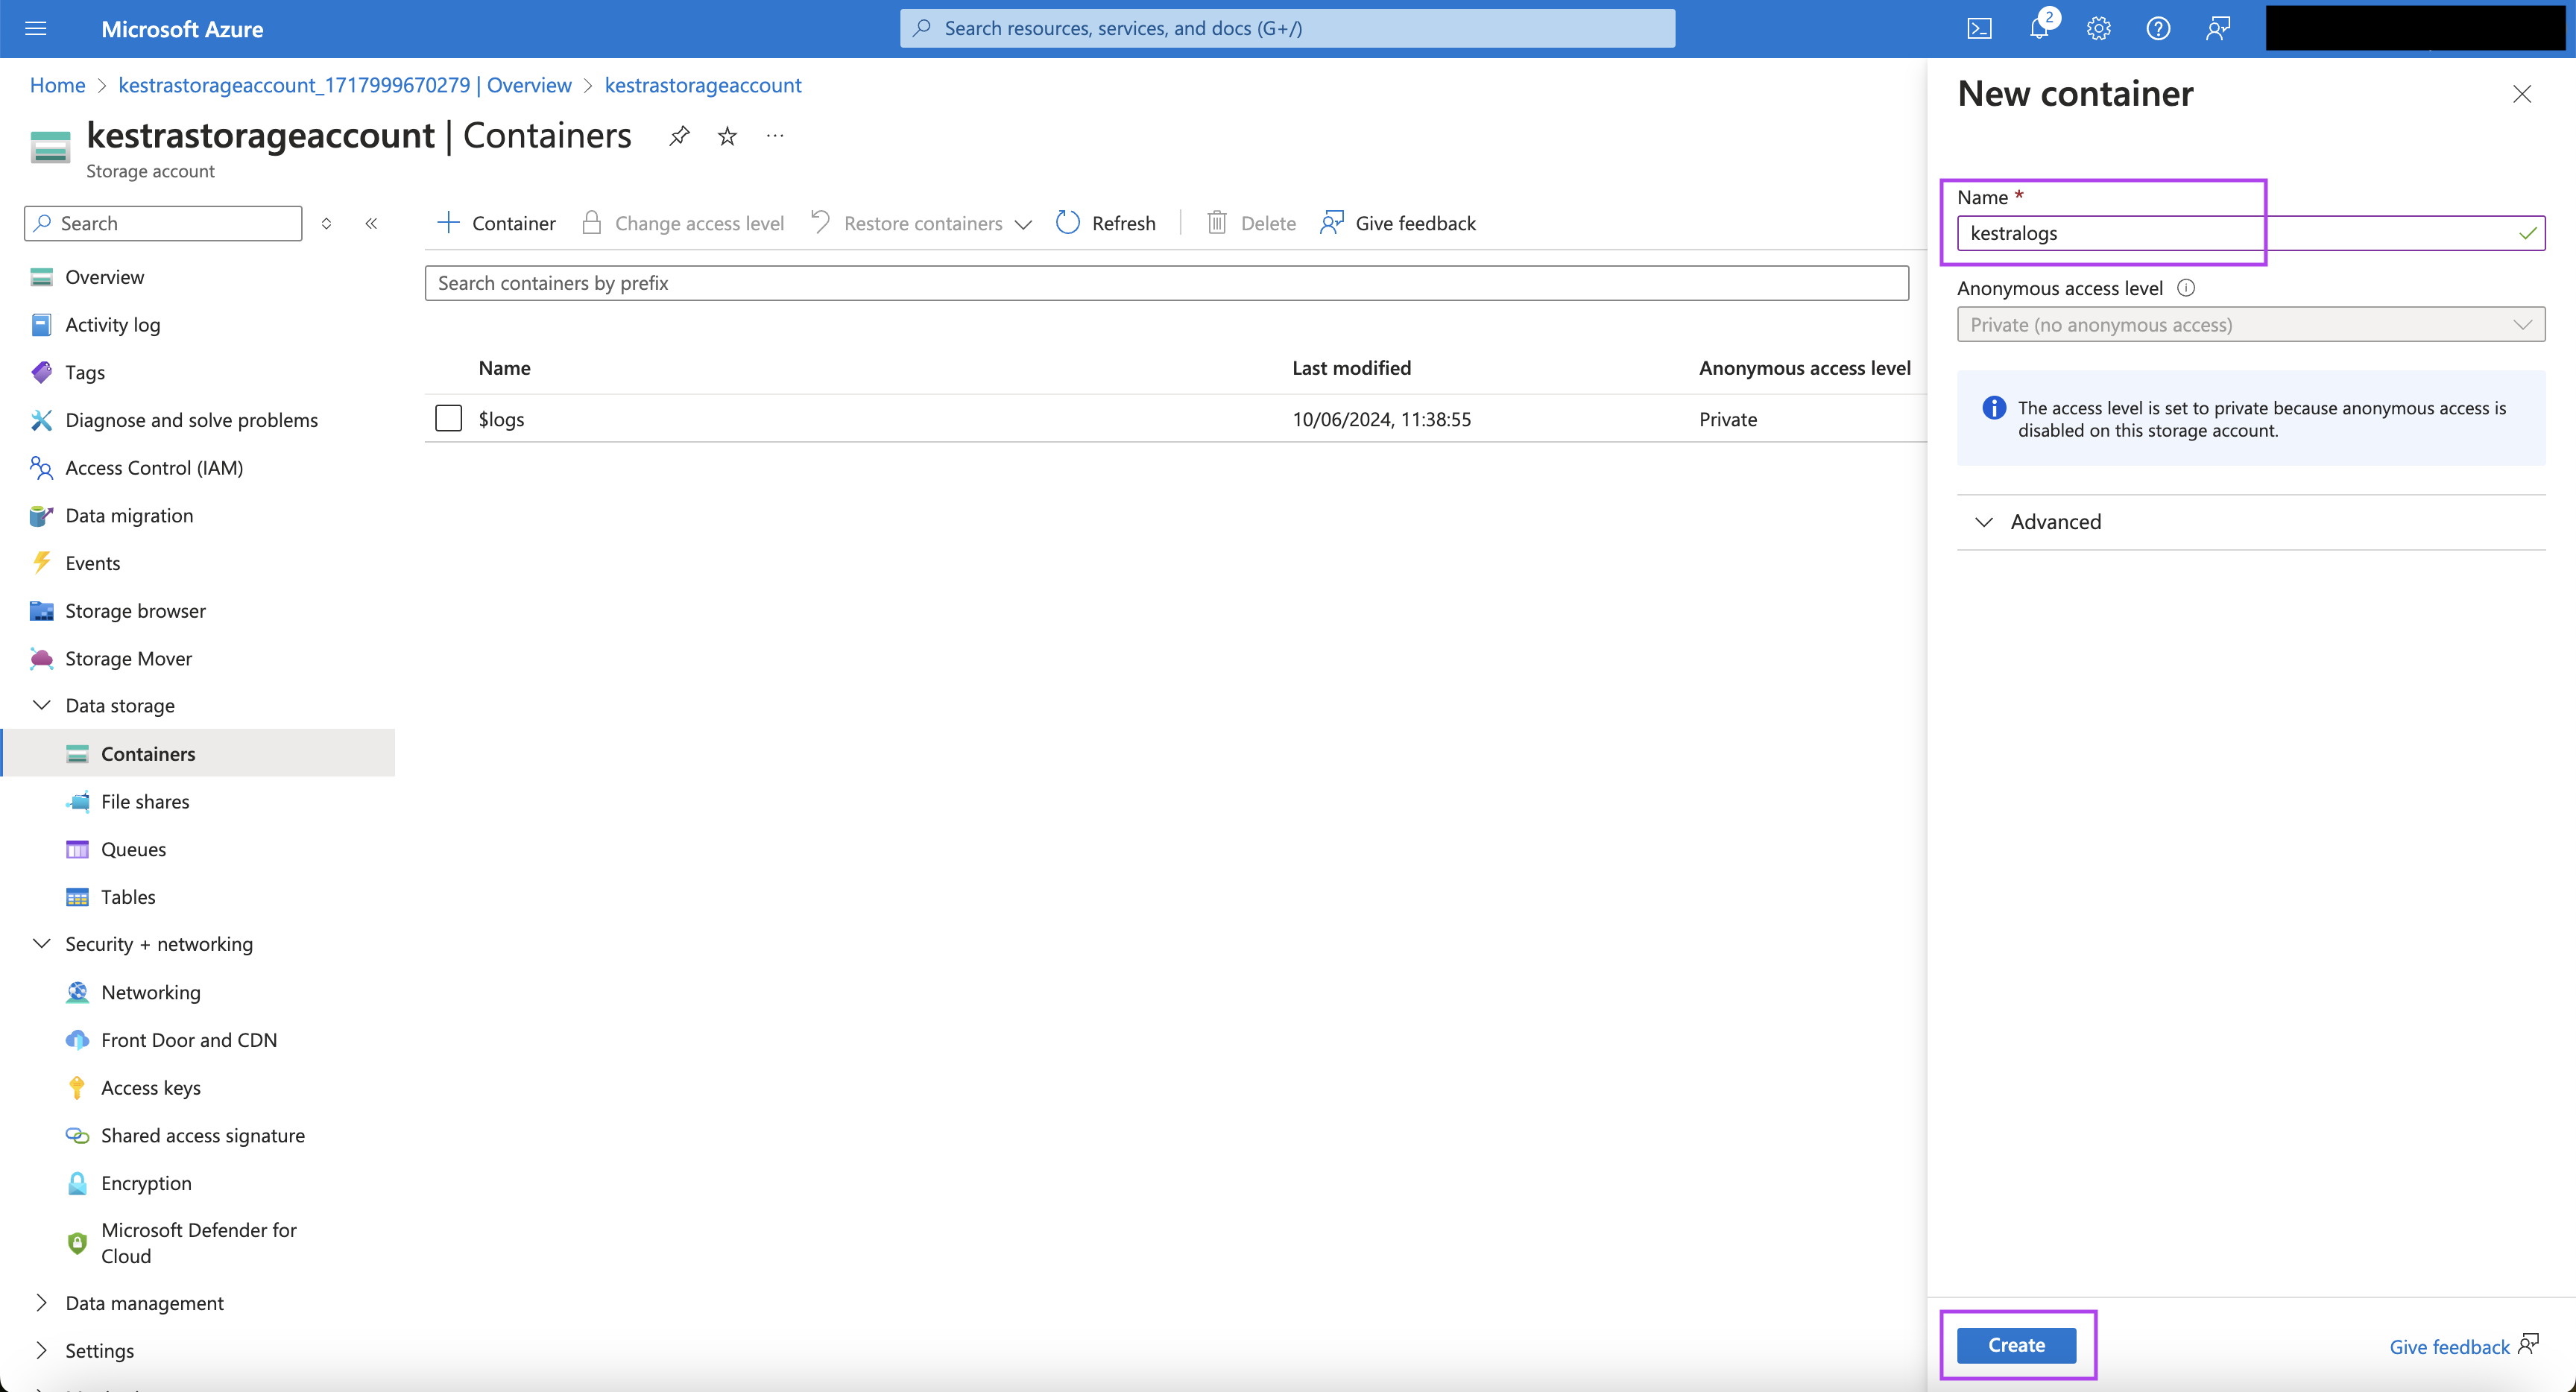
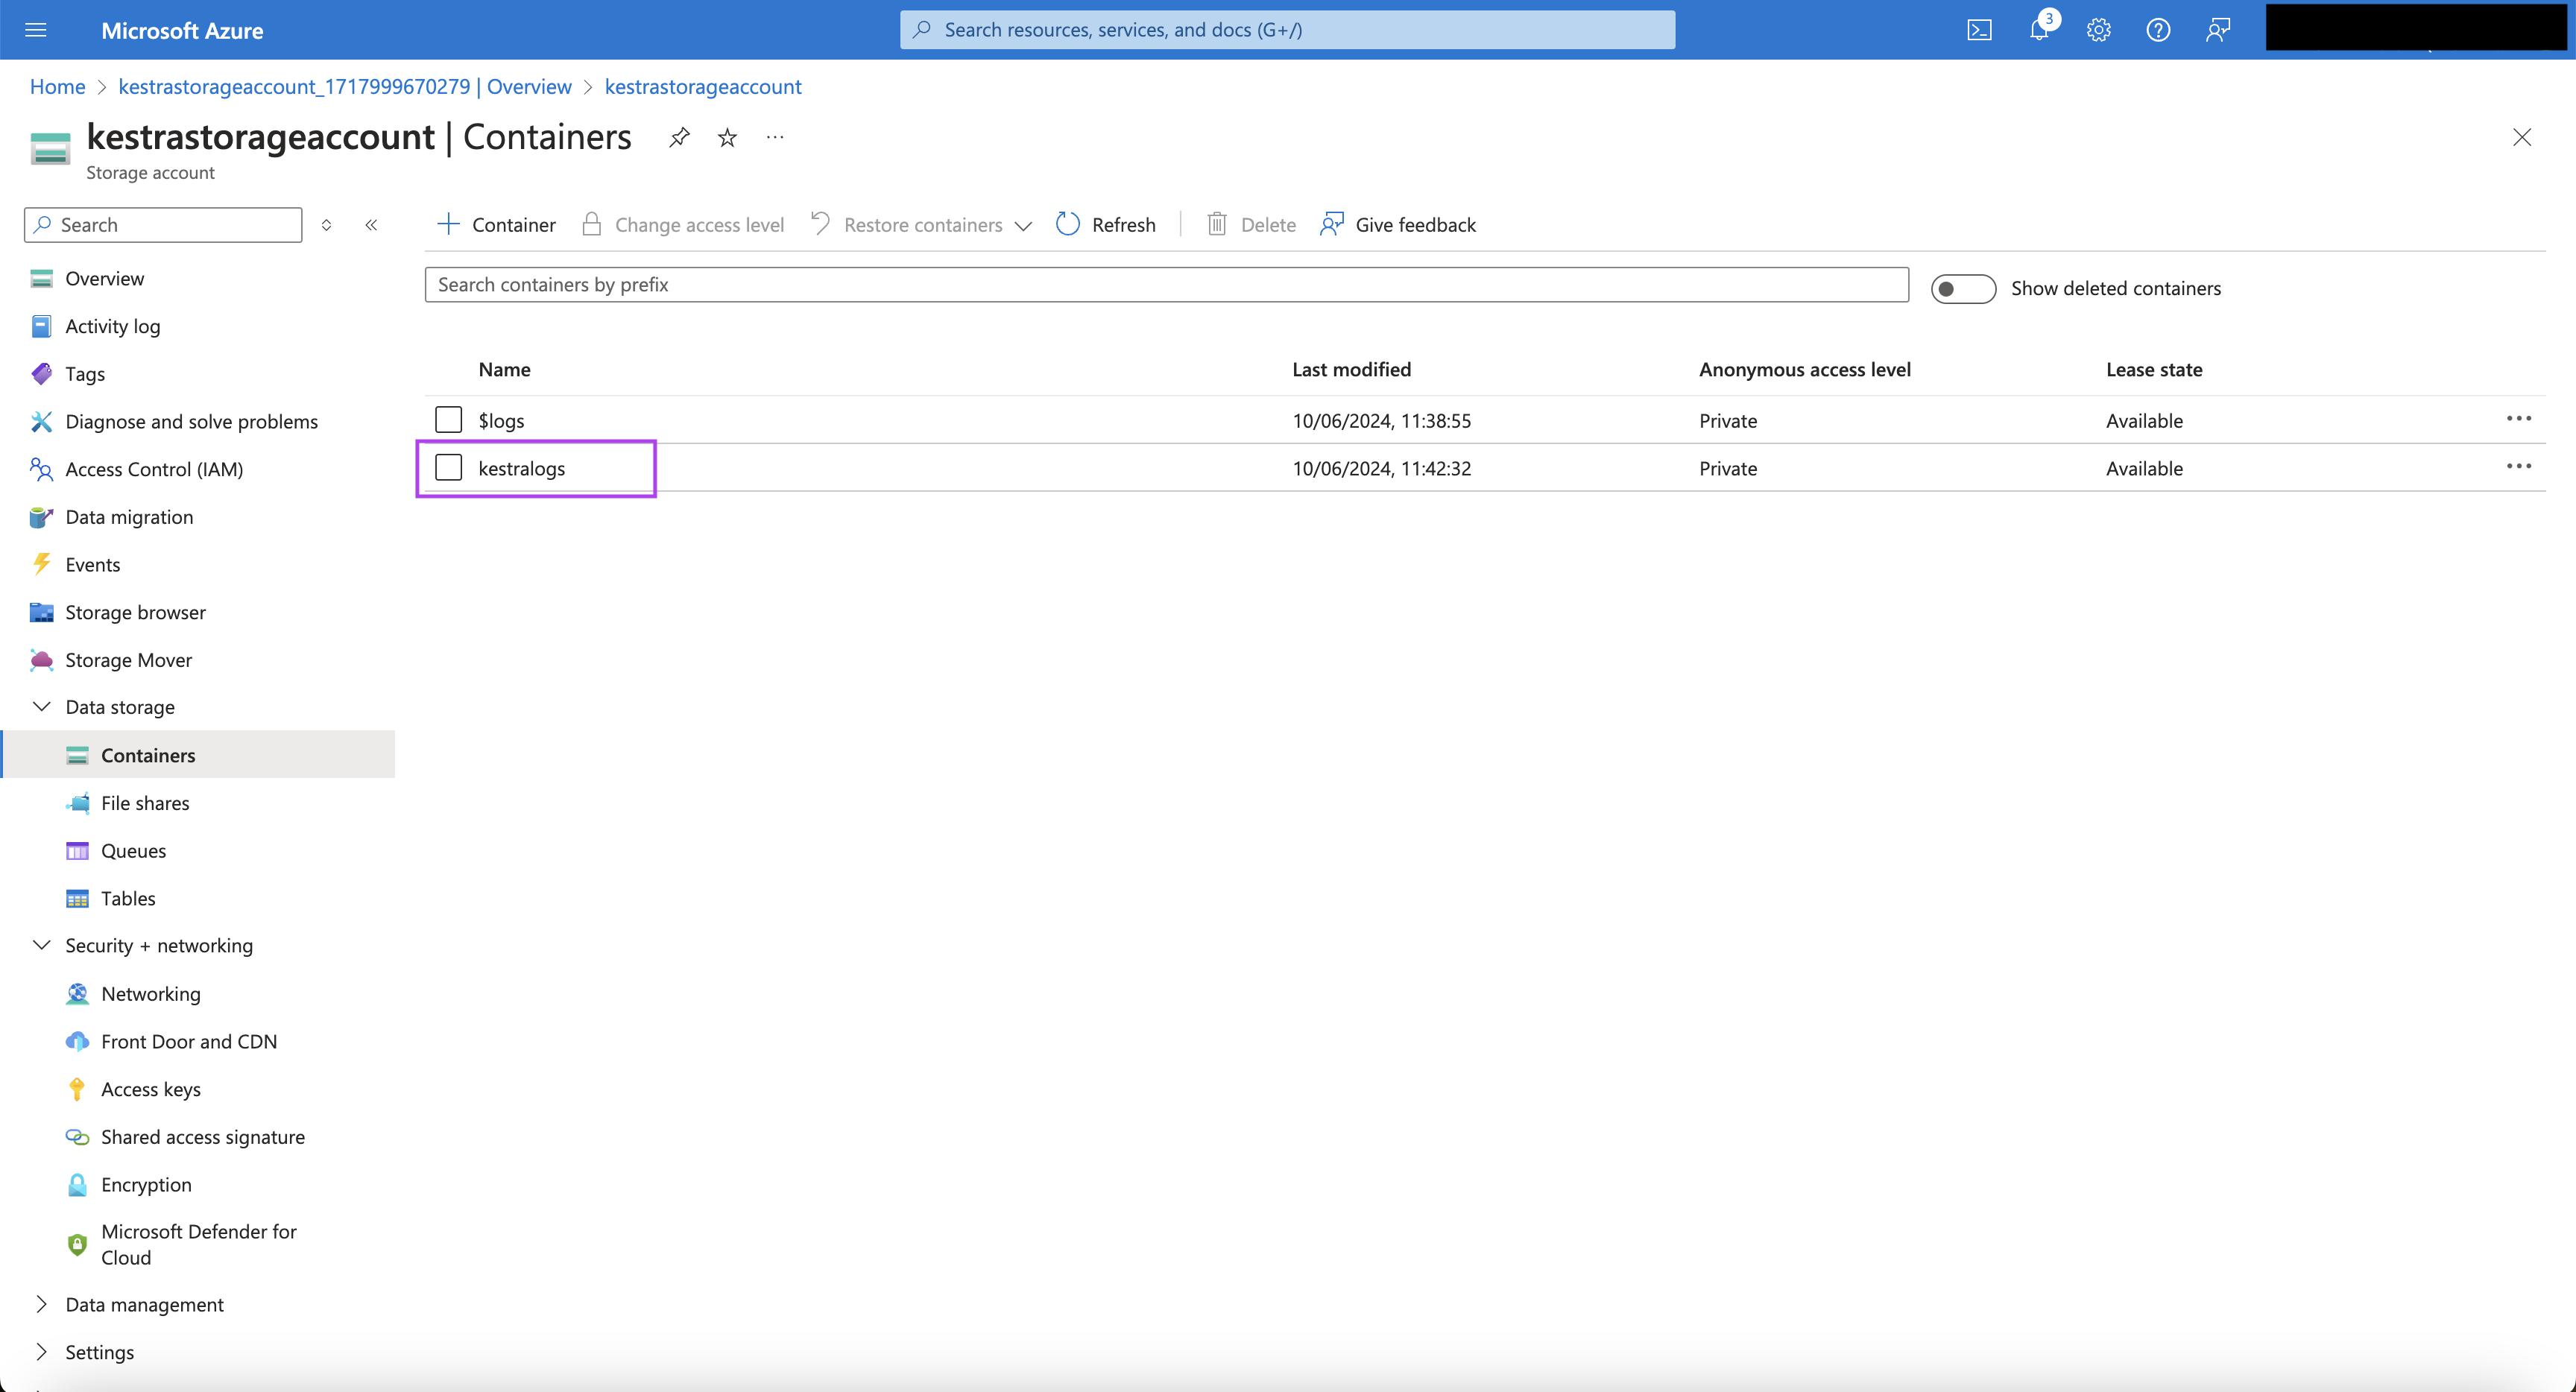
- Put an appropriate name for the container, and click “Create”.
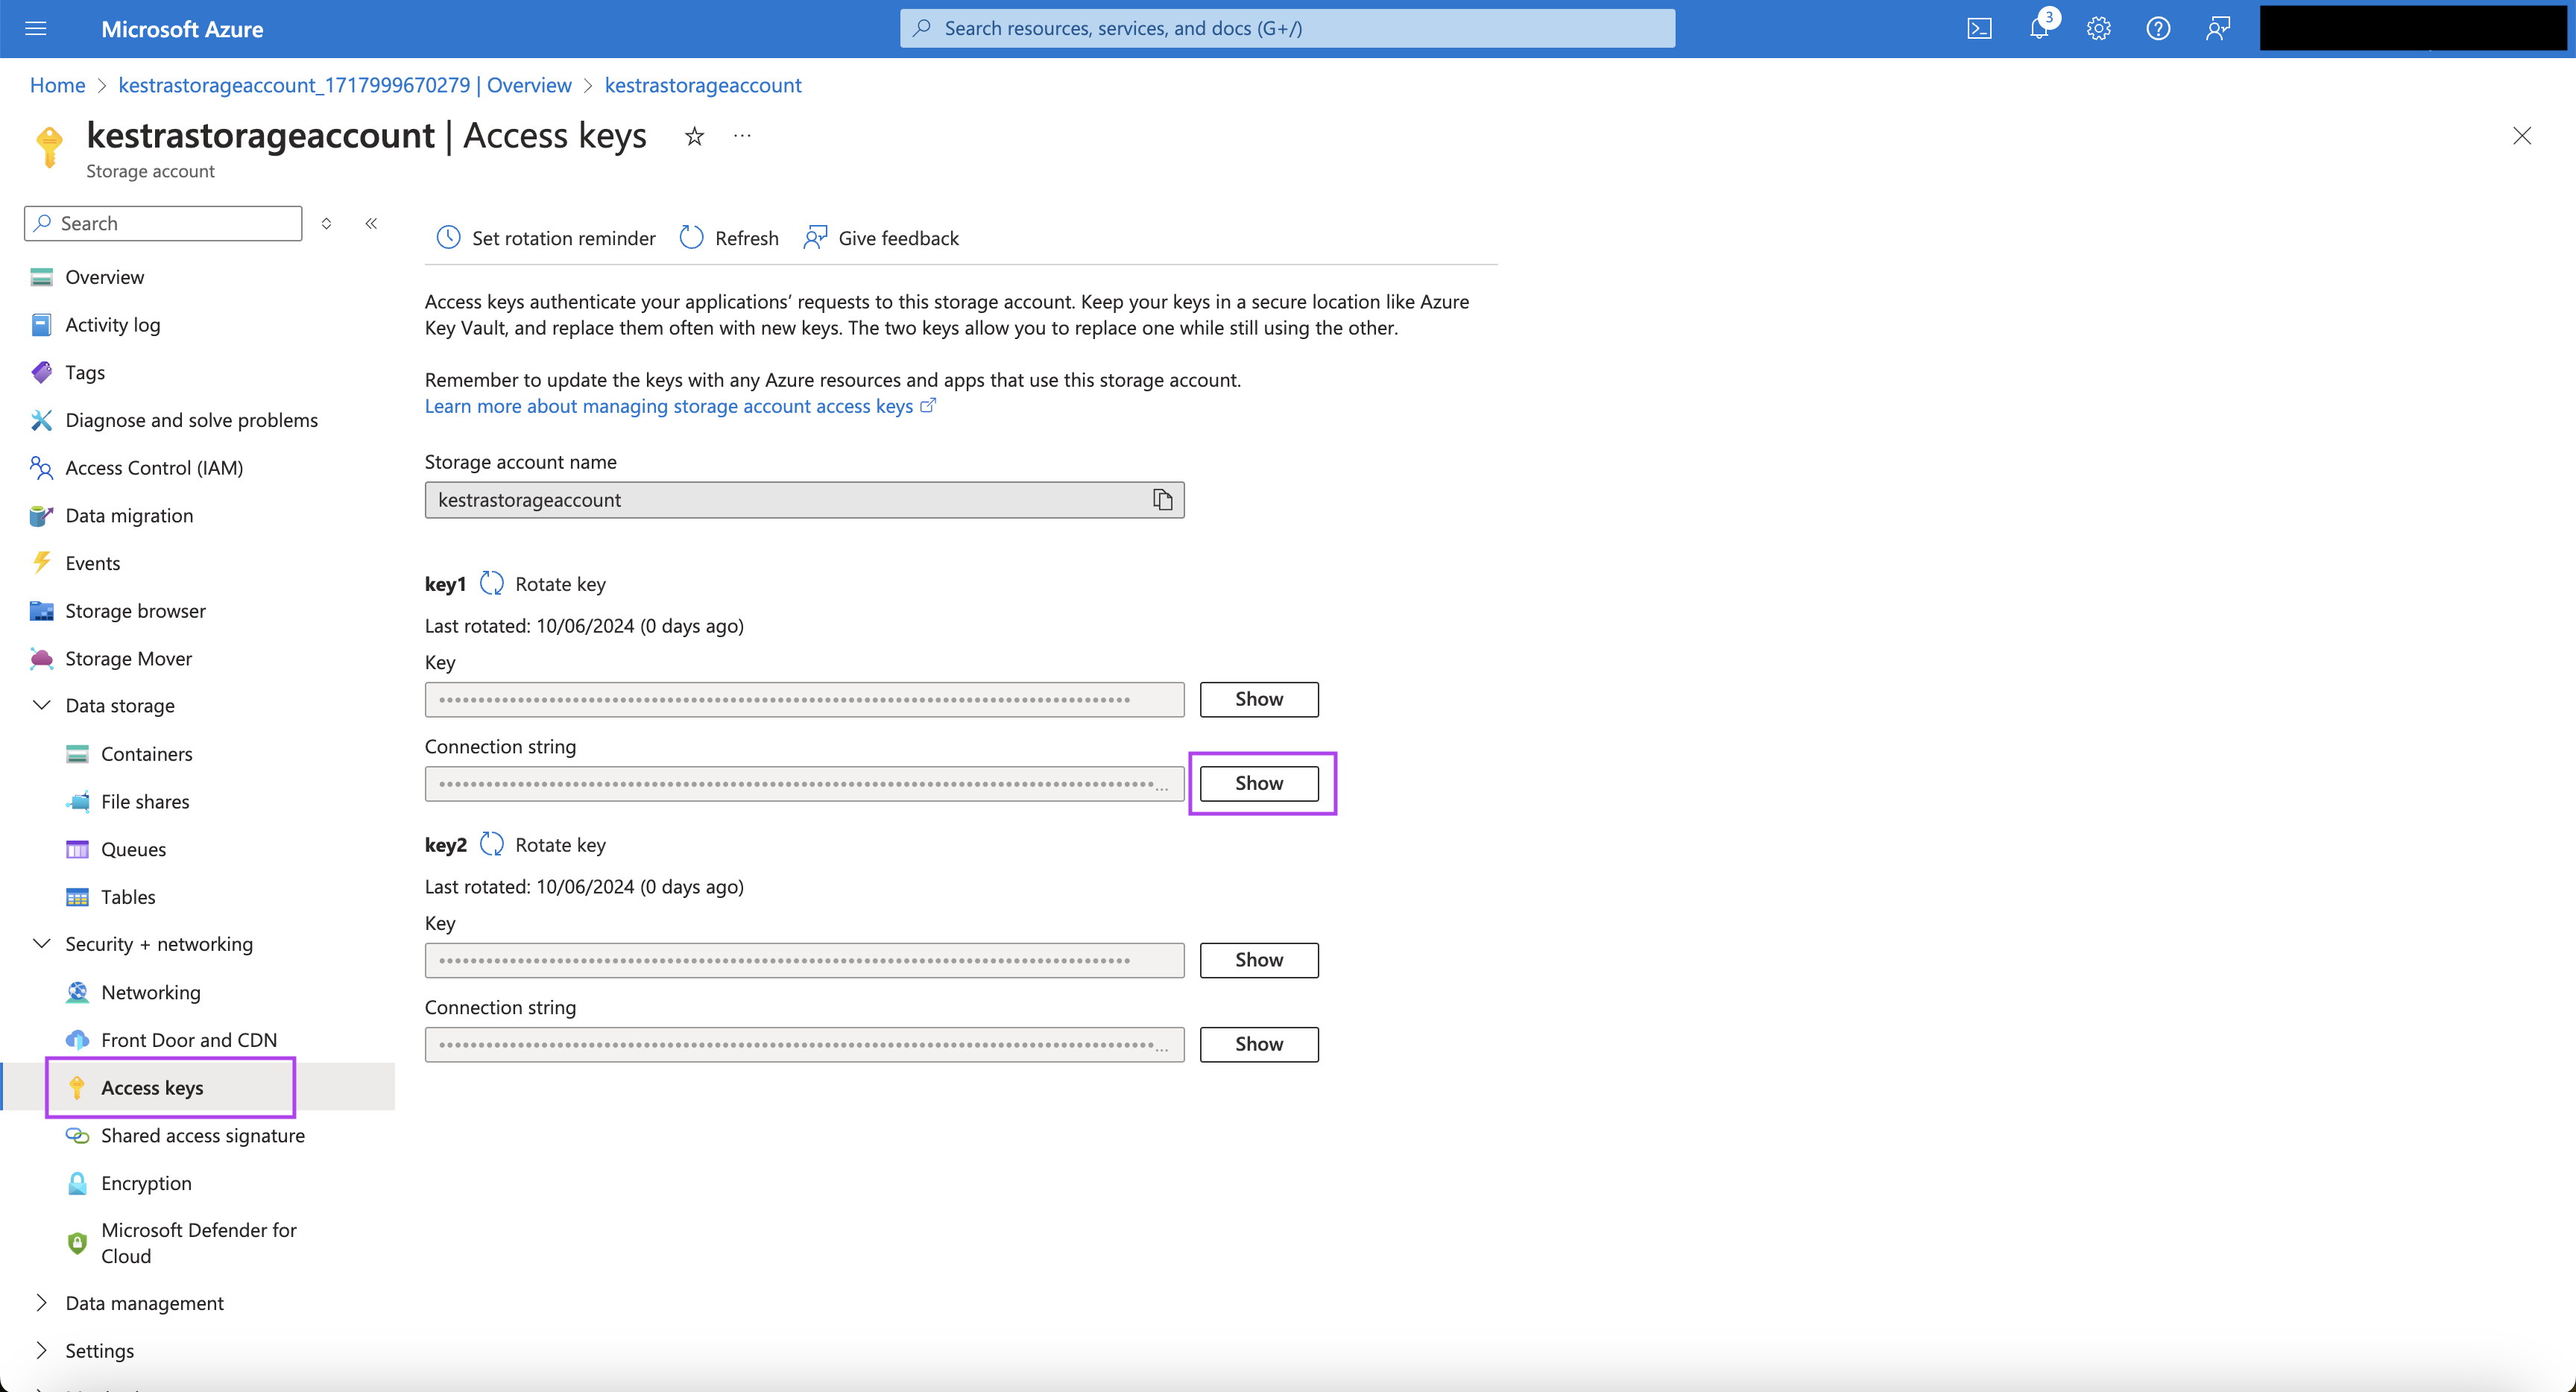
- Once the container is created, navigate to “Access keys” under “Security + networking” from the left menu bar.
- For the key, click on the “Show” button for the connection string and note it down to be used later in the Kestra flow.
Now that all the setup is ready in Azure, start the Kestra cluster with the environment variables “SECRET_EVENTHUBS_CONNECTION” and “SECRET_BLOB_CONNECTION” containing the base64-encoded value for the Event Hubs connection string and Blob connection string, respectively.
The Kestra flow with the Azure Event Hub Realtime Trigger will look as follows:
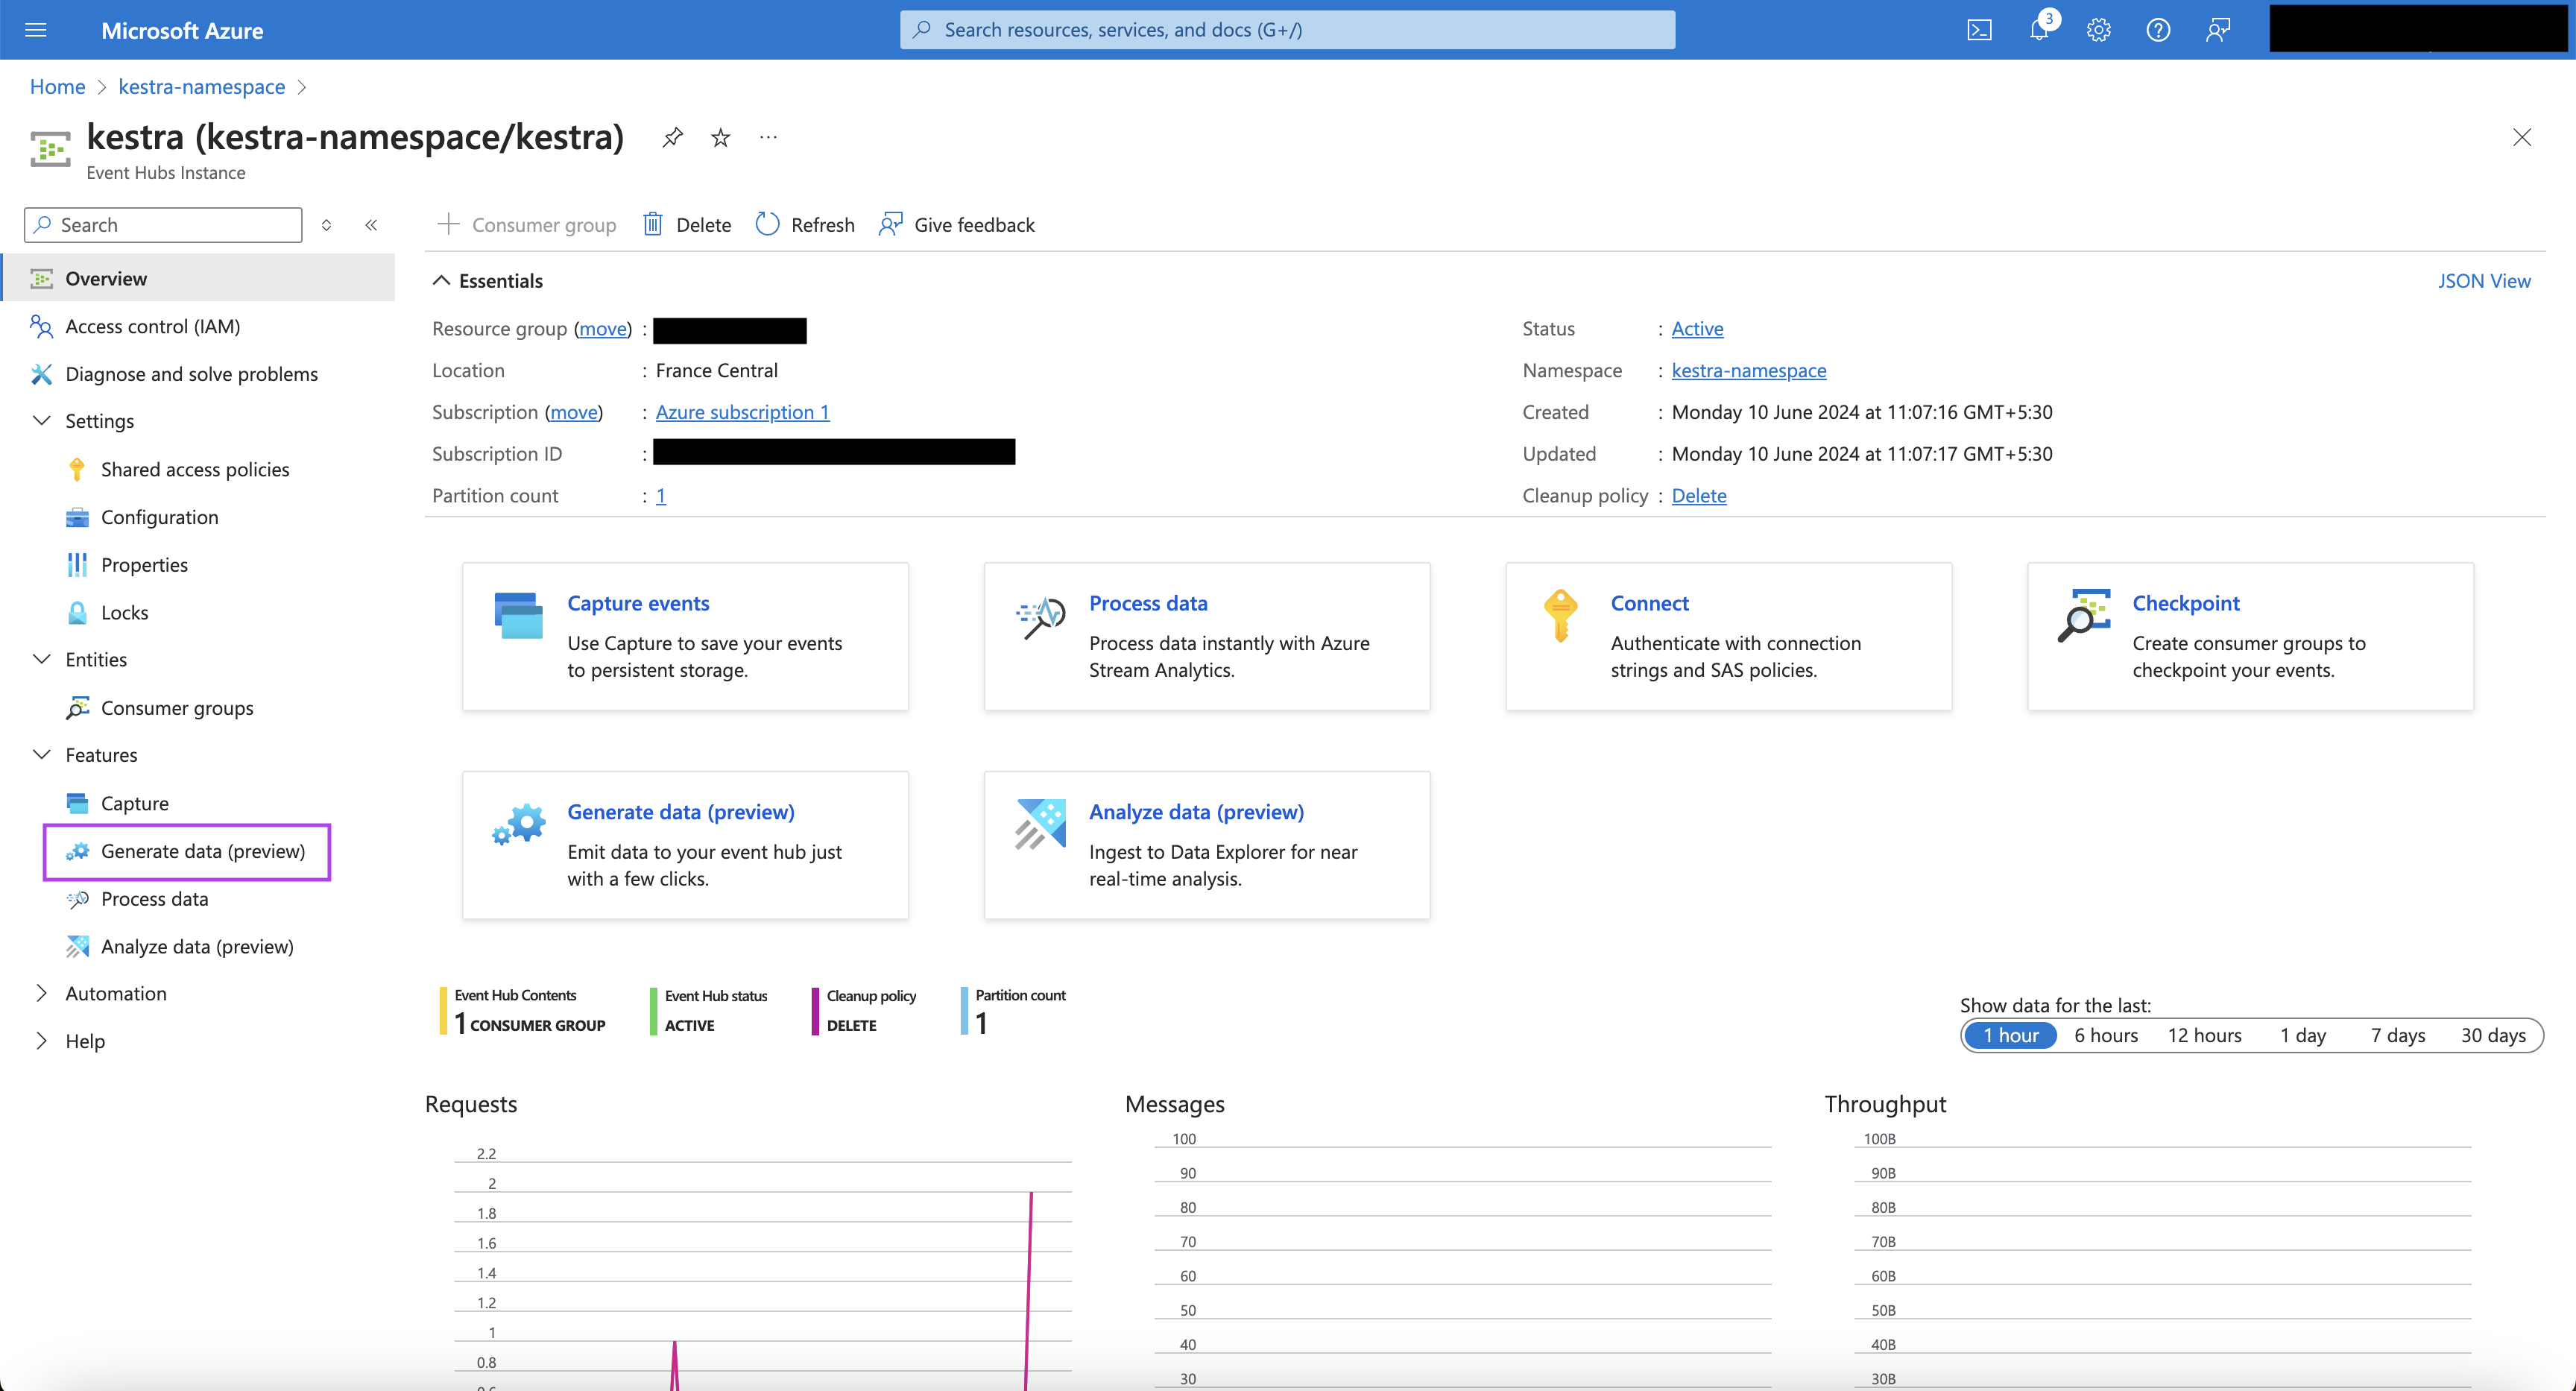
id: TriggerFromAzureEventHubsnamespace: company.teamtasks: - id: hello type: io.kestra.plugin.core.log.Log message: Hello there! I received {{ trigger.body }} from Azure EventHubs!triggers: - id: readFromEventHubs type: io.kestra.plugin.azure.eventhubs.RealtimeTrigger eventHubName: kestra namespace: kestra-namespace connectionString: "{{ secret('EVENTHUBS_CONNECTION') }}" bodyDeserializer: JSON consumerGroup: "$Default" checkpointStoreProperties: containerName: kestralogs connectionString: "{{ secret('BLOB_CONNECTION') }}"On the particular Event Hubs page, you can click on “Generate Data” under “Features” from the left menu bar. Choose an appropriate Content-Type from the drop-down, and put the payload you want to push to the Event Hub. When you click on the “Send” button on the bottom, the payload will be pushed to the Event Hub. Also, the flow will be triggered immediately, and you can see the corresponding execution in Kestra.

Realtime triggers let you react to events in real time to orchestrate business-critical processes.
Was this page helpful?