 Manage dbt projects with Kestra's Code Editor
Edit dbt code from Kestra’s Code Editor
Manage dbt projects with Kestra’s Code Editor
Kestra’s built-in Code Editor allows you to easily manage dbt projects by cloning the Git repository with the dbt code, and uploading it to your Kestra namespace. You can make changes to the dbt models directly from the Kestra UI, test them as part of an end-to-end workflow, and push the changes to the desired Git branch when you are ready.
Let’s look at how you can use Kestra’s Code Editor to manage dbt projects.
Clone a dbt project from Git
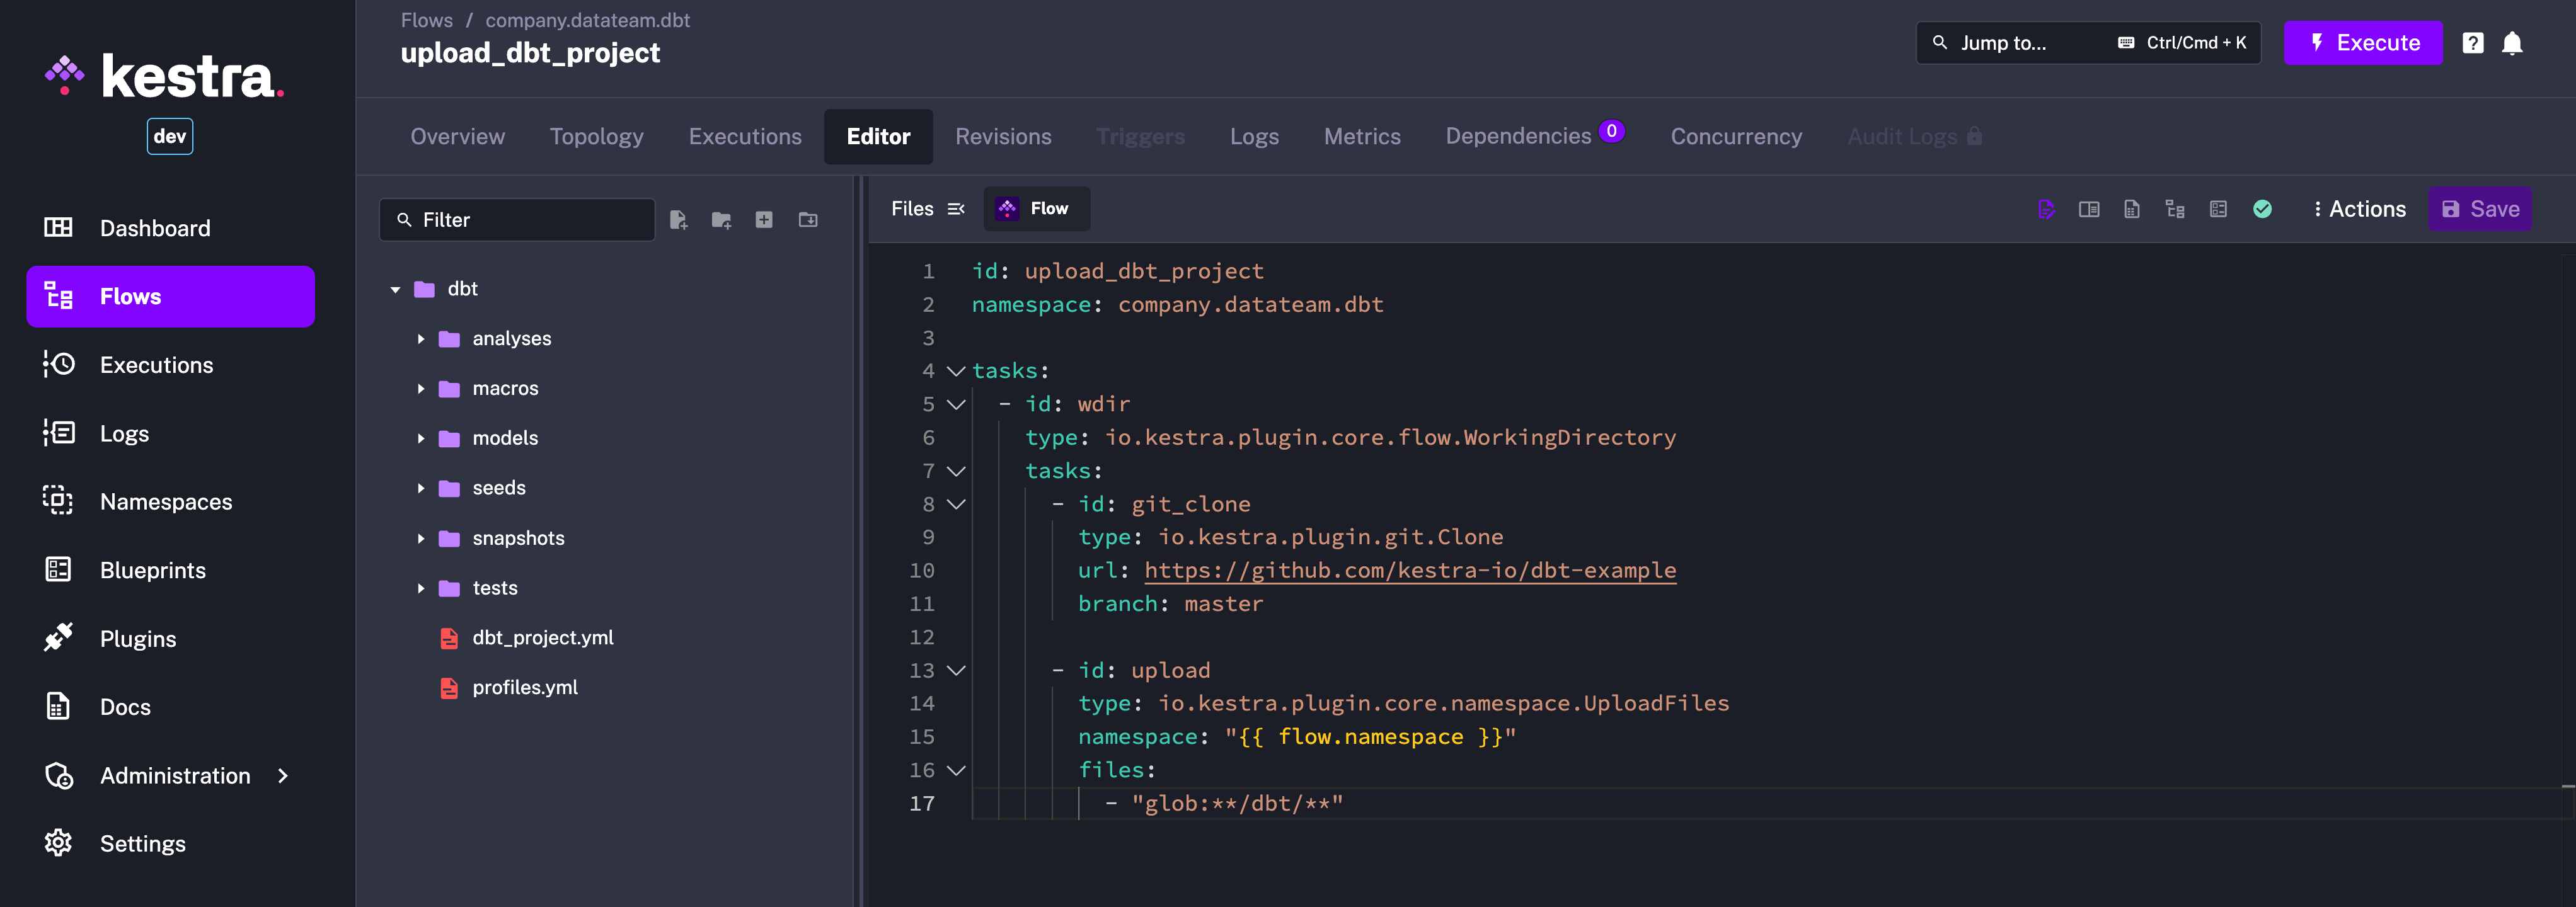
This flow pulls a dbt project from Git and uploads it to Kestra as Namespace Files:
id: upload_dbt_projectnamespace: company.datateam.dbt
tasks:  - id: wdir    type: io.kestra.plugin.core.flow.WorkingDirectory    tasks:      - id: git_clone        type: io.kestra.plugin.git.Clone        url: https://github.com/kestra-io/dbt-example        branch: master
      - id: upload        type: io.kestra.plugin.core.namespace.UploadFiles        namespace: "{{ flow.namespace }}"        files:          - "glob:**/dbt/**"
You can use this flow as an initial setup:
- Add this flow within Kestra UI
- Save it
- Execute that flow
- Click on the
Filessidebar in the code editor to view the uploaded dbt files.

Run dbt CLI commands
Let’s create a flow that runs dbt CLI commands:
id: dbt_buildnamespace: company.datateam.dbt
inputs:  - id: dbt_command    type: SELECT    allowCustomValue: true    defaults: dbt build --project-dir dbt --profiles-dir dbt --no-partial-parse --target prod    values:      - dbt build --project-dir dbt --profiles-dir dbt --no-partial-parse --target prod      - dbt build --project-dir dbt --profiles-dir dbt --no-partial-parse --target prod --select state:modified+ --defer --state ./target --target-path ./dev
tasks:  - id: dbt    type: io.kestra.plugin.dbt.cli.DbtCLI    namespaceFiles:      enabled: true    containerImage: ghcr.io/kestra-io/dbt-duckdb:latest    projectDir: dbt    commands:      - "{{ inputs.dbt_command }}"    loadManifest:      key: manifest.json      namespace: "{{ flow.namespace }}"    storeManifest:      key: manifest.json      namespace: "{{ flow.namespace }}"    taskRunner:      type: io.kestra.plugin.scripts.runner.docker.Docker
Note how by using the namespaceFiles property, we can run dbt commands on the files uploaded to the namespace. This allows you to test the dbt models without having to build the entire project every time.
Execute the flow using the default value for the dbt_command input.
Edit dbt files
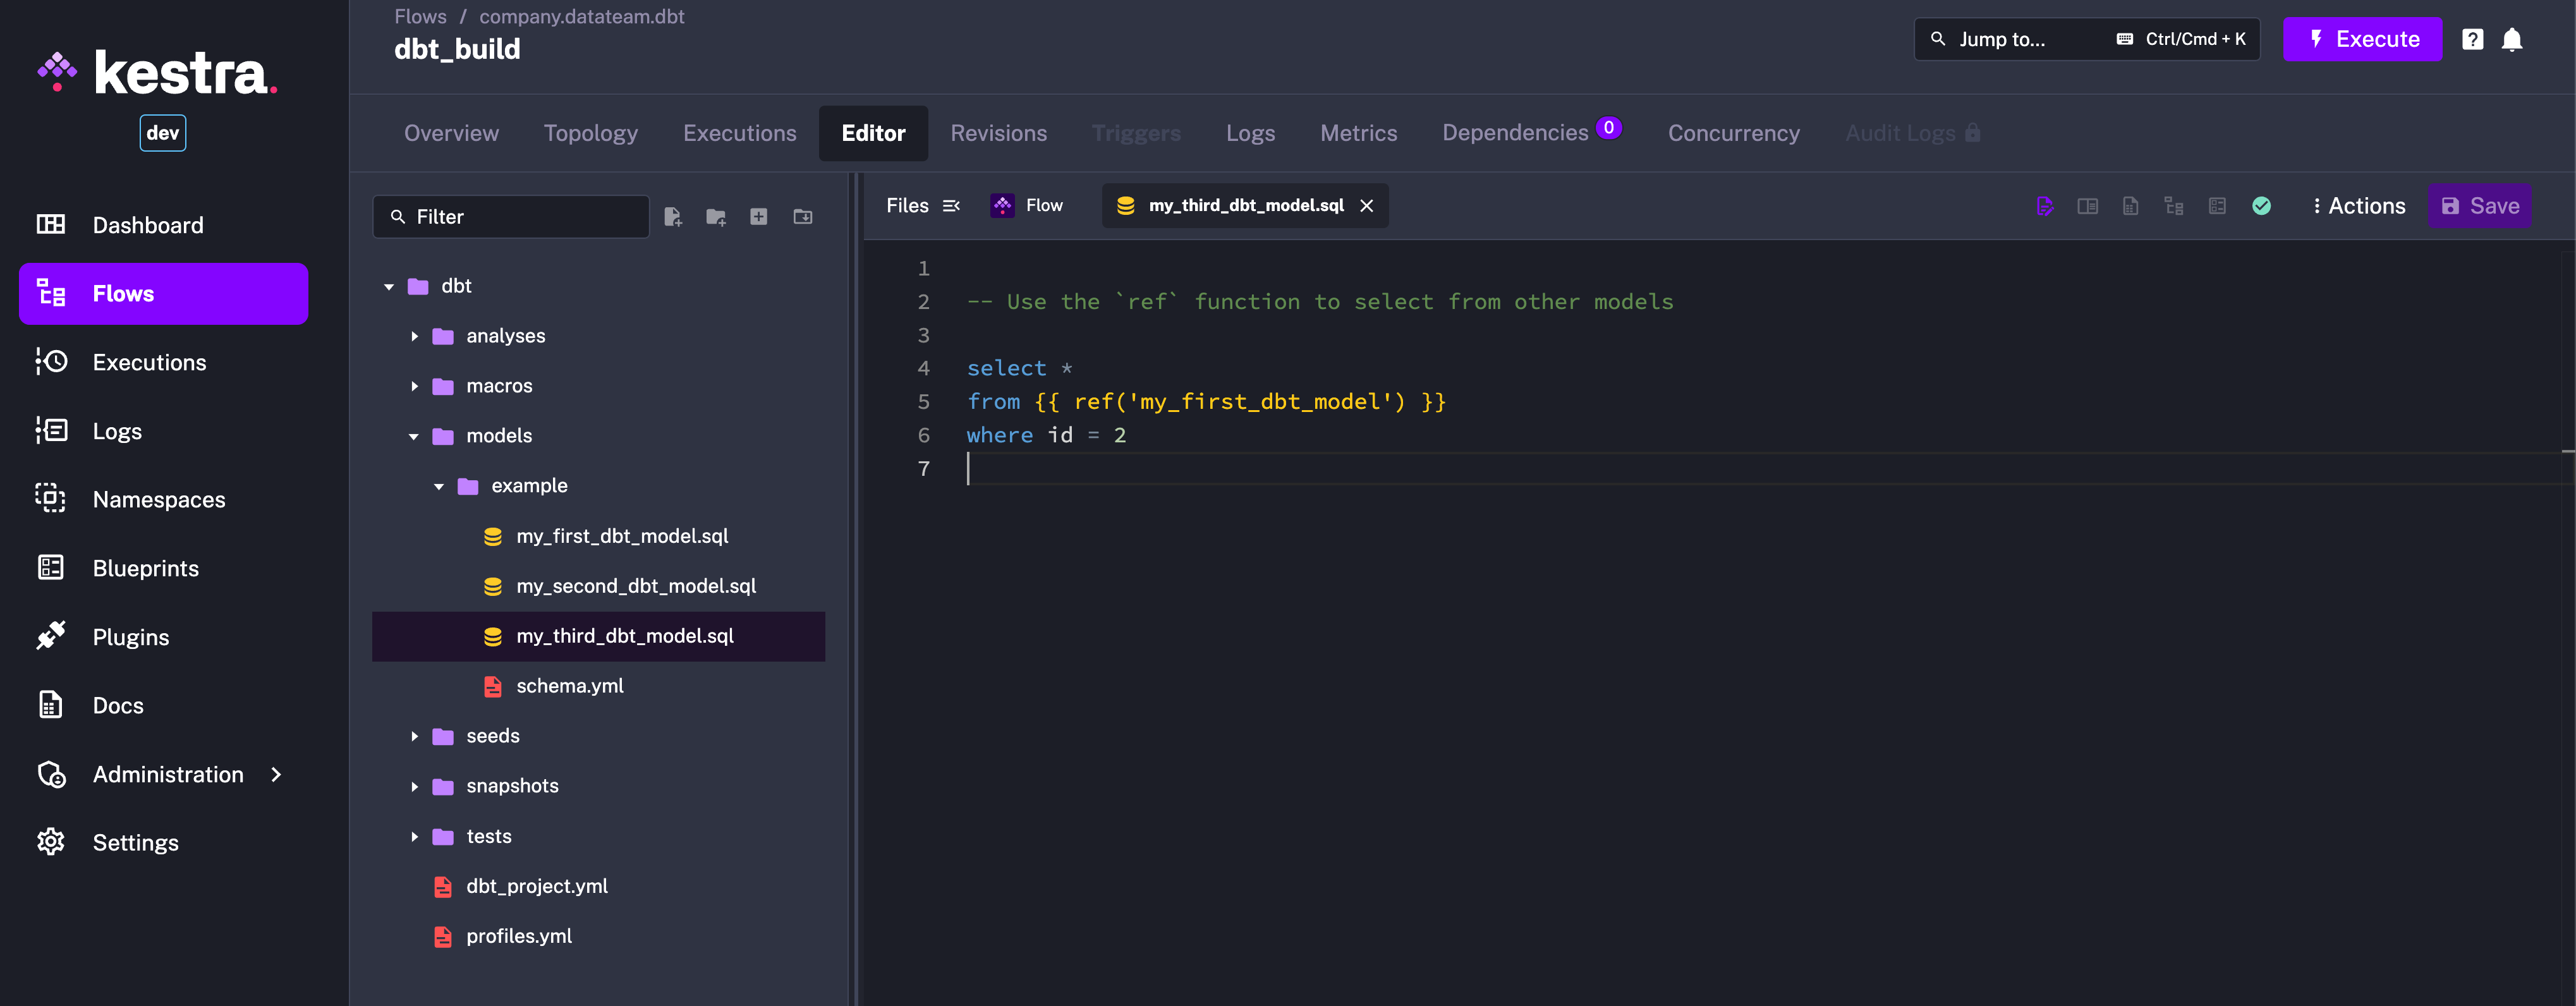
You can now open the dbt files in the Code Editor and make changes as needed. For example, let’s add a new model my_third_dbt_model.sql:
select *from {{ ref('my_first_dbt_model') }}where id = 2
When you now run the flow using the second dropdown value for the dbt_command input, only the new model will be built. This allows you to test the changes quickly and iterate faster.
Push changes to Git
Once you are satisfied with the changes, you can push them to the same Git repository to your desired Git branch using the PushNamespaceFiles.
id: push_dbt_to_gitnamespace: company.datateam.dbt
inputs:  - id: commit_message    type: STRING    defaults: "Changes to dbt from Kestra"
tasks:  - id: commit_and_push    type: io.kestra.plugin.git.PushNamespaceFiles    namespace: "{{ flow.namespace }}"    username: git_username    password: "{{ secret('GITHUB_ACCESS_TOKEN') }}"    url: https://github.com/git_username/scripts    branch: dev    gitDirectory: dbt    commitMessage: "{{ inputs.commit_message }}"
Make sure to adjust the url, branch, and gitDirectory properties to match your dbt Git repository structure. If the branch does not exist, it will be created. If you want to test this step more incrementally, you can set the dryRun property to true to validate the changes before committing them to Git.
Was this page helpful?