Trigger Kestra Flows from Your Web Application
For the complete documentation index, see llms.txt. For a full content snapshot, see llms-full.txt. Append.mdto anykestra.io/docs/*URL for plain Markdown.
Integrate Kestra into your JavaScript App using Webhooks.
With Kestra’s API First Design, you can build web applications to integrate with Kestra acting as a backend server.
This can be useful if you want a request from your website to be made and start a workflow execution to process orders. For example, you have an online shop where orders are made and you want Kestra to receive these orders and start processing them.
In this guide, we’ll walk through how you can set up Kestra to receive webhooks as well as build a basic JavaScript application with React.js that can make requests.
Configuring CORS
To allow requests to Kestra from a JavaScript application running locally, enable CORS in your Kestra configuration:
micronaut: server: cors: enabled: trueMore information can be found in the Observability and Networking configuration.
Building a Workflow with a Webhook Trigger
The JavaScript application needs a workflow with a Webhook Trigger to receive requests and start executions.
Once we’ve added it, we can add any tasks to run. In this example, we have a log message that will log the request body field dataField from the webhook:
id: webhook_examplenamespace: company.team
tasks:  - id: hello    type: io.kestra.plugin.core.log.Log    message: "{{ trigger.body.dataField ?? 'null' }}"
triggers:  - id: webhook    type: io.kestra.plugin.core.trigger.Webhook    key: abcdefg
Building our JavaScript application with React.js
In this example, I am using React.js to interact with Kestra but this will work with any web framework that can make requests.
Create the application using create-react-app:
npx create-react-app exampleStart it with:
npm startNavigate to the application at localhost:3000.
With the application running, modify App.js to make a request to Kestra.
First, install axios to make the POST request:
npm install axiosOnce we’ve done that, we can add a useState hook to help us make our request and handle the response, specifically handle the request body state:
function App() {  const [formData, setFormData] = useState({});
  const handleSubmit = async (e) => {      e.preventDefault();      try {          await axios.post('http://localhost:8080/api/v1/main/executions/webhook/company.team/webhook_example/abcdefg',              formData).then(response => {                console.log(response.data)              });      } catch (error) {          console.error('Error:', error);      }  };  return (    <div className='App'>      <header className='App-header'>        <h1>Kestra Webhook Example</h1>      </header>    </div>  );}
Get the Webhook URL by navigating to Triggers at the top of the flow in Kestra and hovering over the webhook icon on the right:

This example makes a request with data from a form (added later) using the useState hook, storing state in formData and updating it using setFormData.
Add UI elements to set formData, make the request, and display the response.
Modify the JSX in the return statement to include a form that handles the request:
function App() {
  ...
  return (    <div className='App'>      <header className='App-header'>        <h1>Kestra Webhook Example</h1>        <p>Send a message to Kestra</p>        <form onSubmit={handleSubmit}>            <input type="text" name="dataField"                onChange={handleChange} />            <button type="submit">Submit</button>        </form>      </header>    </div>  );}
The form uses onSubmit and onChange to call functions. We use onSubmit on the button to call our newly added handleSubmit function.
However, we don’t have a function to handle automatically adding our text to our state variable formData. We can add a new function called handleChange which will use our state updater function setFormData to update formData everytime new text is added to the input. This means that when we press Submit, the text is ready to be sent in a request body.
function App() {  const [formData, setFormData] = useState({});
  const handleSubmit = async (e) => {      e.preventDefault();      try {          await axios.post('http://localhost:8080/api/v1/main/executions/webhook/company.team/webhook_example/abcdefg',              formData).then(response => {                console.log(response.data)              });      } catch (error) {          console.error('Error:', error);      }  };
  const handleChange = (e) => {      setFormData({ ...formData, [e.target.name]: e.target.value });  };
return ( <div className='App'> <header className='App-header'> <h1>Kestra Webhook Example</h1> <p>Send a message to Kestra</p> <form onSubmit={handleSubmit}> <input type="text" name="dataField" onChange={handleChange} /> <button type="submit">Submit</button> </form> </header> </div> );}Now our example will collect the data in the input field as dataField and send it in our request as a key value pair: dataField: {the input value}. For example, if I type “Hello” and press Submit, it will send the body {dataField: "Hello"}.

The last thing to add now is to display the response back to the user.
We can add another state variable called responseData to handle the response from the request. We can add it into our JSX to only display if we have a response:
{responseData.id && <p><b>Execution ID:</b> {responseData.id}</p>}In this case, id is the Execution ID of the Execution that was started because of the webhook request.
Now we’ve added the response, our full App.js should look like this now:
import React, { useState } from 'react';import axios from 'axios';import './App.css';
function App() {  const [formData, setFormData] = useState({});  const [responseData, setResponseData] = useState({});
  const handleSubmit = async (e) => {      e.preventDefault();      try {          await axios.post('http://localhost:8080/api/v1/main/executions/webhook/company.team/webhook_example/abcdefg',              formData).then(response => {                setResponseData(response.data)              });      } catch (error) {          console.error('Error:', error);      }  };
  const handleChange = (e) => {      setFormData({ ...formData, [e.target.name]: e.target.value });  };
  return (    <div className='App'>      <header className='App-header'>        <h1>Kestra Webhook Example</h1>        <p>Send a message to Kestra</p>        <form onSubmit={handleSubmit}>            <input type="text" name="dataField"                onChange={handleChange} />            <button type="submit">Submit</button>        </form>        {responseData.id && <p><b>Execution ID:</b> {responseData.id}</p>}      </header>    </div>  );}
export default App;
This will:
- Display a Form with an input and a button.
- Make a request to Kestra with the input data as our request body.
- Receive the response and display it to the user.
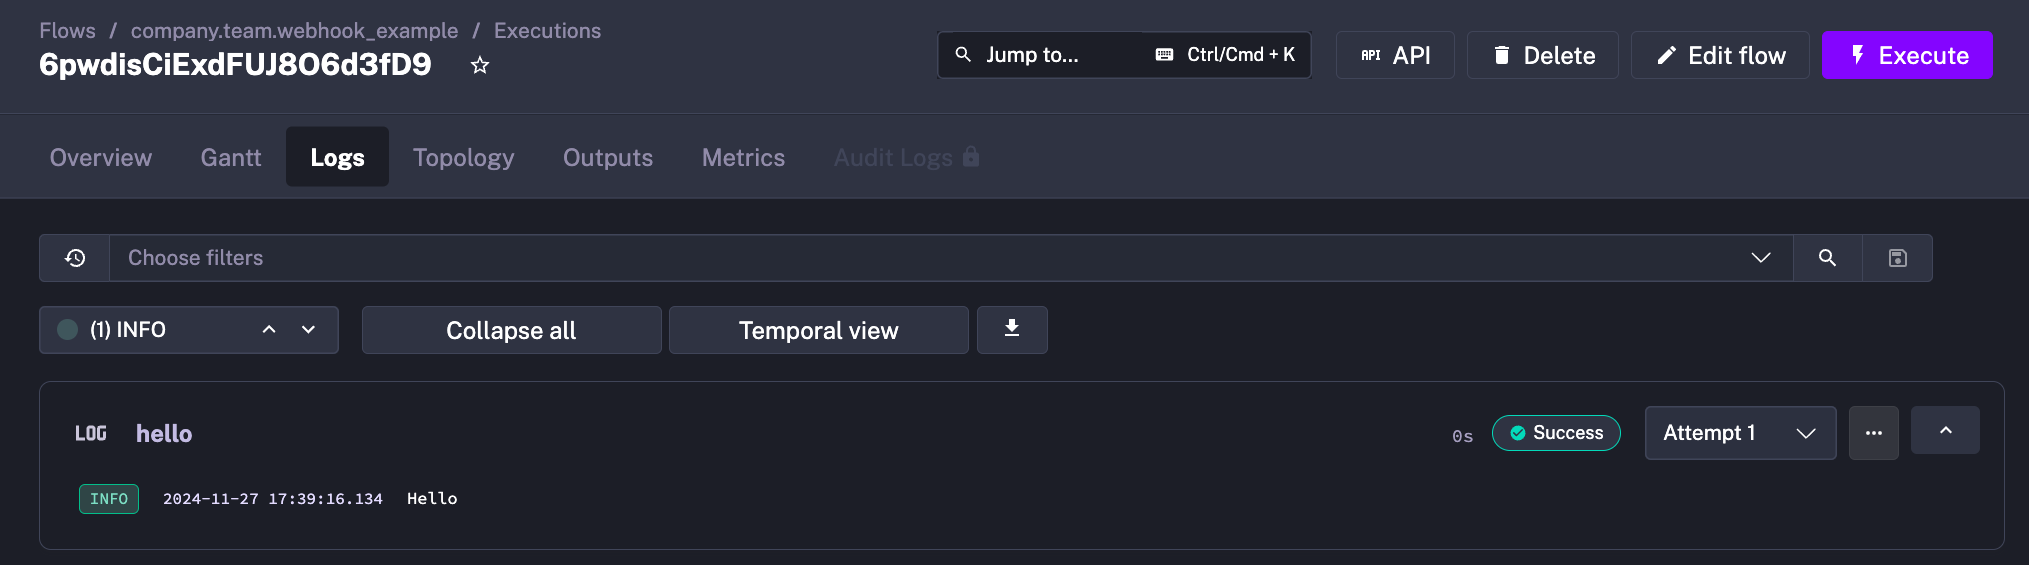
When we type in a value and press Submit, we can see a new execution is created in Kestra and our request body was received and used in our Log task:
CSS Styling
These are the CSS styles used in the example:
.App {  text-align: center;
}.App-header {  background-color: #4b0aaa;  min-height: 100vh;  display: flex;  flex-direction: column;  align-items: center;  justify-content: center;  font-size: calc(10px + 2vmin);  color: white;}
.App h1 {  font-size: 34px;}
.App h2 {  font-size: 24px;}
.App p { font-size: 16px;}Was this page helpful?